
What is CI/CD pipeline?
As a developer we would like to keep our entire focus on production instead of manually testing and deploying each time, that's where automating the process with CI/CD reduces the effort of deployment process, CI/CD refers to creating a code pipeline where code changes are committed, tested and then deployed without any manual interference. Basically, a developer can add a new feature to their codebase and push updates in an efficient, streamlined process.
What are some common CI/CD tools?
- Travis CI/CD
- Jenkins
- Buddy
- CircleCI
- Gitlab
- Codeship
- AWS Codepipeline
This guide covers all steps needed for setting up your CI-CD workflow with AWS CodePipeline and GitHub under the hood. In this tutorial we will clone a sample django application from GitHub, configure CodeDeploy agent in EC2 and finally setup our CI-CD pipeline in AWS.

Link to sample django project: GitHub
Table of Contents
- Clone GitHub repo
- Preparing Django project files
- Create yaml files to automate AWS CI-CD
- Create roles in AWS
- Launching EC2 instance for AWS CI-CD
- Configure AWS Code Deploy
- Configure AWS Code Pipeline
1. Clone GitHub repo
Open your chosen command-line interface and clone the repository with the below command:
$ git clone git@github.com:vinclairvoyant/django-aws_cicd.git
2. Preparing Django project files
For those who have cloned repo need not require to do any changes to the django files and can skip this step 2, but for others who are deploying their own django project shall continue with below steps:
If you are deploying your own django application then make sure to allow all hosts by Changing ALLOWED_HOSTS in your django settings file as shown below. (Not recommended for security reasons, eventually we want to change this to an IP)

Make sure you have requirements.txt file for installing required dependencies.
3. Create yaml files to automate AWS CI-CD
For this basic tutorial we will create 3 files appspec.yml, before_install.sh & after_install.sh to automate the deployment process handled by AWS CI-CD.
Folder/file structure:

Create appspec.yml file inside your root project directory where manage.py file is.
Step 1: Create CodeDeploy appspec.yml file
version: 0.0
os: linux
files:
  - source: /
    destination: /home/ubuntu/django-aws_cicd
hooks:
  BeforeInstall:
      - location: scripts/before_install.sh
  AfterInstall:
      - location: scripts/after_install.sh
Step 2: Create before_install.sh file
#!/usr/bin/env bash

# clean codedeploy-agent files for a fresh install
sudo rm -rf /home/ubuntu/install

# install CodeDeploy agent
sudo apt-get -y update
sudo apt-get -y install ruby
sudo apt-get -y install wget
cd /home/ubuntu
wget https://aws-codedeploy-us-east-1.s3.amazonaws.com/latest/install
sudo chmod +x ./install
sudo ./install auto

# update os & install python3
sudo apt-get update
sudo apt-get install -y python3 python3-dev python3-pip python3-venv
pip install --user --upgrade virtualenv

# delete app
sudo rm -rf /home/ubuntu/django-aws_cicd
vi scripts/after_install.sh
Step 3: Create after_install.sh file
#!/usr/bin/env bash

# kill any servers that may be running in the background
sudo pkill -f runserver

# kill frontend servers if you are deploying frontend
# sudo pkill -f tailwind
# sudo pkill -f node

cd /home/ubuntu/django-aws_cicd/

# activate virtual environment
python3 -m venv venv
source venv/bin/activate

install requirements.txt
pip install -r /home/ubuntu/django-aws_cicd/requirements.txt

# run server
screen -d -m python3 manage.py runserver 0:8000
Before we start setting up AWS CI-CD we need to ensure all changes made locally inside django files are pushed to github.
AWS CI-CD Configuration:
Let's get started configuring AWS for CI-CD pipeline, for this we are going to be using 3 services mainly IAM roles, CodeDeploy & CodePipeline.
4. Create roles in AWS
We want to create 2 IAM roles:
AmazonEC2RoleforAWSCodeDeploy provides EC2 access to S3 bucket to download revision:
Step 1: Choose AWS Service & EC2 for Common use cases and click Next
Step 2: Search & select AmazonEC2RoleforAWSCodeDeploy and click Next
Step 3: Provide a custom role name and click Create role, in my case the role name is EC2CodeDeployRole
AWSCodeDeployRole for CodeDeploy service access to expand tags and interact with Auto Scaling on your behalf.
Step 1: Choose AWS Service & in the 'Use cases for other AWS services' drop down choose CodeDeploy and click Next
Step 2: AWSCodeDeployRole will be the policy on display, click Next
Step 3: Provide a custom role name and click Create role, in my case the role name is CodeDeployRole
5. Launching EC2 instance with AWS CodeDeploy configuration
When launching a new EC2 instance ensure to add AmazonEC2RoleforAWSCodeDeploy IAM role that we created and add user data for CodeDeploy agent installation.

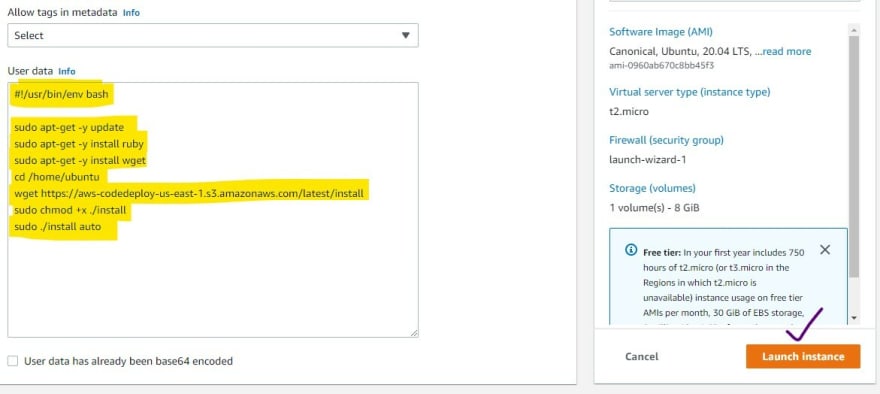
#!/usr/bin/env bash
sudo apt-get -y update
sudo apt-get -y install ruby
sudo apt-get -y install wget
cd /home/ubuntu
wget https://aws-codedeploy-us-east-1.s3.amazonaws.com/latest/install
sudo chmod +x ./install
sudo ./install auto
You must provide a name to your instance if you had not provided when creating an instance, instance name will be required when creating CodeDeploy deployment group in upcoming steps.

Configure Security group attached to EC2 to allow port 8000:

Once you launch your instance wait for few minutes for status checks to be completed.
6. Configure AWS Code Deploy
For creating CodeDeploy we first need to create application and then create deployment group, steps below:
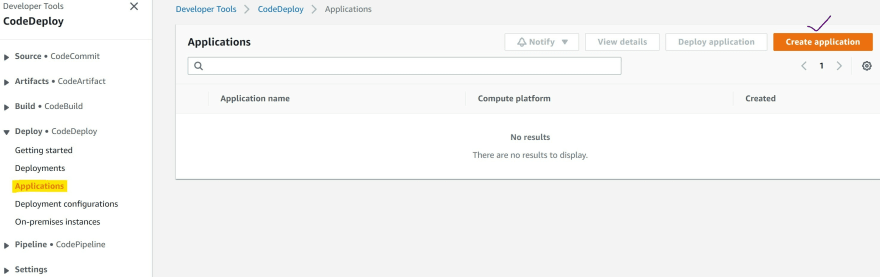
Step 1: Search for CodeDeploy service in AWS
Step 2: On the left navigation panel open Deploy -> Select Applications and then click on Create application
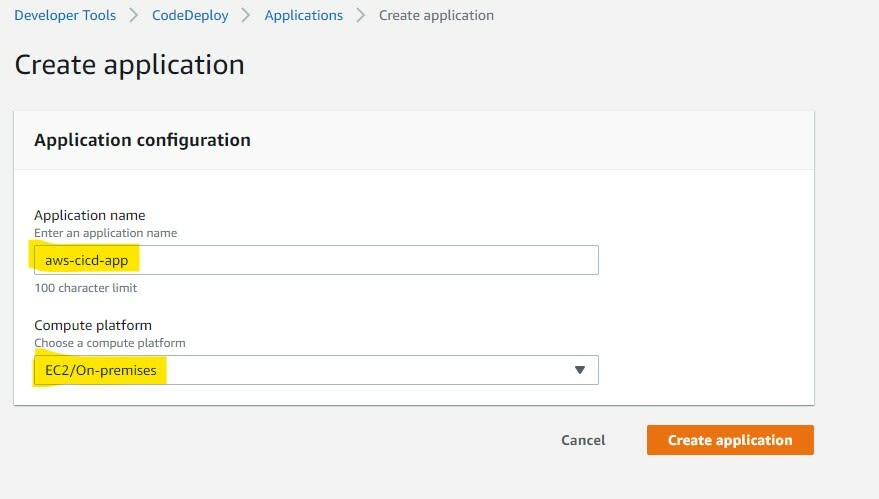
Step 3: Provide any application name of your choice, for Compute Platform choose EC2/On-premises from the drop down and then click on Create application
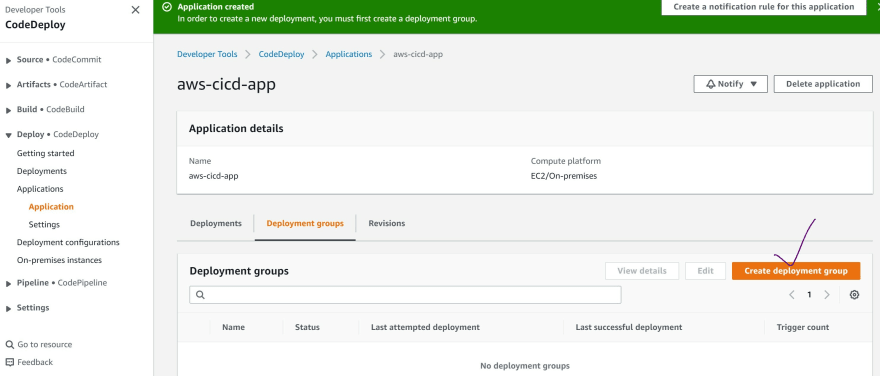
Step 4: Will be redirected inside application that we just created, now click on Create deployment group
Step 5: Enter a deployment group name of your choice and then choose the service role that we created for CodeDeploy, in this tutorial we named it CodeDeployRole
Step 6: Environment configuration choose Amazon EC2 instances and then add the ec2 instance we created, for Key choose Name and for Value choose in this tutorial we named the instance aws-cicd.
Step 7: Uncheck the Enable load balancing and then click on Create deployment group.


7. Configure AWS Code Pipeline
CodePipeline brings everything together to build the final CI-CD
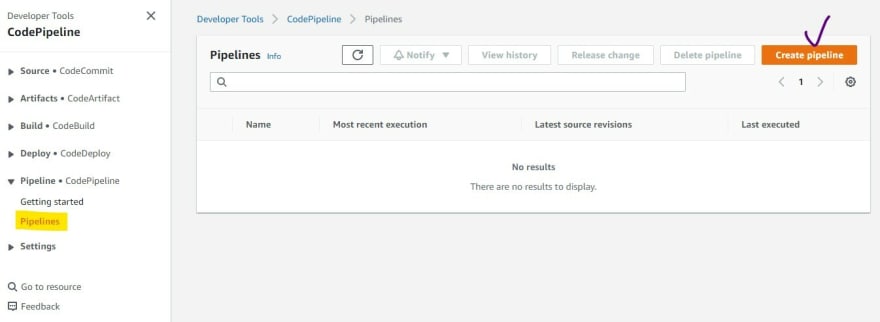
Initial Step: On left navigation panel open Pipeline then click on Pipelines and finally click on Create Pipeline
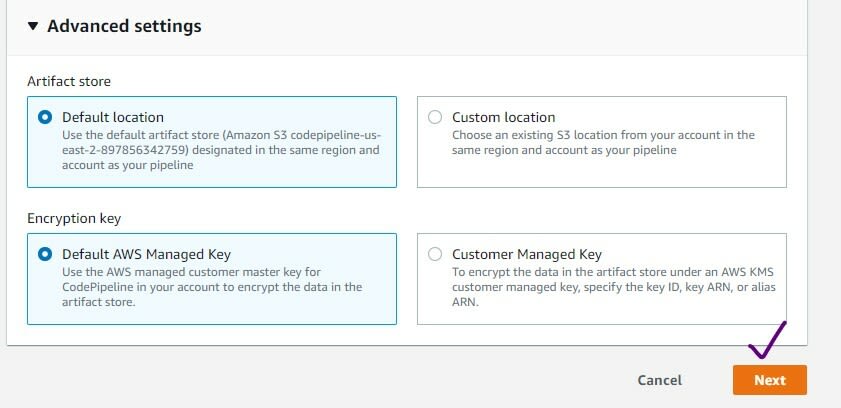
Step 1: Enter a pipeline name of your choice, a role name gets automatically created for you, now click Next

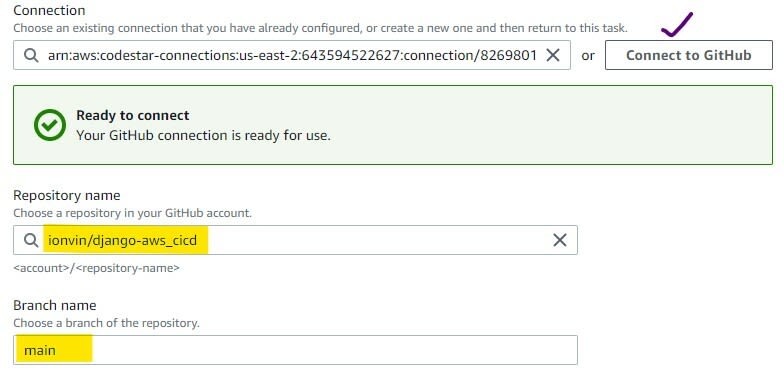
Step 2: From the drop down choose GitHub (Version 2), click on Connect to GitHub, once you have a successful connection choose Repository name, branch name and then click Next


Step 3:
Build is out of scope for this tutorial, click on Skip build stage

Step 4: From Deploy provider drop downs choose AWS CodeDeploy, choose the application name and deployment group that we created from step 6 and then click Next.

Step 5: Review the page, scroll down to the bottom of the page and then click on Create pipeline

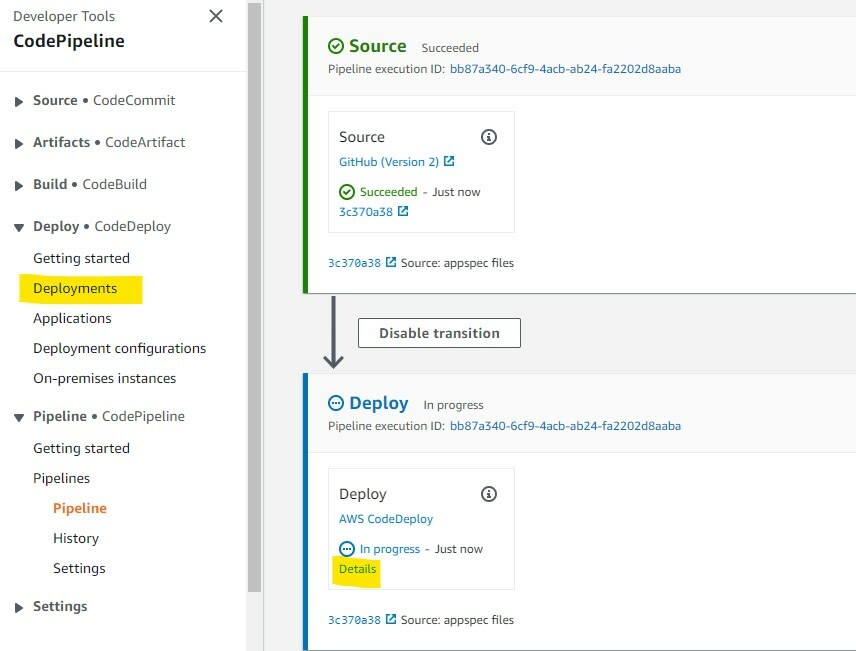
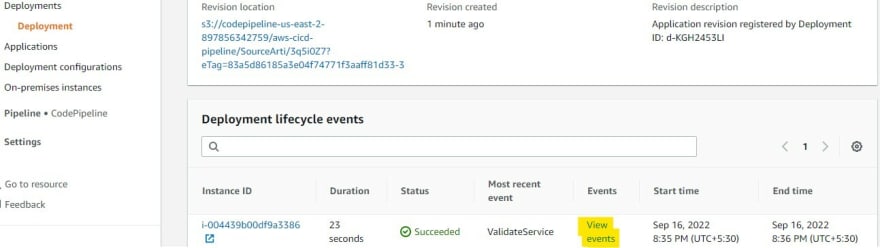
We have completed setting up and creating CI-CD pipeline on AWS, we can check the progress either by clicking on the Details in Deploy section or in the left panel Deployments, then scroll down and click on View events to see the status of deployment.

Run Application:
Go to EC2 instance, copy the Public IPv4 DNS

navigate using this url:
http://<Public IPv4 DNS>:8000
You should see this django app running...


Latest comments (2)
Thanks for sharing ...
Thanks for the article, well done!