As the population is growing, so is the energy demand. This has resulted in fossil fuels affecting the environment, from air and water pollution to climate change. Adopting alternatives like solar and wind, along with improving productivity can help provide cleaner and more efficient energy.
While we must switch to clean energy in our home to make an impact on the climate, it is also important to consider the commercial sector as the energy consumption there is often much higher than in the residential sector. That's because a major portion of this energy consumption goes into products that we buy.
For changes to take place in the commercial sector it is important to raise consumer awareness about energy costs and other greenhouse gases being emitted in the manufacturing process of the goods that we buy. So by creating a Climate Impact Rating system (CIR) we give consumers like us, an idea of what goes into the making of the industrial products that we buy. This creates a framework for a product labeling system and includes a CIR (climate impact rating) system which will be visible to the consumers at the point of sales so they can see what they are bringing into their homes.
CIR is very similar to the labeling found on food that tells you exactly what and how much went into making that particular food item. For example, the amount of sugar, fat, and carbs. Similarly, this rating system will show you how much energy, co2, water, plastic, and other consumables were consumed.
The following is the architecture:
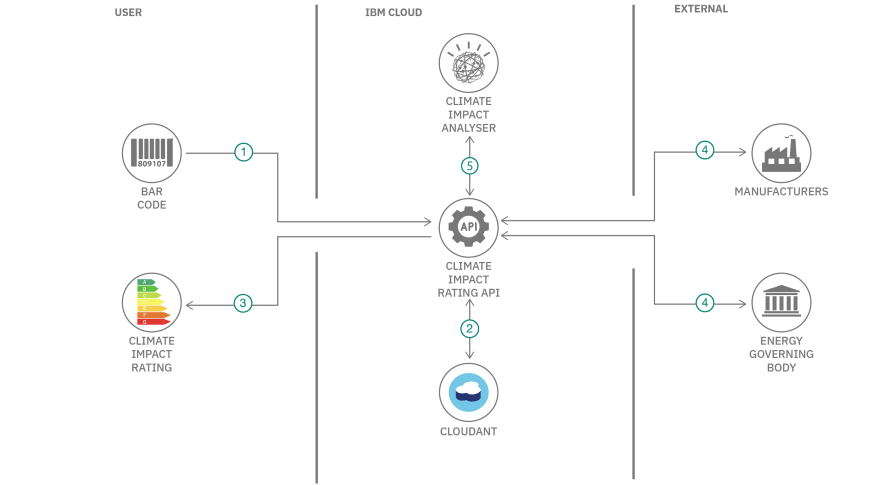
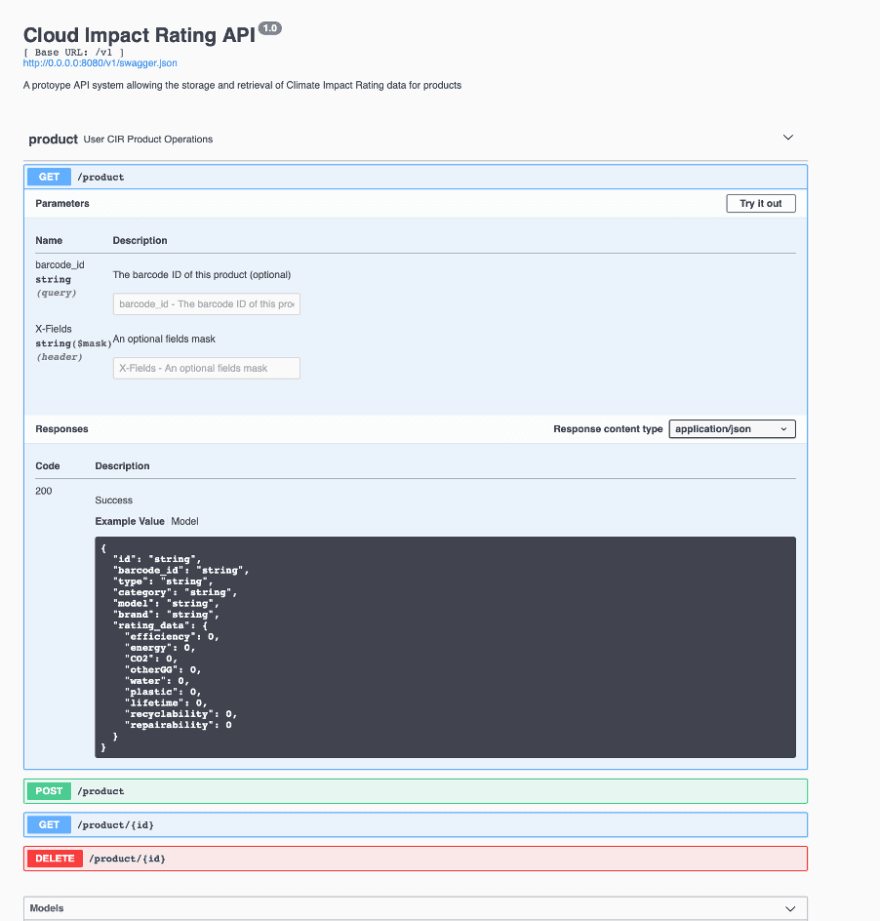
- The user scans a product barcode with an app, which then calls the Climate Impact Rating API, passing in the barcode ID.
- The Climate Impact Rating API retrieves the rating data that matches that barcode ID.
- The Climate Impact Rating API returns the rating data for the app to format and display appropriately.
- Manufacturers can upload product and rating data via the Climate Impact Rating API (via a reserved portal).
- In the future, a Climate Impact Analyzer will run in the background to produce summary data, enabling broader rating queries to be satisfied by the API.
Steps
Step 0: Clone the Repo
https://github.com/Anam-Mahmood/Solution-Starter-Kit-Energy-2020
Step 1: Create a free IBM Cloud account or log in to IBM Cloud
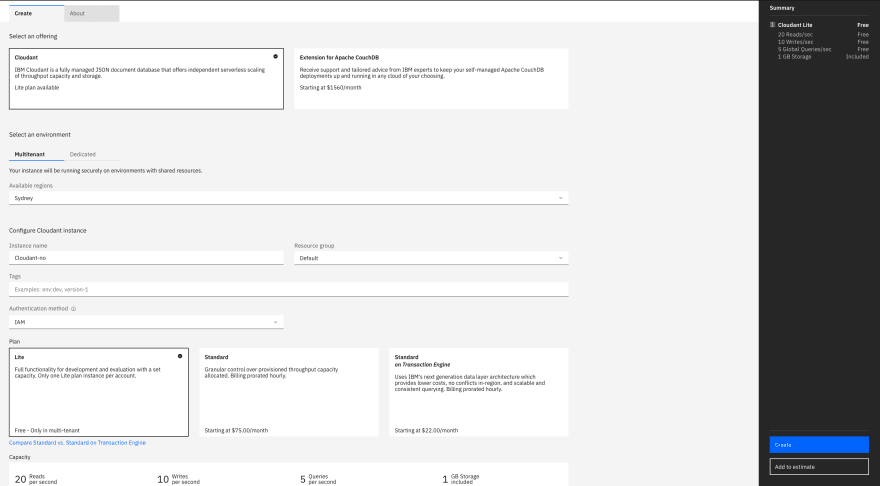
Step 2: Create Cloudant Service on IBM Cloud
- Search for "Cloudant" on IBM Cloud.
- Select "Cloudant" from the Select an offering section.
- Select "Multi-tenant" in the environment and "Dallas" or "London" in the region, give your service instance a unique name.
- Make sure to select "IAM" in the authentication method and select the free "Lite" plan and click on create.
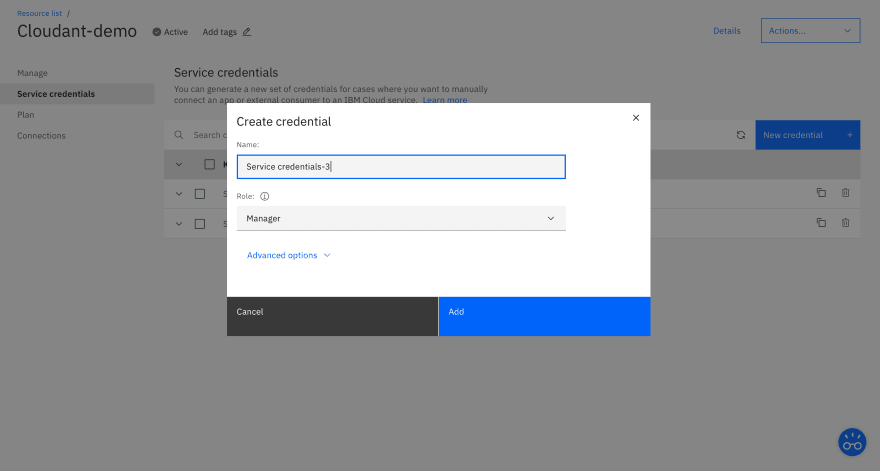
Step 2.1: Create Cloudant service credentials
- Once your Cloudant instance has been created, you need to create a service credential that the CIR API Server can use to communicate with it. By selecting your running Cloudant instance, you can choose "Service credentials" from the left-hand menu.
- Click on "New Credentials" and give it a name and select the role of a "Manager" and click "Create".
-Once created, you can display the credentials by selecting view service credentials, and then copy the credentials.
Step 3: Running the project
- Now open the project you cloned in the IDE of your liking and browse into the "example" directory and open the file "server.py"
- Paste the credentials you copied in the "API access" section.

You are now ready to run your application. You can either run your application locally or on docker. If you want to run using Docker, make sure you have Docker installed and running on your machine.
Install Docker here
Step 4: Run your application
Run Locally
Once you’re in the directory where you cloned your project. Create a virtual environment (also known as vitualenv). It is preferred to run your project in a virtual environment as that creates an isolated environment around your Python/Flask project and allows you to run different projects on different versions without affecting the others.
#this will install the necessary files to create a virtualenv

pip install virtualenv
#name your virtual environment, I am calling it venv

virtualenv venv
#activate your virtualenv

source venv/bin/activate
#Once your work on this project is over, deactivate your virtualenv

deactivate
Once you activate the virtual environment, run the following commands,
#if you don't have python run these commands

brew install python

pip install --user pipenv
Run this command, to have it create a "pipfile.lock" with all the dependencies installed.

pipenv install
Now that you have the dependencies, you can run the API server.
pipenv run python ./server.py
Now your server is up and running at
Running on http://127.0.0.1:5000/ (Press CTRL+C to quit)

Run your application on Docker
If you have docker setup on your machine, you can run the API Server image. Run the following commands
docker build . -t cir-api-server

docker run -p 8080:8080 cir-api-server
The flask server in the docker container should be up and running at
Running on http://0.0.0.0:8080/ (Press CTRL+C to quit)
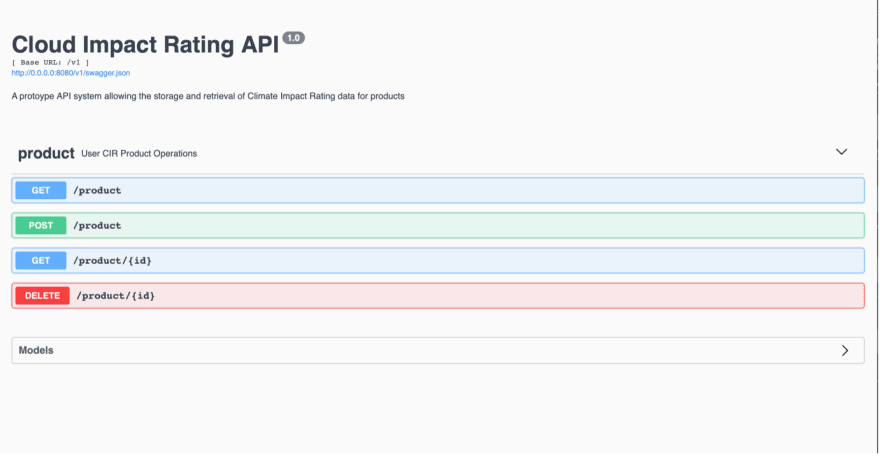
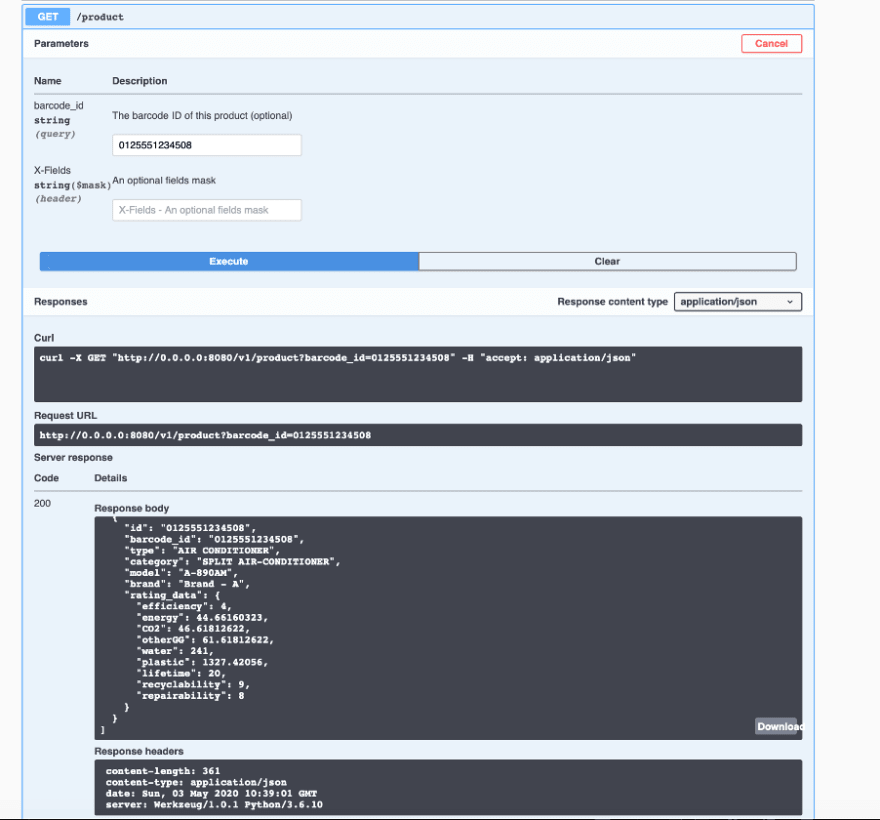
Step 5: You can now test your endpoints!
If you run docker image then you can use this curl statement,
curl "http://0.0.0.0:8080/v1/product?barcode_id=0125551234508"
Alternatively, you can visit: http://0.0.0.0:8080/ and expand "Get product", click on execute and paste 0125551234508 barcode of the product to get the information.
If you are running locally then use this curl statement,
curl "http://0.0.0.0:5000/v1/product?barcode_id=0125551234508"
Alternatively, you can visit: http://127.0.0.1:5000 and expand "Get product", click on execute and paste 0125551234508 barcode of the product to get the information.
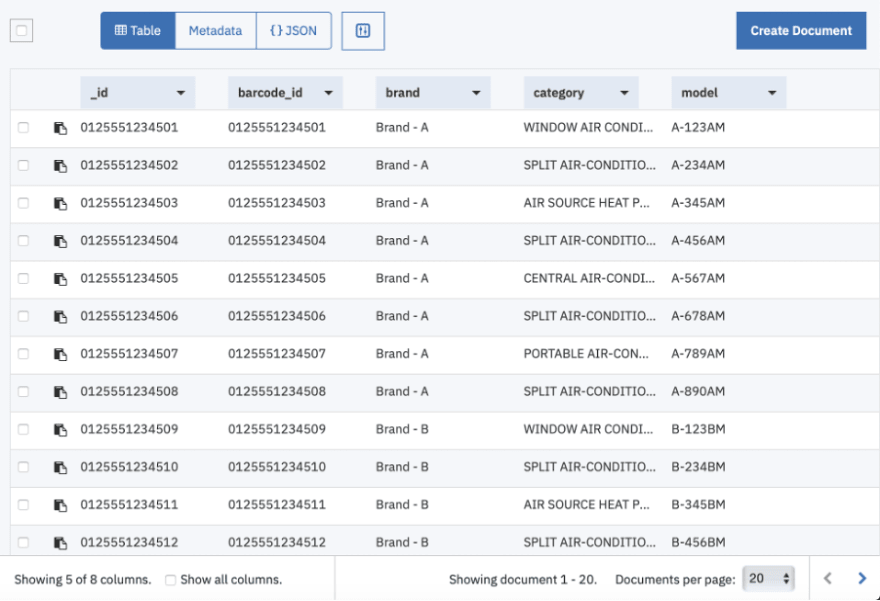
You Can check the Cloudant service on IBM Cloud that you created and the dummy data file should have been uploaded to the database.
You can watch the event recording here. Get an introduction to Data Science and its methodology and a hands-on on how to get started with IBM Cloud.
Note: This code pattern is part of the Call for Code 2020 Starter kit, this is just an example code that you can use to play around with and then build your solutions either on top of this code or start from scratch and build a solution of your own. This code itself as is cannot be submitted for the Call for Code 2021 challenge.


Oldest comments (0)