Google Scholar is a treasure trove of academic and industrial research that could prove invaluable to any research project.
However, as Google doesn’t provide any API for Google Scholar, it is notoriously hard to mine for information.
Faced with this problem, I decided to develop a simple Scrapy spider in Python and create my own Google Scholar API.
In this article, I’m going to show you how I built a Scrapy spider that searches Google Scholar for a particular keyword, and iterates through every available page extracting the following data from the search results:
- Title
- Link
- Citations
- Related Links
- Number of Verions
- Author
- Publisher
- Snippet
With this spider as a base, you will be able to adapt it to scrape whatever data you need and scale it to scrape thousands or millions of research keywords per month. The code for the project is available on GitHub here.
This article assumes you know the basics of Scrapy, so we’re going to focus on how to scrape Google Scholar results at scale without getting blocked.
For this tutorial, we're going to use:
- Scraper API as our proxy solution, as Instagram has pretty aggressive anti-scraping in place. You can sign up to a free account here which will give you 5,000 free requests.
- ScrapeOps to monitor our scrapers for free and alert us if they run into trouble. Live demo here: ScrapeOps Demo

Setting Up Our Scrapy Spider
Getting up and running with Scrapy is very easy. To install Scrapy simply enter this command in the command line:
pip install scrapy
Then navigate to your project folder Scrapy automatically creates and run the “startproject” command along with the project name (“scholar” in this case) and Scrapy will build a web scraping project folder for you, with everything already set up:
scrapy startproject scholar

cd scholar

scrapy genspider scholar scholar.com
Here is what you should see:
├── scrapy.cfg                # deploy configuration file
└── scholar                   # project's Python module, you'll import your code from here
    ├── __init__.py
    ├── items.py              # project items definition file
    ├── middlewares.py        # project middlewares file
    ├── pipelines.py          # project pipeline file
    ├── settings.py           # project settings file
    └── spiders               # a directory where spiders are located
        ├── __init__.py
        └── scholar.py        # spider we just created
Okay, that’s the Scrapy spider templates set up. Now let’s start building our Google Scholar spider.
From here we’re going to create three functions:
- start_requests - will construct the Google Scholar URL for the search queries and send the request to Google.
- parse - will extract all the search results from the Google Scholar search results.
- get_url - to scrape Google Scholar at scale without getting blocked we need to use a proxy solution. For this project we will use Scraper API so we need to create a function to send the request to their API endpoint.
Understanding Google Scholar Search Queries
The first step of any scraping project is to figure out a way to reliably query the target website to get the data we need. So in this case we need to understand how to construct Google Scholar search queries that will return the search results we need.
Luckily for us, Google uses a very predictable URL structure. There are many more query parameters we can use with Google to refine our search results but here are the four of the most important ones for querying Google Scholar:
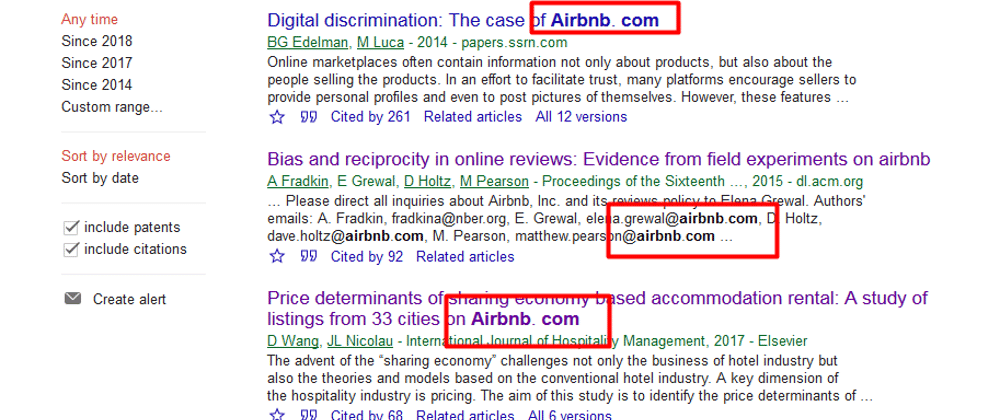
- Define the search keyword using the “q” parameter. Example: http://www.google.com/scholar?q=airbnb
- Define the language of output using the “hl” parameter. Example: http://www.google.com/scholar?q=airbnb&hl=en
- Define the starting date using the “as_ylo” parameter. Example: https://scholar.google.com/scholar?as_ylo=2020&q=airbnb
- Define the number of results per page using the “num” parameter. However, this is not recommended for Google Scholar, so we will leave it as the default (10). Example: http://www.google.com/scholar?q=airbnb&num=10&hl=en
Querying Google Scholar
Now we have created a scrapy project and we are familiar with how to send search queries to Google Scholar we can begin coding the spiders.
Our start requests spider is going to be pretty simple, we just need to send requests to Google Scholar with the keyword we want to search along with the language we want the output to be in:
def start_requests(self):
        queries = ['airbnb']
        for query in queries:
            url = 'https://scholar.google.com/scholar?' + urlencode({'hl': 'en', 'q': query})
            yield scrapy.Request(get_url(url), callback=self.parse, meta={'position': 0})
The start_requests function will iterate through a list of keywords in the queries list and then send the request to Google Scholar using the yield scrapy.Request(get_url(url), callback=self.parse) where the response is sent to the parse function in the callback.
You will also notice that we include the {'position': 0} dictionary in the meta parameter. This isn’t sent to Google, it is sent to the parse callback function and is used to track how many pages the spider has scraped.
Scraping The Search Results
The next step is to write our parser to extract the data we need from the HTML response we are getting back from Google Scholar.
We will use XPath selectors to extract the data from the HTML response. XPath is a big subject and there are plenty of techniques associated with it, so I won’t go into detail on how it works or how to create your own XPath selectors. If you would like to learn more about XPath and how to use it with Scrapy then you should check out the documentation here.
def parse(self, response):
   position = response.meta['position']
   for res in response.xpath('//*[@data-rp]'):
       link = res.xpath('.//h3/a/@href').extract_first()
       temp = res.xpath('.//h3/a//text()').extract()
       if not temp:
           title = "[C] " + "".join(res.xpath('.//h3/span[@id]//text()').extract())
       else:
           title = "".join(temp)
       snippet = "".join(res.xpath('.//*[@class="gs_rs"]//text()').extract())
       cited = res.xpath('.//a[starts-with(text(),"Cited")]/text()').extract_first()
       temp = res.xpath('.//a[starts-with(text(),"Related")]/@href').extract_first()
       related = "https://scholar.google.com" + temp if temp else ""
       num_versions = res.xpath('.//a[contains(text(),"version")]/text()').extract_first()
       published_data = "".join(res.xpath('.//div[@class="gs_a"]//text()').extract())
       position += 1
       item = {'title': title, 'link': link, 'cited': cited, 'relatedLink': related, 'position': position,
               'numOfVersions': num_versions, 'publishedData': published_data, 'snippet': snippet}
       yield item
   next_page = response.xpath('//td[@align="left"]/a/@href').extract_first()
To iterate through all the available pages of search results we will need to check to see if there is another page there and then construct the next URL query if there is.
def parse(self, response):
   ##...parsing logic from above
   next_page = response.xpath('//td[@align="left"]/a/@href').extract_first()
   if next_page:
       url = "https://scholar.google.com" + next_page
       yield scrapy.Request(get_url(url), callback=self.parse,meta={'position': position})
Connecting Our Proxy Solution
Google has very sophisticated anti-bot detection systems that will quickly detect that you are scraping their search results and block your IP. As a result, it is vital that you use a high-quality web scraping proxy that works with Google Scholar.
For this project, I’ve gone with Scraper API as it is super easy to use and because they have a great success rate with scraping Google Scholar.
Scraper API is a proxy API that manages everything to do with proxies for you. You simply have to send them the URL you want to scrape and their API will route your request through one of their proxy pools and give you back the HTML response.
To use Scraper API you need to sign up to a free account here and get an API key which will allow you to make 5,000 free requests and use all the extra features like Javascript rendering, geotargeting, residential proxies, etc.
Next, we need to integrate it with our spider. Reading their documentation, we see that there are three ways to interact with the API: via a single API endpoint, via their Python SDK, or via their proxy port.
For this project I integrated the API by configuring my spiders to send all our requests to their API endpoint.
def get_url(url):
    payload = {'api_key': API_KEY, 'url': url, 'country_code': 'us'}
    proxy_url = 'http://api.scraperapi.com/?' + urlencode(payload)
    return proxy_url
By using this function in our scrapy.Request() requests in the start_requests and parse functions we are able to route all our requests through Scraper APIs proxies pools and not worry about getting blocked.
Before going live we need to update the settings in settings.py to make sure we can use all the available concurrent threads available in our Scraper API free plan (5 threads), and set the number of retries to 5. Whilst making sure DOWNLOAD_DELAY and RANDOMIZE_DOWNLOAD_DELAY aren’t enabled as these will lower your concurrency and are not needed with Scraper API.
## settings.py

RETRY_TIMES = 5
CONCURRENT_REQUESTS_PER_DOMAIN = 5
# DOWNLOAD_DELAY
# RANDOMIZE_DOWNLOAD_DELAY
Setting Up Monitoring
To monitor our scraper we're going to use ScrapeOps, a free monitoring and alerting tool dedicated to web scraping.
With a simple 30 second install ScrapeOps gives you all the monitoring, alerting, scheduling and data validation functionality you need for web scraping straight out of the box.
Live demo here: ScrapeOps Demo
Getting setup with ScrapeOps is simple. Just install the Python package:
pip install scrapeops-scrapy
And add 3 lines to your settings.py file:
## settings.py

## Add Your ScrapeOps API key
SCRAPEOPS_API_KEY = 'YOUR_API_KEY'

## Add In The ScrapeOps Extension
EXTENSIONS = {
 'scrapeops_scrapy.extension.ScrapeOpsMonitor': 500,
}

## Update The Download Middlewares
DOWNLOADER_MIDDLEWARES = {
'scrapeops_scrapy.middleware.retry.RetryMiddleware': 550,
'scrapy.downloadermiddlewares.retry.RetryMiddleware': None,
}
From there, our scraping stats will be automatically logged and automatically shipped to our dashboard.

Going Live!
Now we are good to go. You can test the spider by running the spider with the crawl command and export the results to a csv file.
scrapy crawl scholar -o test.csv
The spider will scrape all the available search results for your keyword without getting banned.
If you would like to run the spider for yourself or modify it for your particular Google Scholar project then feel free to do so. The code is on GitHub here. Just remember that you need to get your own Scraper API api key by signing up here.


Top comments (5)
I love this article, Ian! My projects frequently benefit from monitoring google scholar updates.
Following your first few steps, using Scrapy 2.5.0, I encountered, "Cannot create a spider with the same name as your project"
hi
result csv empty
what problem :(?
Hey, pretty good article. Do you think its possible to do it simply with google? Lets say searching for good articles with key words on the subject?
Thanks
This was very helpful - thank you! Do you have advice on how to adjust the next page section of the code to only scrape up to 5 next pages instead of all of the next pages?
Great Article, Ian! Written very well and easy to follow and understand!