In this part, we are going to write some components for your theme with vue.js.
0. Setup some dummy blog posts
Let's add a few sample markdown files first. I have made some for you to download. Unzip it and put the blog folder under the root. Like the README.md you create in the last article, Vuepress will use the README.md as the default index.html of your blog folder. We will use it to display a list of blog posts.

1. Create the theme's layouts
There are 3 layouts in the theme we are going to create:
- page (e.g. Homepage)
- List of posts (e.g. Blog index page)
- post detail (e.g. A Blog post)
If you worked with wordpress/jekyll before, you're probably familiar with the idea of page v.s post. A page is a static page without published date, it usually contains timeless content like the homepage; whereas a post is a timely blogpost.
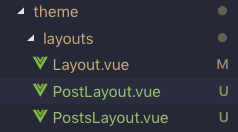
In the layouts folder, in addition to the Layout.vue we created in the previous article, create 2 more files: PostsLayout.vue, PostLayout.vue.
Now let's give each of them some minimum template. Add this to PostsLayout.vue
<template>
  <div>
    <h1>list of posts</h1>
    <Content/>
  </div>
</template>
and add similar thing to PostLayout.vue
<template>
  <div>
    <h1>post detail</h1>
    <Content/>
  </div>
</template>
<Content /> is a Vuepress component that loads slot-free content from your markdown file. Anything that's not wrapped in-between ::: slot-key would be loaded.
In case you are not aware, it's important to know that you can only have 1 child under <template> for Vue.js to work correctly. If you have multiple children directly <template> you will get an error like Error compiling template .... Component template should contain exactly one root element.
Also, notice that in each markdown file in /blog, I've already indicated in the frontmatter that which layouts to use
--------
layout: PostLayout
--------
Now if you head to http://localhost:8080/blog/post-1.html you should see a page like below... which means you've binded each layout to the post correctly! Yay!

2. Create shared components
Now we are ready to add shared components like the global nav and footer. In the theme folder, create a components folder with 2 files inside: Nav.vue and Footer.vue. Notice it's a vue convention that components files are capitalized.
Nav
Simple thing first: let's add some template to the Nav.vue file.
<template>
  <header>
    <nav
      class="font-sans bg-white text-center flex justify-between my-4 mx-auto container overflow-hidden"
    >
      <a
        href="/"
        class="block text-left no-underline font-bold text-black uppercase"
      >{{$site.title}}</a>
      <ul class="text-sm text-grey-dark list-reset flex items-center">
        <li>
          <a
            class="inline-block py-2 px-3 text-grey-darkest hover:text-grey-dark no-underline"
          >menu</a>
        </li>
      </ul>
    </nav>
  </header>
</template>
As you can see, our Nav consists of a \$site title and some menu items. To programatically generate menu items, we first need to add a themeConfig object to our config.js. This is where we are going to site menu data.
module.exports = {
  title: "Vuepress Blog Example",
  description: "just another blog",
  themeConfig: {
    nav: [{ text: "Blog", link: "/blog/" }, { text: "About", link: "/" }],
  },
  postcss: {
    plugins: [
      require("tailwindcss")("./tailwind.config.js"),
      require("autoprefixer"),
    ],
  },
}
Now themeConfig will be available under the global computed $site. Did you notice we have already used it to render the \$site.title?
To programatically generate each menu item, we can utilize v-for to access the $site.themeConfig.nav that we just added to the config.js. Also, the link of each would be available to us. We can add to each item with :href.
<li v-for="item in $site.themeConfig.nav">
  <a
    :href="item.link"
    class="inline-block py-2 px-3 text-grey-darkest hover:text-grey-dark no-underline"
  >{{item.text}}</a>
</li>
v-for and :href are both Vue directives, where :href is a shorthand of v-bind:href. The first one simply means: for every item in $site.themeConfig.nav object, render this <li> block; and the later one is binding item.link to a vue rendered href. You could also use the plain old href but then you'd not be able to access to what's inside of item.
Now your Nav.vue should look like this:
<template>
  <header>
    <nav
      class="font-sans bg-white text-center flex justify-between my-4 mx-auto container overflow-hidden"
    >
      <a
        href="/"
        class="block text-left no-underline font-bold text-black uppercase"
      >{{$site.title}}</a>
      <ul class="text-sm text-grey-dark list-reset flex items-center">
        <li v-for="item in $site.themeConfig.nav">
          <a
            :href="item.link"
            class="inline-block py-2 px-3 text-grey-darkest hover:text-grey-dark no-underline"
          >{{item.text}}</a>
        </li>
      </ul>
    </nav>
  </header>
</template>
Vuepress utilizes vue-router's router-link, which is preferred than a hard-coded <a>. When in HTML5's history mode, router-link won't refresh the page on clicking links and it also progressively supports IE 9's hash-mode. For all these good reasons, we are going to replace all the <a> to <router-link>, and all href to be :to.
<template>
  <header>
    <nav
      class="font-sans bg-white text-center flex justify-between my-4 mx-auto container overflow-hidden"
    >
      <router-link
        :to="'/'"
        class="block text-left no-underline font-bold text-black uppercase"
      >{{$site.title}}</router-link>
      <ul class="text-sm text-grey-dark list-reset flex items-center">
        <li v-for="item in $site.themeConfig.nav">
          <router-link
            :to="item.link"
            class="inline-block py-2 px-3 text-grey-darkest hover:text-grey-dark no-underline"
          >{{item.text}}</router-link>
        </li>
      </ul>
    </nav>
  </header>
</template>
Footer
Not much magic is going on in the footer. Just add this template to Footer.vue
<template>
  <footer class="font-sans bg-black text-white py-8 px-4">
    <div class="text-grey-darker text-center">©2019 Yours truely. All rights reserved.</div>
  </footer>
</template>
Putting everything together
Because we want every single page to have the Nav and the Footer, we have to tell our layouts where to find them. Update the all layout files with the following:
<template>
  <div class="flex flex-col h-full">
    <Nav/>
    <Content class="flex-1 max-w-xl mx-auto leading-normal"/>
    <Footer class="pin-b"/>
  </div>
</template>

<script>
import Nav from "@theme/components/Nav";
import Footer from "@theme/components/Footer";
export default {
  components: { Nav, Footer },
  name: "Layout"
};
</script>

<style lang="stylus">
@import '../styles/theme.styl';
</style>
Since tailwind is not the main focuse of this tutorial, I already included some tailwind classes in the templates to make everything looked decent. Update the theme.styl with these css, under @tailwind components;
body, html, #app {
  height: 100%; /* makes the footer sticked to bottom */
}
By now, you should have pages look like this. Both menu items (Blog and About) are generated from our config!


localhost:8080/blog/post-1.html

Starting to look better, right?
3. List of posts page
To show a list of blog posts, we can create a globally computed properties posts. Update the export of PostsLayout.vue with the following:
export default {
  components: { Nav, Footer },
  name: "Layout",
  computed: {
    posts() {
      return this.$site.pages
        .filter(x => x.path.startsWith("/blog/"))
        .sort(
          (a, b) => new Date(b.frontmatter.date) - new Date(a.frontmatter.date)
        )
    },
  },
}
computed are values that will be computed when Vue starts and it will update itself when the data changes. Which means, you don't need to do extra work to get the new value ... How great is that! Inside we are saving the value of computed to the name posts.$site.pages is one of the Vuepress globals that gives you all the pages in the site, including the non-blog ones. To get a list of posts, I only want the pages under /blog. Therefore in the code above I filtered out the pages I don't need then sort the result by date before returning the value.
Now we can utilize the computed properties posts in our template. Replace <Content /> with this snippet
<ul class="flex-1 max-w-xl mx-auto leading-normal">
  <li v-for="post in posts">
    <router-link :to="post.path">{{ post.title }}</router-link>
  </li>
</ul>
Also, add the missing date into each blog post's frontmatter. Simply fake some date for the purpose of this tutorial.
date: 2019-02-11
If you go to localhost:8080/blog/ now, you should see our list of posts showing!

Wait, how come there's an empty list item on top? Right, because we forgot to filter out the README.md in /blog, which is not a blog post.
Let's add some logic to filter it out:
computed: {
  posts() {
    return this.$site.pages
      .filter(x => x.path.startsWith("/blog/") && !x.frontmatter.blog_index)
      .sort(
        (a, b) => new Date(b.frontmatter.date) - new Date(a.frontmatter.date)
      );
  }
}
In README.md(the one under the blog folder), add blog_index: true to the frontmatter
--------
layout: PostsLayout
blog_index: true
--------
Now if you check localhost:8080/blog/ again, the empty list item should be gone. Try click on every post link and see if it shows the correct post!
4. Use Vuepress plugins
I've always find reading-time info on Medium.com very useful, so let's add similar functionality. Luckily there's already a vuepress plugin exists so we don't have to write our own.
npm install -D vuepress-plugin-reading-time
Add plugins: ['vuepress-plugin-reading-time'] into your config.js.
Replace the <Content/> in your PostLayout.vue with this:
<article class="flex-1 mx-auto leading-normal container">
  <label class="text-grey-dark">{{$page.readingTime.text}}</label>
  <content />
</article>
Voila! Refresh any of your blog detail page, you should see the grey reading time on top:

As you can see, adding/using plugins in Vuepress is super easy and powerful. There aren't many plugins available yet so it's likely that you have to write your own.
Work with external node packages
Usually there's a published date on each post and we can easily accompolish that by adding a date in the frontmatter. But the output still has to be parsed it to be a human readable format, which Vuepress doesn't have support for it yet.
We can use extra tool like moment.js to help:
npm install moment
In PostLayout.vue, add the template to render your date, it'd render something like 2019-02-13T00:00:00.000Z.
<label class="text-grey-dark">{{$page.frontmatter.date}}</label>
To fix this, let's load moment package to our layout. Update the <script> with these:
import moment from "moment"
import Nav from "@theme/components/Nav"
import Footer from "@theme/components/Footer"
export default {
  components: { Nav, Footer },
  name: "Layout",
  methods: {
    formateDate(date) {
      return moment(date).format("MMM Do YYYY")
    },
  },
}
Then apply it onto the template
<label class="text-grey-dark">{{formateDate($page.frontmatter.date)}}</label>
Now you should see a human-readable date format like Feb 13th 2019!
5. Wrapping up
Phew You did it! This is a long tutorial I know, but if you followed through, you'd learn many concepts including
- How to create a custom theme for Vuepress
- How to use basic Vue directives in your theme
- How to work with external node modules
- How to use Vuepress plugins
Next, we are going to learn how to deploy it on Netlify. It's a short simple one, I promise! Let's go, Part 3
This is a cross-post from my website. Check out the original and more there!


Oldest comments (3)
Hi, Amie!
Thanks for your post. It has been very useful to me. I would like to make my blog with vuepress and tailwind. I've followed your steps and everything gone fine. But I've lost some vuepress features like search bar. Do you know how can I recover it? Thanks!
Hi Amie,
VuePress features like search bar are out-of-the-box features.
I have created a VuePress app, source code is also available for reference.
hemasthoughts.com/
Thanks!
Thanks for the information.