
Before starting to code we need to understand the file structure we are going to use in this tutorial.

Public Folder has the default files which comes with create-react-app.

src Folder it has two folders final which contains completed code and rest of the files and pages folder will be used in this tutorial.
Css code to follow along.
*,
::after,
::before {
  box-sizing: border-box;
}
/* fonts */
/* @import url("https://fonts.googleapis.com/css2?family=Roboto:wght@400;500;600&family=Montserrat&display=swap"); */

html {
  font-size: 100%;
} /*16px*/

:root {
  /* colors */
  --primary-100: #e2e0ff;
  --primary-200: #c1beff;
  --primary-300: #a29dff;
  --primary-400: #837dff;
  --primary-500: #645cff;
  --primary-600: #504acc;
  --primary-700: #3c3799;
  --primary-800: #282566;
  --primary-900: #141233;

  /* grey */
  --grey-50: #f8fafc;
  --grey-100: #f1f5f9;
  --grey-200: #e2e8f0;
  --grey-300: #cbd5e1;
  --grey-400: #94a3b8;
  --grey-500: #64748b;
  --grey-600: #475569;
  --grey-700: #334155;
  --grey-800: #1e293b;
  --grey-900: #0f172a;
  /* rest of the colors */
  --black: #222;
  --white: #fff;
  --red-light: #f8d7da;
  --red-dark: #842029;
  --green-light: #d1e7dd;
  --green-dark: #0f5132;

  /* fonts  */

  --small-text: 0.875rem;
  --extra-small-text: 0.7em;
  /* rest of the vars */
  --backgroundColor: var(--grey-50);
  --textColor: var(--grey-900);
  --borderRadius: 0.25rem;
  --letterSpacing: 1px;
  --transition: 0.3s ease-in-out all;
  --max-width: 1120px;
  --fixed-width: 600px;

  /* box shadow*/
  --shadow-1: 0 1px 3px 0 rgba(0, 0, 0, 0.1), 0 1px 2px 0 rgba(0, 0, 0, 0.06);
  --shadow-2: 0 4px 6px -1px rgba(0, 0, 0, 0.1),
    0 2px 4px -1px rgba(0, 0, 0, 0.06);
  --shadow-3: 0 10px 15px -3px rgba(0, 0, 0, 0.1),
    0 4px 6px -2px rgba(0, 0, 0, 0.05);
  --shadow-4: 0 20px 25px -5px rgba(0, 0, 0, 0.1),
    0 10px 10px -5px rgba(0, 0, 0, 0.04);
}

body {
  background: var(--backgroundColor);
  font-family: -apple-system, BlinkMacSystemFont, 'Segoe UI', Roboto, Oxygen,
    Ubuntu, Cantarell, 'Open Sans', 'Helvetica Neue', sans-serif;
  font-weight: 400;
  line-height: 1.75;
  color: var(--textColor);
}

p {
  margin-bottom: 1.5rem;
  max-width: 40em;
}

h1,
h2,
h3,
h4,
h5 {
  margin: 0;
  margin-bottom: 1.38rem;
  font-family: var(--headingFont);
  font-weight: 400;
  line-height: 1.3;
  text-transform: capitalize;
  letter-spacing: var(--letterSpacing);
}

h1 {
  margin-top: 0;
  font-size: 3.052rem;
}

h2 {
  font-size: 2.441rem;
}

h3 {
  font-size: 1.953rem;
}

h4 {
  font-size: 1.563rem;
}

h5 {
  font-size: 1.25rem;
}

small,
.text-small {
  font-size: var(--small-text);
}

a {
  text-decoration: none;
}
ul {
  list-style-type: none;
  padding: 0;
}

.img {
  width: 100%;
  display: block;
  object-fit: cover;
}
/* buttons */

.btn {
  cursor: pointer;
  color: var(--white);
  background: var(--primary-500);
  border: transparent;
  border-radius: var(--borderRadius);
  letter-spacing: var(--letterSpacing);
  padding: 0.375rem 0.75rem;
  box-shadow: var(--shadow-1);
  transition: var(--transition);
  text-transform: capitalize;
  display: inline-block;
}
.btn:hover {
  background: var(--primary-700);
  box-shadow: var(--shadow-3);
}
.btn-hipster {
  color: var(--primary-500);
  background: var(--primary-200);
}
.btn-hipster:hover {
  color: var(--primary-200);
  background: var(--primary-700);
}
.btn-block {
  width: 100%;
}

/* alerts */
.alert {
  padding: 0.375rem 0.75rem;
  margin-bottom: 1rem;
  border-color: transparent;
  border-radius: var(--borderRadius);
}

.alert-danger {
  color: var(--red-dark);
  background: var(--red-light);
}
.alert-success {
  color: var(--green-dark);
  background: var(--green-light);
}
/* form */

.form {
  width: 90vw;
  max-width: 400px;
  background: var(--white);
  border-radius: var(--borderRadius);
  box-shadow: var(--shadow-2);
  padding: 2rem 2.5rem;
  margin: 3rem 0;
}
.form-label {
  display: block;
  font-size: var(--small-text);
  margin-bottom: 0.5rem;
  text-transform: capitalize;
  letter-spacing: var(--letterSpacing);
}
.form-input,
.form-textarea {
  width: 100%;
  padding: 0.375rem 0.75rem;
  border-radius: var(--borderRadius);
  background: var(--backgroundColor);
  border: 1px solid var(--grey-200);
}

.form-row {
  margin-bottom: 1rem;
}

.form-textarea {
  height: 7rem;
}
::placeholder {
  font-family: inherit;
  color: var(--grey-400);
}
.form-alert {
  color: var(--red-dark);
  letter-spacing: var(--letterSpacing);
  text-transform: capitalize;
}
/* alert */

@keyframes spinner {
  to {
    transform: rotate(360deg);
  }
}
.form h5 {
  text-align: center;
}
.form .btn {
  margin-top: 0.5rem;
}
.loading {
  width: 6rem;
  height: 6rem;
  border: 5px solid var(--grey-400);
  border-radius: 50%;
  border-top-color: var(--primary-500);
  animation: spinner 0.6s linear infinite;
}
.loading {
  margin: 0 auto;
}
/* title */

.title {
  text-align: center;
}

.title-underline {
  background: var(--primary-500);
  width: 7rem;
  height: 0.25rem;
  margin: 0 auto;
  margin-top: -1rem;
}

.section {
  padding: 2rem 0;
  width: 90vw;
  max-width: var(--max-width);
  margin: 0 auto;
}

.navbar {
  width: 90vw;
  max-width: var(--max-width);
  margin: 0 auto;
  display: flex;
  gap: 1rem;
}

.link {
  color: var(--grey-500);
}

.active {
  color: var(--primary-500);
}
.products article {
  margin-bottom: 1rem;
}

.products h5 {
  margin-bottom: 0;
}

.product img {
  width: 200px;
  height: 150px;
}
Copy and paste this CSS code in Index.css to follow along
Now lets start it.

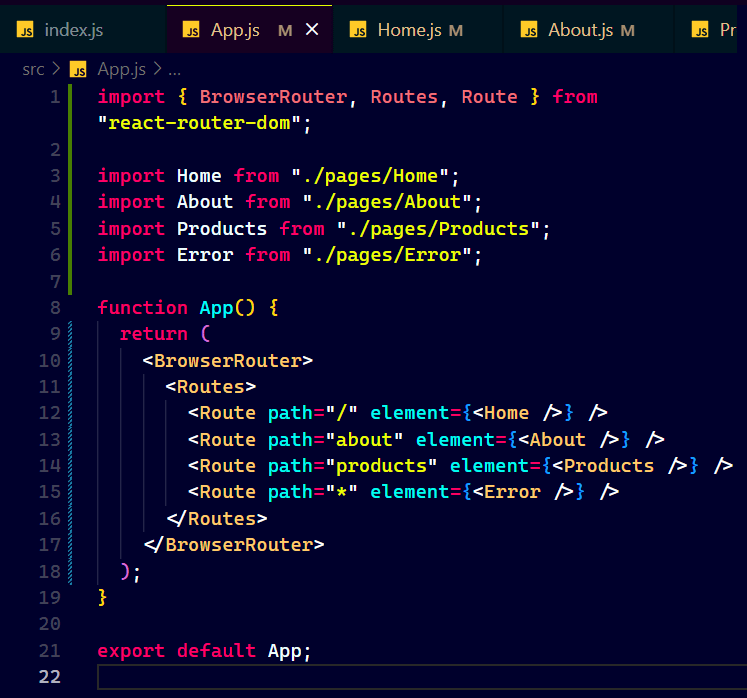
Let's set our first route so open App.js from src.

Line 1 imported the BrowserRouter( browser router which is going to connect to the actual browser), Routes(the routes component which is going to be a parent for all our routes), Route(we'll use it to set up a single page). from react-router-dom.
Line 5 to 9 wrapped everything in BrowserRouter.
Line 7 we set single route path specifies that what we are going to see in the search bar as shown below.

Now we set its value to be / means Home suppose we have www.react-router-tutorial domain so when any one visit this url what we are going to see is specified by this /.
here we passed an attribute element which is a JSX to show when anyone visit this route in our case our domain is http://localhost:3000/ so if we visit this we will be able to see Home.


Line 8 we appended testing after / but in Line 10 we directly wrote about without using / so don't worry both are same now if we visit browser you will get.

Look at the url after / we changed the text we have been served with different content now we can take it to multiple levels as shown below.

Line 17 to 24 set a multi-level route see Line 18 now let's move to browser and check.

Up till now we were setting up the route and displaying the hardcoded content in the form of element attribute passed in Route now we will see dynamic way.
In order to do that we will use the pages folder.

We will use Home, About and Products and set up the route for them as shown below.

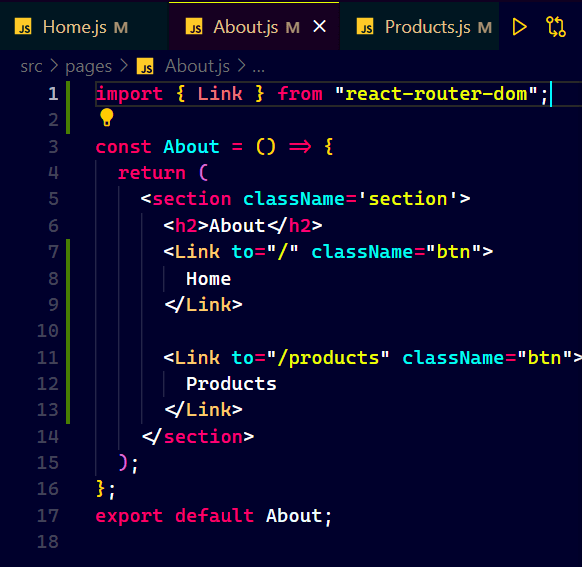
About.js
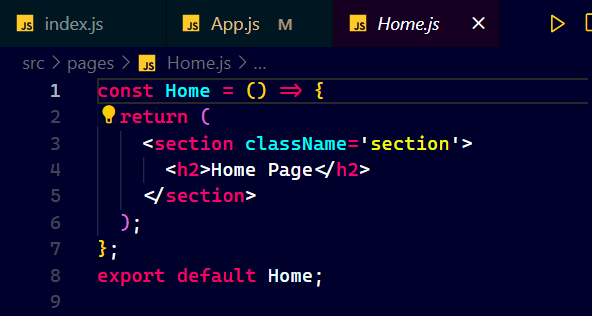
Home.js
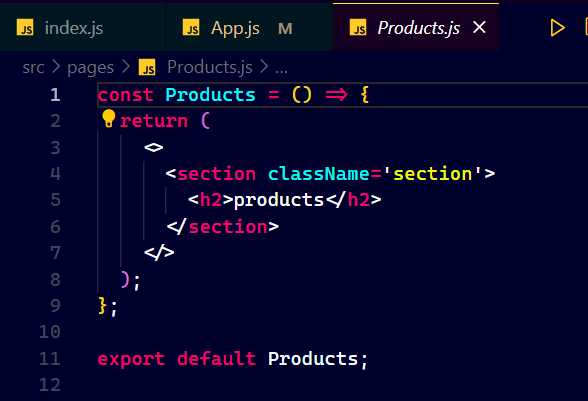
Products.js

Line 3, 4 and 5 imported the components / pages from pages folder.
Line 11, 12 and 13 we set up the same way we did earlier in this tutorial but this time instead of rendering hard coded JSX we are displaying an entire component in element attribute of the Route.
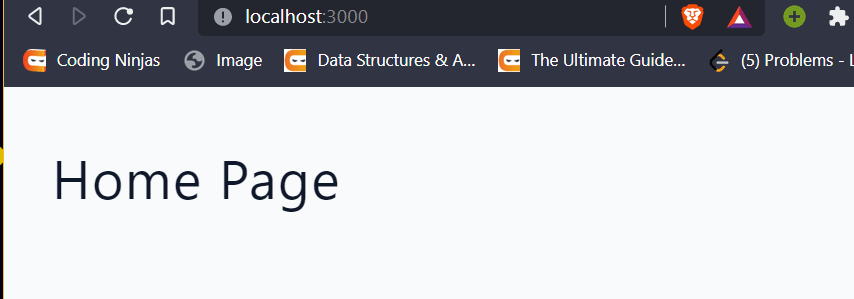

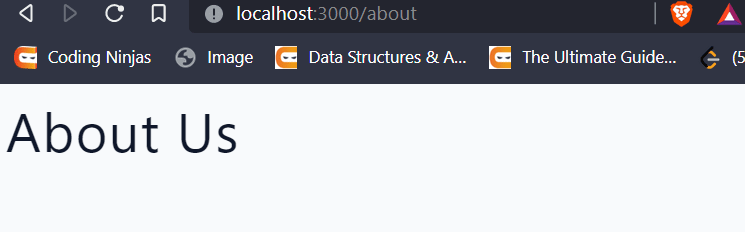
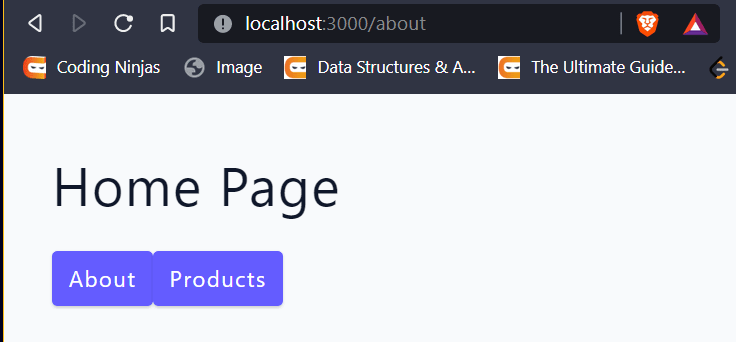
In all three above figures look at the search bar.
Link to component from components-:
Means up till now we were using search bar to navigate now we will try to provide the buttons to navigate.
In order to create the functionality so that we can navigate between pages we can use two things first is the anchor tag and second Link tag provided by react-router-dom.
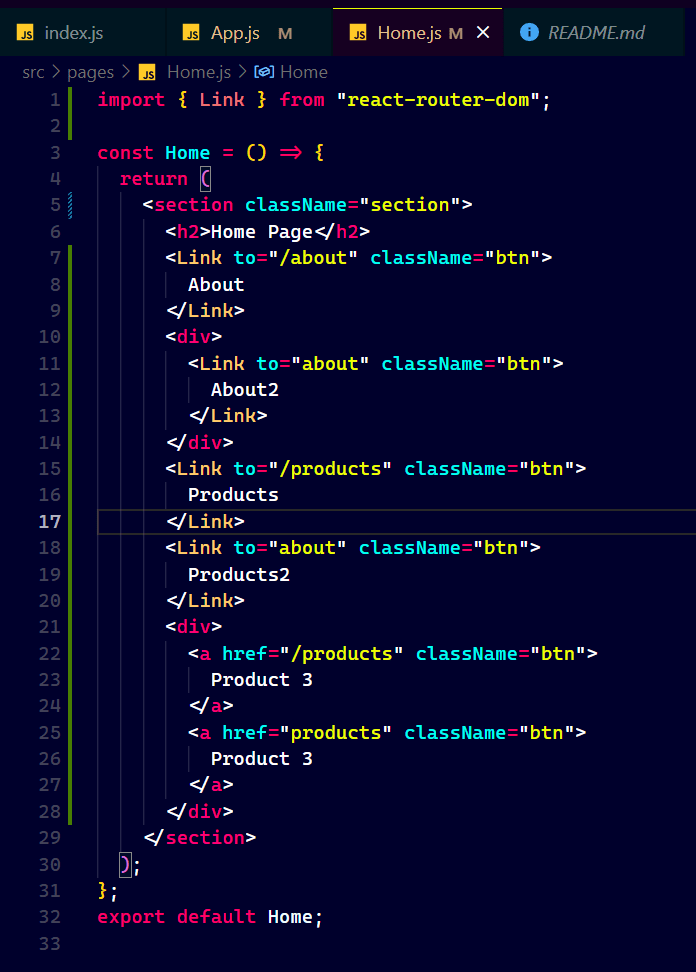
Line 21 to 28 we created using anchor tag means last two buttons if you visit browser.
Line 7 to 20 created 4 links using Link tag.
Now questions arises what's the difference.
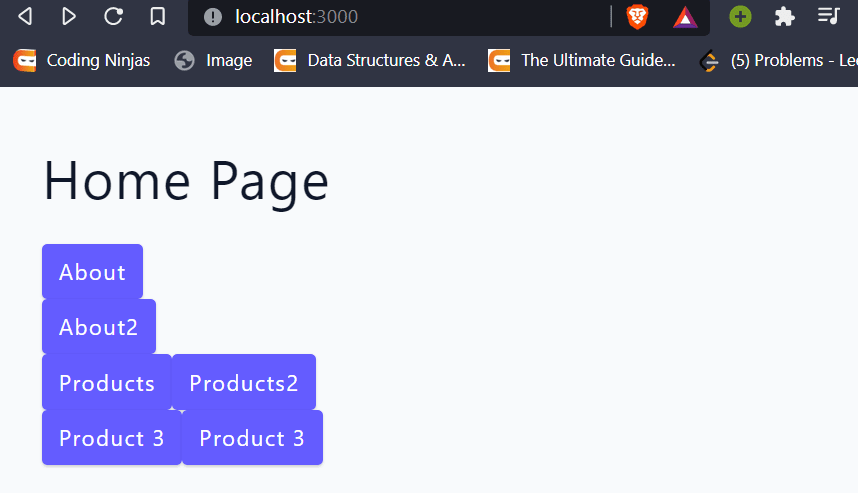
If you visit browser you will get this first 4 buttons Link tag last 2 using anchor tag.
If you click on first 4 buttons then page won't reload as you can see that at the left top corner of image we got a semi circle like this ![]() Means page didn't reload.
Means page didn't reload.

If you click on the last 2 then that button changed to x means page reloaded.
Now you must have noticed we created same route twice Line 7 to 9 same as Line 11 to 13 in one of them we used /about and another just about both are same in anchor tag also we done the same and it created the same thing but all the buttons will work so / is not compulsory but need to be used.
Now we will create the link in all pages.


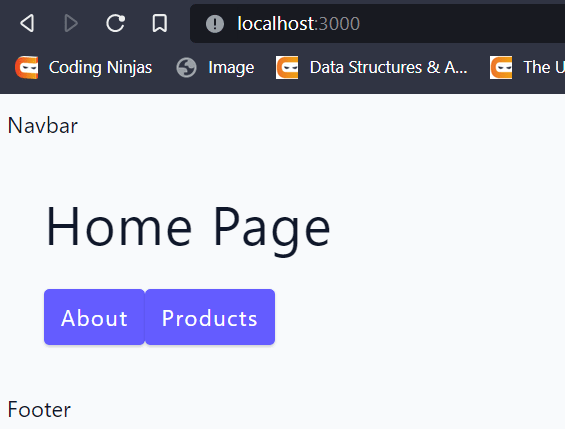
Removed un necessary links from Home.js.

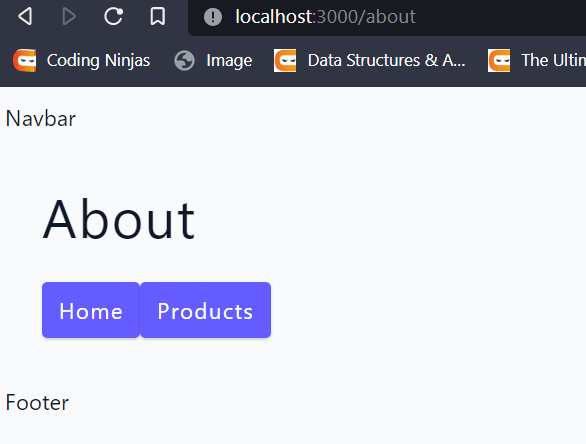
We clicked About.
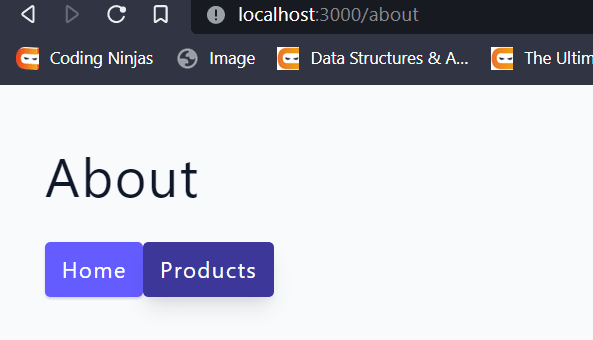
Clicked Products.

Clicked Home.
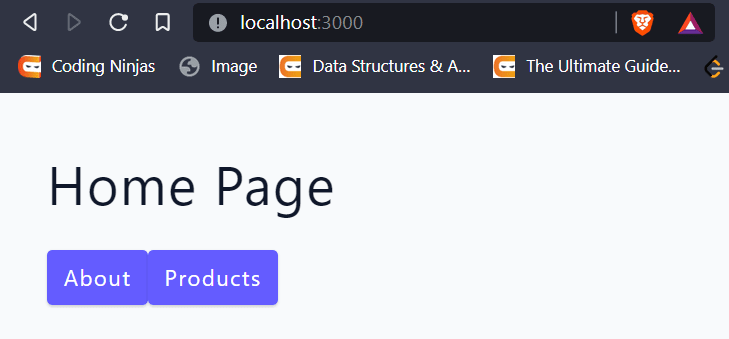
Back to Home.
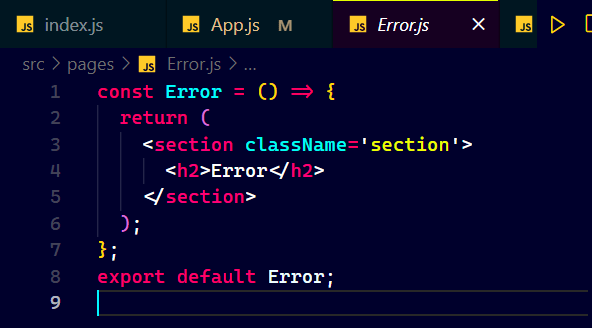
Error Page -:
What if user typed something in the search bar other then the specified route suppose we typed http://localhost:3000/admin since we haven't created any route for this so we have nothing to serve the user so for such cases we use Error Page if any one types other then specified route they will get this error page.
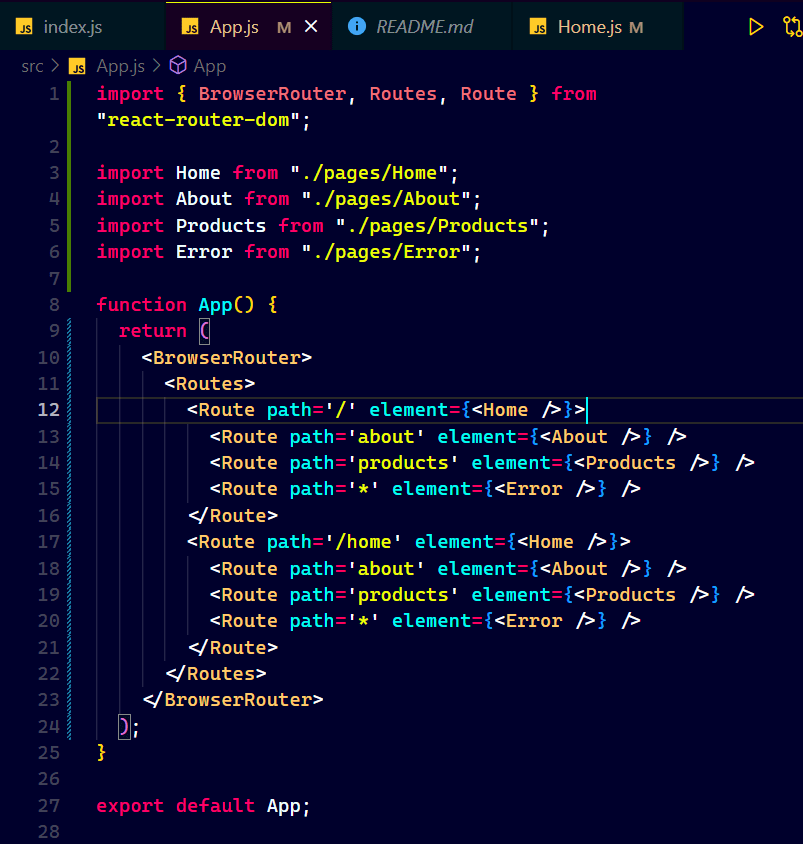
For this we need to move to App.js where we set up our Routes.
Line 6 imported Error.js which looks like this.
Back to App.js.
Line 15 we set a route as "*" means if anyone type something else other then the above specified routes then show them the Error page.

We don't have this route in our App.
Navbar -:
Now we will see that how we can setup a navbar so that it can be accessed from every where in our App.
Move to App.js.

Line 11 we added navbar and in Line 18 the footer.
Now if we move to the browser on our every page we can see that our nav and footer will be common.

This was the basic approach of adding some shared layout between pages.
Navbar -:
Here we will learn nested routes, shared layout, index page.
Nested Routes -:
Here you can see that Line 12 to 16 we made a route for home using / and inside that route nested some more route so that any one types http://localhost:3000/about we should get About component lets move to browser.
But we can see that it didn't work but now you may question that what if we set homes route equal /something same thing we did between Line 17 to 22 now let's move to browser.
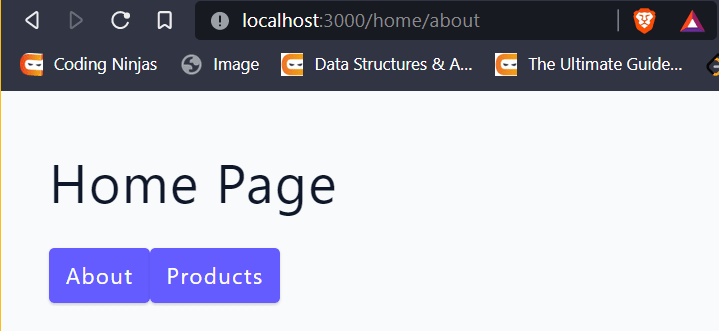
This also didn't worked every time we were just able to access the Home Page or you can say that the parent component of the nested route components.
In order to do that move to the parent and import Outlet as shown below.

Now use it like a component as shown below Line 7.
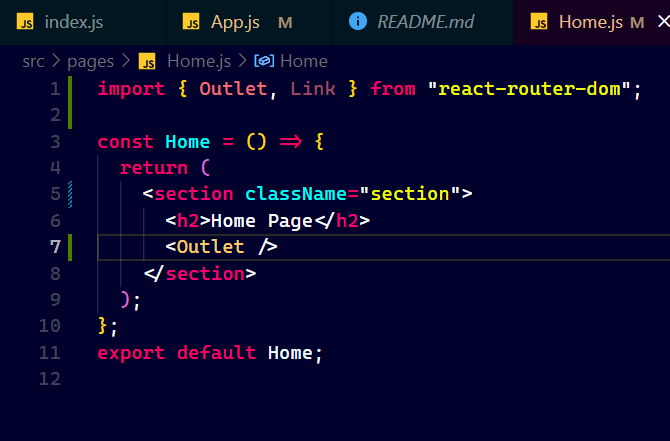
Done, now if you move to the browser you will get the nested routes.

You must have noticed that Home page is shared to all the nested routes so why don't we add a navbar over here so that we can navigate and remove all the buttons as below about.
So in order to do that let's create a components folder in src as shown below.

Create a new file in this Navbar.js and add this lines of code.

Move to Home.js.

Line 5 to 10 took a react fragment and wrapped every thing.
Here Navbar acts as a shared components because inside section we fetched the content of different routes nested in Home with the help of Outlet but we kept Navbar out of it so it will be common for each nested route.
Here outlet works as an empty component which acts according to the route, when we call any component like we used outlet it will show the content of that component but outlet shows the content where the route takes.


Both are working but what if we click Home.

We got nothing because we haven't setup anything for the Home page.
Now let's setup the Index Page which will be displayed when ever we visit Home.
Index Page -:
First of all go to pages and create a new file Index.js since we know that we are using Home.js to display our nested routes using Outlet and a shared component across them that is Navbar as shown below.

Now we need a different page so that we can show it at the Home route that's why Index.js.

Now let's use it in the App.js.

Line 7 imported Index.js.
Line 14 we create a route for our home page but it has some different syntax instead of path we wrote index.
Index- Index in the route will copy the path of the parent route in our case / and display the specified component.
Now if you visit browser.

We got what we written in index.js.
NavLink -:
It is a property provided by the react-router-dom it make sure that the link which is active needs to have different style.
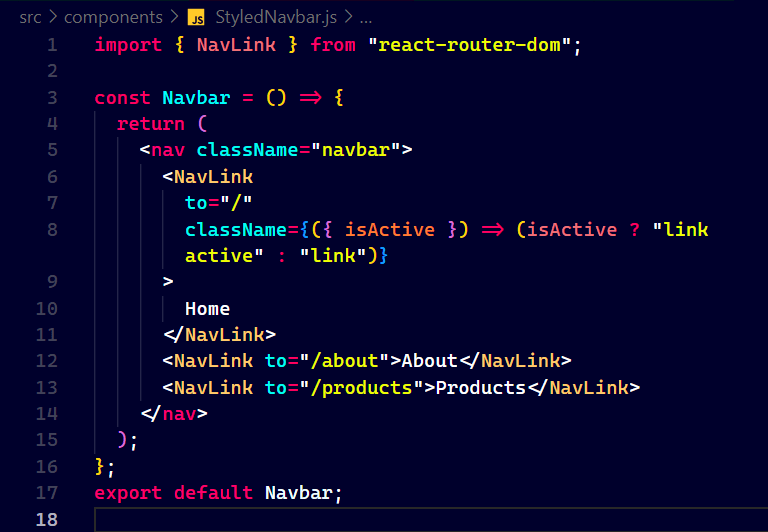
Create a new file StyledNavbar in components and add the following code.

Here we used NavLink instead of Link rest is same as we did earlier in Navbar.js.
Now move to Home.js and import this instead of Navbar.js.

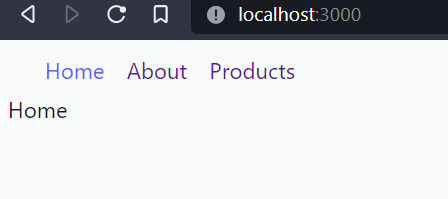
Now if you visit browser you will be able to look that link which is active means the page on which we are currently present is of different color.
Why its happening ?
Its happening because when we use NavLink it goes to the CSS file associated to that file and search for the class link and active once found it will apply the style written in Link to all links and style of class active to active links only.
Since we are just using Index.css to style so let's see is there any class of same name and what if we tweak it.

Yes we have let's make the active color red.

Let's see browser.

It worked.
What if we remove this classes ?


No styling.
Inline styling in NavLink-:
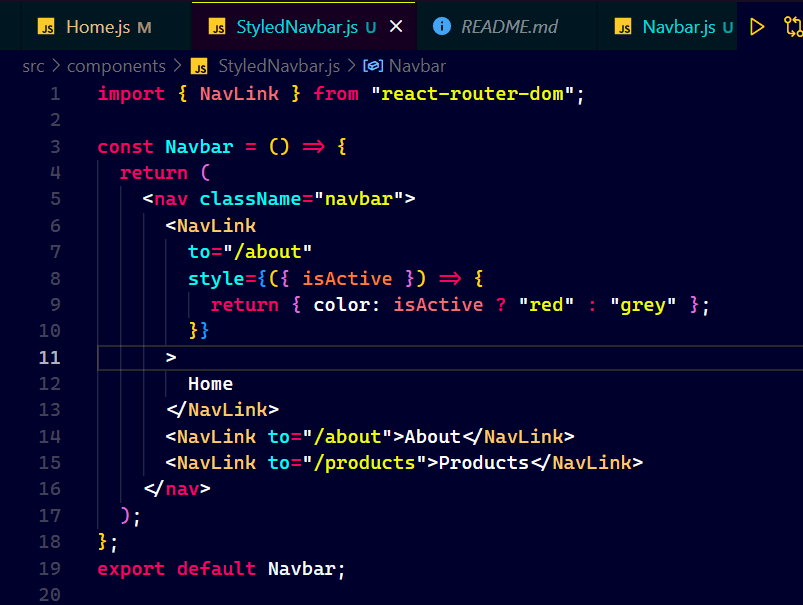
Line 6 to 13 we can see that we passed inline.
Here in NavLink we passed style attribute in this attribute we passed an arrow function inside {} and in function parenthesis we passed property as an object and in the function return statement we specified the color rule using ternary operator.
Now if you move to browser you will get.

When we are at Aboutcolor of Home is grey.

If we click it it's color become red.
Now what if we want to apply CSS using CSS Classes.
Here we used the same class we seen before.
We can see that CSS is applied.
URL Params -:
Helps us to show the dynamic data suppose we have a page products where different products can be found we need to make a functionality that when any one clicks on a single product then a separate page must open for it so are we going to create a page for each product no we will just use a single page and display every product on that.
Suppose we have data coming from database and every product have same set of data then we just fetch the data and show it on the same page.
Move to App.js add a new route.
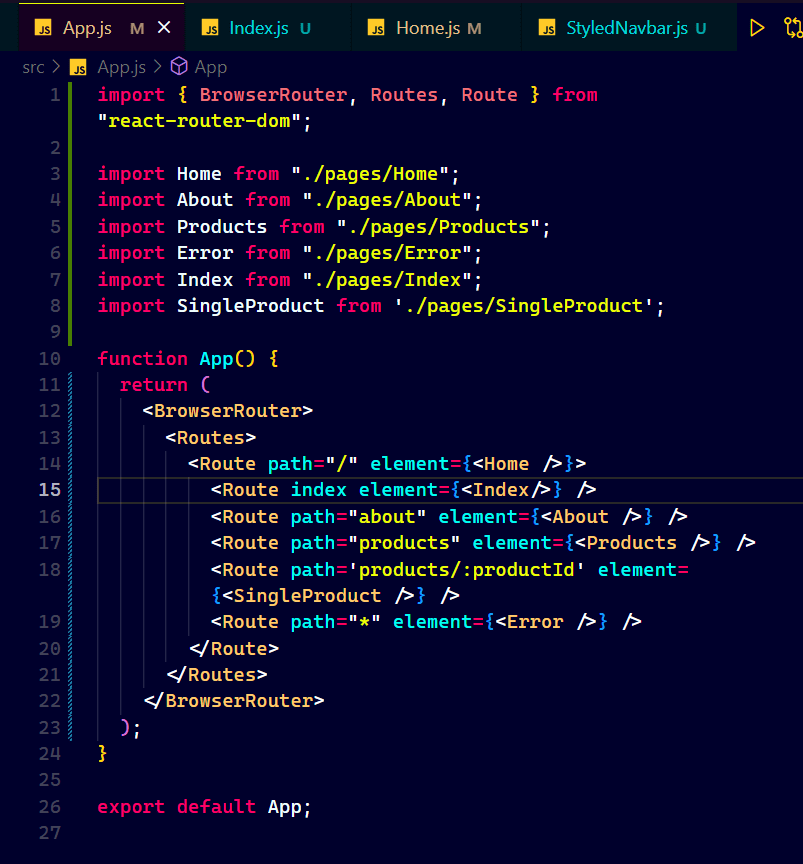
Line 8 imported SingleProduct let's see what inside it.

Back to App.js.
Line 18 we created a new route for SingleProduct but in path we specified that it will open after products page and it need the productId to show some thing.
So lets visit browser.

We are at the products page see URL.
Now how we will be able to access SingleProduct by providing the id after product in URL.
Let's visit browser.
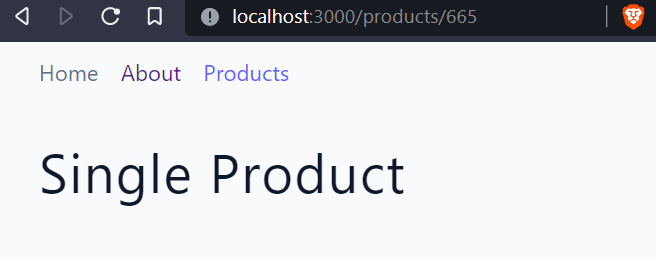
We provided id as 665 so we got SingleProduct.
Navigate to SingleProduct and add this lines of code.

Line 1 imported useParams hook.
Line 3 console logged it.
Lets see browser.

Here we can see that in console we got the id we actually passed in the URL so useParams is used to capture that.
Now let's display this id as JSX.

Line 4 stored the id in a variable using object destructuring.
Line 8 displayed at as JSX.
Line 9 link back to Products.
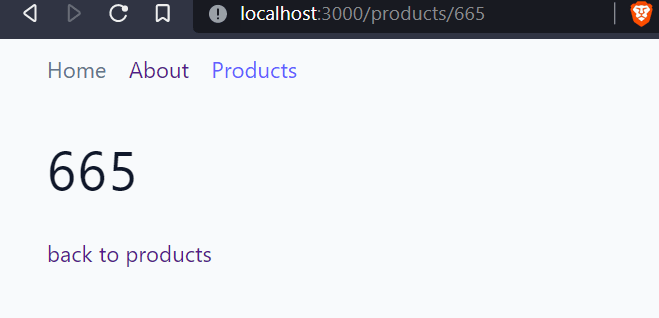
Able to display the id passed.
Now we will iterate over the products in the data.js and view it in products.
Now if you move to data.js it will look like this.

We have three attributes in each fields id, name and image and we have total 5 items.
Now let's visit Products.js and add this lines of code.
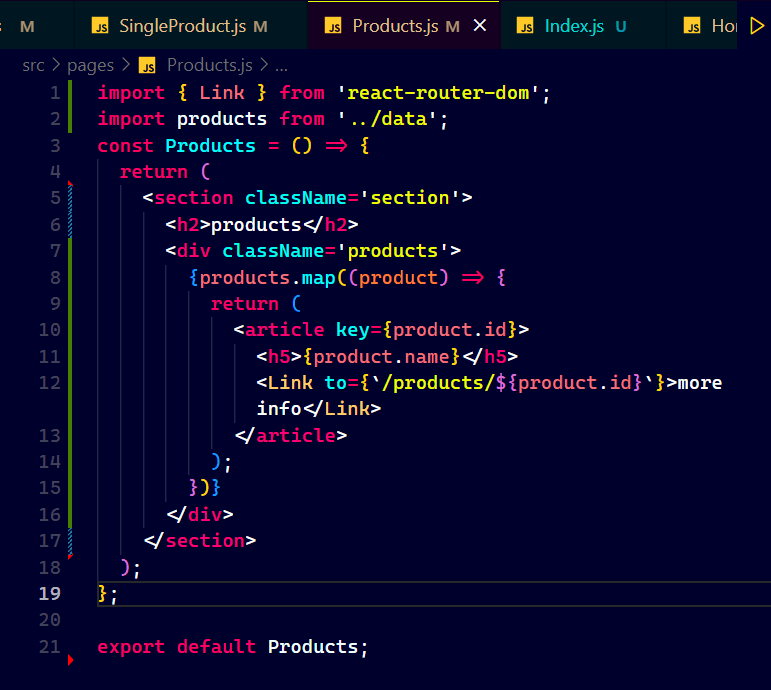
Line 2 imported products the data file.
Line 8 iterated over the products.
Line 11 displayed product.name.
Line 12 generated the button where passed the id as URL from where we can grab in SingleProduct.js.
Lets Visit Browser.

Git the products list let's click on Bar Stool.

Got the id of the Bar Stool lets confirm it with data.js.

Both are same.
Move to SingleProduct.js and add this code.
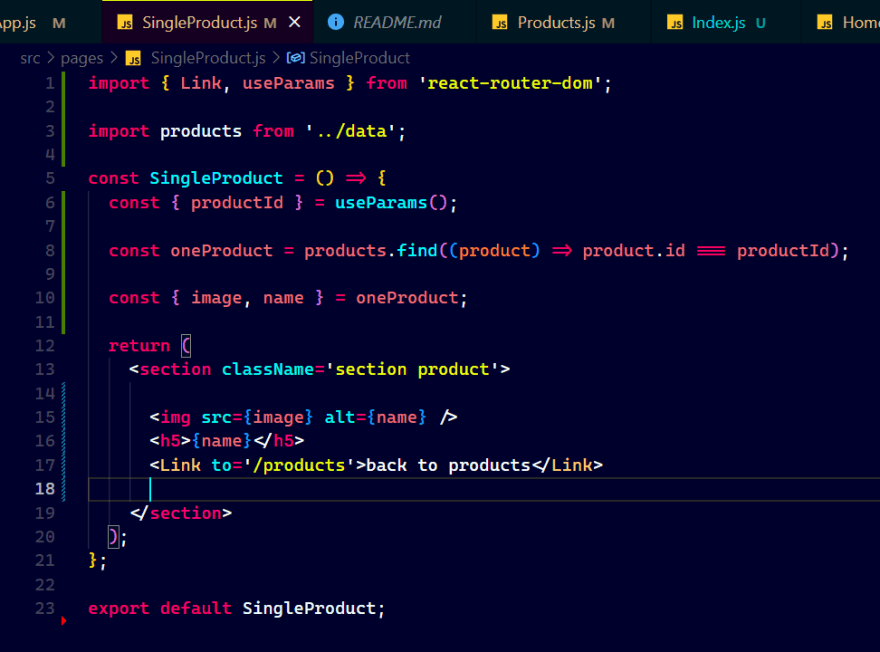
Line 3 imported Products from data.js.
Line 6 fetched the id coming from Products.js using useParams as we did before while showing id's as JSX.
Line 8 we iterated through the products find the product whose id matched with productId and stored it in oneProduct.
Line 10 with the help of Object destructuring we copied the image url as well as name.
Line 15 and 16 displayed them.
Now in the browser.
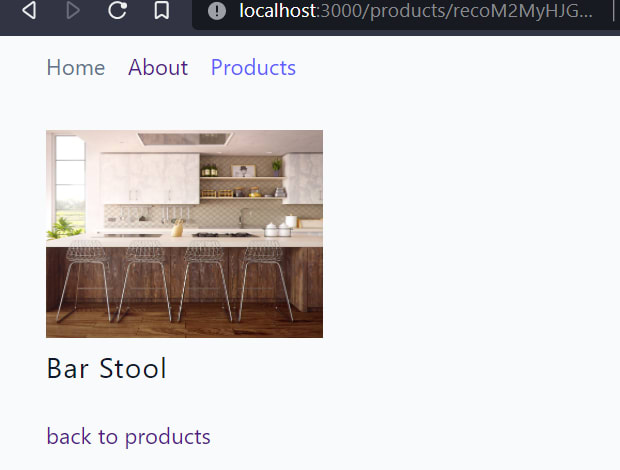
Got the product.
useNavigate()-:
Now we will look that how we can navigate to any page programatically using useNavigate.
First move to App.js add the specified lines of code.

Line 3 imported useState.
Line 11 and 12 imported Dashboard and Login.
Line 15 defined useState.
Line 25 and 26 set the route for the login and dashboard and in element passed setUser in Login and user in Dashboard.
Now moved to StyledNavbar and add two more links in your navbar.

Line 24 to 29 added a NavLink to Login.
Now lets move to Login.js.

It has this lines of code and this can be easily understandable if not refer Advanced react.
Now make this changes.

Here in the above two figures we used async in Line 6 and in Line 10 we can keep it or remove it.
Line 2 import useNavigate.
Line 4 accepted setUser the prop coming from App.js.
Line 8 stored useNavigate to a variable.
Line 12 checked that name and email is valid or not if not return.
Line 13 if correct use setUser function coming from App.js this will copy this data to the user in App.js and if you remember that user is sent to dashboard as prop.
Line 14 used navigate to navigate the dashboard if form submitted successfully.
Now let's move to Dashboard.js and add this lines of code.

Line 1 accepted user the prop coming from App.js
Line 4 used optional chaining to display the message.
Now move to browser.

We are at Home lets click Login.

We are at Login and entered the data required lets click Login.

We are at dashboard with message have you noticed it navigated us to dashboard moment we hit login button.
Protected route -:
In Pages create a new file ProtectedRoute.js as shown below.

Initially add this codes to it.

Now move to App.js and import it.

Line 13 we imported it.
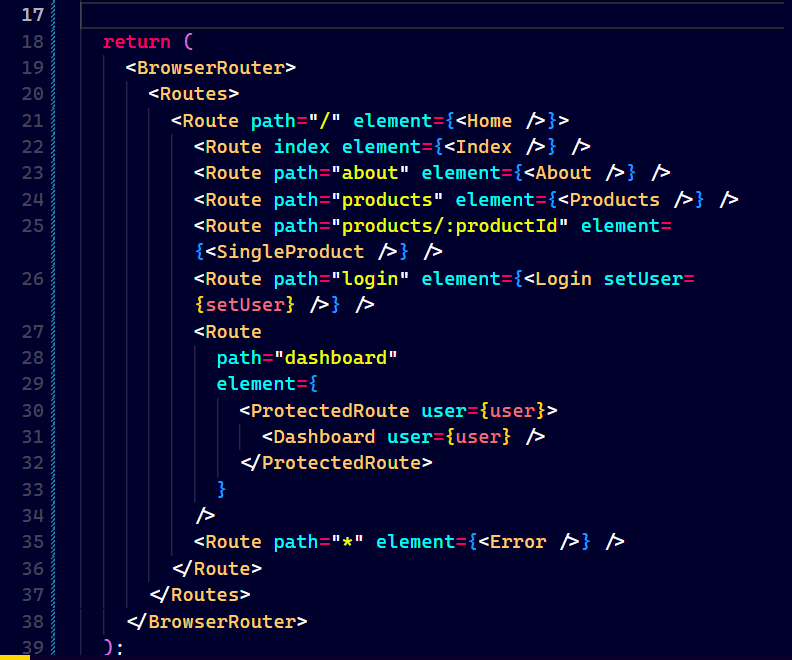
Now we wrapped the dashboard in Protectected Route.
Now if you visit browser you will get.

Now move to ProtectedRoute.js and add this lines of code.

Line 1 imported navigate.
Line 3 accepted props passed one is normal prop user and another is children prop.
Line 4 to 7 if not user back to home else return children.
Now you will be able to access dashboard.

If you want to check this functionality then manually type in the search bar this address http://localhost:3000/dashboard we will be redirected to Home page .


Oldest comments (0)