This post was originally created on our official website. You are more than welcome to read it there!
Now, let's get your code tested!
What is RSpec?
RSpec is the most popular Ruby on Rails testing framework according to Ruby on Rails community. It is also perfectly capable to test any Ruby-written code. RSpec organization repository is neatly organized into smaller parts, such as:
- rspec, the main RSpec package,
-
rspec-core, the gem providing structure for writing executable examples and a customizable
rspeccommand, - rspec-rails, RSpec package dedicated to testing Ruby on Rails applications,
- rspec-mocks, RSpec gem that provides support for stubbing and mocking requests,
- rspec-expectations, RSpec package that exposes a readable API to express expected outcomes of code examples.
and then some more. It all builds up into a comprehensive, fully-featured Ruby and Ruby on Rails testing framework.

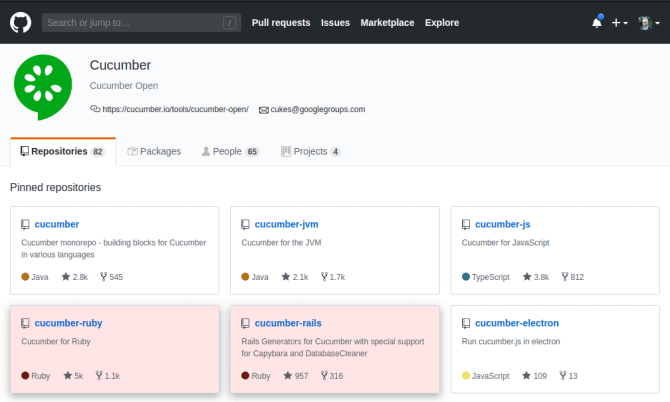
One can easily see that the RSpec for Ruby on Rails is the most frequently developed of all the gems.
As stated on the official RSpec informative website, RSpec provides a Behavior-Driven Development, BDD for Ruby, and it makes Test-Driven Development, TDD, fun and productive.

Thorough documentation of the RSpec framework and all of its gems with executable examples is available thanks to Relish on their official website dedicated to RSpec.

Altogether it seems an awful lot, but it's definitely worth to use RSpec in Ruby on Rails applications, as it is the most advanced Rails testing framework of all.
Why use Ruby on Rails with RSpec over alternatives?
Now that we review what is the RSpec testing framework, let's take a look at why it should be your choice when it comes to Ruby on Rails testing.
As stated at the beginning, RSpec is the most popular choice for Ruby on Rails projects testing. However, it does not come with the default Ruby on Rails application setup, it needs to be installed manually.
The default framework for Ruby on Rails applications testing is a MiniTest. It is a built-in mechanism with the official Ruby on Rails documentation on how to write unit, functional, integration and system tests, and all of its terminologies explained.

Another noteworthy testing framework widely used with Ruby and Ruby on Rails - as with Java, Electron and many others - is a Cucumber framework.
So what does make RSpec the best choice for testing Ruby on Rails applications?
First of all, RSpec has the best documentation, which provides a ton of helpful examples and real-life scenarios that are commonly needed to be covered by developers. This is crucial for using anything that provides its own Domain-Specific Language - DSL- as the RSpec does.
On top of that, RSpec out of the box has all the features that developers need, and all of them are highly maintained.
MiniTest on the other hand, along with its claim that everything done by RSpec might be accomplished using dedicated plugins, does not maintain them successfully, and a lot of them are broken and have not been updated in a long time.
At last, RSpec is an application, while MiniTest and Cucumber are simply frameworks. I cannot stress enough how important it is for daily usage. It does not require anything else to run the test suite, providing an end to end solution for Ruby testing.
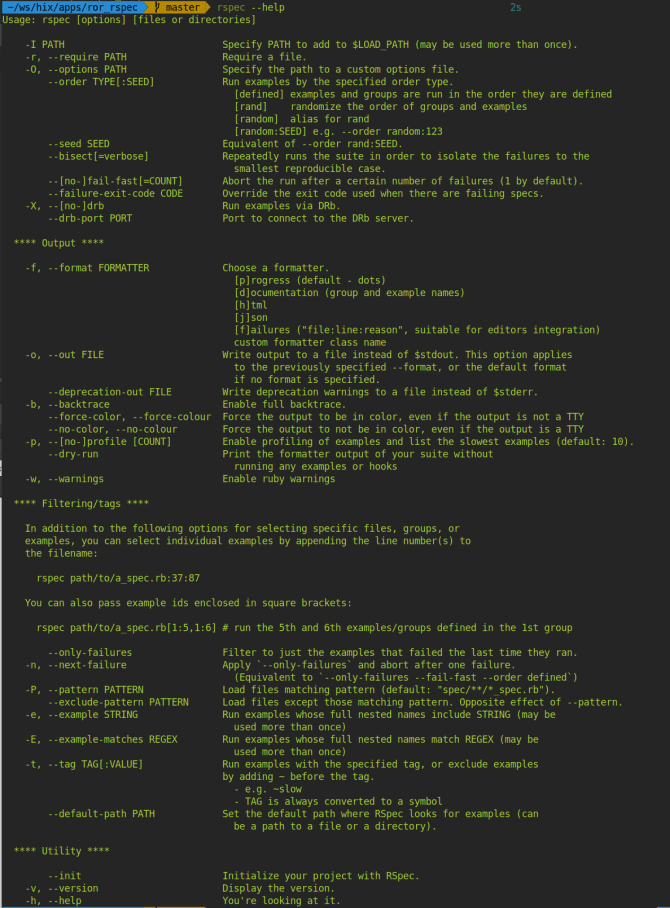
RSpec provides a mature, well maintained and documented command-line interface program. It works exactly as one would expect it to, with the CLI help available via the --help option.
Summing it all up, RSpec is the most popular community choice for testing Ruby on Rails applications. Thanks to that, as it's open-sourced, it is highly maintained, a lot of solutions to the common problems are easily googleable and it grows in power rapidly.
What is code coverage?
Code coverage, also known as test coverage, is a measure responsible for calculating the percentage of code used while running the program's test suite.
On its own, a 100% code coverage does not guarantee that the code does not contain any bugs, as a simple code execution does not guarantee its accuracy.
However, it gives a nice overview of the program's test suite as a whole, telling the developers which parts are safe to edit, and which are yet to be tested.
Rspec code coverage with SimpleCov
Using RSpec in Ruby on Rails, the most popular choice for calculating the project's code coverage reports is SimpleCov.

By default, it provides a simple total percentage of the project's test suite code coverage.
On top of that, SimpleCov allows grouping the reports by meaningful categories such as Ruby on Rails Controllers, Models, Views and Mailers, Sidekiq Workers and anything else that comes to mind for the given Ruby on Rails application, such as Service, Query, and Form Objects.
Using the SimpleCov gem, one can set it up to fail - which means returning a non-zero value CLI-wise - for a minimum (and maximum) test code coverage limits, enforcing developers to meet the established limitations.
It is a super helpful way to make people write tests when implemented in the Continuous Integration suite.
RSpec code coverage overview with Coveralls
If you are serious about the code coverage, we recommend using Coveralls.
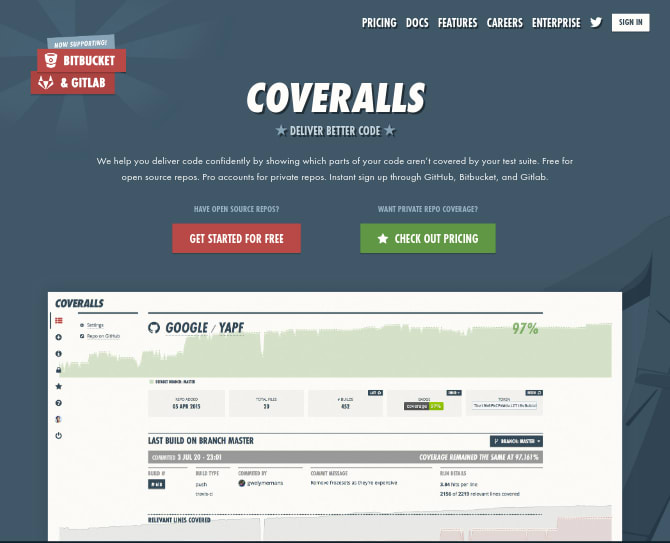
It is a SaaS that provides a comprehensive dashboard showing the test coverage history and statistics for the selected projects and can be easily integrated with any of the most used git repository hosting providers such as Github, Gitlab and Bitbucket.
You might have met it already, as it provides a very popular coverage badge, commonly included in the README files of Open Source projects, as Coveralls is free to use with any open-sourced code, forever.

Coveralls is an overall great tool to ensure a better Ruby on Rails application maintenance, providing both the simple and sophisticated overviews of the projects testing suite code coverage.
Configure RSpec in a Ruby on Rails project
If you use Hix on Rails, you don't need to do any of the following - simply go through the setup wizard and be done with it, anytime you start a new project.
Otherwise, if you sadly did not automate this part of your life yet, read on.
Let us now configure the RSpec testing framework in the Ruby on Rails project, following a simple step by step guide.
Raw RSpec config in Ruby on Rails
In order to use RSpec with your Ruby on Rails application, you need to install the dedicated rspec-rails gem. Open your project's Gemfile and add it to the test and development groups.
Gemfile
group :development, :test do
  gem 'rspec-rails'
end
Next, run the bundle install command in your CLI after navigating to your project's root path, in order to include the gem in your Ruby on Rails project's Gemfile.lock file.
bundle install
RSpec is equipped with the rspec command, that comes with an initialization option. However, in Ruby on Rails, there's a dedicated generator to do just that. In your CLI, run the following command.
rails generate rspec:install
It generates three files: .rspec, spec/spec_helper.rb and spec/rails_helper.rb. The first file is loaded every time the rspec command runs via CLI, passing the RSpec options to it. By default, it only tells RSpec to include the other helper files that are responsible for defining the gem's configuration.
A full list of options available resides under the rspec --help command.
By default, there are three options defined in the second generated file, all of which are going to be the defaults in the next major version of the RSpec framework, the RSpec 4. It is recommended by the framework authors to leave them this way. Options are:
- Including the chained methods in the output messages
- Preventing from mocking or stubbing a method that does not exist on a real object
- Causing shared contexts metadata to be inherited by the metadata hash of host groups and examples, rather than triggering implicit auto-inclusion in groups with matching metadata
On top of that, there are some commented-out configuration options:
- Limiting a spec run to individual examples or groups you care about by providing custom tag
- Persisting tests state between runs in order to support failure-related CLI options
- Limiting the available syntax to the non-monkey patched, which is recommended
- Enabling warnings
- Custom formatting based on a number of spec files in the test run
- Profiling, that for a given number of tests tells us which of them are the slowest to run
- Ordering of the tests in the test run
The last generated file, spec/rails_helper.rb, is responsible for defining the Ruby on Rails specific configuration. Those two are separated for performance reasons, as explained in this rspec-rails dispute.
The third file does a multitude of helpful things:
- Prevents tests run in the production environment
- Sets Rails environment to the TEST if nothing else is set
- Prevents tests run if Rails migrations are not up to date with the schema
- Defines fixtures path and tells RSpec to use transactional fixtures
- Tells RSpec to "figure out" the test type from its location in the project - defaults available are Controllers, Models, and Views
- Filters out the Ruby on Rails output from the backtrace
From now on, whenever adding anything related to Ruby on Rails to the RSpec configuration, we are going to do so in the spec/rails_helper.rb file.
Let us do just that by adding a few helpful gems that make testing easier and more predictable.
DatabaseCleaner gem set up with RSpec in Ruby on Rails
In order to keep our Ruby on Rails project's test database clean between test runs, we are going to install an additional gem dedicated to doing just that, the DatabaseCleaner.
First of all, select and install one of the gems dedicated to specific Ruby on Rails ORMs supported by DatabaseCleaner. The most popular choice is going to be the Active Record gem. In your Gemfile file, add the gem of your choice to the test group.
Gemfile
group :test do
  gem 'database_cleaner-active_record'
end
and run the bundle install command from the root path of your Ruby on Rails project.
Next, let us tell RSpec to clean the Ruby on Rails project tests database in between the test suite runs. Open the spec/rails_helper.rb and add the following.
spec/rails_helper.rb
RSpec.configure do |config|
  # some
  # other
  # configuration
  config.before(:suite) do
    DatabaseCleaner.strategy = :truncation
    DatabaseCleaner.clean_with(:truncation)
  end

  config.before do
    DatabaseCleaner.strategy = :transaction
    DatabaseCleaner.start
  end

  config.append_after do
    DatabaseCleaner.clean
  end
end
This set of configuration hooks tells RSpec to do the following:
- truncate the database before test suite run
- rollback database changes between tests
- clean the database after the tests suite run
Cleaning the Ruby on Rails tests database on all of these stages prevents the test's failures caused by any rubbish data leftovers generated between the RSpec tests run.
ShouldaMatchers gem set up with RSpec in Ruby on Rails
One of the most popular gems that support testing Ruby on Rails applications with RSpec is ShouldaMatchers. It provides a great toolkit for testing the methods commonly used in the classes provided in Ruby on Rails framework, such as ActiveModel, ActiveRecord and ActionController.
In order to use ShouldaMatchers in your Ruby on Rails project with RSpec, we need to install the shoulda-matchers gem first. Open the Gemfile file and add it to the tests group.
Gemfile
group :test do
  gem 'shoulda-matchers'
end
Run the bundle install command in your Ruby on Rails project's root directory, and edit the spec/rails_helper.rb with the following.
spec/rails_helper.rb
Shoulda::Matchers.configure do |config|
  config.integrate do |with|
    with.test_framework :rspec
    with.library :rails
  end
end
That's it - your Ruby on Rails project is ready to use all the matchers provided by the ShouldaMatchers in the RSpec tests.
FactoryBot gem set up with RSpec in Ruby on Rails
FactoryBot is the most popular fixtures replacement for Ruby on Rails projects. It provides a straightforward definition syntax and supports both multiple build strategies and factories for the same class, including inheritance.
In order to use FactoryBot in the Ruby on Rails project with RSpec, install the dedicated FactoryBotRails gem. Open the Gemfile file and add the following to the development and test groups.
Gemfile
group :development, :test do
  gem 'factory_bot_rails'
end
Adding the gem to the development group results in modifying the default Ruby on Rails generators to produce related factories - from now on, whenever you generate the new model via command line, the corresponding factory will be generated as well.
In order to include the FactoryBot in the RSpec configuration, add the following to the spec/rails_helper.rb.
spec/rails_helper.rb
RSpec.configure do |config|
  # some other configuration
  config.include FactoryBot::Syntax::Methods
end
You can take the full advantage of the FactoryBot gem whenever writing RSpec tests in your Ruby on Rails project.
TimeCop gem set up with RSpec in Ruby on Rails
As stated in the RSpec Ruby Styleguide, the best way to deal with time when testing Ruby on Rails applications with RSpec is to use the TimeCop gem.
TimeCop provides time freezing, travel, and acceleration capabilities, giving developers oneliners to deal with the time, instead of stubbing anything on Date, Time and DateTime classes.
In order to use the TimeCop gem in your Ruby on Rails project, simply add it to the test group of your Gemfile file.
Gemfile
group :test do
  gem 'timecop'
end
It does not require any configuration specific to RSpec in the Ruby on Rails project.
In order to take the quality of your RSpec Ruby tests to the next level, visit the Ruby on Rails RuboCop configuration guide - it provides the way to validate your RSpec tests suite in the Ruby on Rails project against aforementioned RSpec Style Guide automatically.
SimpleCov configuration in Ruby on Rails with RSpec
In order to generate the coverage reports in the Ruby on Rails application tested with RSpec, we are going to install the aforementioned SimpleCov gem. In your project's Gemfile, add the required gem to the test group.
Gemfile
group :test do
  gem 'simplecov'
end
and next, navigate to your projects root path and run the bundle install command.
By default, SimpleCov is going to generate all of its reports into the coverage directory of our project. Let's add it to the project's .gitignore file in order to avoid a massive amount of changes accompanying every test run.
.gitignore
coverage/
Next, we are going to follow the gem instructions in order to turn on the SimpleCov code coverage gem every time the test suite runs. Open the spec/spec_helper.rb file and add the following at the beginning of it.
spec/spec_helper.rb
require 'simplecov'

SimpleCov.start 'rails'
In the simplest manner possible, you're done - every test run is going to result in the code coverage report generation.
Coveralls account setup and configuration in Ruby on Rails
Now that we are generating the code coverage reports, let us track their history along the Ruby on Rails application development via Coveralls.
Follow the step by step guide in order to set up your Coveralls account and adding your Ruby on Rails project to it.
Be aware that you are going to subscribe to the Corveralls PRO in order to set up private repositories here.
1.Sign up on the official Coveralls website.
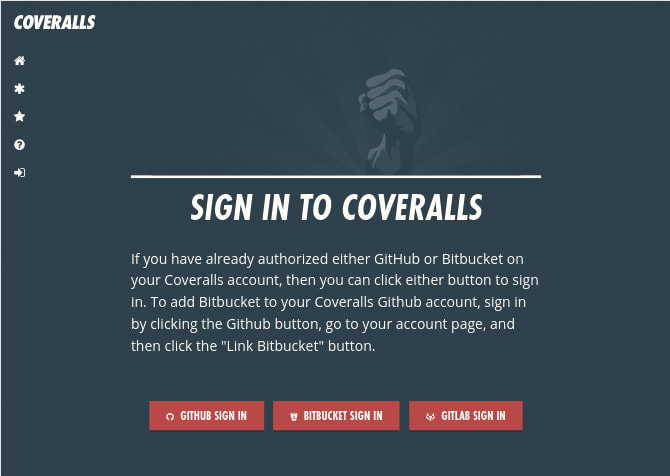
2.After logging in, authorize Coveralls to access your repository hosting provider account.

3.Hover the left-hand side sidebar and click the "Add Repos" link.

4.Search for your Ruby on Rails project repository in Coveralls and turn it on.

5.Click the "Details" button and copy your Coveralls repository key.
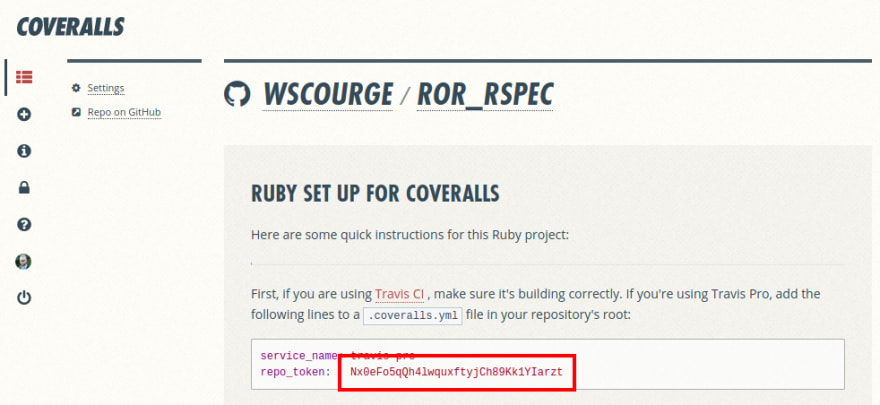
After obtaining the Coveralls repository key and enabling it in the tool's interface, we are going to set it up in our Ruby on Rails project.
First, let's install the provided gem. Open the Gemfile file and add the coveralls to the test group.
Gemfile
group :test do
  gem 'coveralls'
end
Run the bundle install command and open the spec/spec_helper.rb file, in order to tell RSpec to use the provided formatter.
spec/spec_helper.rb
# frozen_string_literal: true

require 'coveralls'
require 'simplecov'

SimpleCov.formatter = SimpleCov::Formatter::MultiFormatter.new([SimpleCov::Formatter::HTMLFormatter,
                                                                Coveralls::SimpleCov::Formatter])
SimpleCov.start 'rails'
The last step is to create a dedicated Coveralls configuration file with our previously generated repository key.
.coveralls.yml
service_name: service-name
repo_token: YOUR_COVERALLS_REPOSITORY_KEY
Depending on the Continuous Integration service that you use, update the service name accordingly. If in doubt, browse the full list of services supported by Coveralls.
My advice is to take another five minutes to figure out how to skip using the .coveralls.yml file completely, as keeping secrets checked into your remote repository might not be the best idea
It is better to define them as environment variables, and most of the Continuous Integration providers enable that option. Coveralls documentation gives you guidelines on how to do just that for their supported services.
The main goal here is to generate your code coverage reports via your RSpec tests run on the Continuous Integration whenever you merge the new feature to develop and master branches. This way your Coveralls history and statistics will not clutter with endless reports of identical feature branches code coverage data.
Conclusion
As stated multiple times in this guide, RSpec is the most popular choice for testing the Ruby on Rails applications, and for a number of good reasons.
If you care about Ruby on Rails tests, setting up the code coverage reporting is recommended - it gives developers a nice overview of the project's maintenance quality.
The SimpleCov gem is a simple to use solution to do just that in your Ruby on Rails projects that use RSpec - all it takes are two extra lines of code and the dedicated gem installed.
For those who want more control, enforcing the minimal code coverage in the Ruby on Rails application takes only the single line of code in the RSpec configuration file.
If you're looking for a professional overview of the code coverage statistics and history for your Ruby on Rails projects, use Coveralls - it aggregates your code coverage data and exposes it via sophisticated web UI.
As you can see, there's a lot of configuration related to the RSpec testing framework set up in the Ruby on Rails project -fortunately, you can skip most of it by using the Hix on Rails, the Ruby on Rails project generator.


Top comments (0)