In this tutorial, we'll go step by step through Ruby on Rails Redis installation and configuration.
Redis is a key-value database, and it is very much worth using in multiple scenarios when working with Ruby on Rails.
This piece is a 1:1 copy of what you can find on our website, along with a bunch of other Rails tutorials.
Let's start this Ruby on Rails Redis guide.
What is Redis?
Redis is a BSD licensed, in-memory data structure store. It is one of the most popular NoSQL choices among open-source options available.
On top of that, Redis is the most popular key-value database, and it was voted the most loved database in the Developer Survey by Stack Overflow three years in a row: 2017, 2018 and 2019.

Redis supports various data structures:
- strings,
- hashes,
- lists,
- sets,
- sorted sets with range queries,
- bitmaps,
- hyperloglogs,
- geospatial indexes with radius queries,
- streams,
and is used as a database, session cache, full page cache, and message broker, such as publish-subscribe messaging.
Why use Redis with Ruby on Rails?
There are multiple reasons to use Redis in Ruby on Rails application.
First of all, Redis offers the most popular in-memory data store. Data kept in the memory, as opposed to tools that write to disks, is going to be read and written faster.

Another reason to use Redis in Ruby on Rails is so obvious that it is even made official by the Ruby on Rails maintainers: using Redis as Ruby on Rails application cache-store.
Next, there are leaderboards: think anything that changes over time, like:
- up and downvotes,
- likes,
- clasps
or internal application statistics, like:
- active user sessions,
- scheduled emails,
- counting visitors
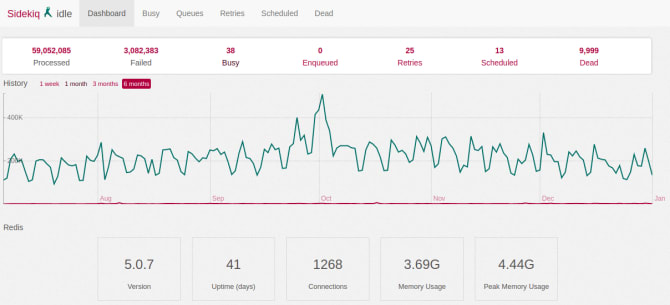
A good example of the leaderboard is the Sidekiq Dashboard - which itself is a great reason to Ruby on Rails Redis usage, as it offers the most popular community choice for asynchronous code execution - and uses Redis.
Last but not least is a commonly needed these days Publish-Subscribe feature, and Redis is truly crafted for the job.
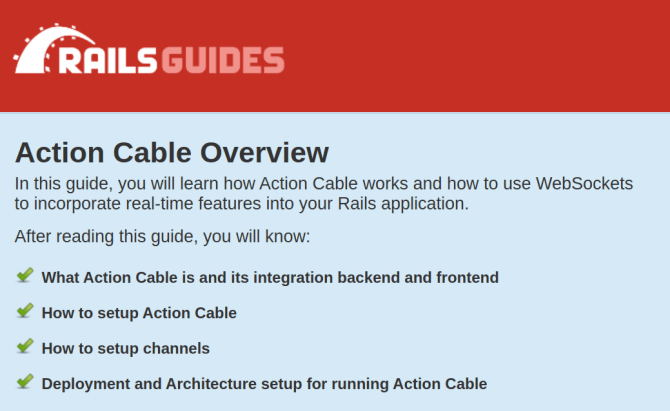
Redis is officially the default production pub/sub queue for the built-in Ruby on Rails ActionCable library, dedicated to channeling data through WebSockets.
As you can see, there are a lot of scenarios when it's going to be worth using Ruby on Rails and Redis combination.
Redis installation
Now that we know what is Redis and what it is used for in Ruby on Rails, let's go through step by step guide to installing it for further usage with our Ruby on Rails application.
macOS
The most straightforward way to install Redis on the macOS is using Homebrew.

Follow these steps:
- Install Homebrew, there's a single command to do so on the official website.
- Install Redis via Homebrew:
brew install redis.
For the development convenience, we are going to do one more thing, that's gonna save us a lot of trouble in the future.
Let's install and enable Brew Services, in order to run Redis in the background. This way, anytime you reboot your machine, it is going to launch Redis for you automatically.
Run the following commands in your CLI.
brew tap homebrew/services
brew services start redis
The first command installs the brew services and the second one launches Redis as a brew service. You can browse all services running at any point using the brew services list command.
Verify that Redis is running with redis-cli ping command - it should return PONG.
At this point, it is worth installing a Redis client for macOS - this way you will be able to easily browse all the data written to any Redis instance:
- Medis from AppStore for $4.99 or install from Github,
- Tableplus for $59,
- RDM - Redis Desktop Manager for $14.99
- FastoRedis for $249.
As scary as it sounds, paying for the Redis client is worth it in the long run, as it vastly improves Ruby on Rails development and debugging process.
Linux
Depending on your Linux distribution you are going to use a different package manager to install Redis.
If you use CentOS or RedHat, install Redis using yum package manager.
sudo yum install redis
Otherwise, if you use Debian based distro such as Ubuntu, use apt package manager.
sudo apt install redis
In both cases, in order to automatically start Redis on boot, run
sudo systemctl enable redis
This way you won't have to remember to launch Redis every time, it is very convenient for continuous development.
Verify that Redis is running with redis-cli ping command - it should return PONG.
At this point, it is also worth installing the Redis GUI client. It greatly improves the development and debugging experience, allowing you to easily browse all data written to Redis while working with your Ruby on Rails application.
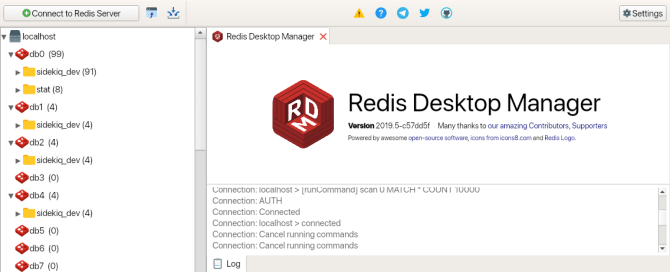
We recommend using a Redis Desktop Manager, which is free for Linux distributions.
Ruby on Rails Redis installation
If you use Hix on Rails, then you can skip the rest of this tutorial - just run the installation wizard and all of the below is going to be preconfigured for you. Optionally you might jump to the Redis Sentinel production configuration part for better understanding and customization.
Otherwise, if you still did not automate this part of your life yet, read on.
With Redis up and running on our system, let us install the required Redis-related gems in order to use it with our Ruby on Rails application.
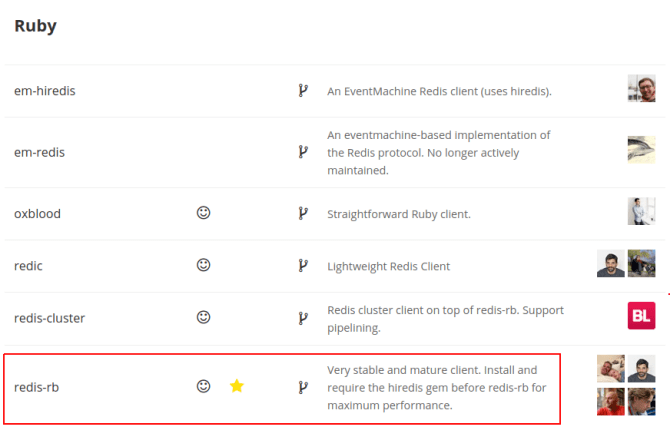
We are going to use a Ruby client recommended on the official Redis website.
On top of that, there are another two gems worth installing:
- redis-rails gem that provides a full set of stores for Ruby on Rails - Cache, Session, and HTTP Cache,
- redis-namespace gem, which is very useful when working with multiple Ruby on Rails projects.
In the Gemfile of your Ruby on Rails project, add the following, outside any of the specific groups. They need to be available to all of the Ruby on Rails environments.
Gemfile
gem 'redis'
gem 'redis-namespace'
gem 'redis-rails'
Now, run the bundle install command in order to generate the Gemfile.lock file.
In order to easily connect to Redis from our Ruby on Rails application, we are going to additionally use the environment variables management gem, dotenv-rails - install it and in your .env file add these three environment variables for development.
.env
REDIS_DB=0
REDIS_URL=redis://127.0.0.1
REDIS_PORT=6379
those are the default host and port of every Redis installation.
Next, we are going to tell our Ruby on Rails application to connect to Redis upon booting by creating the dedicated initializer.
config/initializers/redis.rb
# frozen_string_literal: true

Redis.current = Redis.new(url:  ENV['REDIS_URL'],
                          port: ENV['REDIS_PORT'],
                          db:   ENV['REDIS_DB'])
If you are going to use the aforementioned Action Cable, there's one little thing worth doing at this point.
As you can see, in our environment we have separated the Redis URL and DB variables. Concatenated, they result in the Redis host, and it is how Ruby on Rails Action Cable uses them. Open its configuration and change it to the following.
config/cable.yml
development:
  adapter: async

test:
  adapter: test

production:
  adapter: redis
  url: <%= ENV.fetch("REDIS_URL") %>/<%= ENV.fetch("REDIS_DB") %>
  channel_prefix: app_production
I personally like to keep the development environment as close to the production one as possible in order to catch any bugs at the earliest stage.
To do that, you might consider changing the development Action Cable configuration to the same as production one - this way while writing your Ruby on Rails application's code and running it locally, you will use Redis as well.
Ruby on Rails Redis production configuration with Sentinel
If you care about high Redis availability in the production environment of your Ruby on Rails application, you might consider using the Redis Sentinel.
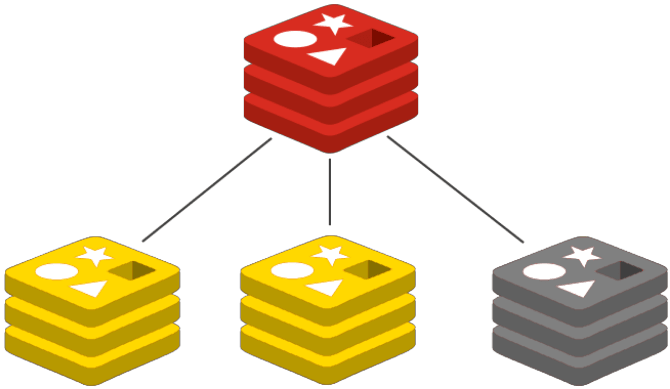
Using Sentinel is the officially recommended way to automatically manage Redis failovers, it is also capable of monitoring and notifying on the Redis deployment.

The Redis client that we have previously installed in the Ruby on Rails application in order to connect to the Redis client is able to perform automatic failover using Redis Sentinel.
In order to do that, we are going to change the Ruby on Rails Redis configuration file. Open the previously created initializer and edit it with the following:
config/initializers/redis.rb
# frozen_string_literal: true

if Rails.env.production?
  SENTINELS = ENV['SENTINEL_HOSTS'].split(' ').map! do |host|
    { host: host, port: ENV['SENTINEL_PORT'] }
  end

  Redis.current = Redis.new(url: ENV['SENTINEL_URL'],
                            sentinels: SENTINELS,
                            role: :master)
else
  Redis.current = Redis.new(url: ENV['REDIS_URL'],
                            port: ENV['REDIS_PORT'],
                            db: ENV['REDIS_DB'])
end
This configuration file assumes the existence of three additional environment variables. In the environment configuration of your Ruby on Rails application, add the following.
.env
SENTINEL_URL=redis://sentinel-master/1
SENTINEL_HOSTS=sentinel-slave-1 sentinel-slave-2 sentinel-slave-3
SENTINEL_PORT=26379
Another assumption that might require additional tweaks is that all the slave Redis instances run on the default Sentinel port which is 26379. If that is not a case, adjust the initializer file accordingly.
If you are using Sidekiq and want it to respect your Sentinel production configuration, you'll need to adjust its configuration pretty much the same way - by conditionally connecting your Ruby on Rails to the Redis Sentinel in the production environment.
In order to additionally improve Ruby on Rails Redis performance, you might want to take a look on hiredis and its dedicated Ruby wrapper hiredis-rb.
Conclusion
Ruby on Rails Redis installation and configuration is a pretty straightforward thanks to the awesome official and community support.
All it takes is installing a few well maintained Ruby gems, and your Ruby on Rails application is ready to read and write to Redis key-value store.
All of this config comes ready with Ruby on Rails application initialized with Hix on Rails Application Template.


Top comments (0)