Recently, a friend asked me if it's possible to work with their MongoDB databases and Atlas clusters locally without the internet and my answer to that was yes. So, I decided to create a guide to show them how and any other persons who might want to test their collections and perform all kinds of database operations with their MongoDB database using VS Code as the editor.
Installing the MongoDB Community Server Edition allows us to host MongoDB databases locally unlike Atlas which is a cloud hosted database option.
Download and Install MongoDB Community Server Edition 5.0
Visit the download website to download and install MongoDB Community Edition for your OS. You can follow this guide to install MongoDB for Windows OS but the process is pretty much the same for other OS.
For Windows, you can download the .msi installation file here.
- The download page should look something like below:

Run the downloaded installer
Choose
Customwhen prompted for the installation typeAt the
Service Configurationpane, select *Install MongoDB as a Service *
Install the MongoDB extension for VS Code
The MongoDB extension for VS Code allows us to create playgrounds to interact and perform query operations on our data and collections and giving us the results on the fly at the click of a button (which is supercool!).
To install, open the extension tab on VS Code and search for MongoDB for VS Code.
The extension looks something like below:
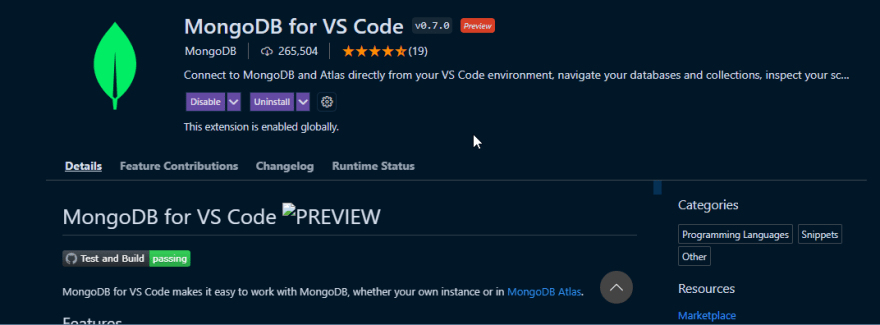
As you can see, it's already installed for me so you can just go ahead and install it.
Connect to a MongoDB deployment
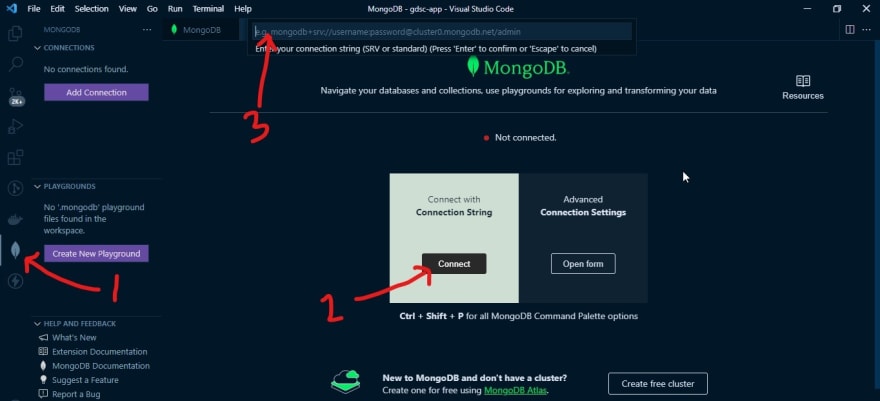
In VS Code, open the MongoDB interactive panel by clicking on the leaf icon on the left sidebar menu, then click on create a connection to connect to a database instance.
Note: To connect to a deployment using a connection string, you must have a MongoDB cluster running on your machine or have one in the cloud using Atlas. We'll create one for this guide in a moment.
An example connection string for a local deployment looks like so:

- localhost: specifies our host
- 27017: the default port used by mongodb
- myDatabase: is the name of our local database
To create a sample database named myDatabase locally, we can either use MongoDB Compass, a graphical interface for working with databases or mongosh (Mongo Shell). For this guide, we'll use mongosh.
Note: You can also connect to a cloud database instance, for example, a MongoDB Atlas cluster.
Download and install Mongosh
Mongosh (MongoDB Shell) is a JavaScript REPL command line tool for interacting with MongoDB offline and online deployments. What this means is that it allows us to run valid JS code right in the command line to query your database. You can download and install Mongosh here
On successful installation, you should see this panel:

Then, open command prompt on windows and type:
> mongosh
You should get the following:
Current Mongosh Log ID: 61bfbc4837f8722b10f9e21e
Connecting to:          mongodb://127.0.0.1:27017/?directConnection=true&serverSelectionTimeoutMS=2000
Using MongoDB:          5.0.5
Using Mongosh:          1.1.7

For mongosh info see: https://docs.mongodb.com/mongodb-shell/

------
   The server generated these startup warnings when booting:
   2021-12-18T10:24:36.928-08:00: Access control is not enabled for the database. Read and write access to data and configuration is unrestricted
------

test >
Note:
- The
testshown at the bottom of the result is the default database created for us by mongosh.
To Create a new database, run the following command on the cmd:
use myDatabase
This automatically creates a new database called myDatabase for us. Which returns:
test> use myDatabase
switched to db myDatabase

myDatabase>
Great. Now, let's connect
Remember the connection string we talked about earlier? Good. We're going to use that on VS Code to connect to our newly created database.
The connection string for our database will be: mongodb://localhost:27017/myDatabase, paste this in the text bar at the top of the window, that is, step 3 in the diagram below:

Upon a successful connection, you should see the following changes:
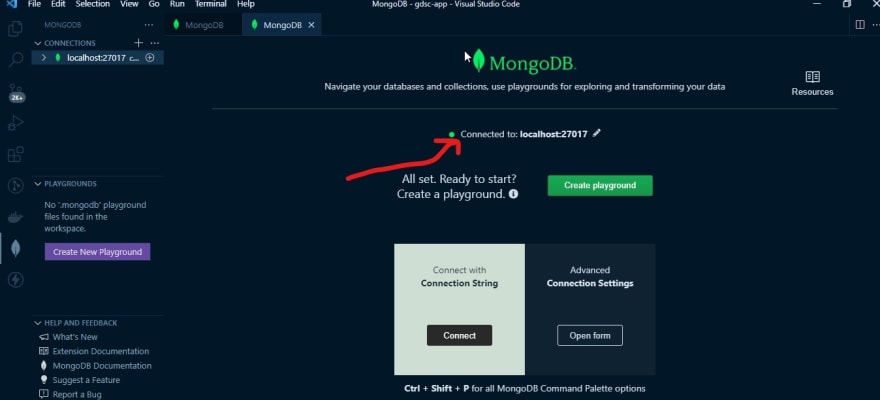
Congratulations! You have just created a local MongoDB database and connected to it from VS Code, successfully!
Play with your database
To perform queries and other database operations on our new database, we can create a Playground in VS Code to do these.
Click on the green create playground button in VS Code to create a playground.
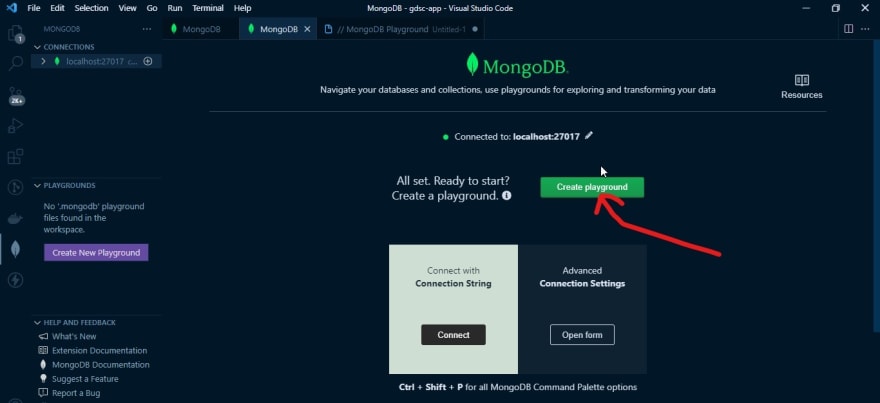
Your newly opened editor tab should look like below:
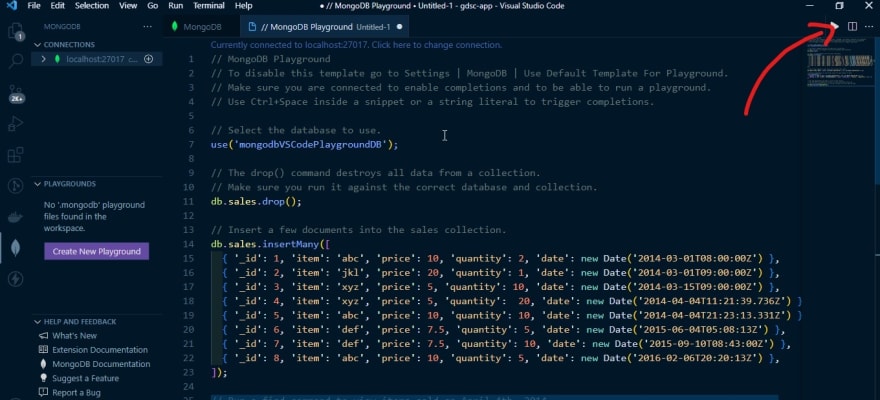
Delete the content in the default template and paste the following to test our myDatabase database:
// Select the database to use
use('myDatabase');

// Insert a few documents in the continents collection
db.continents.insertMany([
    { africa: "Nigeria" },
    { asia: "India" },
    { southAmerica: "Colombia" }
    ]);

// Return all the fields in the continents collection
db.continents.find();

// Write other queries and operations ...
Click on the play button at the top-right side to run the code. A new panel should be opened with our results like so:

Congratulations, you made it!
There you have it. Now you can work with your MongoDB databases locally using VS Code, perform database operations and see the results on the fly! Isn't that awesome? Yeah, it is.
References
Connecting to your MongoDB deployment


Oldest comments (5)
Thanks Mich 😊
Glad I could help!
Nice
It's a working solution but for a developer the easy way to avoid messing with the env, Docker is a good alternative. It help keeping your environment cleaner. No need to install MongoDB, MySQL, PostgreSQL, Redis, and you name it.
I'm using this command and I'm good to go
When you are done you can stop it or delete it
Thanks for writing this.