In this article, we’ll discuss installation of a VMW ESXi hypervisor to an HP ProLiant DL380p server. Also, we will explore how to recover data from a virtual machine of the VM hypervisor and from partitions with the VMFS file system.
The hypervisor lets you virtualize servers to manage various IT infrastructure, so it allows you to consolidate applications while saving time and resources. In this article, we’re going to cover vSphere ESXi hypervisor by VMWare. The basic package of VMware vSphere includes two main components – ESXi and vCenter Server. We are going to explore in detail the installation of ESXi 7 to a server.
VMWare ESXi is a hypervisor that can be installed onto a physical server and lets you run several operating systems on a single host computer. These operating systems work separately from each other but they may interact within a network.
There are both free and commercial versions of VMware ESXi. The functionality of the free version is somewhat limited. It lets you consolidate a limited number of operating systems on one computer, and it cannot be managed with the central server, the vCenter. Nevertheless, the free version of the hypervisor can easily connect to remote storage where you can create, store and use virtual machines.
How to install VMWare ESXi
The first step to take before you can install ESXi is to download the installation image from the official VMWare website. To get a download link for the free version of the hypervisor, you need to sign up. The trial period is 60 days long which gives you enough time to get acquainted with this tool.
When the image is downloaded, you should record it to a pen drive or disk. To create a bootable drive, you can use any tool available that supports this feature – for example, Rufus.
As soon as the bootable drive is ready, you can begin the installation. We’re going to install ESXI 7 to the server HP ProLiant DL380p without the operating system.
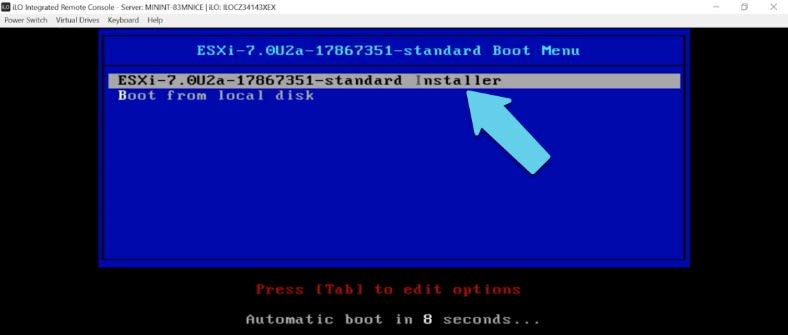
Boot with the bootable pen drive or disk. Select the installation device and press Enter to start the installation.
After that, you will see the ESXI installer loading. Brief system information about the server will appear on the screen, and then components will initialize and boot.
In the end, you will see the ESXI installer welcome screen, so press Enter to continue, or Esc to cancel the operation.
After that, accept the license agreement by pressing the F11 key, and then storage devices available for installation will be scanned.
The program has found the disk, so hit Enter to continue and install the software there. In my case, the installer displays a warning that the central processor in this host may not be supported in future ESXI versions; hit Enter to continue.
In the keyboard settings, don’t change anything, and leave the options as they are – US Default – and press Enter to accept.
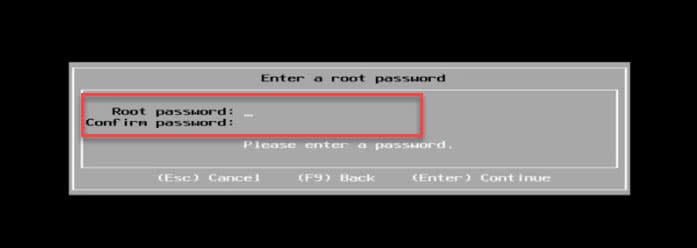
After that, the installer will suggest setting a root password that you will use to enter the ESXi management console. Type the password, confirm it, and hit Enter to continue.
Now the installer asks you to confirm the installation: press the F11 key to start this operation.
After the installation, you’ll be asked to remove the installation media and then reboot – so hit the Enter key to do it. This is the last step of the installation process, and now you have to wait until the server reboots.
Now the system is up and running; above, you can see a brief overview of the server characteristics, and below, the IP address which you can use to connect to the server via the network. It can be modified in the settings, if necessary.
You can access them by pressing the F2 key, and typing the login and root password.
Here are the options you can access through the settings menu: modify the password, configure the network, restart the network manager, configure keyboard, view system logs, access the console; below, you have the option to reset the system configuration to default values. After the configuration is complete, you’ll be able to connect to this server from another computer in this network.
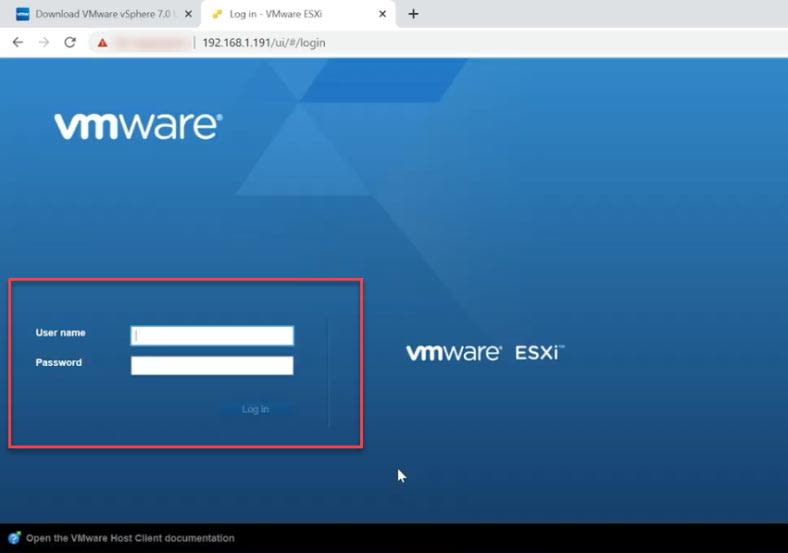
Open the browser and type the server’s IP address. Agree to deal with an untrusted certificate. On the page that opens, give the user name and password for the root account that you specified during the ESXi installation. Click “Log in.”
Here, you can see the ESXi version and its state: not connected to any VCenter Server. The next step is to create and configure a virtual machine. The system has detected the storage, identified the drive type and provisioned some space for virtual machines. You can check the network settings as well.
How to create a virtual machine
Open the Navigator and go to the tab “Virtual Machines.”
In the right-side window, click Create/Register VM and select one of the items to create a new virtual machine.
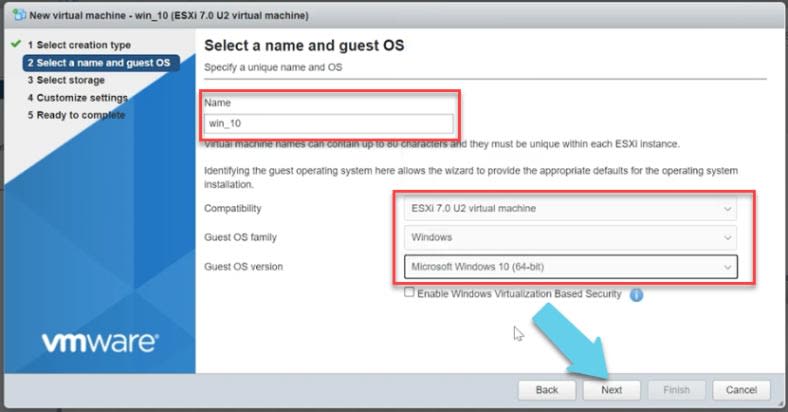
At the next stage, give a name to the future machine, select the family of its operating system and the version, then click “Next.” Select the storage and click “Next” again.
In the Virtual Hardware tab, specify the settings for the new virtual machine. The number of processors and the amount of RAM to be allocated for the machine. Also, don’t forget to allocate some disk space.
In the CD / DVD Drive settings, select the disk type as Datastore ISO File, and a new window opens to let you choose the file.
At this stage, remember to check the box for the option “Connect at power on”, otherwise, the system will refuse to boot from the disk.


Top comments (0)