In this article, we’ll explore how to recover data from iSCSI LUN with the example of a QNAP TS-412 device, and how to recover a network drive or access data from a damaged network storage device.
Although the iSCSI protocol is pretty old, it remains popular for building network storage systems. iSCSI is a protocol for the management of storage systems and interaction between servers and clients.
This protocol is used to transfer data over the network and enables you to see a network drive as a local physical disk while the actual data storage system is arranged inside another device. This type of storage is known as LUN.
LUN is a logical unit number. In other words, it’s a network drive or a partition of such drive which has its own number in the iSCSI network. This functionality is available in Synology, QNAP, and other server-type systems.
YouTube:
How to recover it?
If you have accidentally removed iSCSI LUN, or deleted its data, or if you just can’t access the files stored on your NAS device, there is no way you can do something about it without using third-party data recovery tools. There are only a few data recovery solutions for iSCSI disks. So if you need a well-proven utility capable of restoring information from such disks, use Hetman RAID Recovery.
First of all, let’s find out how to recover lost network storage.
Before you start the recovery process, make sure you have a drive with the same or larger capacity than the capacity of the network drive from which you’re going to recover information.
Connect the drive to a Windows computer, download, install and start Hetman RAID Recovery, and scan the drive.
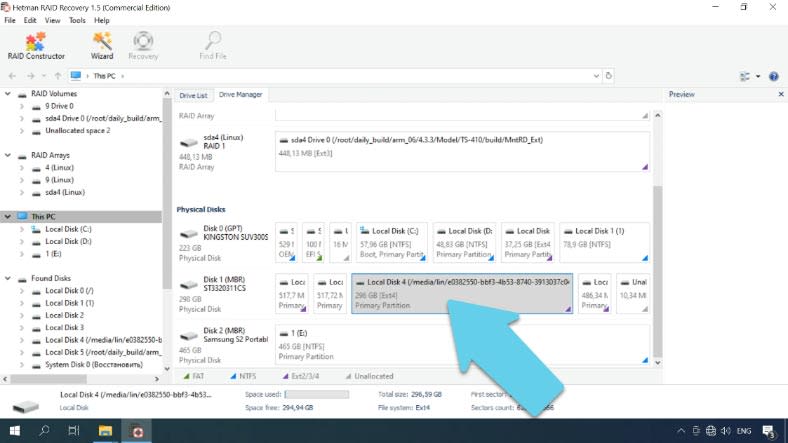
After the scan, you should find the folder with the name “@iscsi”.

Inside the folder, you are going to find all your iSCSI LUN drives in the form of images. Find the necessary drive by its size, select all important data, and click “Recovery”.
Specify where to save the data and hit “Recovery” again. When the process is over, you’ll find the file in the folder you have specified.

Now you can see that the program has recovered the information to the full extent, but the file is no longer a sparse one: in fact, the actually occupied disk space has grown to its full size of 330 GB.
There are several ways to extract the information from there:
- The first method is to restore operability of the network drive with QNAP.
- The second one is to load the image to our program, scan it and recover the necessary data.
How to restore operability of the network drive
If you choose the first method, you need to connect an empty drive to a QNAP device, boot it, and create a new virtual disk of the same size as the previous one. After that, copy the restored file to this new drive.

To copy the image file, connect both drives to a Linux computer or use other tools to access the QNAP file system.

Mount and open the drive in the file manager; in the root directory of the mounted disk, you can find a folder with the name @iscsi.img.
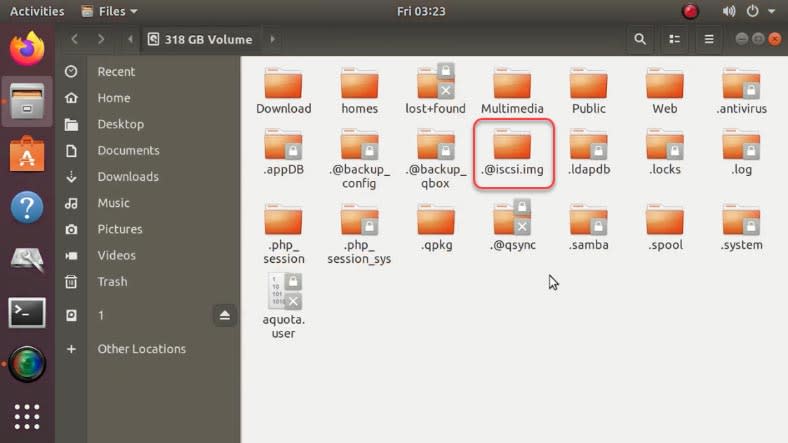
Rename this directory – for example, into @iscsi.img2, and then create a folder with the same name, @iscsi.img.

After that, copy the restored file into the directory you have just created. Do it with the help of the Terminal as you need to convert this image into a sparse file. Use the command for copying – “cp.”
Open the terminal and type the following command:
cp /media/lin/1/iSCSI-q330-606d5c77.000 /media/lin/38c8b452-81c2-4347-afb4-49d71eaf7e6e/@iscsi.img/iSCSI-q330-606d5c77.000 --sparse=always
where:
- /media/lin/1/iSCSI-q330-606d5c77.000 – path to the image.
- /media/lin/38c8b452-81c2-4347-afb4-49d71eaf7e6e/@iscsi.img/iSCSI-q330-606d5c77.000 - the path where the image should be copied.
- The parameter --sparse=always is used to transform it into a sparse file.

If the file size is large, the copying process is going to take a lot of time.
The Terminal doesn’t display any information on the status of the copying process, but you can view it in the system monitor: it shows the amount of information that is already copied, so you can estimate how long you have to wait.
Now that the file has been copied to the dis, run the following command to check the result:
du -h iSCSI-q330-606d5c77.000

Open this directory in the Terminal and type the command containing the file name.
As you can see, this file occupies less than 200 MB on the disk, although it is displayed as having the size of 330 GB. 1 GB, 10 GB. 5 GB.
du -h --apparent-size iSCSI-q330-606d5c77.000
It confirms the fact that it has been converted into a sparse file during the copy operation.
After the successful copying, you should modify the configuration file - replace the new network drive’s name with the name that you need.
Connect the disk to a QNAP device and boot it. Use Winscp or another utility to set up connection with the server. Specify the IP address, login, password and sign in.

By default, Winscp doesn’t recognize hidden files; for starters, make such files visible as this directory may be hidden. Open the settings - Panels - Show hidden files.

Then follow this path /mnt/HDA_ROOT/.config, find a file with the name iscsi_trgt.conf and open it. Find the line LunMetapath and replace the name of the new LUN with the name of the file that you have restored (iSCSI-q330-606d5c77.000).
iSCSI-330q-606d9e8b

The figure “001” at the end shows how many parts your ISCSI has. In my case, it only consists of one drive.
Don’t forget to save changes. If you have several drives, you need to change all their names.
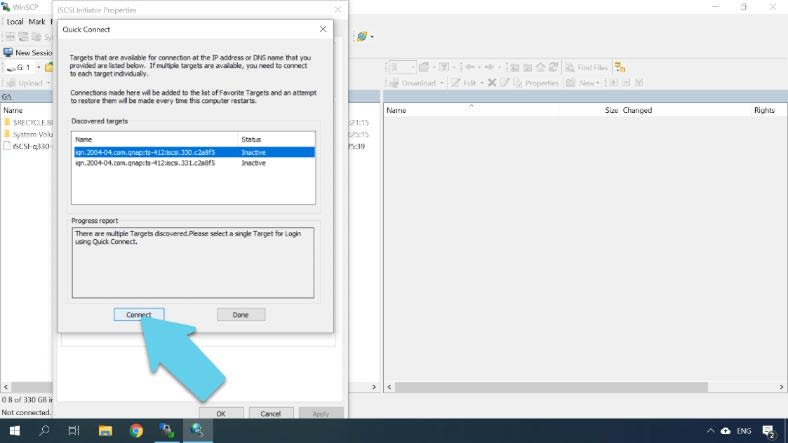
Reboot the QNAP device and wait until it is ready again. Now open the iSCSI initiator again and reconnect the disk. After that, the disk with all of its files should appear in the Explorer.
How to recover data from an iSCSI image file
For the second method, you need to “feed” file to Hetman RAID Recovery.
Open the utility, jump to the tab “Tools” and click “Mount”. Give the path to the image so that the utility displays it in the “images” field. Select “All files” here, then choose it and click “Open”.

The mounted drive will appear in the Drive Manager. Right-click on it and choose “Open”, then select “Full analysis”, specify the file system and click “Next”, and then “Finish” when the process is over. The program has found and displayed the data stored on the network drive. To have them back, select the ones you need, click “Recovery”, give the path to save the files, and click that button again. When the process is over, you will find the recovered files in the folder you have chosen.

As you can see, the second method is much easier. If LUN was not removed, but the problem was caused by a NAS device failure, all you need to do is to mount the disk image in the program and recover the information.


Top comments (0)