
If you're a team developing and maintaining a software monolith, there's a good chance you're considering or planning a move to an architecture based around microservices. I'm won't go into the various trade-offs involved in that decision in this article; rather, I will focus on one specific technique that might help you make the transition: Change Data Capture (CDC)
It's relatively straightforward to build a system around microservices if you're starting from scratch. However, it can be difficult to plan and manage a transition from an existing monolith. The kinds of changes involved can be substantial, and it's hard to keep a live system running smoothly while you fundamentally change how it works.
It's a big shift from an ACID-compliant database to a distributed architecture based on eventual consistency, and keeping data consistent during a long migration, when different information is held in different parts of your system can be particularly challenging.
Change Data Capture (CDC) enables you to make minimal changes (if any at all) to your production system at first. Rather, you set up a system to observe your database, and create events whenever key data is changed, with your "new architecture" systems responding to these events.
Change Data Capture
Let's look at an example. Say you want to add an onboarding email flow to your application, so that new users receive helpful emails over the course of several days after they create an account. Using CDC, you can create this new flow as a microservice. Whenever a new user record is added to your main users table, a new event is created. Then, your new microservice would consume that event and manage the onboarding process, without requiring any further changes to your main legacy application. Another example would be to send users an exit survey after they deleted their account, to capture data on why your service no longer meets their requirements.
I'm going to walk through one technique for achieving this, which requires literally no changes whatsoever to the "main" application; Heroku's recently-launched Streaming Data Connectors Beta.
The way this works is that you add a managed Kafka and a "data connector" to your Heroku application, defining the tables and columns where changes should generate events. Then, you can set up your new microservices to consume events from Kafka topics.
In the rest of this article, I'm going to walk you through how to set this up. We'll be using a trivial database-backed web application to represent our monolith, and a separate application subscribed to a Kafka topic, which will consume the events we generate by making changes to our database.
The Streaming Data Connectors Beta is only available to Heroku Enterprise users at the moment, because it only works in a Heroku Private Space (which is an enterprise feature).
Let's look at some code.
I'm working on a Mac laptop, but these commands should work fine in any posix-compliant terminal environment.
Cleanup
Some of the commands we'll be using create resources in your Heroku account which incur charges. Please don't forget to remove your applications when you're finished, or you could end up being billed for these services.
You can do this by running
make clean
in both the sinatra-postgres-demo directory, and the kafka-consumer directory. You can also delete the applications using the Heroku web interface.
To verify that everything has been successfully removed, you can run:
heroku apps --space ${HEROKU_PRIVATE_SPACE}
Please use the name of your Heroku private space, in the command above.
The Users Application
We're going to use a trivial web application that manages "user" records in a Postgres database. I've written this one in Sinatra, which is a ruby library for lightweight web applications.
The application has a few HTTP endpoints:
get "/" do

  redirect "/users"

end

get "/users" do

  erb :users, locals: { users: get_users }

end

post "/users" do

  add_user(params)  redirect "/users"

end

post "/delete_user" do

  delete_user(params["id"])  redirect "/users"

end
An HTTP GET to "/users" renders a list of the users in the database, a POST to "/users" adds a new user, and a POST to "/delete_user" will delete a user.
This is the implementation of the database code:
def connection

  PG.connect(ENV.fetch("DATABASE_URL"))

end

def get_users

  connection.exec( "SELECT * FROM users" )

end

def add_user(u)

  addsql = %[ INSERT INTO users (first_name, last_name, password, email) VALUES ($1, $2, $3, $4) ]  connection.exec_params(addsql, [ u["first_name"], u["last_name"], u["password"], u["email"] ])

end

def delete_user(id)

  connection.exec_params("DELETE FROM users WHERE id=$1", [ id ])

end
The full application is available here. Let's get it running.
I'm using a private space called devspotlight-private. Please substitute the name of your private space in the code that follows:
git clone https://github.com/digitalronin/sinatra-postgres-demo

cd sinatra-postgres-demo

export HEROKU_PRIVATE_SPACE=devspotlight-private

heroku apps:create --space ${HEROKU_PRIVATE_SPACE}
This will create an app with a random name. To keep the code samples consistent, I'm going to read the name and store it in an environment variable APP.
export APP=$(heroku apps:info | head -1 | sed 's/=== //')

echo ${APP}
We need a database for our app, and in order to use the Streaming Data Connectors Beta you need to use a specific version of the Heroku Postgres add-on:
heroku addons:create heroku-postgresql:private-7 --as DATABASE --app ${APP}
Please note that running this command will incur charges on your Heroku account.
heroku addons:wait
It can take a few minutes to create the database, so the wait command above will let you know when you can move on to the next step:
git push heroku master

heroku run make setup-db
This deploys our application, and sets up the database with the users table and a few sample records.
Once this process has completed, you should be able to run heroku open and see a web page that looks like this:
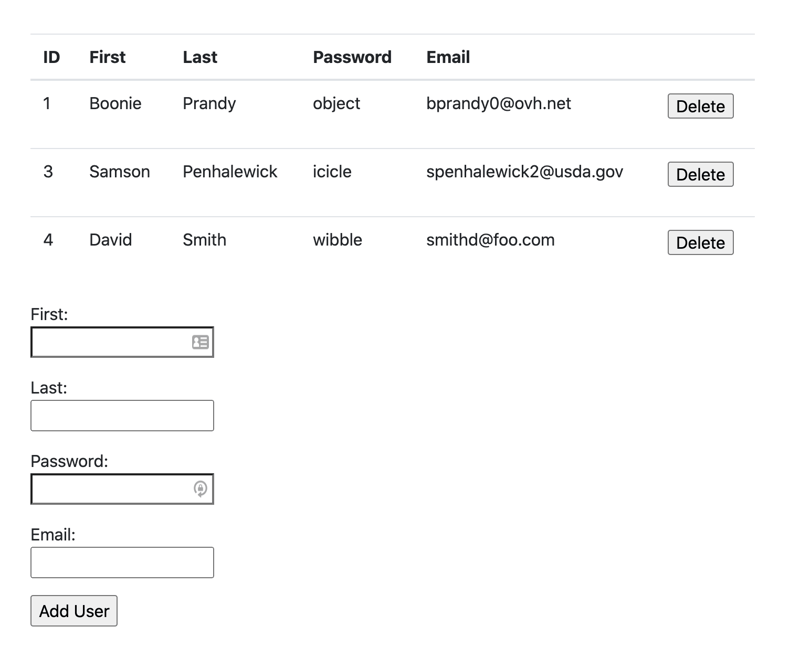
Now we have an example web application, backed by a Postgres database, where we can add and remove records from the users table. This represents our monolith application. Now let's add the Streaming Data Connectors Beta to see how we could use CDC to add microservices without changing our application.
Adding Kafka
We need Kafka to act as the messaging backbone of our connected applications, so we need the Kafka add-on. Again, you need to use a specific version:
heroku addons:create heroku-kafka:private-extended-2 --as KAFKA --app ${APP}
Please note that running this command will incur charges on your Heroku account.
heroku kafka:wait
Again, this can take some time.
Adding the Database Connector
Once we have our Kafka add-on, we can set up the connector to generate Kafka events whenever a table in our Postgres database changes.
We need to install a plugin to be able to add the database connector:
heroku plugins:install @heroku-cli/plugin-data-connectors
Once you've done that, the syntax to create our database connector looks like this:
heroku data:connectors:create \

  --source [postgres identifier] \

  --store [kafka identifier] \

   --table [table name]...
To get the Postgres identifier, run this command:
heroku addons:info heroku-postgresql
You should see output that looks like this (your values will be different):
=== postgresql-tapered-49814

Attachments:  lit-bastion-67140::DATABASE

Installed at: Sun Jul 19 2020 10:26:20 GMT+0100 (British Summer Time)

Owning app:   lit-bastion-67140

Plan:         heroku-postgresql:private-7

Price:        $7000/month

State:        created
The identifier we need is on the first line. In this case, postgresql-tapered-49814
The process for getting the Kafka identifier is similar, with the identifier appearing on the first line of output:
heroku addons:info heroku-kafka
Now that we have identifiers for both the Postgres database and the Kafka instance, we can create the database connector. I'm using the identifiers from my application, so you'll need to substitute the appropriate values from yours when you run this command:
heroku data:connectors:create \

  --source postgresql-tapered-49814 \

  --store kafka-octagonal-83137 \

  --table public.users \

  --exclude public.users.password
I've specified the table as public.users. I used the default public schema of my Postgres database when I created my users table. If you used a different schema, you'll need to specify that instead.
Notice also that I've used --exclude public.users.password. This means there won't be any information about the value of the password field included in the Kafka events which are generated. This is a very useful feature to ensure you don't accidentally send sensitive user information from your main application to a microservice which doesn't need it.
The database connector can take a while to create, and the output of the create command will tell you the command you can use to wait for your database connector to be provisioned.
heroku data:connectors:wait [connector name]
Consuming the Kafka events
Now we have our original database-backed application, and we've added the Streaming Data Connectors Beta, so we should see an event on the Kafka service whenever we make a change to our users table.
The next step is to set up another application to consume these events. In a real-world scenario, you would want to do something useful with these events. However, for this article, all we're going to do is display the events in a very simple web interface.
Creating the Web Application
I've written a very simple "kafka-consumer" application, also using Ruby and Sinatra, which you can see here. In creating this, I ripped off a bunch of code from was inspired by this heroku-kafka-demo-ruby application.
Let's get this deployed, and connect it to our Kafka instance. Fire up a new terminal session and run these commands.
export HEROKU_PRIVATE_SPACE=devspotlight-private
Substitute the name of your own Heroku private space.
git clone https://github.com/digitalronin/kafka-consumer.git

cd kafka-consumer

heroku apps:create --space ${HEROKU_PRIVATE_SPACE}

export APP=$(heroku apps:info | head -1 | sed 's/=== //')
Before we deploy our application, we need to do some setup to enable this application to read from the Kafka topic that was created when we set up the database connector.
To give your new application access to the Kafka instance, we need to run a command like this:
heroku addons:attach [app with kafka]::KAFKA -a [app that wants to access kafka]
The [app with kafka] is the name of your instance of the sinatra-postgres-demo application, which you'll see if you run heroku apps:info in your other terminal session.
The [app that wants to access kafka] is the instance of kafka-consumer, the application we're creating now.
We used the KAFKA label when we originally created the Kafka instance.
In my case, the command I need looks like this (substitute the values for your applications):
heroku addons:attach lit-bastion-67140::KAFKA -a boiling-sierra-18761
Be careful to put two colons before KAFKA, or you'll get Couldn't find that add-on.
The output should look something like this:
Attaching kafka-octagonal-83137 to ⬢ boiling-sierra-18761... done

Setting KAFKA config vars and restarting ⬢ boiling-sierra-18761... done, v3
If you run heroku config you'll see that our new application now has several KAFKA* environment variables set, which will enable us to connect to the Kafka instance.
There is still one more thing we need though: We need to know the Kafka topic on which our events are going to be published. The topic was automatically created when we added the database connector. To find out what it is, go back to your sinatra-postgres-demo directory and run this command:
heroku kafka:topics
The output should look something like this:
=== Kafka Topics on KAFKA_URL

Name                                                  Messages  Traffic ────────────────────────────────────────────────────  ────────  ────────────

connect-configs-311cea8b-0d94-4b02-baca-026dc3e345e0  0/sec     0 bytes/sec

connect-offsets-311cea8b-0d94-4b02-baca-026dc3e345e0  0/sec     7 bytes/sec

connect-status-311cea8b-0d94-4b02-baca-026dc3e345e0   0/sec     0 bytes/sec heartbeat.witty_connector_44833                       0/sec     12 bytes/sec witty_connector_44833.public.users                    0/sec     0 bytes/sec
We want the topic ending with public.users. In my case, that's witty_connector_44833.public.users. If you specified multiple tables when you created the data connector, you'll see a topic for each of them.
Our demo kafka-consumer application just uses a single topic, which it gets from the KAFKA_TOPIC environment variable. So, we can set that now.
Back in your kafka-consumer terminal session, run this command (substituting your own topic name):
heroku config:set KAFKA_TOPIC=witty_connector_44833.public.users
Now we can deploy our application:
git push heroku master
As with the sinatra-postgres-demo application, you may have to wait several minutes for the DNS changes to complete.
CDC in Action
Now, we have all the pieces in place:
- User List - our database-backed pretend monolith, sinatra-postgres-demo
- The Streaming Data Connectors Beta which publishes events to a Kafka topic whenever our users table changes
- Message List - the kafka-consumer application that lets us see the Kafka events
In your browser, use the form to add a new user. A few seconds later, you should see a JSON message appear in the Message List application.
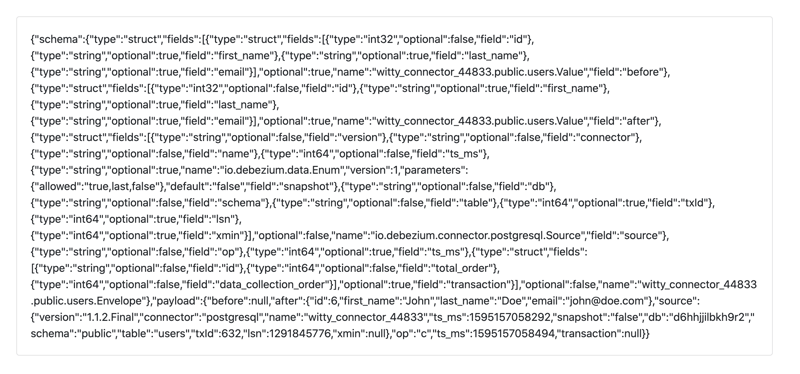
Message structure
The JSON you can see is the "value" of the Kafka event. There is other metadata in the event which you can see by tweaking the kafka-consumer application, but for now let's just look at the JSON data.
You can use a tool such as jq to inspect the JSON, or paste it into an online JSON tool like this one.
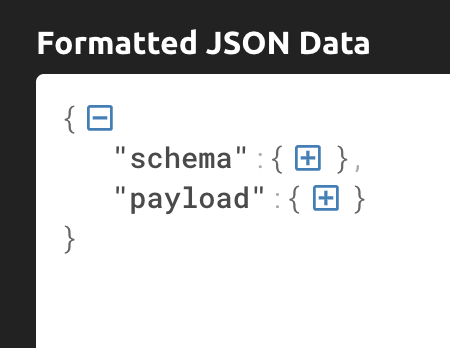
Collapsed down to just the top level, you can see that the message has a "schema" and a "payload":
There is a lot of metadata in the "schema" part, but most of the time you'll probably be more interested in the "payload" which has a "before" and "after" section. This should show you the values of the database record before and after the reported change(s). There are some important caveats about "before" in the best practices document about the Streaming Data Connectors Beta.
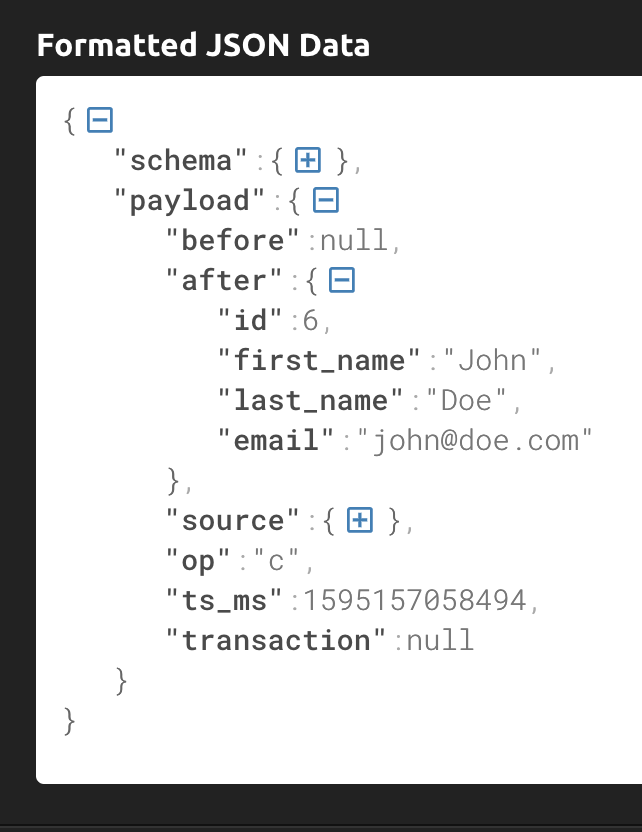
Notice how the "after" section does not include the "password" field of the user record. This is because we excluded it when we created the data connector.
Conclusion
Let's recap what we've covered.
- We started with a database-backed web application, managing a users table.
- We added Kafka, and the Streaming Data Connectors Beta to publish changes to the users table as Kafka events.
- We created a separate application and connected it to the Kafka topic, and saw messages generated by changes to the database.
It's worth emphasizing that we didn't have to make any changes at all to our "monolith" application code to make this happen.
Cleanup
Don't forget to remove your applications when you're finished, or you could end up being billed for these services.
You can do this by running make clean in both the sinatra-postgres-demo directory, and the kafka-consumer directory. You can also delete the applications using the Heroku web interface.
To verify that everything has been successfully removed, you can run:
heroku apps --space ${HEROKU_PRIVATE_SPACE


Top comments (0)