I hate image formats.
Maybe it's an emotional reaction to hours upon hours of searching for obscure specifications, finding bizarre proprietary blobs in supposedly standardised files, wondering if the tool I'm running is even doing anything, and having my (fairly high end) PC completely run out of memory several times - but it's an understandable one, I think.
As a warning, this post is going to be pretty long, boring, and rant-y. If that's not for you, feel free to skip it and go look at some cool WebGL demo, but if you like this sort of thing then read on!
A bit of background.
After a long day of coding, I like to sit down for a nice evening of coding - specifically, working on a to-be-announced game project along with a couple of long-time friends. Naturally, I've ended up in the architect's role, which means I'm responsible for our asset pipelines, and in the (primarily) 2D game we're making, that means a lot of sprites.
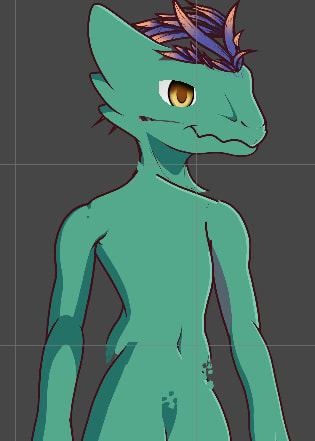
In our game, each character bust is built from a whole load of individual pieces. Arms, feet, noses, shins, eyebrows, breasts, clothes - everything can be mixed and matched, like a space-age Mr. Potato Head. This is obviously more difficult to set up in the short term, but it allows us to quickly create expressive, high-quality character busts that hopefully don't look too creepily alike.
Our artist has a particular creative process that I make no claim of understanding, but the important thing here is the file structure, which looks like this:
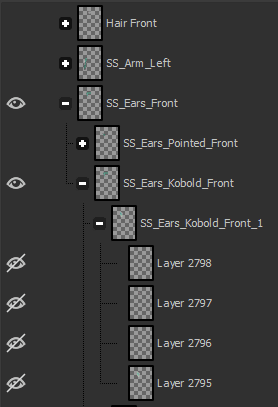
For Photoshop neophytes (like myself): the folder-looking things are exactly that, and are called 'groups'. Groups can be infinitely nested. The leaf nodes of this tree structure are 'layers', and they contain image data. This could include vector shapes, text, or other effects, but for our purposes we can assume it's raster (bitmap) data.
Each of these serves a different purpose: the lowest level layers are where the actual work gets done - so, we might have a layer for some line art, then another one for some shading. Directly above that (usually!) we have a group that collects all the layers for one 'piece', like 'SS_Ears_Kobold_Front_1'. Above that, there are groups used for organisation - gathering together the Kobold ears, all the ears, all the head pieces and so on. This allows the artist to hide the pieces that aren't relevant while working, but making them visible when he needs to check that they fit with the other adjacent pieces. There are also layers and groups used as references, temporary sketches, you get the idea.
For practical reasons, the artist splits his work into multiple PSD (Photoshop Document) files which, as we'll see later, is probably a good thing.
So! How do we get that into a format we can use in Unity?
Attempt #1: keep it simple, stupid.
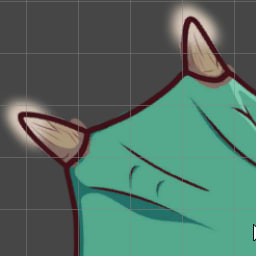
The solution we first jumped to was the one built in to Photoshop: "Quick export layers as PNG". The artist need only individually mouse-select the 434 groups corresponding to the pieces, hit the aforementioned option, and generate a load of images like this:
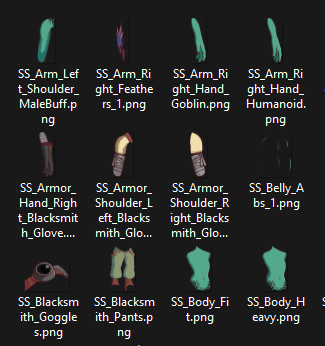
And nicely cropped as well, how thoughtful! So I can just drop them all into Unity, and...

Hmm. Okay, maybe I can make this work...
Yeah.
In hindsight, I spent an embarrassingly high number of hours, in and out of voice calls with the artist, trying to pixel-perfectly align each piece with some 433 others, before coming to the eminently sensible conclusion that this would not do.
Attempt #2: Not enough RAM
After looking into a few possible solutions, including things like adding a nearly-transparent pixel in two corners of every layer to trick it into not cropping the images, the artist found a plugin for Photoshop that provided a slightly more configurable PNG exporter. The new exports would all be identical in size, matching the size of the canvas, with the graphic correctly positioned within it. The downside: you have to merge (combine into a single layer) each of the 434 groups before export - a process that takes several times as many clicks as the previous one. Safe to say, he was not pleased.
I, however, was ecstatic!

...at least until I tried to shift-select all the images in Unity. After minutes of waiting for the unresponsive editor, my PC locked up, having completely run out of memory.
The problem is the sheer size of the images: 3500x5200 (enough to stay sharp on a 4k monitor). The size on disk isn't much changed with the addition of all this empty space--PNG provides pretty good lossless compression after all--but in Unity (both in the editor, and at runtime) things aren't so simple.
In order to display a texture on screen, a desktop GPU requires it to be ultimately stored in one of a few different formats. For RGBA images like ours, we've got essentially two options: raw, uncompressed data at 32 bits per pixel, or the DXT5 fixed-rate compression at 8 bits per pixel. Since blank pixels now cost just the same as filled ones, it adds up to 70MiB or 17MiB for a single image. All together it's 30GiB or 7.5GiB, and that could be for both system and GPU memory depending on the exact operation. The cost when selecting assets in the editor is probably twice that due to internal buffering.
As an aside, crunch compression is a bit of a red herring here. While it does reduce the size on disk, it needs to be expanded back to regular DXT when it's first displayed, so it won't solve our memory issues by itself.
Now as much I love wasting my development headspace with caveats like "Don't ever touch Ctrl+A", this wouldn't do for the eventual players of the game, who would need something like a 2080 Ti in order to run our 2D RPG. If you're familiar with Unity you've probably just yelled the solution at the screen: sprite atlases! With one of these, we can pack all our sprites together into as few textures as possible, cropping out the empty space and even nestling them in each others' concave spaces, while preserving their positional data.

A tip: you can drag a folder into the 'packable objects' list, and Unity will recursively add all the sprites within it to the atlas. Saves a lot of clicking and dragging!
After adding the folder, I hit the "Pack Preview" button, and--you guessed it--got another out of memory crash. Perhaps I could create multiple atlases, limited to a few dozen pieces each, but that would compromise memory efficiency, download size, and draw call count, all because I insisted on having a load of empty space around each sprite. And the problem would only get worse; we projected our final sprite count to be at least 10 times what we currently have.
Attempt #3: Process and reprocess.
So we can't have cropped sprites because we lose the positional data, and we can't have uncropped sprites due to memory issues. But since the only thing the empty space provides us is an offset coordinate, perhaps we can extract this information from the raw images, and store them cropped in the project?
[MenuItem("Tools/Trim sprites")]
public static void TrimSprites()
{
    // For each selected Texture asset...
    var textures = Selection.objects.OfType<Texture2D>();
    foreach (var texture in textures) {

        var path = AssetDatabase.GetAssetPath(texture);
        var importer = (TextureImporter)AssetImporter.GetAtPath(path);

        // Disable compression, and make it 'readable';
        // this allows us to get a pointer to its data later on.
        importer.isReadable = true;
        importer.maxTextureSize = 8192;
        importer.textureCompression = TextureImporterCompression.Uncompressed;

        // Re-import the asset.
        importer.SaveAndReimport();

        // Find the bounds of the graphic by looking for non-transparent pixels
        var rect = GetNonTransparentBounds(texture);

        if (rect.min != Vector2Int.zero || rect.size != new Vector2Int(texture.width, texture.height)) {

            // Calculate the new sprite pivot based on the computed bounds
            var sourcePivot = importer.spritePivot;
            var sourcePivotPixels = sourcePivot * new Vector2(texture.width, texture.height);
            importer.spritePivot = (sourcePivotPixels - rect.min) / rect.size;

            // Copy the graphic to a new, correctly-sized texture
            var trimmed = new Texture2D(rect.width, rect.height, TextureFormat.ARGB32, false);
            trimmed.SetPixels(texture.GetPixels(rect.x, rect.y, rect.width, rect.height));
            trimmed.Apply();

            // Write the texture to the original file path in the PNG format
            File.WriteAllBytes(path, trimmed.EncodeToPNG());
        }

        // Undo the previous changes to the import settings
        importer.isReadable = false;

        // Re-import the asset, again.
        importer.SaveAndReimport();
    }
}
These new cropped, transformed sprites will happily pack into an atlas, while staying correctly aligned, so... yay?
Well as you might imagine, this import/calculate/re-import process isn't exactly quick, and if the assets need updating we'd need to reset the pivot point and re-run the process. Plus, if we needed recover a layered PSD file from these images, it's more difficult to do so (though admittedly not impossible), and after all of this we still don't have the group structure of the original file. It "works", but surely, surely, there's a more sustainable solution out there.
Attempt #4: Just use PSD bro!
In the past, Unity had very poor support for layered image files, at best flattening the entire image into a single texture. This is rapidly changing, however, with the addition of the 2D PSD Importer package. This adds a scripted importer which takes the original image, extracts all the layers, automatically crops and packs them into an atlas (not as efficiently as a regular sprite atlas, but good enough to save on memory use in the editor!), while keeping the group structure. You can even share skeleton rigs between different sprite groups, and (in the beta version) individually enable or disable layers in the import settings.

The artist, however, was sceptical. In order to get sprites for the pieces (instead of each art layer) he would still need to manually merge all the piece layer groups like he does now (the importer can sort of do this, but it's not very flexible), but with the added downside of having to upload a much larger file: the uncropped PNGs total about 20MiB, where the PSD was around 250!
A bizarre limitation of scripted importers is that's impossible to handle any file extension (like .psd) that Unity handles natively - even if the author of said importer is Unity themselves. Thus, the 2D PSD importer actually imports PSB files - a very similar, but much less well-supported format. Before you send the devs any strongly-worded letters though, you can simply rename your .psd files to .psb and it'll work fine (a feature that remains undocumented at the time of writing, naturally).
I persuaded the artist to send me his work file, and, with reckless curiosity, dropped it into Unity, which spun on the importer for about half an hour before crashing (probably due to out of memory, but I was disinclined to confirm this by trying again). Given the sheer number of art layers I'm not too surprised, but in any case I'd have to rule out postprocessing the file in Unity.
Attempt #5: In a tiff.
As much as Adobe might pretend otherwise, PSD isn't the only layered raster format in existence. The TIFF format supports multiple layers (called 'pages' or 'directories'), and both Photoshop and GIMP can save a TIFF file that they claim preserves layer information.
Since I'm a cheap bastard I don't have a Photoshop license, so I used GIMP to start with. Exporting to TIFF gives you some extra settings, which I filled out like so:

The whole process was rather quick, just a few seconds. I then opened the exported file, and got some more settings:

And here's the layer structure that resulted:
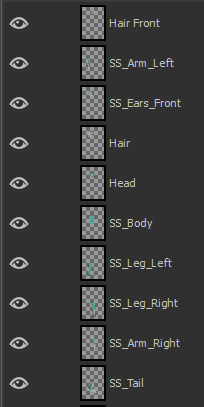
So, it looks like the TIFF export process had individually merged each top-level layer group. This was... not as helpful as I'd hoped, but it's something! The artist would need to un-structure his work, moving each piece group to the top level, but I theorised that it would be much faster than manually merging and selecting each of them.
Of course, Unity won't handle these layered TIFFs in a useful way, so I had to make a scripted importer of my own!
// Remember: Unity won't let us handle '.tif' or '.tiff'!
[ScriptedImporter(1, "tif2")]
public class MyTiffImporter : ScriptedImporter
{
    public override void OnImportAsset(AssetImportContext ctx)
    {
        // This uses BitMiracle.LibTiff.NET from nuget
        using (var tif = Tiff.Open(ctx.assetPath, "r"))
        {
            var textures = new List<Texture2D>();
            var pivots = new List<Vector2>();

            int maxWidth = 0, maxHeight = 0;

            // For each 'page' within the TIFF file...
            do {
                // Get some metadata (width, height, name)
                var width = tif.GetField(TiffTag.IMAGEWIDTH)[0].ToInt();
                var height = tif.GetField(TiffTag.IMAGELENGTH)[0].ToInt();

                maxWidth = Mathf.Max(maxWidth, width);
                maxHeight = Mathf.Max(maxHeight, height);

                if (tif.GetField(TiffTag.PAGENAME) == null) {
                    Debug.Log("No page name");
                    continue;
                }
                var name = tif.GetField(TiffTag.PAGENAME)[0].ToString();

                // Read the 'raster' (pixel data)
                var raster = new int[width * height];
                tif.ReadRGBAImage(width, height, raster);

                var bounds = GetNonTransparentBounds(raster, width, height);
                // Skip all-transparent pages
                if (bounds.width <= 0 || bounds.height <= 0) {
                    continue;
                }

                // Calculate the page's X/Y offset
                var xres = tif.GetField(TiffTag.XRESOLUTION)[0].ToDouble();
                var yres = tif.GetField(TiffTag.YRESOLUTION)[0].ToDouble();
                var xpos = tif.GetField(TiffTag.XPOSITION)?[0].ToDouble() ?? 0;
                var ypos = tif.GetField(TiffTag.YPOSITION)?[0].ToDouble() ?? 0;
                var pageBounds = new RectInt(
                    (int)(xpos * xres),
                    (int)(ypos * yres),
                    width,
                    height
                );

                // Calculate the pivot based on the page's position and calculated bounds
                var srcPivot = (new Vector2(0, 1)*pageBounds.size + new Vector2(-1, 1)*pageBounds.position)/pageBounds.size;
                var pivot = ((srcPivot * pageBounds.size) - bounds.min) / bounds.size;
                pivots.Add(pivot);

                // Create a new texture for the cropped image
                var tex = new Texture2D(bounds.width, bounds.height, TextureFormat.RGBA32, false) {
                    name = name,
                    alphaIsTransparency = true
                };

                // Copy the pixels from the raster into the texture
                var data = tex.GetPixelData<int>(0);
                // data.CopyFrom(raster);
                for (int i = 0; i < bounds.height; i++) {
                    for (int j = 0; j < bounds.width; j++) {
                        data[i * bounds.width + j] = raster[(bounds.x + j) + (bounds.y + i) * width];
                    }
                }

                textures.Add(tex);

                // ReadDirectory returns false when there are no more pages to read
            } while (tif.ReadDirectory());

            // Create a new texture for the combined image
            var atlas = new Texture2D(64, 64, TextureFormat.DXT5, false) {
                alphaIsTransparency = true
            };

            // This function packs the textures somewhat loosely, but good enough for now!
            var rects = atlas.PackTextures(textures.ToArray(), 0, 4096, true);
            EditorUtility.CompressTexture(atlas, TextureFormat.DXT5, TextureCompressionQuality.Best);

            ctx.AddObjectToAsset("atlas", atlas);
            ctx.SetMainObject(atlas);

            for (int i = 0; i < textures.Count; i++) {
                // Add the Sprite to the asset
                var sprite = Sprite.Create(atlas,
                    rects[i].TransformSpace(new Rect(0, 0, 1, 1), new Rect(0, 0, atlas.width, atlas.height)),
                    pivots[i], 100);
                sprite.name = textures[i].name;
                ctx.AddObjectToAsset(sprite.name, sprite);
            }
        }
    }

    public static RectInt GetNonTransparentBounds(int[] raster, int w, int h)
    {
        int x = w;
        int y = h;
        int maxX = 0;
        int maxY = 0;
        for (int i = 0; i < w; i++)  {
            for (int j = 0; j < h; j++) {
                int c = raster[i + j * w];
                int alpha = (c >> 24) & 0xff;
                if (alpha != 0)
                {
                    if (i < x) x = i;
                    if (i > maxX) maxX = i;
                    if (j < y) y = j;
                    if (j > maxY) maxY = j;
                }
            }
        }
        return new RectInt(x, y, maxX - x, maxY - y);
    }
}
It's rough, but it sort of works!

More importantly, though: how easy would it be for our artist to create a valid file? At first it seemed the answer was 'extremely' - as simple as Save As -> TIFF - but when I opened the file in GIMP it seemed to only have a single layer.
Opening the file in the very retro-looking TIFF Inspector gave me this:

One directory (i.e. layer), and a lot of 'privately defined' tags. Using a very helpful reference, we find that most of these tags are irrelevant--colour profiles, thumbnail data and suchlike--but tag 37724 seems to have some proprietary Photoshop-related data, which is corroborated by the Photoshop TIFF spec.
Hang on, Photoshop TIFF spec? Yeah, the TIFFs that Photoshop creates are, for our purposes, totally proprietary, so it's essentially a PSD file but even less well supported. Great! Apparently ImageMagick has support for getting the layer data out of this 'variant', so if you have a bunch of files in the format already, you can still make use of them.
I could get the artist to open his work file in GIMP and go through the export process there, but by this point it seemed like a bit of a hassle for not much benefit.
Attempt #6: Can't I just ZIP a bunch of PNGs together or something?
Before I resorted to making my own format out of chewing gum and string, I thought I'd have a quick browse of the other layered raster formats out there, just to see if there were any other options - and wouldn't you know it, there are! The OpenRaster format (.ora) is an open standard, is supported in GIMP, and is literally a ZIP of PNGs, with an XML file describing the layer structure - groups and all:

So it appeared (foreshadowing!) that OpenRaster was a good candidate for our 'final' asset format. However, we still had the problem of how to go from our many-layered PSD work file to a few-layered OpenRaster file. Merging all the layers was still a manual process, and I have to confess I wouldn't be happy if I had to do several thousand clicks just to get my art in a nice format for the programmers.
So I made a plugin!
(define (merge-and-optimize-recursive image items)
    (for-each (lambda (item)
        (define merged-layer item)
        (if (= TRUE (car (gimp-item-is-group item))) (let* (
            (children (vector->list (cadr (gimp-item-get-children item))) )
        )
            ; If any children are not groups, merge the item
            ; Otherwise, recurse.
            (if (= 0 (foldr * 1 (
                map car (map gimp-item-is-group children)
            ) ) )
                (set! merged-layer (car (gimp-image-merge-layer-group image item)))
                (merge-and-optimize-recursive image children)
            )
        ) )
        ; Auto-crop the (possibly merged) layer
        (if (= FALSE (car (gimp-item-is-group merged-layer))) (let* ()
            (gimp-image-set-active-layer image merged-layer)
            (plug-in-autocrop-layer RUN-NONINTERACTIVE image merged-layer)
        ) )
    ) items )
)

(define (script-fu-merge-and-optimize image layer)
    (gimp-image-undo-group-start image)
    ; The final assets will be in 8-bit RGBA, so convert the image to that if needed.
    (if (not (= PRECISION-U8-GAMMA (car (gimp-image-get-precision image))))
        (gimp-image-convert-precision image PRECISION-U8-GAMMA)
    )
    (merge-and-optimize-recursive image (vector->list (cadr (gimp-image-get-layers image))) )
    (gimp-image-undo-group-end image)
)

(script-fu-register
    "script-fu-merge-and-optimize"
    "Merge layer groups and optimize"
    "Merge layer groups and optimize"
    "Hamish Milne"
    "Hamish Milne"
    "2021"
    "*"
    SF-IMAGE "Image" 0
    SF-DRAWABLE "Layer" 0
)
(script-fu-menu-register "script-fu-merge-and-optimize" "<Image>/Image")
... Or, more specifically a 'Script-Fu Script'. The -ahem- 'code' above is Scheme, specifically TinyScheme, GIMP's scripting runtime of choice. It's also possible to use Python 2.7 (ugh), or compile an executable from scratch, but Scheme is a lot less painful for simple scripts like this one.
There's a few things to note here:
- The input files will generally use high-precision colours for more accurate composition while editing. Before everything, I change the image precision to 8-bit gamma encoding, since this is what will ultimately be used by Unity when importing; skipping this step will result in needlessly large output files.
- My heuristic for whether to merge layers is somewhat specific to our pipeline. I merge the groups directly above the leaf layers and leave the rest alone.
- I run the Auto Crop function on every layer, which cuts it down to the smallest rectangle that encloses the graphic. This obsoletes my Unity-based solution, and naturally makes the output files smaller still.
I have to say, it was certainly satisfying watching layer groups flick down the screen as the script did its thing. If you're sensitive to flashing images, though, I recommend looking away from the screen for a bit...
On exporting to the OpenRaster format, everything seemed to work! I had, effectively, a ZIP of all the cropped layers, in PNG format, along with the layer structure. That's just about everything I'd been looking for, right?
Right?
Well... For starters, Unity has zero support for OpenRaster, so I'd need to make another scripted importer. Not too difficult, since the format's so simple, but I couldn't help feeling some chagrin that I'd have to essentially re-implement all the features of the Unity PSD importer, just in a much more janky way.
Also, it took GIMP several minutes to do the export. On a more reasonably-specced machine, and with a larger file, it might push half an hour. I don't know exactly why this is the case, when exporting to TIFF or PSD takes seconds, but it's probably to do with the OpenRaster exporter being a Python plugin, where those other ones are built in to the main program.
Man, it'd be cool if we could just use PSD, huh?
Attempt #7: Seriously, just use PSD.
The main issue we had with using PSD wasn't the format itself, it was the total effort required to prepare the file for export. With the plugin I'd made, that just became a non-issue; I'd reduced the preparation time to almost nothing, and we could export in whatever format we pleased. Why wouldn't PSD do?
In fact, with all my optimizations, the PSD file exported after running the script was only about 20% larger than the equivalent OpenRaster file, and about half the size of all the un-cropped PNGs. The PSD shrunk from 250MiB to a little over 10. And this time, Unity didn't crash on the importer!

The only major caveat with this approach is the size of the intermediary atlas. Unlike regular sprite atlases, the PSD importer will create one big atlas texture per file. Unity (and indeed, most GPUs) has a maximum texture size of 16k square, even in the editor. If your sprites don't fit, they'll be shrunk until they do, and the sprite atlas won't be able to un-shrink them later on. So if the intermediary atlas looks pretty full, you might want to break up the PSD into smaller files.
Another thing to watch out for is this:
Neither GIMP nor Unity's PSD importer will perfectly handle every Photoshop feature. The effect above is caused by a mask being incorrectly applied, so if your layers are doing anything beyond being linearly composed together, it's a good idea to rasterize them just before you export.
Conclusion: What have we learned?
If you find yourself in the incredibly specific position of having a huge amount of structured, fixed-position sprites, created in Photoshop, that need to be imported into Unity, you've got a few options:
Quick export layers as PNGs:
- Pro: Quick and simple
- Pro: Small file size (thanks to the cropping)
- Con: You lose the positional data and group structure (thanks to the cropping)
Use SuperPNG or similar to export un-cropped PNGs:
- Pro: No special software needed to process the output
- Pro: Keeps position data
- Con: Need to manually merge each sprite group
- Con: No group structure
- Con: Requires post-processing in Unity
- Con: Very easy to accidentally run out of memory in the editor
Use the PSD work file directly:
- Pro: Easiest of the bunch for the artist
- Pro: You use exactly the same file, making it easy to stay in sync
- Pro: Keeps the position data and group structure
- Pro: Importer made by Unity, will get new features over time
- Con: Massive file size
- Con: Importing takes forever and might crash if the file is too big
- Con: If you have a weird layer structure, make use of masks, smart objects etc. you might still need to pre-process the file for Unity to display it correctly
Bring each sprite's group to the top level, then export to TIFF in GIMP:
- Pro: Fewer clicks than merging each sprite group individually
- Pro: Fairly small file size
- Pro: Keeps position data
- Con: No group structure
- Con: Requires a custom scripted importer
- Con: Multi-page TIFFs not well supported
Use a GIMP script to optimize the file, then export to OpenRaster:
- Pro: Smallest file size of the lot
- Pro: Automatic processing saves a lot of time
- Pro: Simple format, easy to parse and use elsewhere
- Pro: Keeps the position data and group structure
- Con: Requires a custom scripted importer
- Con: Format not well supported
- Con: Takes a long time to export
Use a GIMP script to optimize the file, then export to PSD (our solution of choice):
- Pro: Fairly small file size
- Pro: Automatic processing saves a lot of time; quick to export
- Pro: Keeps the position data and group structure
- Pro: Importer made by Unity, will get new features over time
- Con: Need to rasterize masks etc. for Unity to display it correctly
Recap: How we do it
For reference (or if you've just skipped to the end), here's our full 2D pipeline, step by step:
-
Artist setup:
- Install Photoshop (obviously)
- Install GIMP
- Copy the Scheme code above to
%APPDATA%\GIMP\<GIMP version>\scripts\script-fu-merge-and-optimize.scm
-
While creating:
- Structure the layers as you like, but make sure that the group for each sprite only contains layers, and not other groups.
-
To export:
- Delete (not hide!) any layers that you don't want in the final output (references and so on)
- If you're using masks, smart objects, patterns etc., rasterize and/or merge the layers as appropriate so that only simple layers remain
- Open the PSD file in GIMP
- Run the script by going to 'Image -> Merge layer groups and optimize'
- NB, it's not necessary to make all the layers visible at this stage
- Check the results, then export the file as PSD
-
To import:
- Install the "2D PSD Importer" package, if it's missing
- Change the image file's extension to
.psb, and copy it into the project - Check the import settings - in particular, the texture size, hidden layers, and layer group options
- Ensure your sprites are added to an atlas before building
And... that's it! After a lot of trial and error, we've got what I think is a pretty powerful and robust asset pipeline, which hopefully won't make our artist pull his hair out every time he needs to do an export.
All the code in this post is ISC licensed. Feel free to use it if you find it useful!


Oldest comments (0)