
Landing page leads help businesses collect user information. This information gifts businesses a better understanding of the demographic interested in their product.
What We Will Be building
This post will discuss creating a landing page to collect and store a user’s contact information in a Nuxt application. This application does not require a custom backend server.
Github URL:
https://github.com/Iheanacho-ai/nuxt-email-leads
Prerequisites
To get the most out of this article, we require the following:
- Basic understanding of CSS, JavaScript, and Vue.js
- Understanding Nuxt.js would help with this tutorial, but would not be required
- Docker Desktop installed on the computer, run the
docker -vcommand to verify if we have docker desktop installed; if not, install it from Get Docker documentation - Appwrite instance running on our computer, check out this article to create a local Appwrite instance; we will use Appwrite’s powerful database feature for this project ## Setting up our Nuxt app
Nuxt is an open-source Vue.js frontend development framework that allows us to create universal web applications, render statically Vue.js applications without having a server, and enables functionalities like server-side rendering, static site generating, etc. in our project.
To create a Nuxt app, we go to our terminal and run the command below.
NOTE: Use the Powershell terminal to run these commands.
    npm init nuxt-app <project-name>

    #or

    npx create-nuxt-app <project-name>

    #or

    yarn create nuxt-app <project-name>
Running this command will trigger a set of question prompts. Here is the setup I used.
Project name: google-analytics-nuxt
Programming language: JavaScript
Package manager: Npm
UI framework: None
Testing framework: None
Rendering mode: Universal (SSR/SSG)
Deployment target: Server (Node.js hosting)
After that, run these commands.
    cd <project name>
    npm run dev
This would change the directory to our project and run it on the browser. To see our app go to http://localhost:3000/
Installing Appwrite
Appwrite is an open-source, end-to-end, back-end server solution that allows developers to build applications faster.
To use Appwrite in our Nuxt application, we install the Appwrite client-side SDK for web applications.
npm install appwrite
Creating a New Appwrite Project
During the creation of the Appwrite instance, we specified what hostname and port we see our console on. The default value is localhost:80.
Go to localhost:80 and create a new account to see our console.
On our console, there is a Create Project button. Click on it to start a new project.

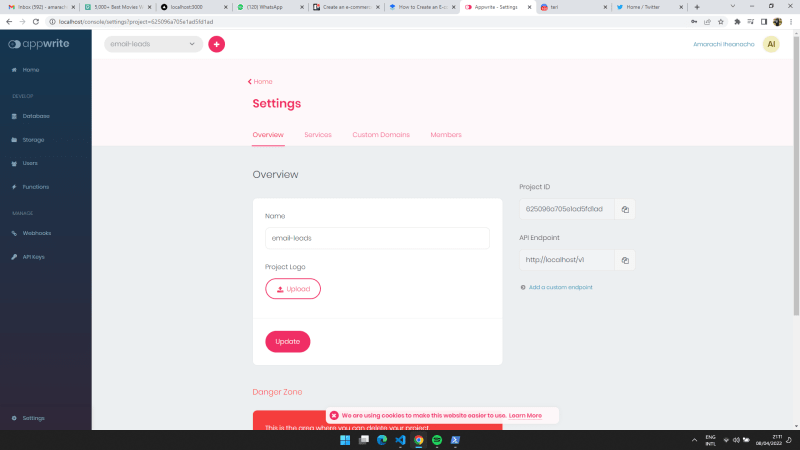
Our project dashboard appears once we have created the project. At the top of the page, there is a Settings bar. Click the Settings bar to access the Project ID and API Endpoint.

We copy the Project ID and API Endpoint, which we need to initialize the Appwrite Web SDK.
We create an init.js file at our project's root directory to initialize the Appwrite Web SDK with the following code.
    import { Appwrite } from 'appwrite';
    export const sdk = new Appwrite();
    sdk
      .setEndpoint('http://localhost/v1') // Replace this with your endpoint
      .setProject('projectID'); // Replace this with your ProjectID
Creating the Collection and Attributes on the Appwrite Database
In the Appwrite web Console, we click on Database on the left side of the dashboard.

We create a collection in the database tab by clicking on the Add Collection button. This action redirects us to a Permissions page.
At the Collection Level, we want to assign a Read Access and Write Access with a role:all value. We can modify these permissions later to control who has access to read or write to our database.
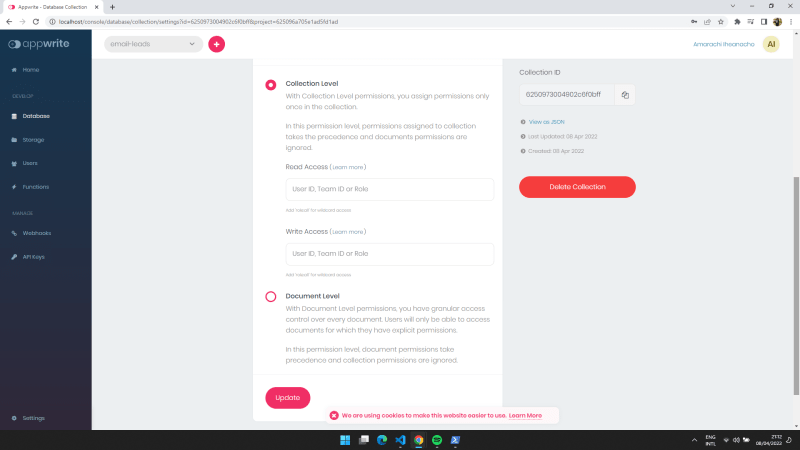
On the right of the Permissions page, we copy the Collection ID, which we need to perform operations on the collection’s documents.
Next, we go to the Attributes tab to create the properties we want a document to have.
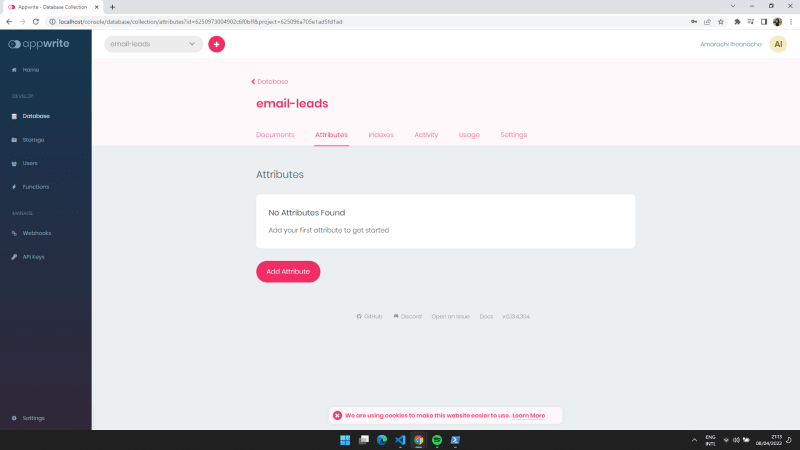
We create an email attribute of emailAddress.

Creating our Landing Page
In our index.vue file, we create the landing page for collecting email leads. This landing page consists of an input element for users to input their email addresses. We store these email addresses on our Appwrite database.
The code below creates the landing page user interface.
https://gist.github.com/Iheanacho-ai/7d4178284b85dd9f9008412a62769e36

Adding Input Interaction with the Database
In the script section of the index.vue file, we import the sdk instance into our file.
    <script>
      import {sdk} from '../init';
    </script>
Next, we create an emailAddress state variable to hold the value of our input element.
    <script>
      import {sdk} from '../init';
      export default {
        name: 'IndexPage',
        data(){
          emailAddress: ''
        },
      }
    </script>
Next, we create a handleEmailAddress to store the email addresses on our Appwrite database.
    <script>
      import {sdk} from '../init';
      export default {
        name: 'IndexPage',
        data(){
          emailAddress: ''
        },
        methods: {
          handleEmailAddress: async function(){
            try {
              await sdk.database.createDocument(collectionID', 'unique()',{
                "emailAddress": this.emailAddress
              })
              this.emailAddress= '',
              alert("Email saved successfully!")
            } catch (error) {
              console.log(error)
            }
          }
        }
      }
    </script>
In the code block above, the handleEmailAddress function does the following:
- Creates a new document in the database using Appwrite’s
createDocumentfunction; this function receives the collection ID we saved from the Permissions page, a unique() parameter that specifies that we want a unique document ID, and attributes values as parameters - Alerts us when we have successfully saved the document and then clears out the information in our
emailAddressstate variable - Logs any error we encountered to our console
We then pass the emailAddress variable to a v-model directive on the input element and the handleEmailAddress function to the Add email address button @click event listener.
    <input
      type="text"
      v-model="emailAddress"
    />
    <button type="button" @click="handleEmailAddress">Add email address</button>
Here is how our index.vue file looks.
https://gist.github.com/Iheanacho-ai/f988c7cfcc14cd7cf701708deff15c93

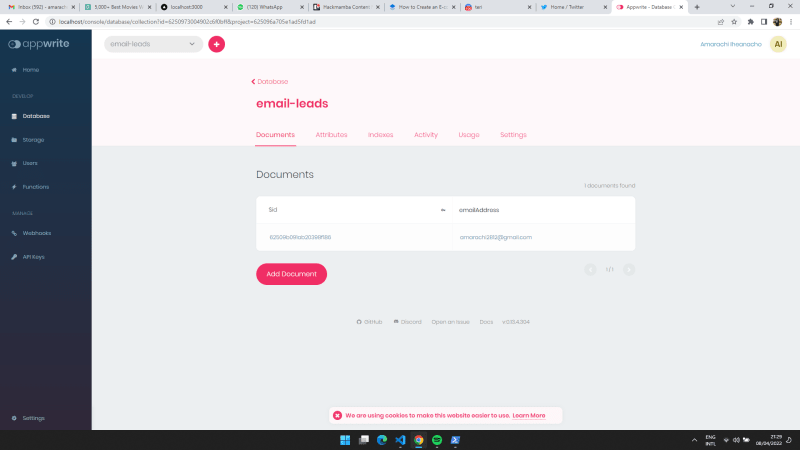
Input an email address to see it saved on the database.
Conclusion
This article discussed using Appwrite to create data on the database. We created a simple lead generation page in a Nuxt application.
Resources
Here are some resources that might be helpful:


Oldest comments (0)