E-commerce has become integral to everyday life, especially during and after the Covid pandemic. One of the vital aspects of E-commerce is the product reviews from users. Users drop positive and negative comments on a particular product, which influences the choice of potential buyers of that product.
There are instances where all the comments on a product are too numerous to load on a page. Several ways of dealing with this situation have been devised, for example, applying pagination. However, an infinite scroll provides a better user experience and the user does not have to flip through pages.
This post will teach us how to implement infinite scroll on comments using the Intersection Observer API.
Github
Check out the complete source code here.
Prerequisites
To follow along in this tutorial, we require:
- A basic understanding of JavaScript and Vue.js
- Familiarity with Nuxt.js
- Docker Installation
- An Appwrite instance: please check out this article on how to set up an instance (we recommend using the latest version of Appwrite at the time of writing this article,
v0.15.2
Getting started
We need to create a Nuxt.js projects so let’s open a terminal and run the following commands.
npx create-nuxt-app nuxt-comments-intersection-observer
A series of prompts will appear when the command runs. Here are the recommended defaults for this tutorial.
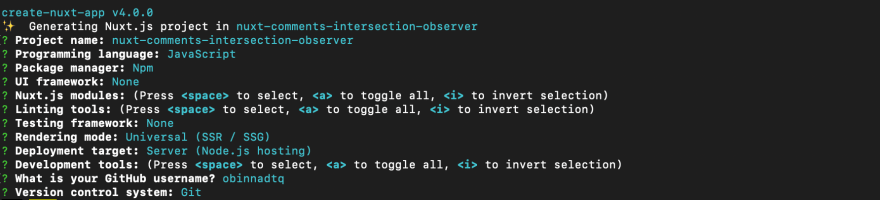
Next, we need to navigate into our project directory and start the development server on localhost:3000 using the below commands.
cd nuxt-comments-intersection-observer && npm run dev
Installing Appwrite
Appwrite is a Backend-as-a-Service platform that provides APIs for building web and mobile applications.
To use Appwrite in our application, we install the Appwrite client-side SDK for web applications using the command:
npm install appwrite
Appwrite has a one-click install on digital ocean droplet.
Creating an Appwrite Project
To create a new Appwrite project, start the Appwrite instance and navigate to the specified hostname. If default, visit http://localhost. Next, we need to sign in to our account or sign up if we don’t have an account.
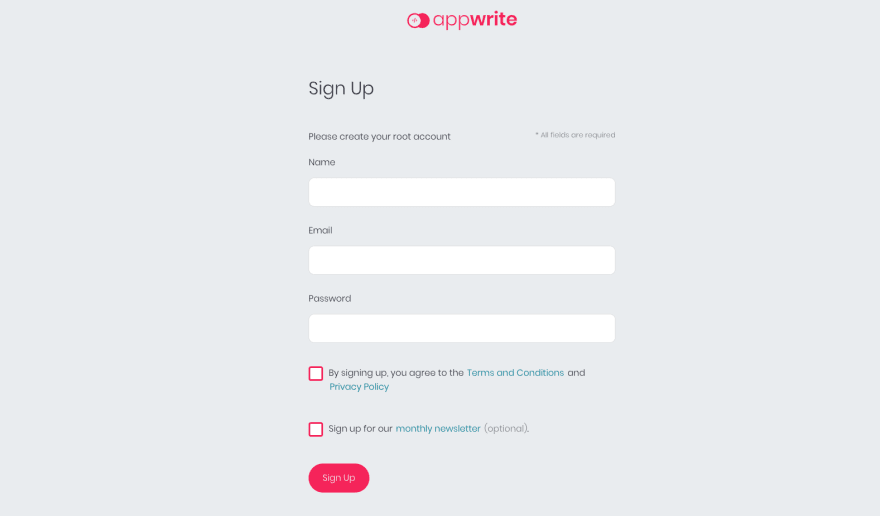
After signing in or up:
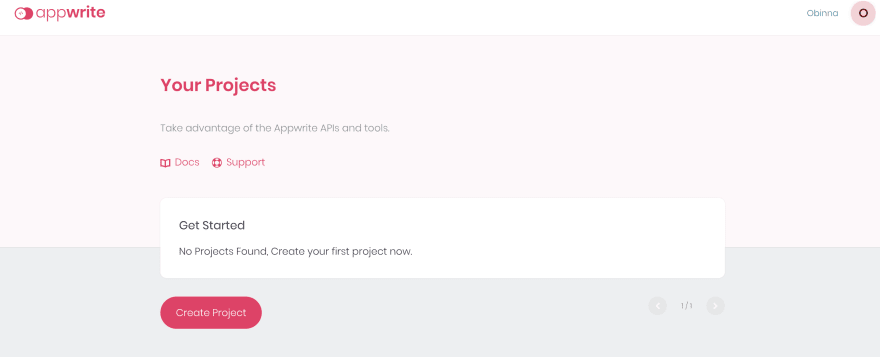
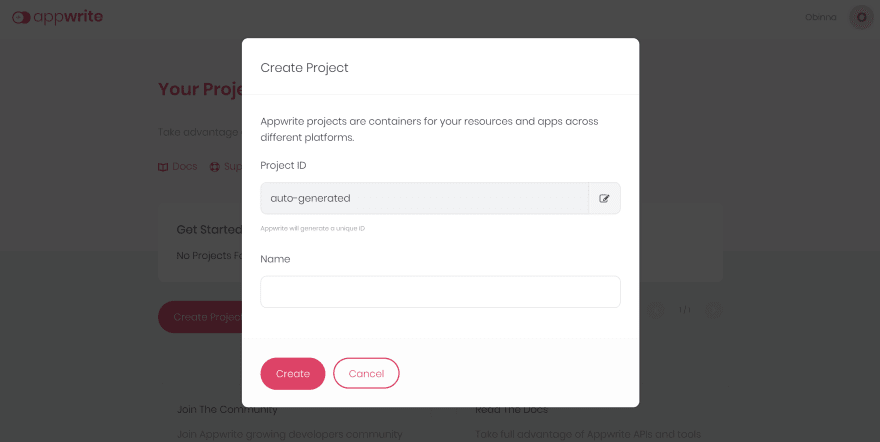
- Click on the Create Project button
- Input
Product_Commentsas the project's name - Click on Create
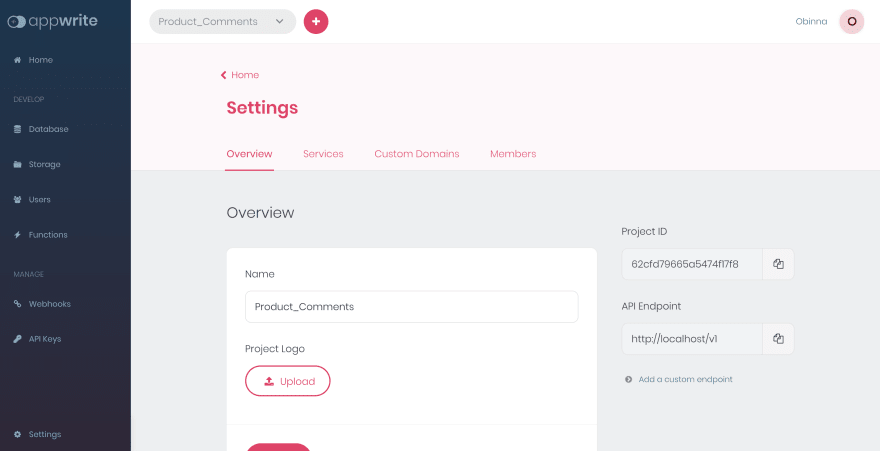
The project dashboard shows after the project has been created. There is a Settings bar at the top of the page; click on it to get the Project ID and API Endpoint.

Copy the Project ID and API Endpoint, which will be needed to initialize the Appwrite Web SDK.
Before we continue, we will create a .env file to save our environmental variables. These variables are what we will be using to access Appwrite. At this point, the .env file should look like this:
PROJECTID='' // Appwrite ProjectID
To access the environmental variables, we need to install dotenv in our project using the command:
npm install @nuxtjs/dotenv
After installing the dotenv package, we modify the nuxt.config.js file in our project by adding the package to the buildModules array.
buildModules: [
 '@nuxtjs/dotenv'
],
Then, we create an init.js file in our project root directory to initialize Appwrite’s Web SDK with the code below.
import { Client, Databases } from 'appwrite';
const client = new Client();
client
        .setEndpoint('http://localhost/v1') // set your endpoint here
        .setProject(process.env.PROJECTID); //project ID from env file
Creating the Database, Collection, and Attributes
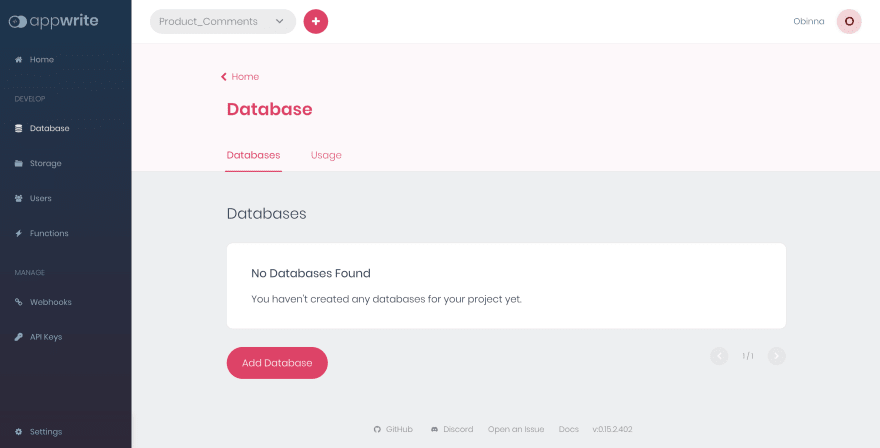
We will create a database on Appwrite to store our comments. To create a database, navigate to the Database tab on the left side of the dashboard and click on Add Database.
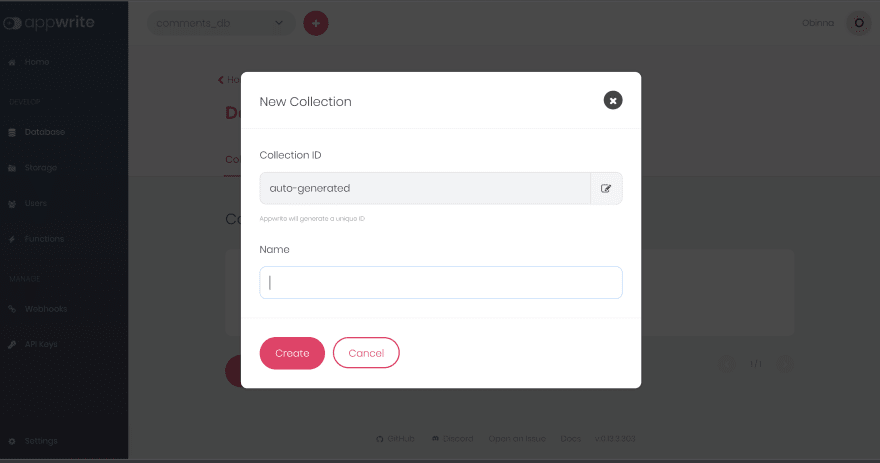
Then, we are prompted to enter the name of the database. We will name our database product_comments_db. Next, we create a collection. We will call our collection product_comments. On creating the collection, we are redirected to a Permissions page. We will set the Read and Write Access with a role:all value. The permissions can be modified to specify who is granted read or write access to the database.

Copy the Collection ID, which is on the right side of the page. It will be used to perform operations on the collection’s documents.
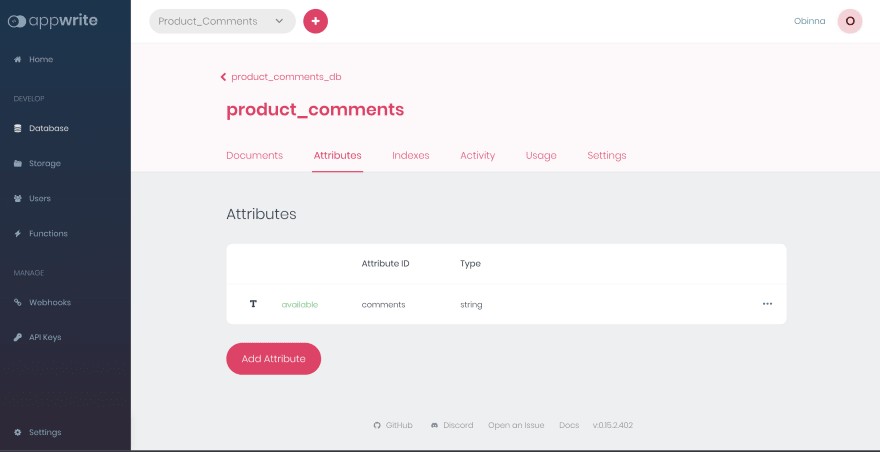
Then, navigate to the Attributes tab to create the document’s properties.

We create a string attribute: comments, representing the user’s comments on a product.
Populate the database with comments
Next, we need to populate the database with some comments. To populate the database, click on the Documents tab and click on Add Document.

To reduce the manual effort of adding the documents, we will create a JavaScript file named repository.js in the project root directory. The file will handle data migration to the database. We need to install node-appwrite to be able to run the JavaScript file against Appwrite using the code below:
npm install node-appwrite
To populate the database, we will need properties from Appwrite such as the Project ID, Database ID, ApiKey, and Collection ID. We already know how to get the Project ID and Collection ID.
The Database ID can be found in the Settings tab of our database.
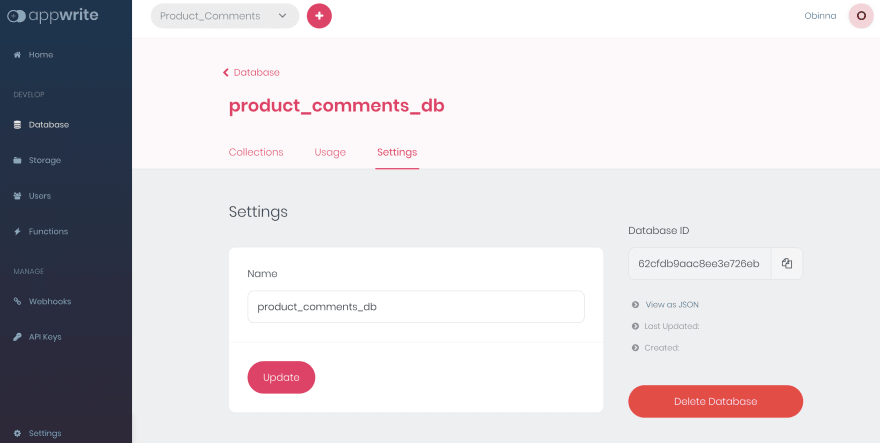
The API Key can be created by clicking on the API Keys tab on the left bar. Then click on the Add API Key button. For our use case, databases, collections, and documents read and write permissions are sufficient.

At this point, we will update our .env file with new environmental variables.
PROJECTID='' // Appwrite ProjectID
DATABASEID='' // Project DATABASEID
COLLECTIONID='' // Database COLLECTIONID
APIKEY='' // Project APIKEY
Copy the code below into the repository.js file
const sdk = require('node-appwrite');
const axios = require('axios');
require('dotenv').config();

const client = new sdk.Client();
client
      .setEndpoint('http://localhost/v1') // Your API Endpoint
      .setProject(process.env.PROJECTID) // Your Project Id
      .setKey(process.env.APIKEY); // Your Api Key

const database = new sdk.Databases(client, process.env.DATABASEID);

async function getComments(){
    try{
        const response = await axios.get('https://dummyjson.com/comments?limit=340');
        return response.data.comments.map(x => x.body);
    }catch(e){
        console.log(e.message);
    }
}

async function populateDatabase(){
    try{
        const comments = await getComments();
        comments.forEach(async (element) => {
            try{
                await database.createDocument(process.env.COLLECTIONID, 'unique()', {'comments': element})
            }catch(e){
                console.log(e.message)
            }
        });
    }catch(e){
        console.log(e.message);
    }

}

populateDatabase();
We obtain the random comments from https://dummyjson.com/comments?limit=340 and then use the data to populate the database. The database is populated with the comments when the file is run using node repository.js.
Building our UI
At this point, our init.js file should look like this.
import { Client, Databases } from 'appwrite';
const client = new Client();
client
      .setEndpoint('http://localhost/v1')
      .setProject(process.env.PROJECTID);
export const database = new Databases(client, process.env.DATABASEID);
We will set up the UI for the application. Navigate to the components folder, create a Comment.vue file, and add the code block below
<template>
  <div class='comment'>
    <p>{{comment}}</p>
  </div>
</template>

<script>
export default {
    name: 'Comment',
    props: ['comment', 'id']
}
</script>

<style>
.comment{
    padding: 1rem;
    border: 1px dotted #ccc;
    margin: 1rem 0;
}
</style>
Proceed to the index.vue file in the pages folder and import the Comment component. Also, import the database from init.js.
At this point, the pages/index.vue should look like this:
<template>
    <div class="container">
        <h2>Product Comments</h2>
        <Comment v-for="comment in comments" :key="comment.id" :comment="comment.comments"/>
    </div>
</template>
<script>
    import Comment from '../components/Comment.vue'
    import {database} from '../init'
    export default {
      components: { Comment },
      name: 'IndexPage',
      data(){
        return{
          comments: [],
          offset: 0,
          commentsPerPage: 10
        }
      },
     methods: {
        async getComments(){
           try {
              const response = await database.listDocuments(process.env.COLLECTIONID, [], this.commentsPerPage, this.offset);
              this.offset += this.commentsPerPage
              const docs = response.documents;
              this.comments = [...this.comments, ...docs];
            } catch(err){
                console.log(err);
            }
        }
      }
    }
</script>
<style>
    * {
      box-sizing: border-box;
      margin: 0;
      padding: 0;
    }
    body{
      font-family: Arial, Helvetica, sans-serif;
      font-size: 1rem;
      line-height: 1.6;
      background: #f4f4f4;
    }
    .container{
      max-width: 800px;
      margin: 2rem auto;
      overflow: hidden;
      padding: 1rem 2rem;
      background: #fff;
    }
    h2{
      text-align: center;
    }
</style>
The code above does the following:
- Fetches the comments from the Appwrite database. This uses the
limitandoffsetparameters of thelistDocumentsmethod. Thelimitdefines the number of documents that can be returned per request, and theoffsetdefines the number of documents to skip before selecting the next set of documents. We use both parameters to achieve pagination. - Append the responses in the comments array.
- The comments array is iterated through, and each comment is displayed.
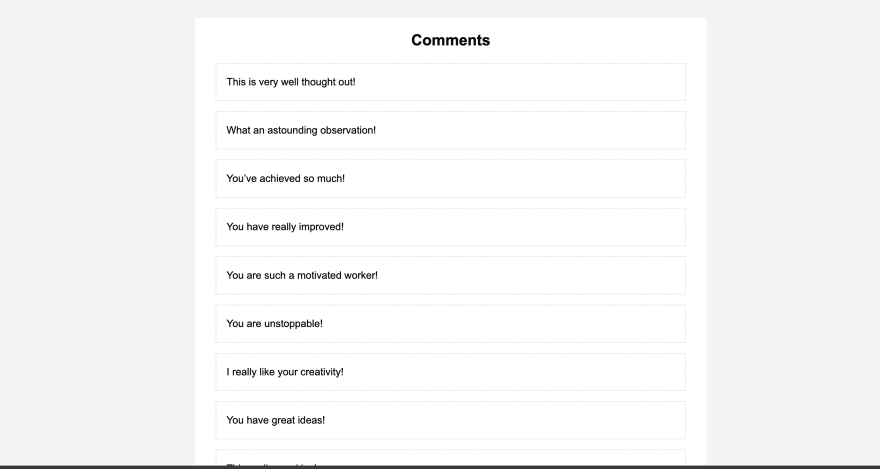
The UI at this point should look like this
Using Intersection Observer API
The Intersection Observer API provides a way to observe changes in the intersection of a target element with an ancestor element. To make use of the Intersection Observer API, we first need to create an instance of IntersectionObserver like this:
const observer = new IntersectionObserver(callbackFunction, options);
const targetElement = document.querySelector('.observed');
observer.observe(targetElement);
The IntersectionObserver receives two arguments. The first is a callback function that is executed when an intersection occurs and the second is the option argument which is optional.
We will create an observer component in our Components folder based on the brief introduction on how the Intersection API is used. The Observer.vue file should look like this:
<template>

</template>

<script>
export default {
    data(){
        return {
            observer: null
        }
    },
    mounted(){
        this.observer = new IntersectionObserver(([entry]) => {
            if (entry && entry.isIntersecting){
                this.$emit('intersect');
            }
        }, {});
        this.observer.observe(this.$el);
    },
    destroyed(){
        this.observer.disconnect();
    }
}
</script>

<style>

</style>
The Observer.vue component is then used in the index.vue file in the Pages folder to obtain the desired result. At this point, index.vue should look like this:
<template>
  <div class="container">
    <h2>Comments</h2>
    <Comment v-for="comment in comments" :key="comment.id" :comment="comment.comments"/>
    <Observer @intersect="getComments" />
  </div>
</template>

<script>
import Comment from '../components/Comment.vue'
import {database} from '../init'
import Observer from '../components/Observer.vue'
export default {
  components: { Comment, Observer },
  name: 'IndexPage',
  data(){
    return{
      comments: [],
      offset: 0,
      commentsPerPage: 10
    }
  },
  methods: {
    async getComments(){
       try {
        console.log(process.env.COLLECTIONID)
          const response = await database.listDocuments(process.env.COLLECTIONID, [], this.commentsPerPage, this.offset);

          this.offset += this.commentsPerPage;
          const docs = response.documents;
          this.comments = [...this.comments, ...docs];
        } catch(err){
            console.log(err);
        }
    }
  }
}
</script>
<style>
* {
  box-sizing: border-box;
  margin: 0;
  padding: 0;
}

body{
  font-family: Arial, Helvetica, sans-serif;
  font-size: 1rem;
  line-height: 1.6;
  background: #f4f4f4;
}
.container{
  max-width: 800px;
  margin: 2rem auto;
  overflow: hidden;
  padding: 1rem 2rem;
  background: #fff;
}
h2{
  text-align: center;
}
</style>
After this, it will be possible to continuously scroll depending on the number of comments on the page as shown below.
Conclusion
This post discussed how to use the Intersection Observer API to scroll through comments fetched from an Appwrite database. Appwrite offers Database features that enable us to create, read, update, and delete documents.
The resources below might be helpful:


Oldest comments (3)
Saying that infinite scrolling is good for UX can not be generalist. Did you checknyour site with keyboard only? Screen readers?
I would prefer a „load more“ button so the user can decide if there should be more comments loaded.
But in general, nice feautere, nice code, pretty well explained.
Hi Obinna, it's a great article!
You almost wrote my migration program ;).How can I work with an array instead of a single comment in the function populateDatabase() ? I want to import a record into the appwrite database ( e.g. array : "const person = { name: 'John', age: 20 };"? Thanks for your answer.
One day later. I solved my problem... it work's fine.
great article!