
Authentication is about proving the accuracy of assertions, i.e., whether they are true or false. These assertions can be of varying types, such as the identity of a system user.
Appwrite’s documentation described Appwrite as a self-hosted backend-as-a-service platform that provides developers with all the core APIs required to build any application. Appwrite delivers solutions that help in building backend servers for applications.
Building applications without appropriately taking care of the authentication exposes the application’s data to cyber-attacks. This article will discuss how to authenticate a Nuxt.js application using Appwrite’s Facebook OAuth provider.
Github
Check out the complete source code here.
Prerequisites
Understanding this article requires the following:
- Installation of Node.js
- Basic knowledge of JavaScript
- Docker installation
- An Appwrite instance; check out this article on how to set up an instance
- A Facebook account; signup is completely free
Creating a Nuxt.js Project
Use npx create-nuxt-app <project-name> to create a new Nuxt.js project.
The process of scaffolding the project would provide a list of options, which should look like this:

After successful project creation, we'll navigate into our directory and start our application by running the following command:
cd <project name>
npm run dev
Nuxt.js will, in turn, start a hot-reloading development environment that is accessible by default at http://localhost:3000.
Installing Appwrite
To use Appwrite, we will install it in our project, like so:
npm install nuxt-appwrite
Configuring nuxt.config for Appwrite
We need to configure our Nuxt.js application in the nuxt.config file before use.
To do this, we will register the Appwrite for global use in the nuxt.config.js file by adding nuxt-appwrite in the modules section:
modules: [ 'nuxt-appwrite' ]
Creating a New Appwrite project
To create a new project, start up the Appwrite instance on your machine and navigate to the specified hostname and port http://localhost:80. Next, we need to log in to our account or create an account if we don’t have one.
You can learn more about setting up Appwrite here. On the console, click on the Create Project button.
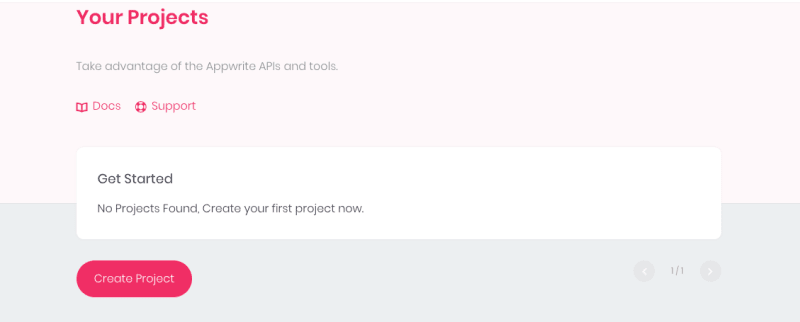
Clicking on the Create Project will take us to an inner page where we can add our project name. We will add appwrite_facebook as the name and click Create.

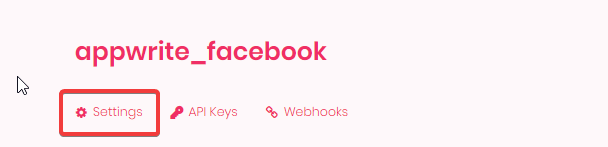
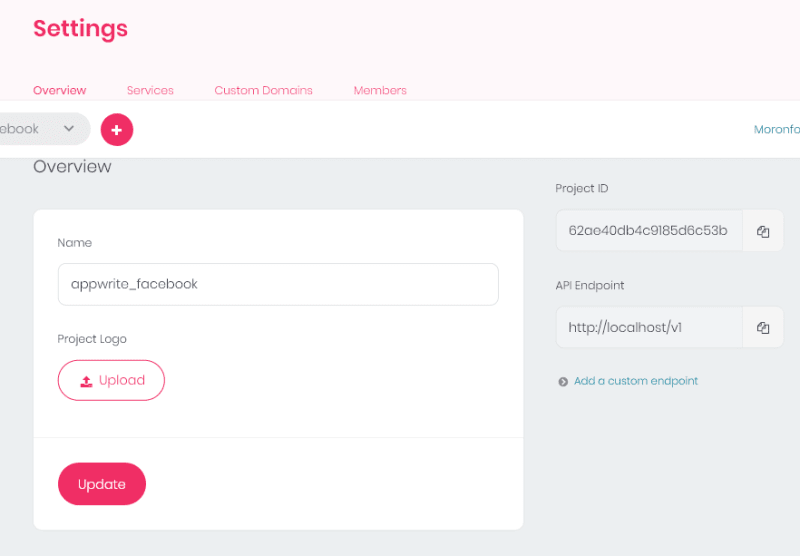
The project dashboard becomes visible on the console after project creation. We can access the inner page from the Settings tab at the top of the page.
The inner page allows us access to copy the Project ID and API Endpoint for use in our Nuxt.js application.
We will then proceed to create an init.js file in our Nuxt.js application’s root directory to initialize the Appwrite Web SDK by adding the code block below:
import { Appwrite } from 'appwrite';
export const sdk = new Appwrite();
sdk
  .setEndpoint('http://localhost/v1') // Replace this with your endpoint
  .setProject('***'); // Replace this with your ProjectID
Activating Facebook OAuth2 provider on Appwrite
We will navigate to the Users section on the main menu, where we can access the Settings tab and select from the list of auth providers.

From the OAuth2 providers, we will look out for the Facebook provider to update its settings.
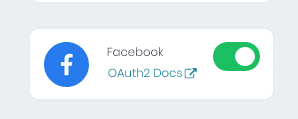
Toggling the Facebook provider will bring to view the App ID and App Secret fields to be filled. We will fill these fields shortly, but we need to take note of the “Facebook redirect URL” provided as we need it for authentication on the Facebook dashboard.

Creating an App on Facebook
Appwrite's Facebook OAuth provider requires us to create an application on Facebook from the developer's dashboard. Check out this comprehensive documentation on creating a Facebook developer's account and an application.
After creating the Facebook application, we click on the Settings > Basic tab.
From there, we will add the Facebook redirect URL from the Appwrite application to the site URL.

We will finish this setup by copying the App ID and App Secret. We will add these keys to the empty fields shown in our Appwrite Facebook Oauth2 settings.

Building Authentication in Nuxt.js
Our application will have two pages - the login page where authentication happens using the Appwrite Facebook provider and the second page where we display the user details.
Creating the login page
The login page is the application’s entry point where users get authenticated. To build this, we will update the pages/index.vue with the code below:
<template>
  <div class="bg-light-gray vh-100 pa3 tc">
    <h2>Facebook authentication with Appwrite</h2>
    <div class="br3 bg-white ba dark-gray b--black-10 shadow-3 w-100 w-60-m w-30-l mw5 center mt5 ph4 pv4">
      <p>Click on this button to login</p>
        <button class="f6 link dim br3 pv2 ph2 mb2 dib white bg-navy ba b--navy pointer mt3 mt0-l inline-flex items-center" @click="loginWithFacebook">
          <svg class="dib h2 w1" fill="currentColor" xmlns="http://www.w3.org/2000/svg" viewBox="0 0 16 16" fill-rule="evenodd" clip-rule="evenodd" stroke-linejoin="round" stroke-miterlimit="1.414"><path d="M15.117 0H.883C.395 0 0 .395 0 .883v14.234c0 .488.395.883.883.883h7.663V9.804H6.46V7.39h2.086V5.607c0-2.066 1.262-3.19 3.106-3.19.883 0 1.642.064 1.863.094v2.16h-1.28c-1 0-1.195.476-1.195 1.176v1.54h2.39l-.31 2.416h-2.08V16h4.077c.488 0 .883-.395.883-.883V.883C16 .395 15.605 0 15.117 0" fill-rule="nonzero"/></svg>
          <span class="f6 ml2 pr2">Login with Facebook</span>
        </button>
    </div>
  </div>
</template>
<script>
import {sdk} from '~/init.js'
export default {
  methods: {
    loginWithFacebook: async function(){
      try {
        await sdk.account.createOAuth2Session('facebook', 'http://localhost:3000/dashboard')
      } catch (error) {
        console.log(error)
      }
    }
  }
}
</script>
In the code block, we achieved the following:
- The
<template>tag contains the markup for displaying the login UI - Imported the Apprwite SDK initialized in the
init.jsfile. - We created a
loginwithFacebookasynchronous function that uses the imported Appwrite SDK; within this function, we added the AppwritecreateOAuth2Sessionmethod that received the following:-
facebook: this is the OAuth2 provider we would like users to use to sign in - A redirect URL where users are directed after successful authentication
-
Creating the dashboard page
Next, we will create a page to which users get directed after successful login. This page shows the user's name and email with a button that allows them to log out. To implement this, we will create a pages/dashboard.vue file and add the code below:
<template>
  <div class="bg-light-gray vh-100 pa3 tc">
    <h2 class="tc">Facebook authentication with Appwrite</h2>
    <div class="br3 bg-white ba dark-gray b--black-10 shadow-3 w-100 w-60-m w-30-l center mt5 ph4 pv4 mw6">
      <div class="f4 tl">
        <p class="navy fw7">Name:</p>
        <p>{{name}}</p>
        <p class="mt4 navy fw7">Email:</p>
        <p>{{email}}</p>
      </div>
      <button class="f6 link dim br3 pv2 ph3 mb2 dib white bg-navy ba b--navy pointer mt4 mt0-l inline-flex items-center" @click="logOutWithFacebook">
        Log out
        </button>
    </div>
  </div>
</template>
<script>
import {sdk} from '~/init';
  export default {
    data(){
      return{
        namme: '',
        email: '',
        response: ''
      }
    },
    mounted: function(){
        this.getUserSession()
    },
    methods: {
      getUserSession: async function(){
        try {
          this.response = await sdk.account.get()
          if (this.response) {
            this.name = this.response.name,
            this.email = this.response.email
          }

        } catch (error) {
          console.log(error)
        }
      },
      logOutWithFacebook: async function(){
        try {
          await sdk.account.deleteSession('current')
          this.$router.push('/')
        } catch (error) {
          console.log(error)
        }
      }
    }
  };
</script>
The snippet above does the following:
- Added the
<template>tag for displaying the user information - Imported the Appwrite SDK initialized in the
init.jsfile - Updated the data property with
name,email, andresponseto hold the user’s information - Created a
getSessionfunction which gets executed when the application is mounted,. this function fetches the logged-in user information for the current and updates the variables declared in thedataproperty with the information - Added the
logOutWithFacebookfunction, which is connected to Appwrite’sdeleteSessionmethod, thelogOutWithFacebookfunction logs the user out of the application and immediately routes the user to the home page
At this stage, the application should look the below:

Conclusion
This article explains how to add authentication to an application using Appwrite’s OAuth2 Facebook provider.
Resources
Here are some resources that might be helpful:


Top comments (0)