
If we want to change or switch jobs, a job board app is a section on a website where employers advertise jobs available to be filled by applicants. Several platforms post jobs like Upwork, Fiverr, LinkedIn jobs, etc.
In this article, we will learn how to build a job board platform using Next.js combined with Xata and Cloudinary.
Xata is a serverless database service. Cloudinary is a cloud-based media library that provides powerful visual experiences with its image and video API. Next is a frontend React framework responsible for building user interfaces for web and mobile applications.
Prerequisites
The following are required to follow along with this tutorial:
- Node >= 14.0.0 and npm >= 5.6 installed on your local machine
- Tailwind CSS. Follow the installation guide to install the dependencies
- Basic knowledge of JavaScript and React
- Create an account on Xata and Cloudinary. Sign-up for a free account
Demo
Check out how the deployed app functions.
Reference the Repository
For your use, you can reference the complete source code on GitHub.
Creating the Database
With the setup of your Xata account complete, head over to your workspace dashboard and create a new database. Name it whatever you like, and you can specify the region of the server location.

Next, create a table called Jobs that holds the data collection in a schema. Xata schemas describe each table in a database, expressed as code in JSON, which should look something like this:

Note: The auto-generated id is unique for each record in the table, otherwise known as the primary key.
Installation and Setup
Run this command to scaffold a new Next app in your terminal:
npx create-next-app <app-name>
After installation, navigate to the created directory and start the development server on port 3000 with this command:
    cd <app-name>

    yarn dev
Setup Xata Instance
To connect the job board app with Xata, let’s install the Xata software development kit (SDK) globally to work with all of the Xata commands it provides.
yarn global add @xata.io/cli
Next, run this command to authenticate you:
xata auth login
This command presents you with two choices via a prompt in your terminal:
- Create a new existing API key, or
- Paste in an existing one

Initialize the App
To initialize the app locally, the command below provides a series of prompts to set up Xata in your app.
xata init

Upload Images to Cloudinary
In your Cloudinary account, upload several images in the media library.

For this tutorial, these are some of the images you need:
https://res.cloudinary.com/terieyenike/image/upload/v1667490303/logos/cloudinary_cloud_glyph_blue_png.png
https://res.cloudinary.com/terieyenike/image/upload/v1667579350/peeps_ed6eci.png
https://res.cloudinary.com/terieyenike/image/upload/v1667490306/logos/xatafly.png
Creating the Page Layout
In this section, you will create a Layout component reused between pages to include the navigation bar and footer on every page.
In the root folder of this app, create a new folder called components and in there, include these three files, Footer.js, Header.js, and Layout.js.
Copy and paste the following code to these files:
    // components/Header.js
    import Link from 'next/link';

    const Header = () => {
      return (
        <div className='max-w-7xl mx-auto w-4/5 my-5'>
          <div className='flex items-center justify-between'>
            <Link href={'/'}>
              <span className='font-bold whitespace-nowrap tracking-wide'>
                All Dev Jobs
              </span>
            </Link>
            <Link href='/post-a-job'>
              <ul>
                <li className='bg-blue-600 text-gray-50 py-0.5 px-1 tracking-wide whitespace-nowrap'>
                  Post a Job
                </li>
              </ul>
            </Link>
          </div>
        </div>
      );
    };

    export default Header;
// components/Footer.js
import Link from 'next/link';
const Footer = () => {
const year = new Date().getFullYear();
return (
<div className='max-w-7xl mx-auto w-4/5 my-5'>
<footer className='flex items-center justify-center flex-col'>
<Link href={'/'} className='mb-2'>
<span className='font-bold whitespace-nowrap tracking-wide'>
All Dev Jobs
</span>
</Link>
<p className='text-xs text-center'>
Built by Teri. Reach out on Twitter:
<a
href='http://twitter.com/terieyenike'
target='_blank'
rel='noopener noreferrer'
className='underline text-blue-500'>
{' '}
@terieyenike
</a>
</p>
<address className='text-xs mt-3'>
<p>Copyright © {year}</p>
</address>
</footer>
</div>
);
};
export default Footer;
    // components/Layout.js
    import Footer from './Footer';
    import Header from './Header';

    const Layout = ({ children }) => {
      return (
        <div className='min-h-screen flex flex-col'>
          <div className='border-b border-gray-100'>
            <Header />
          </div>
          <main className='flex-grow   md:max-w-7xl md:mx-auto md:w-4/5 my-5 '>
            {children}
          </main>
          <div className='border-t border-gray-100'>
            <Footer />
          </div>
        </div>
      );
    };

    export default Layout;
These changes will only take effect in the browser once you import the Layout.js component into the application's entry point, index.js.
    // pages/index.js
    import Head from 'next/head';
    import Layout from '../components/Layout';

    export default function Home({ jobs }) {
      return (
        <div>
          <Head>
            <title>Job board</title>
            <meta name='description' content='Job board app' />
            <link rel='icon' href='/favicon.ico' />
          </Head>
          <Layout></Layout>
        </div>
      );
    }
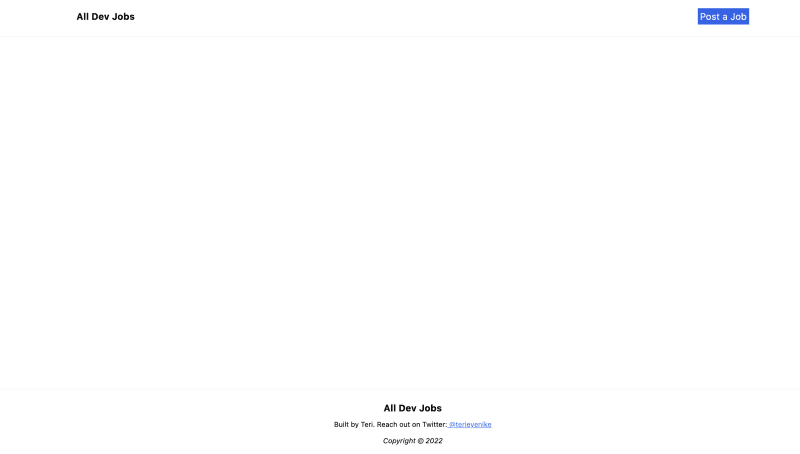
The job board app should look something like this:
Building the Frontend
The next phase for the job board app is to include the partner logos below the navigation bar. Within the components folder, create another folder called Companies and have the file Companies.js.
Copy and paste this code:
// components/Companies/Companies.js
import Image from 'next/image';
const LeadingCompanies = () => {
const images = [
{
id: 1,
img: 'https://res.cloudinary.com/terieyenike/image/upload/v1667490303/logos/cloudinary_cloud_glyph_blue_png.png',
alt: 'cloudinary',
},
{
id: 2,
img: 'https://res.cloudinary.com/terieyenike/image/upload/v1667490306/logos/xatafly.png',
alt: 'xata',
},
];
return (
<div>
<section className='py-3 flex items-center justify-center flex-col'>
<p>Trusted by the world's leading companies</p>
<div className='my-5 flex items-center'>
{images.map(({ img, id, alt }) => (
<Image
key={id}
src={img}
alt={alt}
width={50}
height={50}
className='flex-shrink-0'
/>
))}
</div>
</section>
</div>
);
};
export default LeadingCompanies;
The following occurs in the code snippet above:
- Import the Image component that Next provides
- Creates an object array that includes the URL of the companies logo
- Within the
LeadingCompaniescomponent that returns the HTML elements, we iterate through the image array using the .map function
Once again, the logos and text won’t appear on the frontend. You need to import the component in the index.js file.
    // pages/index.js

    // other imports
    import LeadingCompanies from '../components/Companies/Companies';

    export default function Home({ jobs }) {
      return (
        <div>
          <Head>
            <title>Job board</title>
            <meta name='description' content='Job board app' />
            <link rel='icon' href='/favicon.ico' />
          </Head>
          <Layout>
            <LeadingCompanies />
          </Layout>
        </div>
      );
    }
Recent changes to the project should look something like this:

Posting New Jobs
Let’s create a form component to handle the data submission into the Xata database. We’ll do this in pages/post-a-job.js.
Copy and paste this code:
https://gist.github.com/Terieyenike/4ccd9cd4ce05572c47a3db8c59235bd4
Above, we created the state for each input and textarea field using the useState hook. The useRouter hook enables access to the router object inside any function component in the app. It returns the page to the home screen upon successfully submitting the information to Xata.
Also, the function submits within the PostJob component connects the API route to insert a record with the .create().
Add the Job API Route
Let’s create a new file for the API route in pages/api/add-job.js. Copy and paste the following code:
    // pages/api/add-job.js
    import { getXataClient } from '../../src/xata';

    const handler = async (req, res) => {
      const xata = await getXataClient();
      const { title, company, location, technologies, website, description, date } =
        req.body;
      await xata.db.Jobs.create({
        title,
        company,
        location,
        website,
        description,
        technologies,
        date: new Date(),
      });
      res.end();
    };

    export default handler;
The essence of the code above is to handle the values from the data submitted from the request body using getXataClient with the data type from Xata.
Try submitting a record to Xata by clicking the Post a Job button. Fill in the data in the field and submit the form.
View the latest changes in the Xata jobs table.

Fetching and Displaying All Jobs
For fetching all the jobs from Xata, we need to import the getXataClient upon initialization of the app.
Update the pages/index.js file with the following code:
    // pages/index.js
    import { getXataClient } from '../src/xata';
    // other imports

    export default function Home({ jobs }) {
      console.log(jobs);
      return (
        <div>
          {/* Head elements with meta tags */}
          <Layout>
            <LeadingCompanies />
          </Layout>
        </div>
      );
    }

    export async function getServerSideProps() {
      const xata = await getXataClient();
      const jobs = await xata.db.Jobs.getAll();
      return {
        props: {
          jobs: jobs.map(({ replace, ...job }) => job),
        },
      };
    }
Above, getServerSideProps is a Next.js server-side rendering technique for data fetching required for dynamically rendered content. Within this async function, we query all the records using the .getAll() and return the variable jobs as a prop after iteration.
Now, pass jobs as a prop in the Home component and console.log its contents.
The results should return an array of objects in the browser:

Let’s now pass the jobs props into a component JobList we would create that will list all the submitted job data on the home screen.
Still, in pages/index.js, update the code with the following:
    // pages/index.js

    // other imports

    export default function Home({ jobs }) {
      return (
        <div>
          {/* Head elements with meta tags */}
          <Layout>
            <LeadingCompanies />
            <JobList jobs={jobs} />
          </Layout>
        </div>
      );
    }

    // getServerSideProps async function
Creating the Job List
The job list component will display all the jobs on the home page of the job board app. Within the components folder, create a file called JobList.js file in a folder called JobList.
Copy and paste the following code:
    // components/JobList/JobList.js
    import Link from 'next/link';

    const JobList = ({ jobs }) => {
      function reformatDate(fullDate) {
        const date = new Date(fullDate);
        return date.toDateString().split(' ').splice(1, 2).join(' ');
      }

      function getFirstLetter(character) {
        return character.charAt(0).toUpperCase();
      }

      return (
        <div>
          {jobs.length > 0 ? (
            <div>
              {jobs.map(
                ({ title, company, id, skills, date, location, technologies }) => (
                  <div key={id}>
                    <Link href={{ pathname: `job/${id}` }}>
                      <div className='flex justify-between text-sm sm:text-lg mb-4 bg-gray-100 p-5 border-2'>
                        <div className='flex'>
                          <p className='self-center bg-white py-2 px-4 mr-2'>
                            {getFirstLetter(company)}
                          </p>
                          <div>
                            <h2 className='font-bold mb-1'>{title}</h2>
                            <p className='mb-1'>{company}</p>
                            <span>{location}</span>
                            <ul className='mt-3'>
                              <li className='text-stone-900 text-xs sm:text-base'>
                                {technologies}
                              </li>
                            </ul>

                          </div>
                        </div>
                        <span className='text-gray-600'>{reformatDate(date)}</span>
                      </div>
                    </Link>
                  </div>
                )
              )}
            </div>
          ) : (
            <div className='flex items-center justify-center font-bold text-2xl'>
              <p>No data in the database</p>
            </div>
          )}
        </div>
      );
    };

    export default JobList;
With the code above, the following occurs:
- Passed in the props in the JobList component
- The function reformatDate gets the date from Xata as an argument and applies some methods to return only the month and day
- Also, the getFirstLetter function accepts an argument and returns the first letter of the company name and makes it a capital letter
- Within the component that returns the HTML element, we passed in a ternary operator the results of the jobs from Xata if it is present or displays No data in the database if no records exist

Creating a Single Job List
Here is all about displaying just a job when clicked from the home page, which means it will be dynamic for each record from the database.
Create a new file, [id].js, in a folder called job within the pages directory. Paste the following code:
    // pages/job/[id].js
    import { getXataClient } from '../../src/xata';
    import Layout from '../../components/Layout';

    const Job = ({ data }) => {
      function reformatDate(fullDate) {
        const date = new Date(fullDate);
        return date.toDateString().slice(4);
      }

      return (
        <Layout>
          <div className='max-w-7xl mx-auto w-4/5'>
            <div className='flex items-center flex-col justify-center mb-10'>
              <h2>{data.company}</h2>
              <p className='text-2xl'>{data.title}</p>
            </div>
            <p className='mb-3'>
              <span className='font-bold'>Posted: </span>
              {reformatDate(data.date)}
            </p>
            <p className='mb-3'>
              <span className='font-bold'>Job Location: </span>
              {data.location}
            </p>
            <ul className='mb-8'>
              <li className='text-stone-900 mr-2 text-xs sm:text-base'>
                <span className='font-bold'>Skills:</span> {data.technologies}
              </li>
            </ul>
            <h2 className='font-bold text-base mb-5'>Job Description</h2>
            <div>
              <p>{data.description}</p>
            </div>
            <section className='bg-gray-50 py-16 px-12 mt-10'>
              <div className='flex items-center flex-col justify-center'>
                <a
                  href={data.website}
                  target='_blank'
                  rel='noopener noreferrer'
                  className='bg-blue-600 text-white px-3.5 py-2 mb-2 flex-shrink-0'>
                  Apply for this position
                </a>
                <p className='text-center'>
                  Mention All Dev Jobs when applying for this job.
                </p>
              </div>
            </section>
          </div>
        </Layout>
      );
    };

    export default Job;

    export async function getServerSideProps(context) {
      const { id } = context.query;
      const xata = await getXataClient();
      const job = await xata.db.Jobs.read(id);
      return {
        props: {
          data: job,
        },
      };
    }
The code above makes use of the getServerSideProps with the context parameter, and this object results in using the query string. Afterwards, the function returns a props reading the dynamic route of the id and getting one record from Xata using the read().
Clicking on a job listing opens a new page with the job URL with an id like this: http://localhost:3000/job/rec_cdkpfenc1bb2cvnnat0g.
Remember that in the JobList.js component, we linked this individual page with the Link component from Next.

Conclusion
In this article, we learned how to use Xata and Cloudinary to build a job board with the ability to switch between individual pages of the app using a dynamic route provided by Next.js.


Latest comments (0)