This article dives into the more advanced Git topics, providing valuable tips and tricks for using Git on the command line. By going through concrete examples, you will become more confident while working on the command line, greatly increasing overall productivity in your daily job.
What is Git?
Git is, by far, the most widely used free and open source modern distributed version control system (VCS), an efficient and trustworthy tool that helps you keep track of all the changes in your source code during software development.
It was initially developed by Linus Torvalds in 2005, for development of the Linux kernel, and with significant help from other developers such as Junio Hamano, it is still an actively maintained project on GitHub. From the early stages, Git was designed to handle both small and very large projects with speed and efficiency, and since then, it has become a de facto standard tool of its kind.
GUI vs Command Line
In spite of its popularity, Git is often criticized for being difficult to learn, primarily due to its command line nature which makes it hard for new users to become familiar with all of the commands and options Git has to offer. This is the main reason why a lot of developers, soon after being introduced to Git, start looking for a GUI client, convinced that it will make them faster and more productive. And it often does, at least in the beginning, as there are a lot of modern third-party tools that offer great user experience and cutting edge features, such as GitHub Desktop, SmartGit, GitKraken or Git Tower, to name a few.
The problem is that in the long run, instead of investing their time into learning Git, developers become dependent on these GUI clients and fail miserably the very first moment they have to act quickly from command line, without having the right tool at their disposal. That is why it is always a good idea to take it one step at a time and to practice Git from command line first, because over time, it will make you feel more comfortable and confident while using Git from terminal, greatly increasing productivity in your daily job. In other words, if you wish to become a Git master, you will have to go back to basics and build up from there.
Using aliases
One of the very first things we all probably did using Git was setting up our name and email address. It is your first day at a new job, and the colleague sitting next to you tells you that the best way to configure Git is by passing the --global option, for example:
$ git config --global user.name "Your Name"
$ git config --global user.email "your.email@example.com"
If this was the first and last time you've used the config command, there is a chance that you are unaware of the fact that Git can be configured on three levels: local, global and system. Since "local" is the default option, you do not have to specify --local when invoking the git config command from your repository:
$ git config --local user.name "Your Name"
$ git config user.email "your.email@example.com"
This command will create a "config" file under your $REPO/.git directory, after which it will take precedence over --global setting for every value it contains.
This becomes extremely useful as soon as you have to start working on 2 separate projects, where one of the repositories requires that you configure your corporate email, and the other one your client's email address.
In practice, it is completely fine to configure most of the Git settings on a global level, but it is worth remembering that each Git configuration level overrides values in the "upper" level:
local > global > system
Global configuration level is usually more suitable for creating aliases that can replace specific commands which are used often, but are long and cumbersome to type. For example, Git's log command offers a lot of information by default, but it can be rather difficult to get the high-level overview of all commit messages, which is what we usually want. For this reason, most people often use git log with some additional options, in order to simplify the output or to limit the number of results, e.g.
$ git log --oneline -n10
But we can take this a step further, and instead of constantly typing the --oneline option or limiting the number of results to 10, we can specify the exact kind of information we need by globally configuring a hist alias that will show us the last 10 commits accompanied by a nice graph:
$ git config --global alias.hist \
  "log --graph --date=short --abbrev=10 \
  --format='%C(yellow)%h %C(white)%ad %C(green)%s %C(cyan)[%an, %ar]%C(white)%d' \
  -n10"
I know that this might scare you at first, so try removing the "format" part from the command to make it more readable.
Executing this command will allow us to use the hist alias to display the latest 10 commits from Git history. We can even override the number of displayed commits to show the last 20 commits, for example:
$ git hist -n20
Overriding specific parameters is certainly useful, but it is worth noting that Git allows you to pass parameters to an alias:
$ git config --global alias.echo '!f() { text=${1-Hello World}; echo $text; }; f'
Again, the example above might seem confusing at first, but if you focus only on the part between the quotation marks, you will see that we are defining an anonymous function by specifying its body between curly braces, and we are then invoking it. Individual commands are separated by semicolons, and we have defined a variable "text" which takes the first parameter or defaults to "Hello World" if the parameter has not been passed. The function then prints value of variable "text" to the console using standard system command echo.
As you can see, this enables us to write powerful functions that accept one or more parameters, and by utilizing both Git and OS level commands, you can easily create custom Git plug-ins that may be used by your entire team for some specific tasks.
We can try out this concept by defining the find alias that will allow us to quickly search for a particular commit message using case-insensitive text:
$ git config --global alias.find '!f() { \
  text=${1}; \
  results=${2-10}; \
  git log --all --full-history --oneline -n$results \
  -i --grep="$text"; \
  }; f'
Now, by using the following command, we can search through all commit messages that contain a specific word, such as "refactor", limiting output to only 5 results:
$ git find "refactor" 5
Reset
One of the things that often make beginners uncomfortable (perhaps even scared) while using Git is its tendency to keep track of all the file changes in a repository. In other words, even if you only wish to compile the project without modifying any code, Git is still going to detect all artifacts produced after compilation and report that there are new files present in your repository.
Manually deleting files or adding them to .gitignore is often the easiest or quickest solution, but if there are a lot of random untracked files in your working directory, you should be aware of the following command which helps you clean-up dirty working tree:
$ git clean -f -d
In the command above, parameter -f means "force", and it will remove any untracked files, as well as any subdirectories that become empty as a result.
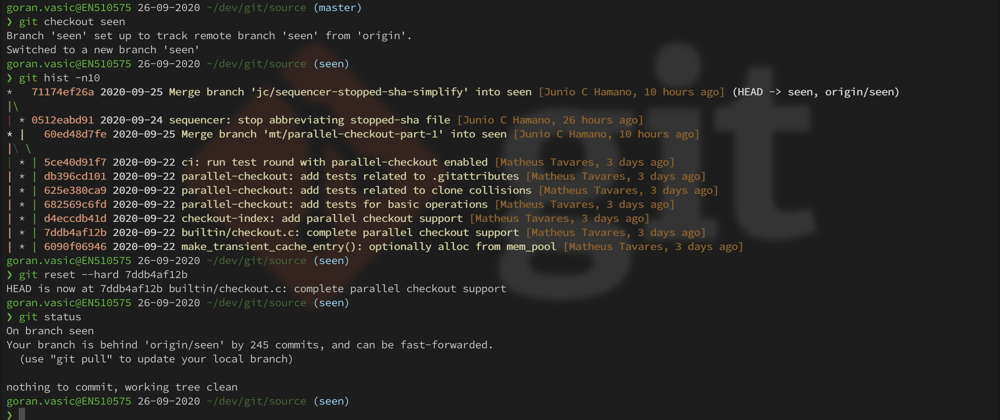
You should not worry about losing any changes on your existing files, they will remain intact. On the other hand, in a situation where you would like to revert all changes performed on tracked files while leaving the untracked files as they were, you can run:
$ git reset --hard HEAD
You can omit HEAD because it is implied, and it is not mandatory to use uppercase letters. Finally, if you wish to undo all of your changes, you can reset the entire working directory to the state of the latest commit by adding all files in the working directory to the staging area first, and then performing a hard reset on them:
$ git add .
$ git reset --hard
Undo
Having an "undo" option in software is such a common feature these days that we often end up shocked once we realize that it is not available. Valuable data can be lost and irreversible damage can be made. This is one of the main reasons why beginners hesitate so much when someone asks them to commit their changes in Git. What if they have just made a huge mistake, and there is no way back?
The good news is that you can revert your changes even after committing them, the same way as you can revert all changes to your tracked or untracked files. The only difference this time is that, instead of referencing the last commit using HEAD, you should perform a hard reset to a previous commit, which can be referenced using HEAD^:
$ git reset --hard HEAD^
There is a more convenient notation for referencing one or more commits, such as HEAD~1, HEAD~2 etc. This way of undoing changes almost feels like you are peeling the layers of an onion. But what if, instead of completely removing a layer, you only wish to change (update) the last commit? You can step back and re-commit your changes by performing a soft reset to a previous commit:
$ git reset --soft HEAD~1
Similar result can also be achieved by amending previous commit. In a situation when you forget to add some important files to a commit you've already created, or if there are some changes that logically belong to a previous commit, it is a better route to modify the existing commit by adding these changes to staging area, and then committing them using the --amend option:
$ git add .
$ git commit --amend
Git will prompt you to update the old commit message, after which it will replace the old commit with a new one. This new commit will also get a unique hash, as a result of containing both old and new changes, so it is important to note that undoing or modifying your commit history is fine as long as you haven't published the old commit history to a remote repository.
In case that you did, Git will refuse to overwrite your remote repository's commit history and will warn you as soon as you try to push your newest changes. At this point, you should coordinate with your team members, because some of your colleagues might have already pulled your previous changes and started working on top of them.
You can imagine how problematic this can become when you have a large team of developers contributing to the same repository. That is why, in these type of situations, it is always better to revert a particular commit using the following command:
$ git revert <commit>
Reverting a commit will not modify the existing commit history – it will create a new commit on top of it. This new commit will do the complete opposite of all of the changes performed in a referenced commit, so it is completely safe to push it to your remote.
Reflog
By now, you should already feel more comfortable using Git. At least, you should no longer be afraid of creating new commits, knowing how easy it is to undo all of your changes. Actually, you should start committing more frequently, because now you know that you can always reset or modify a commit, but if you perform a hard reset on any uncommitted changes, they are lost for good. As a matter of fact, the only way that you can completely lose your changes in Git is by NOT committing them, because even if you perform a hard reset to HEAD~4, you can always go back.
This is possible because Git keeps a local journal of everything you’ve done in your repository after cloning it. This journal is called "reflog", and it allows you to see all of the actions you've performed on a particular branch by using the following command:
$ git reflog <branch-name>
If branch is not specified, HEAD is implied. Reflog also preserves the order in which you've performed all actions, with HEAD@{0} being the most recent one, and HEAD@{1} the one before it. This way, even if you undo the last 4 commits by hard resetting to HEAD~4, you can always undo that step by performing a hard reset to HEAD@{1}. What's more, if you perform a hard reset to HEAD@{1} one more time, it will again remove the last 4 commits because this was the last action you did before performing an undo. Using reflog for undoing your actions is so convenient that it simply deserves its own alias. The following command creates an alias undo which performs a hard reset to a previous action:
$ git config --global alias.undo '!f() { \
  git reset --hard $(git rev-parse --abbrev-ref HEAD)@{${1-1}}; \
  }; f'
Now, you can simply type git undo whenever you hard reset to a particular commit.
Working with branches
It is possible that you have been in a situation where your fellow developer is unable to perform a quick bug fix because he/she is currently on a separate branch, working on a specific feature, and current code changes are half-done and not ready to be committed. This the right time to introduce them to git stash. Stashing takes your modified tracked files and staged changes and saves it on a stack of unfinished changes:
$ git stash save <comment>
You can then checkout another branch, fix the bug, and reapply your stashed uncommitted changes to a previous branch or anywhere you want using:
$ git stash apply stash@{0}
To view all stashed items, use git stash list, and to apply and remove the latest stashed item from the stack, use git stash pop.
There is one more situation which might slow you down, and that is when your code has a dependency on a particular commit that has been published to the remote repo. The only problem is that you are on a separate branch and do not want to merge all of the changes that came before and after that commit. You can easily solve this problem using Git's cherry-pick feature:
$ git cherry-pick <commit>
This will take a particular commit that exists on a separate branch and copy it on top of your branch. It's content will be exactly the same as in the original commit, but it will have a different SHA-1 hash.
Fixing merge conflicts
Copying code from other branches or merging your branch with another one can often result in merge conflicts. This happens when both branches contain commits that are changing the same code.

Logically, Git will ask you to choose which changes to keep. The easiest way to resolve conflicts is by keeping either your or their changes:
$ git checkout --ours <file>
$ git checkout --theirs <file>
The other way is to manually edit all files that were modified by both sides. Git has a fairly unknown feature called Reuse Recorded Resolution (ReReRe):
$ git config --global rerere.enabled true
It allows you to ask Git to remember how you’ve resolved a hunk conflict so that the next time it sees the same conflict, Git can automatically resolve it for you.
Rewriting history
Another way of solving the problem with merge conflicts is to resolve them on your branch before you even create a pull request. Git’s pull --rebase allows you to avoid creating merge commits, thus making Git history appear linear:
$ git pull origin develop --rebase
Invoking this command will temporarily remove your code changes and apply the latest changes that have been published to develop branch, simulating a scenario where you have just created a new branch from the latest develop. Then, one after another, it will try to add all of your commits back, stopping whenever a merge conflict occurs. After fixing a potential conflict, you should continue the process by typing git rebase --continue. Eventually, you should end up having the latest changes from "develop", followed by all of your "conflict-free" commits.
Pulling with --rebase is such a common workflow that there is a dedicated configuration option for it:
$ git config --global branch.autosetuprebase always
Another way of rewriting history is by using Git's interactive rebase feature. Among other things, it allows you to reorder, rename, fix, drop or squash commits from your local history:
$ git rebase -i <parent-commit>
Again, after fixing a potential conflict, simply run git rebase --continue. Also make sure not to rebase already published commit history, do this only on your local changes.
Git hooks
Git allows you to enforce code quality on your project using Git hooks. All hooks are scripts, stored in the .git/hooks subdirectory of the Git repository. You can use existing sample scripts by removing ".sample" suffix from their name, or write your own, such as "http://git.io/validate-commit-msg".
Git hook from the example above will warn you if your commit message is longer than 50 characters, and will ask you to modify the message.

Another example could be setting up a server-side hook that gets triggered whenever you push code to your remote repo. It will read all commit messages, and automatically resolve a particular JIRA using a plugin whenever it detects the word "Fix" accompanied by a JIRA number. It is worth mentioning that client-side hooks are not copied when you clone a repository. If your intent with these scripts is to enforce a policy, you'll probably want to do that on the server side.


Top comments (0)