
In this blog we will be creating a Portfolio website using React and the tools provided by the GitHub Student Developer Pack.

What is the GitHub Student Developer Pack? Never heard of it.
Real-world tools such as cloud hosting services, domain names, specific software can be expensive for students. That’s why GitHub created the Student Developer Pack in partnership with other tech companies to give students free access to the best developer tools in one place.
That’s great. What all is included in the Student Developer Pack?
Currently there are 23 services and tools included in the pack which can be used by a student. Some of the services are, 50$ Digital Ocean credits, a free Heroku Hobby Dev Dyno for two years, a free .me domain name, emailing via SendGrid with higher limits, private continuous integration builds through Travis CI and many more.

Awesome. How can I apply for it?

To apply for the GitHub Student Developer Pack, you need to be a current student. If you are not a student, then you aren’t eligible for the pack. Apply for the student developer pack at https://education.github.com/pack. Click on get the pack and follow the onscreen requests. If you do not have a school-issued email address that ends in .edu, you will also need a valid school ID, or other proof of enrollment like a picture of your schedule, which will be reviewed by the GitHub team. It takes 24 to 48 hours for the request to get reviewed.
A summary about what’s coming next
In this blog, we will be creating a Portfolio website using React and the tools provided by the GitHub Student Developer Pack. For this, we will be using the free Heroku dyno from the Pack and free Namecheap domain. We will also use GitHub to push our code and deploy to GitHub pages.

Getting Started
Before we dive deep into the coding part, we will first install the required tools. I will be using the yarn package manager. You can find instructions for installing yarn at https://yarnpkg.com/lang/en/docs/install/
1. React
Install and create a react app named portfolio using the following command
yarn create react-app portfolio
2. Heroku CLI
Execute the following command to install Heroku CLI on Ubuntu 16+ OS.
curl [https://cli-assets.heroku.com/install-ubuntu.sh](https://cli-assets.heroku.com/install-ubuntu.sh) | sh
Instruction for all other OS can be found at https://devcenter.heroku.com/articles/heroku-cli
Make sure to login to Heroku CLI using heroku login command.
3. Install gh-pages and fontawesome package using
yarn add gh-pages
yarn add @fortawesome/fontawesome-svg-core
yarn add @fortawesome/free-solid-svg-icons
yarn add @fortawesome/react-fontawesome
yarn add @fortawesome/free-brands-svg-icons
Coding The Portfolio
We will be using Bootstrap 4’s resume template to build our portfolio. The template can be found here. https://github.com/BlackrockDigital/startbootstrap-resume
Copying jquery and bootstrap
Create directories css and js inside public folder and copy the following files to it from the downloaded template.
1. bootstrap.min.css
2. resume.min.css
3. bootstrap.bundle.min.js
4. jquery.easing.min.js
5. jquery.min.js
6. resume.min.js
Linking the added dependencies
Open the index.html inside the public directory and link the copied css and js as follows:
For CSS
<link href="%PUBLIC_URL%/css/cssfilename.css" rel="stylesheet">
For Javascript
<script src="%PUBLIC_URL%/js/jsfilename.js"></script>
Adding template to React Component based structure
The Bootstrap resume template needs to be split into components. Create a directory Components in the src directory where all the components will reside. We will split it into the following 7 Components:
1. Sidebar.js
2. Landing.js
3. Experience.js
4. Education.js
5. Skills.js
6. Interests.js
7. Awards.js
Using json as a user data store
Create a json file inside thesrc directory with the name profileData.json. This file will hold the portfolio data for the user. The structure of json file is as follows:
{
    "landing": {
        "firstName": "First Name",
        "lastName": "Last Name",
        "phoneNumber": "Phone Number",
        "bio": "User's descriptive bio",
            "email": "User's email",
            "linkedin": "User's LinkedIn",
        "github": "User's GitHub"
    },
    "experience": [
        {
                "position": "Web Developer",
                "organization": "Company one",
                "aboutWork": "Details about work here",
                "fromDate": "Date of starting",
                "toDate": "Ending Date"
        },
        {
            "position": "App Developer",
            "organization": "Company 2",
            "aboutWork": "Details about work here",
            "fromDate": "Date of starting",
            "toDate": "ending date"
        },
        ...
        ...
            ...
    ],
    "education": [{
            "university": "University or School Name",
            "degree": "Major",
            "gpa": "GPA",
            "fromDate": "Date of start",
            "toDate": "Date of completion"
        },
            ...
            ...
            ...
    ],
    "skills": [{
            "name": "skill1"
        },
        {
            "name": "skill2"
        },
            ...
            ...
            ...
    ],
    "interests": {
        "paragraphOne": "Descriptive detail about your interests for paragraph one",
        "paragraphTwo": "Descriptive detail about your interests for paragraph two"
    },
    "awards": [{
            "awardDetail": "Your first award"
        },
        {
            "awardDetail": "Your second award"
        },
            ...
            ...
            ...
    ]
}
Each key of the json is named for the component of the data that is going to be used.
Modifying App.js
App.js is the main file which imports all the other components and defines the structure of the website.
import React, { Component } from 'react';
import Sidebar from './Components/Sidebar';
import Landing from './Components/Landing';
import Experience from './Components/Experience';
import Education from './Components/Education';
import Skills from './Components/Skills';
import Interests from './Components/Interests';
import Awards from './Components/Awards';
import profileData from './profileData.json';

class App extends Component {
  constructor(props) {
    super(props);

    this.state = {
      landingData : profileData.landing,
      experience : profileData.experience,
      education : profileData.education,
      skills : profileData.skills,
      interests : profileData.interests,
      awards : profileData.awards
    }
  }
  render() {
    return (
      <div className="App">
        <Sidebar sidebarData={this.state.landingData} />
        <div className="container-fluid p-0">
          <Landing landingData={this.state.landingData} />
          <hr className="m-0" />
          <Experience experience={this.state.experience} />
          <hr className="m-0" />
          <Education education={this.state.education}/>
          <hr className="m-0" />
          <Skills skills={this.state.skills} />
          <hr className="m-0" />
          <Interests interests={this.state.interests} />
          <hr className="m-0" />
          <Awards awards={this.state.awards} />
        </div>
      </div>
    );
  }
}

export default App;
First, we import all the created components and the user’s data from the json created. In the constructor, we set the state for each component with its respective data from the json. This data from the state will be passed to components as props. All the components are then arranged per the Bootstrap’s template.
Creating Sidebar.js
The Sidebar component consists of the code for the sidebar of the website. This is the complete nav tag from the template. Before copying the code from the template, make sure to make it jsx compliant. class should be renamed to className or you can use this https://magic.reactjs.net/htmltojsx.htm to convert your HTML to JSX.
In the constructor of every component, the data from the props will be assigned to a variable through which it will be added to its relevant position in the jsx.
For the Sidebar component, this is done as this.sidebarData = props.sidebarData. It is done in a similar way for all the other components.
Replace all the hardcoded names and fields with the data from the JSON. To do this, reference your JSON data through the variable to which the props passed to the component are assigned. The syntax to reference a variable in JSX is referencing the variable within curly braces. So the first name of the user in the sidebar can be accessed as {this.sidebarData.firstName}. All other data fields can be accessed and replaced by the data from the JSON in a similar way.
Find Sidebar.js on GitHub at this link.
Creating Landing.js
Landing.js is created in a similar way. The first section with id about is the needed landing section HTML. First the data from the props are loaded in the constructor and added on to thejsx of the component.
Find Landing.js on GitHub at this link.
Creating Skills.js
Skills of a user in the JSON data is a list of dictionaries. To add this to the jsx the loaded data from the props is looped over using a map and the data is inserted in the jsx.
{
  this.skills.map((data, index) => (
    <div key={index} className="col-6">
      <p className="list-item">
        <FontAwesomeIcon icon={faCheckCircle} color="green" />
        <span className="ml-3">{data.name}</span>
      </p>
    </div>
  ))
}
where this.skills is the skills data of a user loaded from profileData.json
In a similar way that other components are created. Run the server using yarn start to see your portfolio at http://localhost:3000 in your browser.
Using GitHub Student Developer Pack
Using Namecheap to get free **.me** domain
Go to https://education.github.com/pack/offers and look for Namecheap. Get a free domain name by connecting your GitHub account on Namecheap.
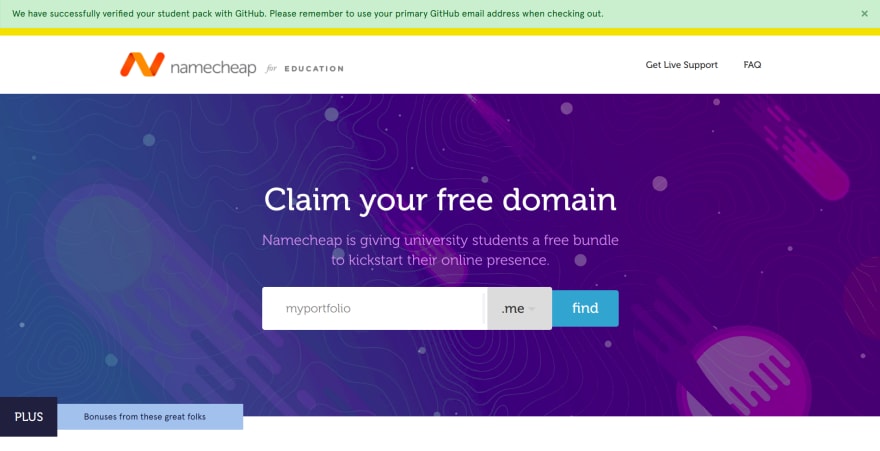
Authorize Namecheap and then find your free domain. After getting your domain, go to your domains list and click on manage to manage your domain.
Click on Advanced DNS tab and find Host Records. Click Add new Record button to add new records. Add the following records:
| Type | Host | Value | TTL |
| CNAME Record | www | githubusername.github.io | 30 |
| A record | @ | 185.199.108.153 | automatic |
| A record | @ | 185.199.109.153 | automatic |
| A record | @ | 185.199.110.153 | automatic |
| A record | @ | 185.199.111.153 | automatic |
Replace githubusername.github.io with your actual GitHub username. After this, your domain is ready to be used with GitHub Pages.
Using GitHub to host your portfolio using GitHub pages.
In the root directory of your project, initialize a git repository as follows
git init. Head over to GitHub and create an empty repository with the name githubusername.github.io, here replace githubusername with your actual GitHub username. Copy the git link for your repo and add it to your local git repo as follows
git remote add origin <git link>
Create a file with name CNAME in the root of your directory and add your namecheap domain name to it, in the format yournamecheapdomain.me and save it.
Add 2 scripts predeploy and deploy to your scripts in package.json as follows.
"predeploy": "yarn run build",
"deploy": "gh-pages -d build"
Note: If your repo is githubusername.github.io then use the following script instead of above one. githubusername.github.io repo can only be hosted from master branch and this will avoid the issue of you encountering readme instead of website on accessing the domain.
"predeploy": "yarn run build",
"deploy": "gh-pages -d build -b master"
Both the scripts should be inside the scripts key of package.json. Also add a homepage key to package.json and set it to http://yournamecheapdomain.me/
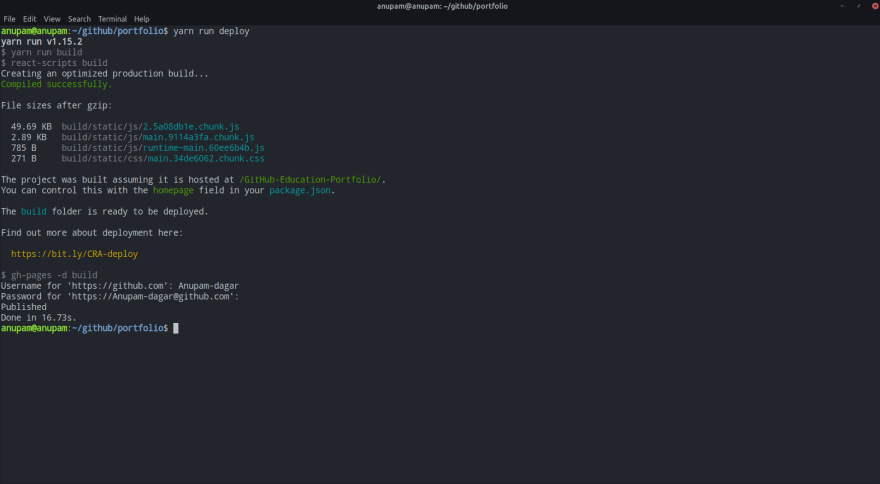
Run yarn run deploy to push your code to gh-pages branch and host it from it. Head over to http://yournamecheapdomain.me/ to see your hosted portfolio.
Push your code to master by doing the following steps:
git add -A
git commit -m "Push portfolio code"
git push origin master
Hosting your portfolio on Heroku
With the GitHub Student Developer Pack, you get a free Hobby Dev Dyno for Heroku. Headover to Heroku on https://education.github.com/pack/offers and connect your GitHub account with Heroku.
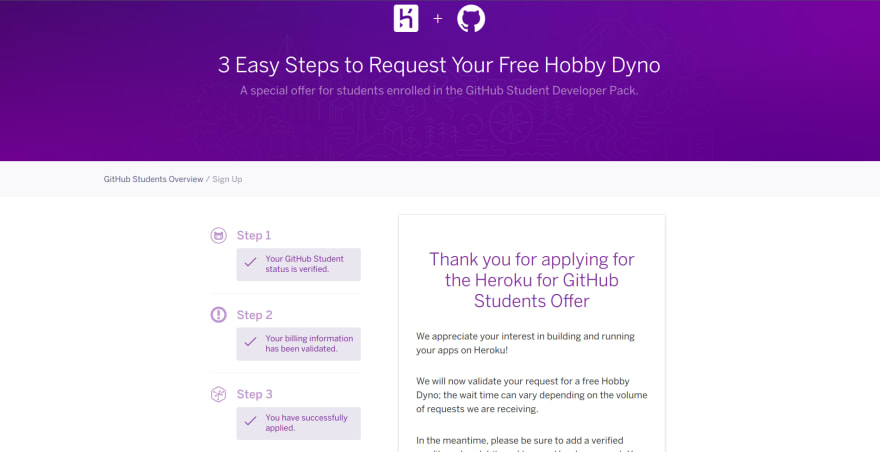
The process involves a manual verification by the Heroku team and may take a day or two to get approved. After the request gets approved, the app is ready to be deployed on your Heroku account with a Hobby Dev Dyno.
To deploy your app, make sure to login to Heroku CLI. Also, add a new object inside package.json as follows:
"engines" : {
    "npm": "6.4.1",
    "node": "10.5.2"
}
You can get your node version by running node -v and npm version by running npm -v in your terminal.
Create a Heroku app by executing heroku create appname where appname is your choice of appname for your portfolio. Commit your code if you haven’t yet and do git push heroku master. Wait for Heroku to complete the deployment.
Run heroku open to open your app hosted on Heroku.
That’s it, it’s as simple as that.
GitHub Pages deployed version is at http://anupamdagar.com/GitHub-Education-Portfolio/
Heroku Deployed version is at https://studentpackportfolio.herokuapp.com/
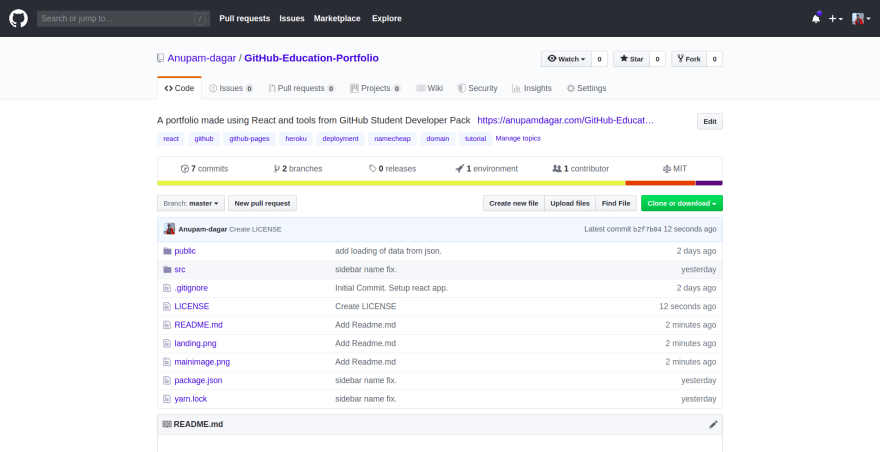
The complete source code for the app is on GitHub at Anupam-dagar/GitHub-Education-Portfolio


Top comments (9)
Great post! I currently have a portfolio site that was made with HTML, CSS, JS, Bootstrap.
I'm just wondering why you chose to make a portfolio site with React (i.e. would it be beneficial to update my site and use React as well?).
Glad you liked it. My main aim with this was to provide reader a quick introduction with how different services in GitHub Student Developer pack can be used through a single project. It's completely not neccessary to use React for building a portfolio. It was easier for me to explain using React. Shifting to React is a completely personal choice. My personal portfolio was using html,css,js for long time until I shifted to Gatsby based website recently.
Basically every company uses frameworks, I dont know one that doesn't. Showing that you have skills in a framework like react is good.
Fair point, thanks!
I am getting readme when I deploy GitHub pages. Can someone help me debug
Hi Arjun.
This is the most asked doubt to me by the readers. The difference between the blog and readers ques was in the part that readers were trying it for
githubusername.github.iorepo which I didn't in the blog.For
githubusername.github.iorepo, it can only be deployed by master branch while by default gh-pages library deploy to the gh-pages branch.Changing your deploy script to
gh-pages -d build -b mastershould resolve this issue.I will add this to the blog soon.
Thank you for reading the blog.
Thanks for the reply. I anyways deployed via Netlify. Great Article btw !
Great one!!
Beautiful ❤️