
When you think about a web application, a graph database doesn’t usually spring to mind. Instead, most people just take the familiar route of using an SQL database to store information. While this is perfectly acceptable for most use cases there are sometimes those that would see tremendous benefits by using a graph database.
In this tutorial, I will show you how to make a basic web application using Flask that stores all of its information in a graph database. To be more precise we are using Memgraph DB, an in-memory database that can easily handle a lot of information and perform read/write instructions quite quickly.
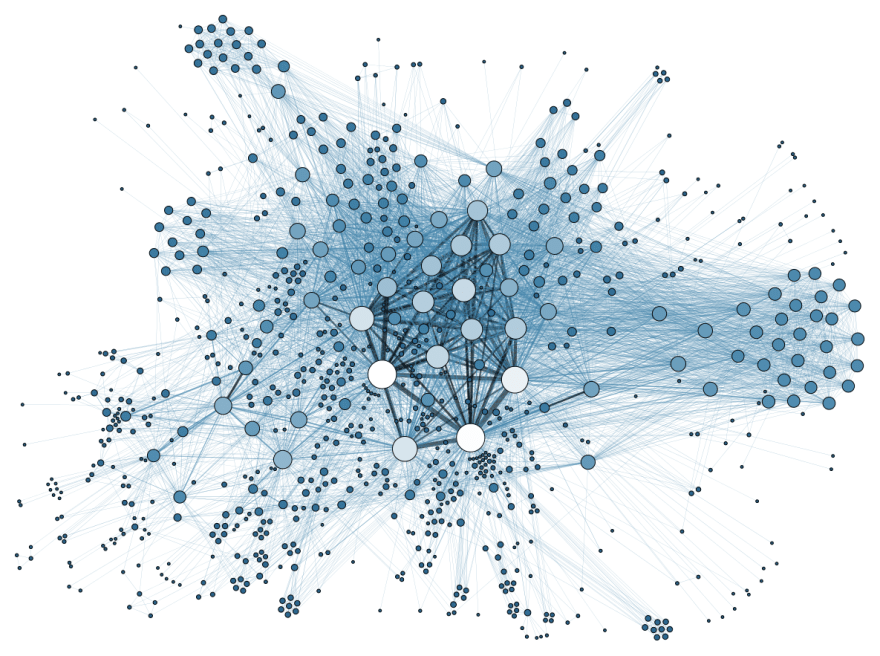
Our use case is a Social Network Graph (in the code referred to as SNG for convenience) representing users and the connections between them. Usually, such a graph would contain millions of relationships and the algorithms that are performed on them don’t do well with data being stored in relational databases.
In this tutorial, I will show you step by step how to build a simple Python web application from the bottom up so you get a basic understanding of the technologies that are used. You can also find all of the code here if you don't want to work on it as you go through the tutorial. If at any point in this tutorial you have a question or something is not working for you, feel free to post on StackOverflow with the tag memgraphdb.
Prerequisites
Because we are building a complete web application there is a number of tools that you will need to install before we begin:
- Poetry: a tool for dependency management and packaging in Python. It allows you to declare the libraries your project depends on and it will manage (install/update) them for you.
- Flask: a very powerful web framework that provides you with tools, libraries, and technologies used in web development. A Flask application can be as small as a single web page or as complex as a management interface.
- Docker and Compose: an open platform for developing, shipping, and running applications. It enables us to separate our application from our infrastructure (host machine). If you are installing Docker on Windows, Compose will be already included. For Linux and macOS visit this site.
- Memgraph DB: a native fully distributed in-memory graph database built to handle real-time use-cases at enterprise scale. Follow the Docker Installation instructions on the Quick Start page. While it's completely optional, I encourage you to also install Memgraph Lab so you can execute openCypher queries on the database directly and see visualized results.
Creating the Project Structure and Handling Dependencies
Sometimes standard packaging systems and dependency management in Python can be confusing for beginners so we decided to use Poetry.
To start building our project structure choose a working directory and run:
poetry new sng-demo
Now you should have a directory with the following content:
sng-demo
├── pyproject.toml
├── README.rst
├── sng_demo
│  └── __init__.py
└── tests
   ├── __init__.py
   └── test_poetry_demo.py
In this tutorial, we won’t use the testing functionalities so go on ahead and delete the directory tests as well as the file README.rst.
Now we need to add the dependencies for our project. Given that we are going to run the app inside a Docker container we don't need the dependencies installed locally, only inside the container. Copy the files project.toml and poetry.lock and place them in the root directory of the project. The only other thing we need to do about dependency management is to tell Docker how to run Poetry on startup so it can install/update all the necessary dependencies inside the container.
Dockerizing an Application
In the root directory of the project create two files, Dockerfile and docker-compose.yml. At the beginning of the Dockerfile, we specify the Python version and instruct the container to install CMake, poetry, mgclient and pymgclient. Poetry is necessary to manage our dependencies inside the container while CMake and mgclient are required for pymgclient, the Python driver for Memgraph DB.
You don’t have to focus too much on this part just copy the code to your Dockerfile:
FROM python:3.7

#Install CMake
RUN apt-get update && \
  apt-get --yes install cmake

#Install poetry
RUN pip install -U pip \
  && curl -sSL https://raw.githubusercontent.com/python-poetry/poetry/master/get-poetry.py | python
ENV PATH="${PATH}:/root/.poetry/bin"

#Install mgclient
RUN apt-get install -y git cmake make gcc g++ libssl-dev && \
  git clone https://github.com/memgraph/mgclient.git /mgclient && \
  cd mgclient && \
  git checkout 5ae69ea4774e9b525a2be0c9fc25fb83490f13bb && \
  mkdir build && \
  cd build && \
  cmake .. && \
  make && \
  make install

#Install pymgclient
RUN git clone https://github.com/memgraph/pymgclient /pymgclient && \
  cd pymgclient && \
  python3 setup.py build && \
  python3 setup.py install
Next, we define the working directory with:
WORKDIR /app
COPY poetry.lock pyproject.toml /app/
The second command will enable us to cache the project requirements and only reinstall them when pyproject.toml or poetry.lock are changed.
RUN poetry config virtualenvs.create false && \
  poetry install --no-interaction --no-ansi
We don’t need to create a virtual environment because our application is already isolated by being in a Docker container. To disable it virtualenvs.create needs to be set to false.
The second line in the command ensures that Poetry asks us no interactive questions while installing/updating dependencies and it makes the output more log friendly.
COPY . /app
EXPOSE 5000
ENTRYPOINT [ "poetry", "run" ]
This is where we essentially create all the directories and files inside of our container. The EXPOSE command informs Docker that the container listens on the specified network port at runtime.
Next, we need to create a docker-compose.yml file. Compose is a tool for defining and running multi-container Docker applications. With Compose, you use a YAML file to configure your application’s services. Then, with a single command, you create and start all the services from your configuration. For our project, we need two services. One is the web application (sng_demo) and the other a database instance (memgraph).
If you followed the instructions on how to setup Memgraph DB with Docker correctly you only need to add the following code to your docker-compose.yml file to run the container:
version: '3'
services:
  memgraph:
    image: "memgraph"
    ports:
      - "7687:7687"
  sng_demo:
    build: .
    volumes:
      - .:/app
    ports:
      - "5000:5000"
    environment:
      MG_HOST: memgraph
      MG_PORT: 7687
    depends_on:
      - memgraph
When it comes to the ports key, there is an important distinction between the HOST_PORT and the CONTAINER_PORT. The first number in the key is the HOST_PORT and it can be used to connect from your host machine to the service (for example with Memgraph Lab). The second number specifies the CONTAINER_PORT which is used for service-to-service communication. More precisely, our service sng_db can use this port to access the service memgraph and connect to the database.
The environment key contains MG_HOST and MG_PORT which represent environment variables in the service’s container. They store the memgraph service address and port which are needed to establish a database connection.
The depends_on key is used to start services in dependency order because we need the database to start before the web application.
The build key allows us to tell Compose where to find the build instructions as well as the files and/or folders used during the build process. By using the volumes key, we bypass the need to constantly restart our image to load new changes to it from the host machine.
Finally, we have a dockerized project that utilizes Poetry! This approach is great for development because it enables us to run our project on completely different operating systems and environments without having to worry about compatibility issues.
Web Development with Flask
Flask is very simple to use so why not create a Hello World! page to try out our Docker+Poetry setup.
In the project root directory create a file called app.py with the following code:
from flask import Flask

app = Flask(__name__)


@app.route('/')
@app.route('/index')
def index():
   return "Hello World"
First, we imported the Flask class and then created an instance of it. The route() decorator tells Flask what URL should trigger our function.
Now, we need to tell Docker how to run our app. This can be done by creating a simple script in the project root directory. Let’s call it start.sh:
#!/bin/bash
export FLASK_APP=app.py
export FLASK_ENV=development
flask run --host 0.0.0.0
Setting FLASK_ENV to development will enable the debug mode. This makes Flask use an interactive debugger and reloader.
Setting FLASK_APP to app.py specifies how to start the application.
We need to tell Docker when and how to run this script so put the following code in your Dockerfile after the line EXPOSE 5000 :
ADD start.sh /
RUN chmod +x /start.sh
The command chmod +x makes the script executable by setting the right permission.
To execute the script, add the following command after the line ENTRYPOINT [ "poetry", "run" ]:
CMD ["/start.sh"]
That’s it! Our first web page is ready so let’s start our app to make sure we don’t have any errors.
In the project root directory execute:
docker-compose build
The first build will take some time because Docker has to download and install a lot of dependencies.
After it finishes run:
docker-compose up
The URL of our web application is http://localhost:5000/. When you open it there should be a message Hello World! which means that the app is up and running.
Now it’s time to create a more complex web page that will contain our Social Network Graph. In the project root directory create a folder called templates and in it a file with the name base.html. This will be our base HTML template for other pages. Copy the code:
<!doctype html>
<html lang="en">

<head>
    <meta charset="utf-8">
    <meta name="viewport" content="width=device-width, initial-scale=1, shrink-to-fit=no">

    <link rel="stylesheet" href="https://stackpath.bootstrapcdn.com/bootstrap/4.3.1/css/bootstrap.min.css">
    <link rel="stylesheet" href="/static/css/style.css">

    <script src="https://code.jquery.com/jquery-3.3.1.slim.min.js"></script>
    <script src="https://stackpath.bootstrapcdn.com/bootstrap/4.3.1/js/bootstrap.min.js"></script>
    <script src="https://d3js.org/d3.v4.min.js" charset="utf-8"></script>

    <title>Social Network Graph Demo</title>
</head>

<body>
    {% block content %} {% endblock %}
</body>

</html>
We also need to create an HTML file for our actual landing site that utilizes this base file and an accompanying JavaScript file. Create the HTML file in the same location with the name index.html and copy the following code into it:
{% extends 'base.html' %} {% block content %}
<div class="container">
  Hello World!
</div>
<script src="/static/js/index.js" charset="utf-8"></script>
{% endblock %}
In the project root directory create a folder called static with one subfolder called js and another called css. The js folder will contain all of the needed local JavaScript files while the css folder will contain all the CSS stylesheets. In the js folder create a file called index.js and in the css folder one called style.css. Just leave them empty for now.
If you want to find out more about web development with Flask I suggest you try out this tutorial.
Your current project structure should like this:
sng-demo
├── sng_demo
│  └── __init__.py
├── templates
│  └── index.html
├── static
│  ├── css
│  │  └── style.css
│  └── js
│     ├── base.html
│     └── index.js
├── app.py
├── docker-compose.yml
├── Dockerfile
├── poetry.lock
├── pyproject.toml
└── start.sh
The Data Model and Database Connection
In the app directory sng-demo create a folder called database. This folder will contain all of the modules that we need to communicate with the database. You can find them here and just copy their contents. They are closely related to the database driver and if you wish to examine them a bit more I suggest you look up the driver documentation here.
In the app directory sng-demo create the module db_operations.py. This is where all the custom database related commands will be located.
The sng_demo directory should look like this:
sng_demo
├── __init__.py
├── db_operations.py
└── database
   ├── __init__.py
   ├── memgraph.py
   ├── connection.py
   └── models.py
We will use a very simple data model that can be easily upgraded later on.
There is only one node with the label User and each User has two properties, a numerical id and a string name. Nodes are connected with edges of the type FRIENDS:

There are several methods to populate our database (more on that here) but we will be doing it manually by executing openCypher queries so you can get a better understanding of how to communicate with the database. You will find all the necessary queries to populate the database in the files data_big.txt and data_small.txt. The former just has a larger dataset than the latter.
In the project root directory create a folder called resources and place the files in it. Now you can add an import method to your web application.
In the module db_operations.py add the following import and method:
import json

def clear(db):
  command = "MATCH (node) DETACH DELETE node"
  db.execute_query(command)

def populate_database(db, path):
  file = open(path)
  lines = file.readlines()
  file.close()
  for line in lines:
      if len(line.strip()) != 0 and line[0] != '/':
          db.execute_query(line)
The method clear() deletes any data that might have been left in the database before populating it.
The method populate_database() reads all of the openCypher queries in the specified file and executes them.
In the module app.py change the imports and method index() to:
from flask import Flask, render_template, request, jsonify, make_response
from sng_demo.database import Memgraph
from sng_demo import db_operations

app = Flask(__name__)


@app.route('/')
@app.route('/index')
def index():
    db = Memgraph()
    db_operations.clear(db)
    db_operations.populate_database(db, "resources/data_small.txt")
    return render_template('index.html')
Now every time we refresh our index page the database is cleared and repopulated with new data. While this is not suitable for the production stage, it is highly useful during development because it will enable us to make changes in the data without having to restart the whole application or working directly on the database.
If you want to examine the graph before proceeding, I suggest you open Memgraph Lab and run the query MATCH (n1)-[e:FRIENDS]-(n2) RETURN n1,n2,e;.
The result should be:
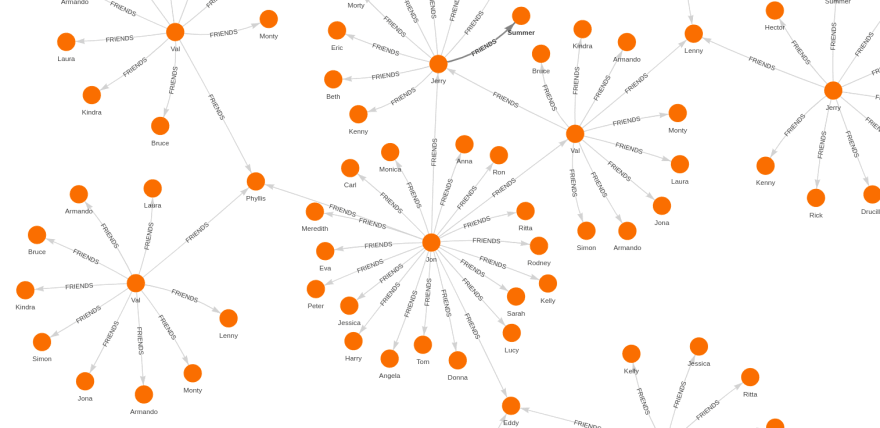
We also need a method in our app to fetch all the relevant data from the database when a client requests it.
Let’s call it get_graph() and place it in the db_operations.py module:
def get_graph(db):
   command = "MATCH (n1)-[e:FRIENDS]-(n2) RETURN n1,n2,e;"
   relationships = db.execute_and_fetch(command)

   link_objects = []
   node_objects = []
   added_nodes = []
   for relationship in relationships:
       e = relationship['e']
       data = {"source": e.nodes[0], "target": e.nodes[1]}
       link_objects.append(data)

       n1 = relationship['n1']
       if not (n1.id in added_nodes):
           data = {"id": n1.id, "name": n1.properties['name']}
           node_objects.append(data)
           added_nodes.append(n1.id)

       n2 = relationship['n2']
       if not (n2.id in added_nodes):
           data = {"id": n2.id, "name": n2.properties['name']}
           node_objects.append(data)
           added_nodes.append(n2.id)
   data = {"links": link_objects, "nodes": node_objects}

   return json.dumps(data)
First, we need to execute the openCypher query MATCH (n1)-[e:FRIENDS]-(n2) RETURN n1,n2,e; and return its results from the database. These results will contain all the edges in the graph as well as all the nodes that are connected to those edges. Nodes that don't have connections will not be returned and that's ok for now.
The results (the object relationships) are in the form of a generator which we can iterate over and access its contents by using the node/edge names specified in our initial query (n1,n2 and e).
We also need to check if a node has already been appended to the node_objects list because multiple edges can contain (point to or from) the same node. All of the objects are stored in key-value pairs suitable for later JSON conversion.
The final result is a JSON object containing:
-
links: all the relationships that are in the graph as pairs ofsourceandtargetid properties, -
nodes: all the nodes from the graph that form relationships with other nodes.
In your app.py module add the following method:
@app.route("/get-graph", methods=["POST"])
def get_graph():
   db = Memgraph()
   response = make_response(
       jsonify(db_operations.get_graph(db)), 200)
   return response
This method is responsible for responding to POST requests from the client. It returns the graph data that we fetched from the server in the previous method.
Now let's do something with this data! Copy the contents for your index.js file from here
and the style.css file from here.
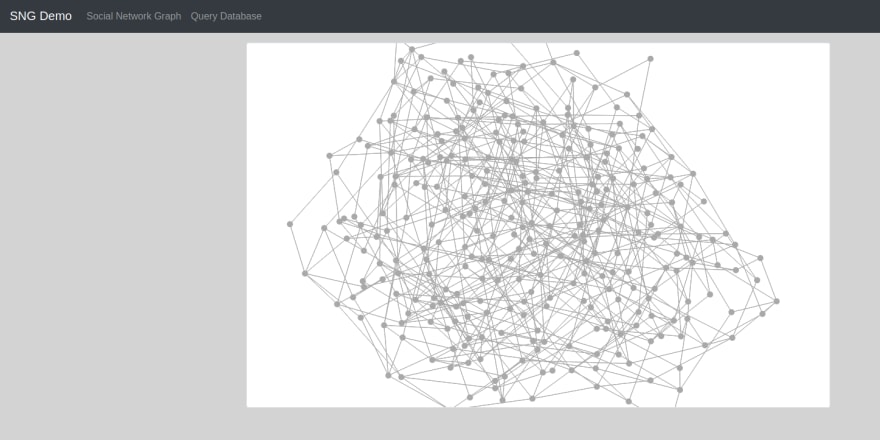
We also need to add the actual SVG graphic to our page so change the index.html file to:
{% extends 'base.html' %} {% block content %}
<div class="container">
    <svg class="border rounded mt-3" width="960" height="600" style="background-color:white"></svg>
</div>
<script src="/static/js/index.js" charset="utf-8"></script>
{% endblock %}
I won't go into much detail about how to use D3.js so if you want to find out more I encourage you to visit their website.
In short, we fetch all the nodes and edges from the database and add them to an SVG element. The visual representation of the graph is made by simulating how physical forces act on particles (charge and gravity). You can drag and drop the nodes, hover over them to see the value of their name property, zoom in and out of the graph and move the SVG graphic.

Additional Functionalities
Go ahead and copy the file query.js to the directory static/js and query.html to the directory templates. You can find the updated base.html file here. Copy the necessary methods from the db_operations.py module and app.py module.
After you made the changes, just open http://localhost:5000/query/ and see the results.
This page will make your life easier if you want to debug the data being fetched from the server. It returns all the nodes or edges and shows them in a JSON highlighted format.

Your current project structure should like this:
sng-demo
├── resources
│  ├── data_big.py
│  └── data_small.txt
├── sng_demo
│  ├── __init__.py
│  ├── db_operations.py
│  └── database
│     ├── __init__.py
│     ├── memgraph.py
│     ├── connection.py
│     └── models.py
├── templates
│  ├── base.html
│  ├── index.html
│  └── query.html
├── static
│   ├── css
│   │  └── style.css
│   └── js
│      ├── index.js
│      └── query.js
├── app.py
├── docker-compose.yml
├── Dockerfile
├── poetry.lock
├── pyproject.toml
└── start.sh
Conclusion
Even though graph databases have been around for a long time, they are still not considered a mainstream tool in software development. Relational database-management systems model data as a set of predetermined structures. Complex joins and self-joins are necessary when the dataset becomes too inter-related. Modern datasets require technically complex queries which are often very inefficient in real-time scenarios.
Graph databases offer powerful data modeling and analysis capabilities for many real-world problems such as social networks, business relationships, dependencies, shipping, logistics... and they have been adopted by many of the world's leading tech companies. With this tutorial, I hope to shed some light on how easy it is to integrate a graph database in your development process and I encourage you to try it out yourself.
As I said at the beginning, feel free to ask us any questions about this tutorial or Memgraph in general on StackOverflow with the tag memgraphdb or on our official forum. Good luck with your coding!


Latest comments (0)