What is web scraping?
In a nutshell, web scraping means automating the task of collecting useful information from websites. There are many use cases for web scraping, but here are just three ideas: collecting prices from various online stores for a price comparison site, getting flight times and hotel listings for a travel site, even building a search engine like Google!
Getting started with web scraping is easy, and the process can be broken down into two main parts:
- acquiring the data using an HTML request library or a headless browser
- parsing the data to get the exact information you want
What is this article about and What are we going to do?
This article is all about showing you how to get data from search engine results pages. To do that, we’ll need a scraper.
You can use whatever scraping tool you feel most comfortable with. Just know that from here on, the article will focus on how to get the results using WebScrapingAPI. It’s a simple, fast, and reliable REST API that collects HTML from any web page and handles all possible problems in the backend. So, we don’t have to worry about proxy management, Javascript rendering, or CAPTCHAs.
So, let’s learn how to get the SERP data using WebScrapingAPI in Node.js!
What is SERP or SERP data?
Every second, Google processes 60,000+ searches. That means that this year there will be over 2 trillion Google searches.
Well, that’s a lot of Googling! It also means that as a digital marketer or website developer, it’s more important than ever to understand Google SERP features and how they affect your webpage.
A SERP or Search Engine Results Page is the result page's data returned by Search Engines. When you type in a keyword into Google, it will fetch the most relevant data, structured into SERPs.
Besides getting answers to the random questions that might pop into your head, Google SERPs are invaluable for many other reasons:
- Search Engine Optimization
- Competitor analysis
- Paid ads monitoring
- Keyword research
So, SERP data can help you in two significant ways: keeping an eye on the competition and getting ahead in the search results.
Sometimes we need more SERP data that can be easily copied manually. In that case, the most efficient way to collect information is to develop algorithms that do if for as. But it’s not always easy as search engines regularly change their SERP structure and search algorithms, meaning that we have to change our own code to match them. No need to panic, though. WebscrapingAPI will help extensively here.
What is WebScrapingAPI ?
It’s one of the leading REST APIs for web scraping. WebScrapingAPI collects the HTML from any web page with a simple API call and provides ready-to-process data to everyone in your company or maybe for personal use. It’s easy to integrate into your own scripts, making it a versatile and reliable tool in any developer’s arsenal.
Perks of WebScrapingAPI
- Make sure you never get blocked
- 100M+ rotating proxies at your fingertips
- Easy to use, easy to customize
- Around the globe geotargeting
- 99.99% Uptime
- Automatic Scaling
- 24/7 Monitoring
- Collect data from any type of webpage
For more info, check out WebScrapingAPI.
So let’s proceed with the tutorial to integrate WebScrapingAPI in Node.js.
How to use WebScrapingAPI to scrape SERP data
In the following section, we will use Node.js and some libraries like got and Cheerio to create the script that will get all the data from a SERP and format it nicely to be as understandable as possible.
Let’s see how all the information presented above can be converted to tangible results:
Step 1: Get API Access Key
The API Key is required to access the API. So first, we will create an account and get the API Access Key from the dashboard.
- Register for free at webscapingapi.com
- Get the API access key
You can start your free trial with 5000 requests and access to all functionalities to test the product.
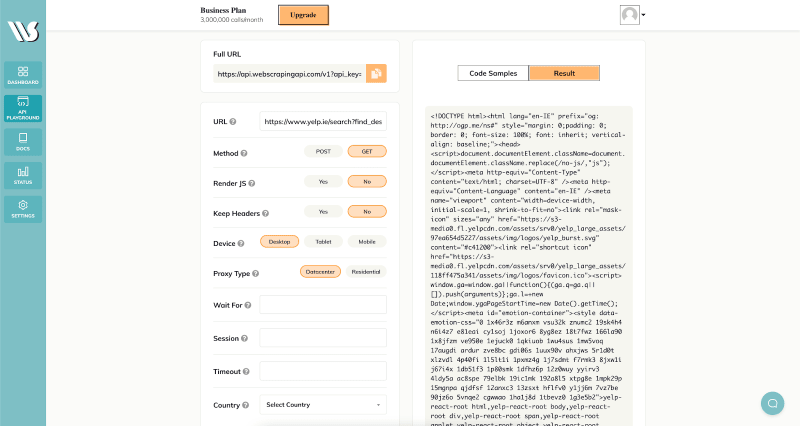
After successfully creating a free account, access the API Playground page through the button on the dashboard’s left side. The page should look like this:

As the name suggests, this is the place where we can test the scraping tool before creating our script. Let’s copy the URL presented above in the URL input (left column), scroll down a little bit, and smash the “Send API Request” button. This action should return a result that looks like this:
Now let’s build the script that is going to do the work for us.
Step 2: Check if you have installed node and npm
Run these commands in terminal/Command line
node -v
and
npm -v
Output might look like
v14.16.1
If you get the version as the command’s output, you have already installed node and npm. If you receive any errors, please try installing them from Node.js, and once you have installed Node.js, run npm install -g npm to install npm and repeat Step 2.
Step 3: Set up new npm Package
npm init -y
This command will do a lot of the hard work at the back and create a package.json file which will keep track of all the dependencies and DevDependencies we will install throughout our program.
Step 4: Install the packages
npm i got cheerio
or
npm install got cheerio
With Cheerio installed, it’ll be much easier to parse the HTML we extract.
Step 5: Go to your favorite Code Editor/IDE
Let's make a file named serpScraper.js and include the modules into our script to get the results page’s HTML.
const got = require('got');
const $ = require('cheerio');
If you face any problem using cheerio, sometimes require('packageName').default needs to be exported. So if you get an error about cheerio is not a function or $ is not a function. Try using this:
var $ = require('cheerio');
if (typeof $ != "function") $ = require("cheerio").default;
Step 6: Use the API Key
We will initialize API Access Key to create the client to access the API.
(async () => {
const params = {
    api_key: "YOUR_API_KEY_HERE”,
    url: "https://www.google.com/search?q=nodejs&rlz=1C1SQJL_enIN868IN868&oq=nodejs&aqs=chrome.0.69i59l3j69i60j69i61j69i65j69i60j69i61.987j0j7&sourceid=chrome&ie=UTF-8",
    country: "US",
}

const response = await got('https://api.webscrapingapi.com/v1?', {searchParams: params});

// Storing the results in a variable
const html = response.body;
Make sure to replace the “YOUR_API_KEY_HERE” string with the API key provided to you by the service. You can find it on the dashboard page.
Step 7: Inspect the Page
Let’s get back to the page we want to scrape. Right-click on the first heading and click ‘Inspect.’ This is how we can select only the information we need.
You’ll get a new window containing the HTML source code:
- We will inspect the heading and get the class-name used to identify the heading from the source code.

For the Heading, we got the class-name
h3.LC20lb.DKV0Md. The heading is contained inside theh3tag, and the class-name is.LC20lb.DKV0Md.In
.LC20lb.DKV0Md,.LC20lband.DKV0Mdare two different classes.
- We will inspect the link and get the class-name used to identify the paragraph from the source code.


- For the links we got class-name as
yuRUbfwhich contain anotheratag inside of it. So we will use this syntax to get the link from the page.yuRUbf > a.
Step 8: Store the headings and links in separate arrays
As we have already inspected and got to know the class-name of the heading and link, we can now extract the information from the source code. We can go through and grab a list of links to all Node.js topics by getting them from each element’s “attribs” section.
Let's use them to extract the headings and links.
  const length = $("h3.LC20lb.DKV0Md", html).length;
  const links = [];
  const headings = [];

  for (let i = 0; i < length; i++) {
    links.push($(".yuRUbf > a", html)[i].attribs.href);
    headings.push($("h3.LC20lb.DKV0Md", html)[i].children[0].data);
  }
Step 9: Format the information
As we have extracted the information from the source code, we need to format it in a human-readable format.
function print(links, headings) {
    for(let i = 0; i < length; i++) {
      console.log(`${i+1}. ${links[i]} :- ${headings[i]}`);
    }
  }

print(links, headings);
Step 10: Put it all together.
Here is the complete code to make WebScrapingAPI request and get response result data.
const got = require("got");
var $ = require("cheerio");
if (typeof $ != "function") $ = require("cheerio").default;

(async () => {
  const params = {
    api_key: "YOUR_API_KEY_HERE",
    url: "https://www.google.com/search?q=nodejs&rlz=1C1SQJL_enIN868IN868&oq=nodejs&aqs=chrome.0.69i59l3j69i60j69i61j69i65j69i60j69i61.987j0j7&sourceid=chrome&ie=UTF-8",
    country: "US",
  };

  const response = await got(
    "https://api.webscrapingapi.com/v1?",
    { searchParams: params }
  );

  const html = response.body;
  const length = $("h3.LC20lb.DKV0Md", html).length;
  const links = [];
  const headings = [];

  for (let i = 0; i < length; i++) {
    links.push($(".yuRUbf > a", html)[i].attribs.href);
    headings.push($("h3.LC20lb.DKV0Md", html)[i].children[0].data);
  }

  function displayResults(links, headings) {
    for(let i = 0; i < length; i++) {
      console.log(`${i+1}. ${headings[i]} :- ${links[i]}`);
    }
  }

  displayResults(links, headings);
})();
Output:
1. Node.js :- https://nodejs.org/
2. Node.js - Wikipédia :- https://fr.wikipedia.org/wiki/Node.js
3. NodeJs : le guide complet pour tout comprendre du javascript ... :- https://practicalprogramming.fr/nodejs
4. Qu'est-ce que Node.js et pourquoi l'utiliser ? - Kinsta :- https://kinsta.com/fr/base-de-connaissances/qu-est-ce-que-node-js/
5. Apprendre NodeJS | Grafikart :- https://grafikart.fr/tutoriels/nodejs
6. Tutoriel : Node.js sur Windows pour débutants | Microsoft Docs :- https://docs.microsoft.com/fr-fr/windows/dev-environment/javascript/nodejs-beginners-tutorial
As you can see, scraping SERP data using WebScrapingAPI is quite easy. We have to use a scraping API to get the HTML content, parse the response, get the relevant information from each element on the page and console everything or store it in arrays or json format.
The results might differ depending on the location of the proxy. The results stated above are for a US proxy but if you choose a proxy from another location results will be different.
Conclusion
To take your startup or business to their peak nowadays takes a lot more than having a great product. There are endless opportunities depending on how creative you can be. Some of the most important and healthy strategies business owners should pay attention to are:
- creating an online presence;
- knowing the Substitutes for and Complimentary products to your own;
- working on providing the most value for the lowest price;
- knowing about the demand and supply for your product- this helps in knowing when to modify the pricing according to the demand and supply chains;
- having a complete understanding of the competition’s advantage.
All of these strategies can prove vital in one’s business. It feels good to know that web scrapers offer a huge help in tackling these problems. Adding automation to the data gathering process may be the easiest step to improve their business.
We try to offer a helping hand by creating the necessary tools for these kinds of jobs. Thank you for reading the article, and remember that you can use this code too with a WebScrapingAPI free trial. Give it a spin and see if it works well for your use case!
Additional Resources
- WebScrapingAPI Introduction
- WebScrapingAPI Documentation
- Using WebScrapingAPI with Javascript
- More articles on WebScrapingAPI


Oldest comments (1)
Thanks for the tutorial! If anyone interested learn how to webscrape from scratch in Javascript, feel free to read this post as well: serpapi.com/blog/web-scraping-in-j...