1. Overview
Whatever you do on Google Cloud and Kubernetes, you have to understand the roots and focus on the basic knowledge.
Kubernetes is an open source project (available on kubernetes.io) which can run on many different environments, from laptops to high-availability multi-node clusters; from public clouds to on-premise deployments; from virtual machines to bare metal.
2. Objectives
To package and deploy your application on Kubernetes Engine, you must:
- Package your app into a Docker image
- Run the container locally on your machine (optional)
- Upload the image to a registry
- Create a container cluster
- Deploy your app to the cluster
- Expose your app to the Internet
- Scale up your deployment
- Deploy a new version of your app
3. Practice demo
3.1. Package your app into a Docker image
To use Google Cloud Shell:
Go to the Google Cloud Platform Console.
Click the Activate Google Cloud Shell button at the top of the console window.
![]()
A Cloud Shell session opens inside a new frame at the bottom of the console and displays a command-line prompt.
- Create your Node.js application
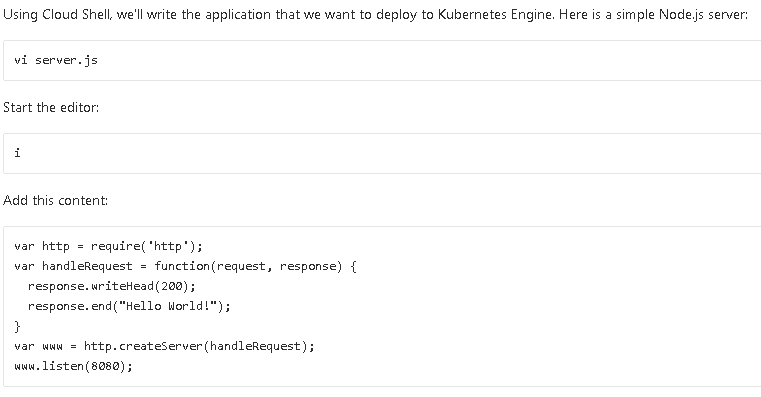

- Create a Docker container image
Next, create a Dockerfile which describes the image that you want to build. Docker container images can extend from other existing images, so for this image, we'll extend from an existing Node image.
![]()
Start the editor.
![]()
Add this content :

Save this Dockerfile:
![]()
Build the image with the following, replace PROJECT_ID with your lab project ID, found in the console:
docker build -t gcr.io/PROJECT_ID/hello-node:v1 .

3.2. Run the container locally on your machine (optional)
Run a Docker container as a daemon on port 8080 from our newly-created container image:
docker run -d -p 8080:8080 gcr.io/PROJECT_ID/hello-node:v1
Output look something like this:
![]()
Take advantage of the Web preview feature of cloud shell to see your results:

Or use curl or wget from your Cloud Shell prompt:
This is the output you should see :
Hello World!
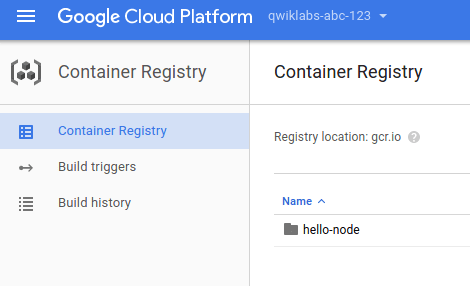
3.3. Upload the image to a registry
Make sure to replace PROJECT_ID with your lab project ID, found in the console
gcloud docker -- push gcr.io/PROJECT_ID/hello-node:v1
The initial push may take a few minutes to complete. You'll see the progress bars as it builds.

The container image will be listed in your Console: Tools > Container Registry. Now you have a project-wide Docker image available, which Kubernetes can access and orchestrate.
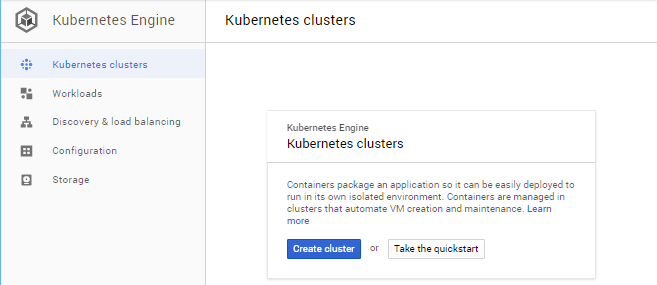
3.4. Create a container cluster
Now you're ready to create your Container Engine cluster. A cluster consists of a Kubernetes master API server hosted by Google and a set of worker nodes. The worker nodes are Compute Engine virtual machines.
Navigate to the Kubernetes clusters section of the console and wait for the system to initialize (it should only take a few seconds).

Create a cluster with two n1-standard-1 nodes (this will take a few minutes to complete):
gcloud container clusters create hello-world \
--num-nodes 2 \
--machine-type n1-standard-1 \
--zone us-central1-f

The console output should look like this:

You can also create this cluster through the Console, image shown above: Kubernetes Engine > Kubernetes clusters > Create cluster.
Now you have a fully-functioning Kubernetes cluster powered by Kubernetes Engine:

3.5. Deploy your app to the cluster
To deploy and manage applications on a Kubernetes Engine cluster, you must communicate with the Kubernetes cluster management system. You typically do this by using the kubectl command-line tool.
A Kubernetes pod is a group of containers tied together for administration and networking purposes. It can contain single or multiple containers. Here we'll use one container built with your Node.js image stored in our private container registry. It will serve content on port 8080:
kubectl run hello-node \
--image=gcr.io/PROJECT_ID/hello-node:v1 \
--port=8080

3.6. Expose your app to the Internet
By default, the pod is only accessible by its internal IP within the cluster. In order to make the hello-node container accessible from outside the Kubernetes virtual network, you have to expose the pod as a Kubernetes service.
From Cloud Shell we can expose the pod to the public internet with the kubectl expose command combined with the --type="LoadBalancer" flag. This flag is required for the creation of an externally accessible IP:

To find the publicly-accessible IP address of the service, request kubectl to list all the cluster services:

The EXTERNAL-IP may take several minutes to become available and visible. If the EXTERNAL-IP is missing, wait a few minutes and try again.
You should now be able to reach the service by pointing your browser to this address: http://:8080

3.7. Scale up your deployment
One of the powerful features offered by Kubernetes is how easy it is to scale your application. Suppose you suddenly need more capacity for your application. You can tell the replication controller to manage a new number of replicas for your pod:
![]()
You can request a description of the updated deployment :

You can also list the all pods :

3.8. Deploy a new version of your app
At some point the application that you've deployed to production will require bug fixes or additional features. Kubernetes helps you deploy a new version to production without impacting your users.
First, let's modify the application. Edit the server.js by starting the editor:
![]()

Now we can build and publish a new container image to the registry with an incremented tag (v2 in this case):
Make sure to replace PROJECT_ID with your lab project ID, found in the Console and done sequence 2 steps:

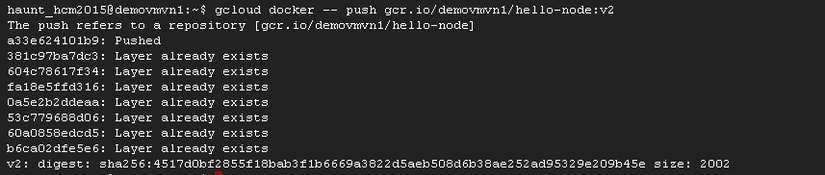
Building and pushing this updated image should be quicker as we take full advantage of caching.
Kubernetes will smoothly update our replication controller to the new version of the application. In order to change the image label for our running container, we will need to edit the existing hello-node deployment and change the image from gcr.io/PROJECT_ID/hello-node:v1 to gcr.io/PROJECT_ID/hello-node:v2
To do this, use the kubectl edit command. It opens a text editor displaying the full deployment yaml configuration. It isn't necessary to understand the full yaml config right now, just understand that by updating the spec.template.spec.containers.image field in the config we are telling the deployment to update the pods with the new image:
kubectl edit deployment hello-node
Edit /tmp/kubectl-edit-fplln.yaml file

Change old line: image: get.io/demovmvn1/hello-node:v1 to image: get.io/demovmvn1/hello-node:v2
After making the change, save and close this file:
:wq
This is the output you should see:

Open browser to watch result:

4. Reference document:
[1] Deploying a containerized web application: https://cloud.google.com/kubernetes-engine/docs/tutorials/hello-app


Top comments (0)