Introduction
I was asked at work recently by someone completely new to DevOps and coding in general - "Why would you use Terraform? It is so much easier to do things in the portal."
Today, we will be exploring my personal favourite feature of Terraform - the fact it is declarative.
Yes - I have ranked my favourite and most hated features of Terraform :).
This will be very beginner orientated. This is also a laying down some of the foundational concepts for the upcoming TERF series (Terraform Enterprise Ready Framework).
What does it actually mean to be declarative?
Terraform state on their website:
The Terraform language is declarative, describing an intended goal, rather than the steps to reach that goal.
A common explanation on google searches:
A language which describes what needs to be done, instead of how to do it.
If you are like me - when you first started using Terraform and following tutorials you probably thought, "I am telling Terraform to create these resources for me, but I am also telling it how to join these resources together, so, what exactly is declarative about this?"
The way I understand it:
Terraform allows you to create an image of exactly what you want your infrastructure to look like and then Terraform manages the underlying logic to transform the infrastructure into your desired state.
If no infrastructure currently exists, Terraform will create the new infrastructure in the correct sequence of steps to create what you coded.
If infrastructure currently exists, but does not match your coded image, then Terraform will orchestrate the sequence of events required to change the infrastructure to match what you coded.
Let's learn through an example - an AWS virtual machine
We will be using the example provided under "Network and Credit Example" at the following Link.
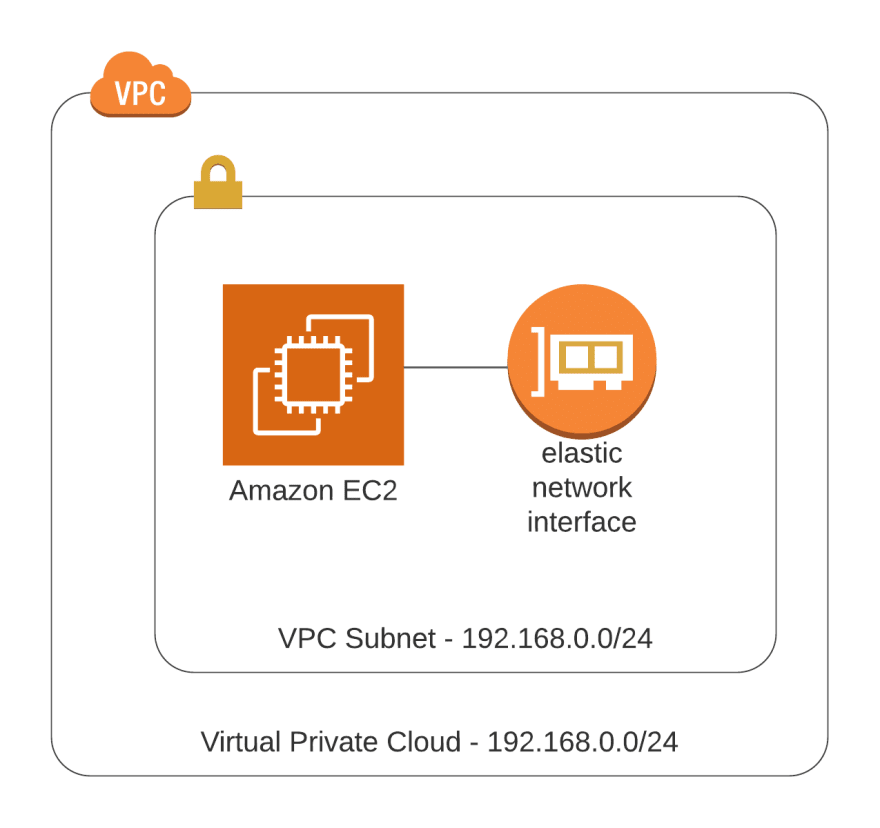
We will be creating:
- A VPC with CIDR address 192.168.0.0/24.
- A subnet with CIDR address 192.168.0.0/24.
- A network interface card associated with the above subnet.
- An EC2 instance with the above network interface card attached.
Creation through the portal
Creation through the portal requires the following steps:
- Create the VPC through the VPC section of AWS.
- Create subnet under that VPC in the VPC section of AWS.
- Create a network interface in the subnet in the EC2 section of AWS.
- Create an EC2 instance attaching the above network interface and selecting above subnet and VPCs during the configuration process.
Note: The above call be done from the EC2 launch wizard where you can select "Create VPC" and "Create Subnet" under stage "3. Configure Instance".
Let's say we want to change the VPC and subnet CIDR subnets to 192.168.1.0/24 - AWS documentation states:
It's not possible to modify the IP address range of an existing virtual private cloud (VPC) or subnet. You must delete the VPC or subnet, and then create a new VPC or subnet with your preferred CIDR block.
If you tried to go make this change within the portal you see this:

This means that you have to do the following in this order:
- Delete the EC2 instance
- Delete the network interface
- Delete the subnet
- Delete the virtual machine
You would then have to recreate all the resources all over again. Now, just imagine this change with multiple EC2 instances and other virtual infrastructure created within that VPC.
Creation through Terraform
The sample Terraform could be used for this slightly more semantic code:
resource "aws_vpc" "DemoVPC" {
  cidr_block = "192.168.0.0/24"

  tags = {
    Name = "DemoVPC"
  }
}

resource "aws_subnet" "DemoSubnet" {
  vpc_id            = aws_vpc.DemoVPC.id
  cidr_block        = "192.168.0.0/24"
  availability_zone = "us-west-2a"

  tags = {
    Name = "DemoSubnet"
  }
}

resource "aws_network_interface" "DemoNIC" {
  subnet_id   = aws_subnet.DemoSubnet.id

  tags = {
    Name = "DemoNIC"
  }
}

resource "aws_instance" "DemoVM" {
  ami           = "ami-005e54dee72cc1d00" # us-west-2
  instance_type = "t2.micro"

  network_interface {
    network_interface_id = aws_network_interface.DemoNIC.id
    device_index         = 0
  }

  credit_specification {
    cpu_credits = "unlimited"
  }
}
Terraform would create the following plan:
  # aws_instance.DemoVM will be created
  # aws_network_interface.DemoNIC will be created
  # aws_subnet.DemoSubnet will be created
  # aws_vpc.DemoVPC will be created
Plan: 4 to add, 0 to change, 0 to destroy.
Terraform would then create these resources
aws_vpc.DemoVPC: Creation complete
aws_subnet.DemoSubnet: Creation complete
aws_network_interface.DemoNIC: Creation complete
aws_instance.DemoVM: Creation complete
Notice how Terraform created the infrastructure in the correct order? Well it is not too evident here but it will become more evident in the following example.
To make change the VPC and Subnet CIDR we would change the code :
resource "aws_vpc" "DemoVPC" {
  cidr_block = "192.168.1.0/24"

  tags = {
    Name = "DemoVPC"
  }
}

resource "aws_subnet" "DemoSubnet" {
  vpc_id            = aws_vpc.DemoVPC.id
  cidr_block        = "192.168.1.0/24"
  availability_zone = "us-west-2a"

  tags = {
    Name = "DemoSubnet"
  }
}

resource "aws_network_interface" "DemoNIC" {
  subnet_id   = aws_subnet.DemoSubnet.id

  tags = {
    Name = "DemoNIC"
  }
}

resource "aws_instance" "DemoVM" {
  ami           = "ami-005e54dee72cc1d00" # us-west-2
  instance_type = "t2.micro"

  network_interface {
    network_interface_id = aws_network_interface.DemoNIC.id
    device_index         = 0
  }

  credit_specification {
    cpu_credits = "unlimited"
  }
}
Terraform would make the following plan:
Terraform has picked up that to make this change, all the resources must be deleted and recreated:
Terraform will perform the following actions:

  # aws_instance.DemoVM must be replaced
  # aws_network_interface.DemoNIC must be replaced
  # aws_subnet.DemoSubnet must be replaced
  # aws_vpc.DemoVPC must be replaced

Plan: 4 to add, 0 to change, 4 to destroy.
However Terraform also knows the sequence in which these events needs to occur. For example it can not delete the VPC until everything else is deleted. You can see this in the simplified output from the console:
aws_instance.DemoVM: Destruction complete
aws_network_interface.DemoNIC: Destruction complete
aws_subnet.DemoSubnet: Destruction complete
aws_vpc.DemoVPC: Destruction complete
aws_vpc.DemoVPC: Creation complete
aws_subnet.DemoSubnet: Creation complete
aws_network_interface.DemoNIC: Creation complete
aws_instance.DemoVM: Creation complete
This time, it is evident that Terraform orchestrated the destruction and creation of resources into the correct order.
We did not have to tell Terraform to destroy the old infrastructure, to recreate new infrastructure or explicitly state the order of events. This is the declarative nature of Terraform.
Concluding Remarks
In complex and layered deployments - this declarative nature is a game changer and lets you focus on delivering business value and functionality. Terraform abstracts away underlying logic and sequencing of events.
I work on a Terraform code base over 2000 lines long and managing over 250 resources in AWS. Whenever I have made changes to a resource which are sequenced in the beginning or middle of the deployment, Terraform has been comfortably able to orchestrate the change.
Support Me
Follow me here on Dev.to
Follow me on LinkedIn
Comment below feedback to help me improve my series!


Top comments (0)