Originally published here
Remix is a relatively new, full-stack JS framework, backed by some of the giants in the JS community such as Kent C. Dodds, Ryan T. Florence and Michael Jackson. Up until Next.js came along, piecing together various tools to build your SPA was the de-facto way to build JS apps. Next.js revolutionized that to some extent and went unrivaled for a while. However, the landscape is shifting fast in the last year or so with healthy competition from RedwoodJs, BlitzJs and now Remix. All of these tools are trying to solve some of the age-old problems in web development in a more creative, reliable and most importantly, developer friendly way so that building a performant web app becomes the default for JS developers.
It is definitely very early to identify a clear winner among all these tools in this space but Remix certainly looks like a worthy contender. So, if you haven’t already wet your feet in the awesomeness that is Remix, I hope this tutorial will help you get started and convince you to choose it for what you build next!
Birds eye view
In this post, I will walk you through building an AMA (Ask Me Anything) app using Remix. Below is a list of the primary tools we will be using to build this app. It will certainly be easier for the reader to follow along if they are familiar with the basics of some of the tools (except for Remix, of course) but don’t worry too much if not.
- Remix - Primary framework
- React - UI framework
- Prisma - Database ORM
- PostgreSQL - Database
- TailwindCSS - CSS framework
This is going to be a long post so I recommend following along in multiple sittings and to make it easier for you to decide if reading the whole thing is a worthwhile investment or not, here’s a outline of what we will do/learn about throughout the whole thing, in chronological order:
- App Spec - Outline the features of the app we are going to build from a higher level.
- Get started with Remix - Mostly following their official docs and installing a few things.
- Database Schema - Setup the database schema that can support all the dynamic content needed by our app.
- CRUD - Basic CRUD operations in standard Remix way.
- UI/UX - Sprinkle a little bit of Tailwind to make things look nice and pretty.
As you can tell, we have a lot to cover, so, let’s dive right in. Oh, before that though, if you’re impatient like me and just want to see the code, here’s the whole app in on github: https://github.com/foysalit/remix-ama
App Spec
In any project, if you know exactly what you’re going to build, it becomes a lot easier to navigate the landscape from the get go. You may not always have that liberty though but luckily, in our case, we know all the features we need for our app. Before we methodically list out all the features from a technical perspective, let’s look at them from a general product point of view.
AMA Session
A user on our app should be able to host multiple AMA sessions. However, it doesn’t make sense to host multiple sessions within the same day so let’s restrict a session’s duration to a full day and allow only 1 session per user per day.
Q&A
A user on our app should be able to ask a question to a host during a running AMA session. To build exclusivity, let’s block users from asking questions after the session ends. Of course, the host of the session should be able to answer the questions asked in their sessions.
Comments
To build more engagement and make things a bit more fun than traditional Q&A, let’s add a comment thread feature that lets any user add a comment to a question. This can be used to add more context to an already asked question or have a discussion about the provided answer by the host etc.
Now let’s break down how we will implement them:
Authentication - Users need to be able to register in order to host an AMA session, ask a question to a host or comment in a thread. However, let’s not prevent an unauthenticated user from viewing an already running session. For authentication, let’s use email address and password. Additionally, when signing up, let’s also ask the user to input their full name to be used everywhere in the app. A User entity will be used for storing auth related data.
Sessions - Show a list of all current and past sessions in an index page to all (authenticated/unauthenticated) users that will allow them to click into each session and see questions/answers/comments etc. Authenticated users can start a new session if there already isn’t one for that day. Let’s ask the host to provide some context/details to each session when starting one. Each session is an entity that belongs to a user.
Questions - Every individual session can have multiple questions from any registered user except for the host. The question entity will also contain the answer from the host in the database and every answer input will be validated to ensure the author is the host of the session. The entity belongs to a session and a user. Let’s ensure that a user can only ask one question per session so until they ask a question, let’s show a text input to every user. Under every answered question, let’s show a text input to the host to add their answer.
Comments - Every question (answered or not) can have multiple comments. To reduce complexity, let’s not add threading in comments for now. Every user can post multiple comments under a question so let’s always show the comment text input to all users under every question. To simplify the UI, let’s show the question (and answer) list on the session page by default and add a link to open the comment thread in a sidebar.
Get started with Remix
Remix has many great qualities but documentation probably takes the top spot. A framework under heavy development is bound to have many many moving pieces that are constantly being evolved by the maintainers so documentation is bound to fall behind as features get prioritized. However, Remix team takes great care to keep documentation up to date and in sync with the constant stream of amazing changes being pushed out. So, to get started, of course, the official docs will be our first point of entry.
If you’re too lazy to go to another website and read another wall of text, worry not. Here’s all you need to do in order to install Remix:
- Make sure you have Node.js development env setup.
- Open your Terminal window and run the following command
npx create-remix@latest. - Done.
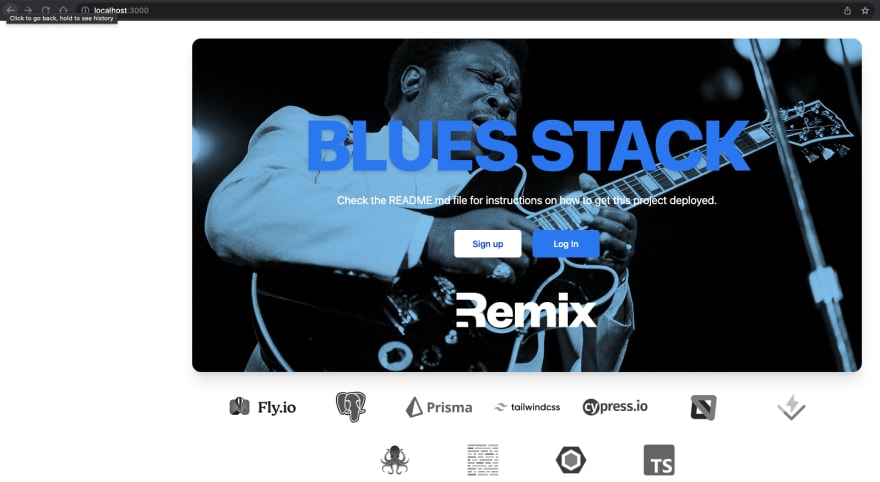
Remix doesn’t just give you a bunch of tools and ask you to go build your thing, they lead by example which is why they have the concept of Stacks. Stacks are essentially templates/starter kits that gives you the groundwork for a complete project right out of the box. For our project, we will use the Blues Stack which gives us a fully configured Remix project with Prisma, Tailwind and an entire module that shows how to use those tools to build a CRUD feature. I mean honestly, I feel like I shouldn’t even be writing this post since the template did all the work already. Oh well… I’m in too deep now so might as well finish it.
All you need to do is run the command npx create-remix --template remix-run/blues-stack ama in your terminal and Remix will drop the entire project in a new folder named ama after you answer a couple of questions.

Now let’s open up the ama folder and familiarize ourselves a bit with the content inside. There’s a bunch of config files in the root and we won’t get into most of those. We are mostly interested in the prisma, public and app directories. The prisma directory will contain our database schema and migration. The public directory will contain any asset the app needs such as icons, images etc. Finally, the app directory will house all our code, both client and server. Yes, you read that right, both client and server. If this is giving you major legacy codebase flashbacks, please know that you’re not alone.
Before we dive into writing our own app’s code, let’s check everything into git so that we can trace our changes from what was already done for us by remix blues stack.
cd ama
git init
git add .
git commit -am ":tada: Remix blues stack app"
And finally, let’s run the app and check out how it looks before we touch anything. The README.md file already contains all the detailed steps that should help you with this and since these are subjected to frequent change, I am going to link out to the steps instead of writing them down here https://github.com/remix-run/blues-stack#development
If you follow the steps exactly, the app should be accessible at http://localhost:3000
The stack comes with a default note module that you can play around with after registering with your email and password.
Database Schema
Usually, I like to start thinking of a feature/entity from its database schema and work my way up to the UI where the data gets interpreted, displayed and manipulated in various ways. Once you have the schema worked out, it becomes much easier to move through that implementation quickly.
As discussed above in the app spec, we need 3 entities in our database: Session, Question and Comment. We also need a User entity to store each registered user but the blues stack from Remix already includes it. We just need to slightly modify it to add a name column. Let’s open the file prisma/schema.prisma and add the below lines at the end of the file:
model Session {
  id String @id @default(cuid())
  content String
  createdAt DateTime @default(now())
  updatedAt DateTime @updatedAt
  user User @relation(fields: [userId], references: [id], onDelete: Cascade, onUpdate: Cascade)
  userId String
  questions Question[]
}

model Question {
  id String @id @default(cuid())
  createdAt DateTime @default(now())
  updatedAt DateTime @updatedAt
  content String
  answer String?
  user User @relation(fields: [userId], references: [id], onDelete: Cascade, onUpdate: Cascade)
  userId String
  session Session @relation(fields: [sessionId], references: [id], onDelete: Cascade, onUpdate: Cascade)
  sessionId String
  comments Comment[]
}

model Comment {
  id String @id @default(cuid())
  content String
  createdAt DateTime @default(now())
  updatedAt DateTime @updatedAt
  user User @relation(fields: [userId], references: [id], onDelete: Cascade, onUpdate: Cascade)
  userId String
  question Question @relation(fields: [questionId], references: [id], onDelete: Cascade, onUpdate: Cascade)
  questionId String
}
And then add this line in the definition of the User model:
model User {
  …
  name String
  sessions Session[]
  questions Question[]
  comments Comment[]
  …
}
Now there’s a lot to unpack here but most of it is outside of the scope of this post. This schema definition is all we need for prisma to take care of building all the tables with the right columns for the 3 new entities we need. How the definitions and the syntax work you should head over to this link https://www.prisma.io/docs/concepts/components/prisma-schema and read up a bit. A high level summary is:
- An entity/table definition starts with
model <EntityName> {}and inside the curly braces goes all the columns/properties of the entity and relationships with the other entities. So, a table for comment would look likemodel Comment {} - Column definitions usually look like
<columnName> <columnType> <default/relationship/other specifiers>. So, if our comment entity requires a column to store the content of the comment input by the user it would look like
model Comment {
    content String
}
- Relationships between 2 tables/entities are usually defined via a foreign key column so these are also defined alongside other columns. The definition usually requires 2 lines. A column to contain the foreign key id and the other to specify the name used to access related entity which usually looks like:
<entity> <entityName> @relation(fields: [<foreignKeyColumnName>], references: [id], onDelete: Cascade, onUpdate: Cascade). So, to relate the comment entity to the question entity with a one-to-many relationship we need to define it like
model Comment {
  content String
    question Question @relation(fields: [questionId], references: [id], onDelete: Cascade, onUpdate: Cascade)
  questionId String
}
The above doesn’t even cover the tip of the iceberg that is prisma so please please please, do read up on it from their official docs and you will see its true power. For the sake of this blog post, the above should give you an idea of why we need the prisma schema above.
We need to make one last adjustment related to the database. Along with the entire authentication system, the blues stack also includes an initial data seeder that populates your database with a dummy user for testing purposes. Since we introduced a new column name in the user table, we also need to adjust the seeder to add a dummy name to the user. Open the file prisma/seed.js and modify the user insert code as below:
const user = await prisma.user.create({ data: { Email, name: 'Rachel Remix', password: { create: { hash: hashedPassword, }, }, }, });
With that, we are finally ready to sync all these changes with our database. However, since our database has already been spun up with previously created schema and some seeded data and since then, our db has changed we can’t really sync all our changes right away. Instead, we will have to adjust the migration a bit. Prisma provides commands for this kind of adjustments but luckily our existing data and schema is not in production or anything so at this point, it’s just easier to nuke the db and start fresh with our current schema. So let’s go with the easier route and run these commands:
./node_modules/.bin/prisma migrate reset
./node_modules/.bin/prisma migrate dev
The first command resets our db and the second one uses the current schema definition to recreate the db with all the tables and populates it with seeded data.
Now, let’s stop the running app server, re-setup the app and spin it back up
npm run setup
npm run dev
Update User Registration
Since we have added a new name column to the user table, let’s start by requiring users to fill in their name when signing up. This will give us a nice entry to the remix way of doing things without making it a big shock if you’re mostly familiar with react’s usual way of building apps.
The code for user sign up can be found in ./app/routes/join.tsx file. Open it up and right under the <Form> component the following code to add the input field for name:
<Form method="post" className="space-y-6" noValidate>
          <div>
            <label
              htmlFor="name"
              className="block text-sm font-medium text-gray-700"
            >
              Full Name
            </label>
            <div className="mt-1">
              <input
                ref={nameRef}
                id="name"
                required
                autoFocus={true}
                name="name"
                type="text"
                aria-invalid={actionData?.errors?.name ? true : undefined}
                aria-describedby="name-error"
                className="w-full rounded border border-gray-500 px-2 py-1 text-lg"
              />
              {actionData?.errors?.name && (
                <div className="pt-1 text-red-700" id="name-error">
                  {actionData.errors.name}
                </div>
              )}
            </div>
          </div>
It basically mimics the already existing email field. Now, we need to adjust a few more things in here to make sure the name input is handled correctly. First, let’s create a ref to the name field and if there is an error in handling the name input, we want to auto focus that field just like the other fields in the form.
  const emailRef = React.useRef<HTMLInputElement>(null);
  // New line
  const nameRef = React.useRef<HTMLInputElement>(null);
  const passwordRef = React.useRef<HTMLInputElement>(null);

  React.useEffect(() => {
    if (actionData?.errors?.email) {
      emailRef.current?.focus();
    } else if (actionData?.errors?.password) {
      passwordRef.current?.focus();
    // New block
    } else if (actionData?.errors?.name) {
      nameRef.current?.focus();
    }
  }, [actionData]);
Now what is actionData? It’s simply the returned response from the server from the submit request. Any form submit action will send the post request from the browser to the server and remix will handle it via the action function defined right above the component. This function receives an object with a request property which gives you some very handy methods to access the data sent over from the browser and you can return a response from this function which the browser code can handle accordingly. In our case, we want to validate the submitted data and make sure the name field is actually filled in. So here are the changes we need in the action function:
  const email = formData.get("email");
  const name = formData.get("name");
  const password = formData.get("password");

  if (typeof name !== "string" || name.length === 0) {
    return json<ActionData>(
      { errors: { name: "Name is required" } },
      { status: 400 }
    );
  }
Which boils down to, retrieving the name input from the form submit request and then returns an error message if the name is not filled in. Since the return data is typed via the ActionData type, we need to adjust the definition and add the name property:
interface ActionData {
  errors: {
    email?: string;
    name?: string;
    password?: string;
  };
}
We have only handled the incorrect input case so let’s go ahead and make sure that in the case of correct input, the user’s name gets inserted in the column property by updating the line const user = await createUser(email, password); to const user = await createUser(email, password, name); and consequently, we need to adjust the definition of createUser in the app/models/user.server.ts file:
export async function createUser(email: User["email"], password: string, name: string) {
  const hashedPassword = await bcrypt.hash(password, 10);

  return prisma.user.create({
    data: {
      email,
      name,
      password: {
        create: {
          hash: hashedPassword,
        },
      },
    },
  });
}
A couple of things to note here:
- To keep server specific code isolated and away from the client, we can suffix files with
.server.ts. - We are using a very expressive and intuitive prisma API to easily insert a new row into the db. This usually takes the form of
prisma.<entityName>.<actionName>({})whereentityNameis the table name in small letters andactionNameis the db operation such as create, update, findOne etc. We will see more use of these soon.
With that we just added a new name input which will be validated when the user hits Create Account.

This is probably a good stopping point to check in our changes on git so let’s commit our code: git add . && git commit -am “:sparkles: Add name field to the sign up form”
Sessions
So far we’ve been mostly adjusting existing code here and there to gain some insight into how Remix does things. Now we get to dive into building our own module from scratch. The first thing we will build is a way for users to host an AMA session according to the initial app spec definition.
In remix, url routes are file based. I mean, it pretty much invents a whole new paradigm so simplifying it down to file based routing is probably not very accurate or fair but we will slowly get into it. To start with sessions, we want
- A list page where all current and historical sessions are listed
- A dedicated page per session where all questions, answers and comment threads are shown
- A page to start a new session for any logged in user
Let’s start with the list page. Create a new file in app/routes/sessions/index.tsx and put the following code inside of it:
import { Link, useLoaderData } from "@remix-run/react";
import { getSessions } from "~/models/session.server";
import type { LoaderFunction } from "@remix-run/node";
import { json } from "@remix-run/node";
import { Header } from "~/components/shared/header";
import { Button } from "~/components/shared/button";

type LoaderData = {
  sessions: Awaited<ReturnType<typeof getSessions>>;
};

export const loader: LoaderFunction = async () => {
  const sessions = await getSessions();
  if (!sessions?.length) {
    throw new Response("No sessions found", { status: 404 });
  }
  return json<LoaderData>({ sessions });
}

export function CatchBoundary() {
  return (
    <>
      <Header />
      <div className="mx-auto px-6 md:w-5/6 lg:w-4/5 xl:w-2/3">
        <div className="rounded bg-red-100 p-5">
          <h4 className="text-lg font-bold">No sessions found</h4>
          <p className="mb-4">Why don't you start one... could be fun!</p>
          <Button isLink to="new" className="bg-blue-600 text-white">
            Start AMA session!
          </Button>
        </div>
      </div>
    </>
  );
}

export default function SessionIndexPage() {
  const data = useLoaderData<LoaderData>();
  const dateFormatter = new Intl.DateTimeFormat("en-GB");

  return (
    <>
      <Header />
      <div className="mx-auto px-6 md:w-5/6 lg:w-4/5 xl:w-2/3">
        <div>
          {data.sessions?.map((session) => (
            <div
              key={`session_list_item_${session.id}`}
              className="mt-4 p-4 shadow-sm"
            >
              <div className="flex flex-row">
                <Link className="underline" to={session.id}>
                  {session.user.name} -{" "}
                  {dateFormatter.format(new Date(session.createdAt))}
                </Link>
                <span className="px-2">|</span>
                <div className="flex flex-row">
                  <img
                    width={18}
                    height={18}
                    alt="Question count icon"
                    src="/icons/question.svg"
                  />
                  <span className="ml-1">{session._count.questions}</span>
                </div>
              </div>
              <p className="pt-2 text-sm text-gray-700">{session.content}</p>
            </div>
          ))}
        </div>
      </div>
    </>
  );
}
If you’re familiar with react, this should look familiar to you, for the most part. However, let’s break it down piece by piece. Remix will render the default exported component. Above the component definition, we have a loader function. This is a special function that you can have only 1 per route/file and on page load, Remix will call this function to retrieve the data your page needs. It will then hydrate your component with the data and send the rendered HTML over the wire as a response which is one of the magic behaviors or Remix. This ensures that users do not have to see a loading state as your browser JS code loads data from API requests. The body of the action function calls out to a getSessions() function which is imported from ~/models/session.server. Here, we’re following the already discussed strategy of putting db operations in server only files. Let’s create the new file in app/models/session.server.ts and put the following code in it:
import { prisma } from "~/db.server";

export type { Session, Question, Comment } from "@prisma/client";

export const getSessions = () => {
  return prisma.session.findMany({
    include: {
      user: true,
      _count: {
        select: { questions: true },
      },
    },
  });
};
It’s simply fetching all entries from the session table and all the user entries related to them, since we will use the host’s info on the UI and it’s also including the total number of questions each session has. This is not super scalable because as our app grows, there might be hundreds of thousands of AMA sessions and retrieving all of them is not going to scale well. However, for the purpose of this post, we will skip pagination for now.
Let’s jump back into our sessions/index.tsx route file. If there are no sessions in the database, we return a 404 error response using the Response helper from Remix. Otherwise, we return a JSON response containing the array of sessions using the json helper from Remix.
The const data = useLoaderData<LoaderData>(); is calling a special Remix hook which gives us access to the data in the response sent back from action. You might be wondering, how are we handling the error response? It’s definitely not being handled in the body of the SessionIndexPage function. Remix uses the long available ErrorBoundary feature for handling error views. All we need to do is export a react component named CatchBoundary from a route file and any error thrown from rendering the route (client or server) the CatchBoundary component will be rendered. Let’s define this real quick above the SessionIndexPage component:
export function CatchBoundary() {
  return (
    <>
      <Header />
      <div className="mx-auto px-6 md:w-5/6 lg:w-4/5 xl:w-2/3">
        <div className="rounded bg-red-100 p-5">
          <h4 className="text-lg font-bold">No sessions found</h4>
          <p className="mb-4">Why don't you start one... could be fun!</p>
          <Button isLink to="new" className="bg-blue-600 text-white">
            Start AMA session!
          </Button>
        </div>
      </div>
    </>
  );
}

export default function SessionIndexPage() {
…
This is simply rendering a shared header component and a link to starting a new session. It’s also using a shared Button component. Let’s build these shared components out. We are gonna put them in the app/components/shared/ directory. Let’s start with the app/components/shared/header.tsx file:
import { Link } from "@remix-run/react";

export const HeaderText = () => {
  return (
    <h1 className="text-center text-3xl font-cursive tracking-tight sm:text-5xl lg:text-7xl">
      <Link to="/sessions" className="block uppercase drop-shadow-md">
        AMA
      </Link>
    </h1>
  );
};

export const Header = () => {
  return (
    <div className="flex flex-row justify-between items-center px-6 md:w-5/6 lg:w-4/5 xl:w-2/3 mx-auto py-4">
      <HeaderText />
    </div>
  );
};
This is a basic react component with some tailwind styling sprinkled. We are using the Link component from Remix (which is basically just a proxy to the Link component from react-router) to link to the list of sessions page. Another notable thing here is that we’re using a font-cursive style on the header text to make it look a bit like a logo. Cursive font style is not included in the default tailwind config so we will have to configure it ourselves. Open up the tailwind.config.js file from the root of the project and adjust the theme property like below:
module.exports = { content: ["./app/**/*.{ts,tsx,jsx,js}"], theme: { extend: { fontFamily: { cursive: ["Pinyon Script", "cursive"], }, }, }, plugins: [],
};
Notice that the additional bit extends the theme to add a new fontFamily with the name cursive and the value is Pinyon Script I chose this off google fonts but feel free to pick your own font. If you’re not super familiar with tailwind, this only gives us the ability to apply this font family on a text using the font-cursive helper class but we still need to load the font itself on our webpage. Adding external assets to Remix is pretty simple. Open the app/root.tsx file and update the links definition to add 3 new objects to the array:
export const links: LinksFunction = () => {
  return [
    { rel: "stylesheet", href: tailwindStylesheetUrl },
    { rel: "preconnect", href: "https://fonts.googleapis.com" },
    {
      rel: "preconnect",
      href: "https://fonts.gstatic.com",
    },
    {
      rel: "stylesheet",
      href: "https://fonts.googleapis.com/css2?family=Pinyon+Script&display=swap",
    },
  ];
};
All the above links are retrieved from the google fonts page here.
Tracing our steps back to the sessions/index.tsx file, the other shared component there is the button component. Let’s create that one real quick in app/components/shared/button.tsx:
import React from "react";
import { Link } from "@remix-run/react";
import type { LinkProps } from "@remix-run/react";

export type ButtonProps = {
  isAction?: boolean;
  isLink?: boolean;
};

export const Button: React.FC<
  ButtonProps &
    (ButtonProps["isLink"] extends true
      ? LinkProps
      : React.ButtonHTMLAttributes<HTMLButtonElement>)
> = ({ children, isLink, isAction, className, ...props }) => {
  let classNames = `${className || ""} px-3 py-2 rounded`;

  if (isAction) {
    classNames += " bg-green-300 text-gray-600 text-sm font-semi-bold";
  }

  if (isLink) {
    return (
      <Link className={classNames} {...(props as LinkProps)}>
        {children}
      </Link>
    );
  }

  return (
    <button className={classNames} {...props}>
      {children}
    </button>
  );
};
This is a simple button component that will help us unify the look and feel of buttons that are either link or action buttons in various places of the app. In order to make the component type safe while accepting props for button and link, we apply some typescript magic to the props and rendering.
Finally, we look at the actual page component code itself. The page maps through all session entries and shows the date of the session, name of the host of the session, the premise/detail added by the host for the session and a total count of how many questions there are. To render dates, we are using browser’s built in Intl module which supports locale based formatting. We are using a small svg icon next to question count. You can find all the assets used in the app here https://github.com/foysalit/remix-ama/tree/main/public/icons but feel free to use your own icons as you like. All public assets need to be added to the /public folder and in order to keep all icons together, we created an icons directory.
With all of the above, you should now be able to go to http://localhost:3000/sessions url and see the 404 error page since we haven’t created any sessions yet.

Now, let’s go build the new session page so that we can host a session and see that on the list page. We will put that in another page so that users can easily go to /sessions/new on our app and start hosting a session. Create a new file routes/sessions/new.tsx with the following code:
import { Form, useActionData, useTransition } from "@remix-run/react";
import {
  ActionFunction,
  json,
  LoaderFunction,
  redirect,
} from "@remix-run/node";
import { startSessionsForUser } from "~/models/session.server";
import { requireUserId } from "~/session.server";
import { Header } from "~/components/shared/header";
import { Button } from "~/components/shared/button";

export type ActionData = {
  errors?: {
    content?: string;
    alreadyRunning?: string;
  };
};

export const action: ActionFunction = async ({ request }) => {
  const userId = await requireUserId(request);
  const formData = await request.formData();

  try {
    const content = formData.get("content");

    if (typeof content !== "string" || content.length < 90) {
      return json<ActionData>(
        {
          errors: {
            content: "Content is required and must be at least 90 characters.",
          },
        },
        { status: 400 }
      );
    }

    const session = await startSessionsForUser(userId, content);
    return redirect(`/sessions/${session.id}`);
  } catch (err: any) {
    if (err?.message === "already-running-session") {
      return json<ActionData>(
        {
          errors: { alreadyRunning: "You already have a session running." },
        },
        { status: 400 }
      );
    }

    return json({ error: err?.message });
  }
};

// A simple server-side check for authentication to ensure only logged in users can access this page
export const loader: LoaderFunction = async ({ request }) => {
  await requireUserId(request);
  return json({ success: true });
};

export default function SessionNewPage() {
  const transition = useTransition();
  const actionData = useActionData();

  return (
    <>
      <Header />
      <div className="p-5 bg-gray-50 px-6 md:w-5/6 lg:w-4/5 xl:w-2/3 mx-auto rounded">
        <h4 className="font-bold text-lg">
          Sure you want to start a new AMA session?
        </h4>
        <p className="mb-4">
          An AMA session lasts until the end of the day regardless of when you
          start the session. During the session, any user on the platform can
          ask you any question. You always have the option to not answer.
          <br />
          <br />
          Please add a few lines to give everyone some context for the AMA
          session before starting.
        </p>

        <Form method="post">
          <textarea
            rows={5}
            autoFocus
            name="content"
            className="w-full block rounded p-2"
            placeholder="Greetings! I am 'X' from 'Y' TV show and I am delighted to be hosting today's AMA session..."
          />
          {actionData?.errors?.content && (
            <p className="text-red-500 text-sm">{actionData.errors.content}</p>
          )}
          <Button
            className="px-3 py-2 rounded mt-3"
            disabled={transition.state === "submitting"}
            type="submit"
            isAction
          >
            {transition.state === "submitting"
              ? "Starting..."
              : "Start Session"}
          </Button>
        </Form>
      </div>
      {actionData?.errors?.alreadyRunning && (
        <div className="mt-4 p-5 bg-red-500 mx-auto min-w-[24rem] max-w-3xl rounded">
          <p>{actionData.errors.alreadyRunning}</p>
        </div>
      )}
    </>
  );
}
In usual fashion, let’s break down this large chunk of code.
- Action - When the user fills out the session’s details and hits
Start Sessionwe want to receive the form data as a POST request and create a new session for the currently logged in user. So, the action starts with therequireUserId(request)check. It’s a helper method that comes with the stack and simply re-routes unauthorized users to the login page or returns the authorized user’s id. Then we’re retrieving the user input for the session’scontentcolumn usingrequest.formData()which gives us access to all POST data. If the content is not filled in or crosses a certain length, we return an error message. Otherwise we start the session and route the user to the newly created session page. - startSessionsForUser - This is a server only function that creates a new session entry in the database. Let’s add this to our
models/session.server.tsfile:
// … other imports
import type { User, Session } from "@prisma/client";
import startOfDay from "date-fns/startOfDay";
import endOfDay from "date-fns/endOfDay";
// … other functions

export const startSessionsForUser = async (
    userId: User["id"],
    content: Session["content"]
) => {
  const runningSession = await prisma.session.findFirst({
    where: {
      createdAt: {
        lte: endOfDay(new Date()),
        gte: startOfDay(new Date()),
      },
      userId,
    },
  });

  if (runningSession) {
    throw new Error("already-running-session");
  }

  return prisma.session.create({ data: { userId, content } });
};
This function receives a userId and the content of the session. If there’s already a session created by the user within the boundaries of today, then it throws an error, otherwise, it creates a new session entry. Manipulating dates is kind of weird in JS so I prefer dropping a library into my project for handling dates. In this case I’m using date-fns lib but feel free to use your preferred lib.
- Loader: We want only authorized users to see this page so the loader simply runs the
requireUserId()function which will logout unauthenticated users and prevent them from seeing the session create form. - Transition - Remix comes with a very useful
useTransition()hook which gives you access to various states of a page. As you submit a form from a page, send data to the server and wait for the response,transition.statewill change tosubmittingthroughout that duration. Using this, we are disabling the submit button to prevent users from accidentally attempting to create multiple sessions. - Error handling - As users attempt to start a session, we get back either validation error for the content field or we get a specific error if there’s already a running session, we are handling both via UI display of error message by accessing the data from
useActionData(). - Form component - The
Formcomponent from remix is just a small syntactic sugar on top of the browser’s form component. It maintains all the default behavior of a form. You can read up on it in more depth here: https://remix.run/docs/en/v1/guides/data-writes#plain-html-forms
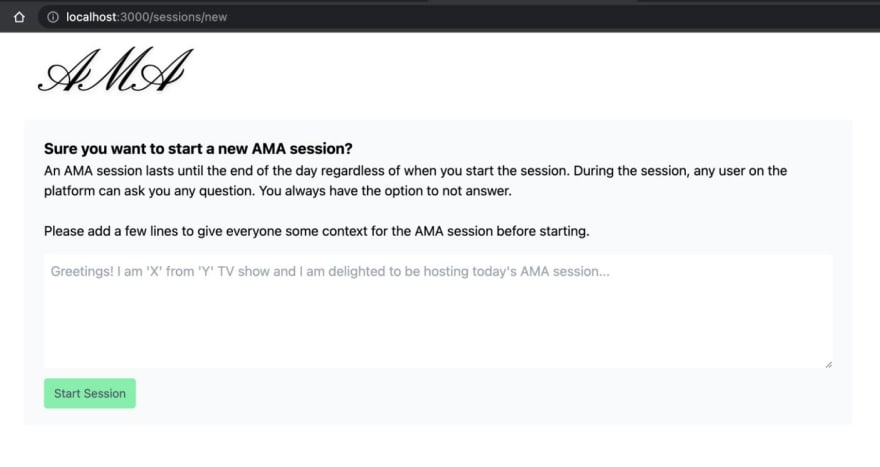
If you’ve followed all the above steps, open http://localhost:3000/sessions/new in your browser and you should see a page like above. However, if you fill out the input field and hit Start Session, it will take you to a 404 not found page but that doesn’t mean the button didn’t work. You can manually go back to http://localhost:3000/sessions and see the newly created session by yourself on the list page. Something like this:

Q&A
With sessions list and create pages working well, we can now build Q&A per session. Each session should be accessible via sessions/:sessionId url where :sessionId is a variable that will be replaced by ids of sessions. In order to map dynamic route param to a route file in Remix, we need to start the file name with $ sign suffixed by the name of the parameter. So, in our case, let’s create a new file routes/sessions/$sessionId.tsx with the following code:
import type { ActionFunction, LoaderFunction } from "@remix-run/node";
import { json, redirect } from "@remix-run/node";
import {
  Form,
  useCatch,
  useLoaderData,
  Outlet,
  useParams,
} from "@remix-run/react";
import invariant from "tiny-invariant";

import {
  addAnswerToQuestion,
  addQuestionToSession,
  getSession,
} from "~/models/session.server";
import { getUserId, requireUserId } from "~/session.server";
import { Button } from "~/components/shared/button";
import { QuestionAnswer } from "~/components/sessions/question-answer";
import { Header } from "~/components/shared/header";

type ActionData = {
  errors?: {
    title?: string;
    body?: string;
  };
};

type LoaderData = {
  session: Awaited<ReturnType<typeof getSession>>;
  currentUserId?: string;
};

export type OutletContext = LoaderData;

export const loader: LoaderFunction = async ({ request, params }) => {
  invariant(params.sessionId, "sessionId not found");

  const session = await getSession(params.sessionId);
  if (!session) {
    throw new Response("Not Found", { status: 404 });
  }
  const currentUserId = await getUserId(request);
  return json<LoaderData>({ session, currentUserId });
};

export const action: ActionFunction = async ({ request, params }) => {
  const userId = await requireUserId(request);
  invariant(params.sessionId, "sessionId not found");

  const formData = await request.formData();
  const questionId = formData.get("answer_to_question");

  if (typeof questionId === "string") {
    const answer = formData.get("answer");
    if (typeof answer !== "string" || answer?.trim()?.length < 3) {
      return json<ActionData>(
        { errors: { title: "Answer is required" } },
        { status: 400 }
      );
    }

    await addAnswerToQuestion({ id: questionId, userId, answer });
    return redirect(`/sessions/${params.sessionId}/questions/${questionId}`);
  }

  const content = formData.get("content");
  if (typeof content !== "string" || content?.trim()?.length < 3) {
    return json<ActionData>(
      { errors: { title: "Question is required" } },
      { status: 400 }
    );
  }

  const question = await addQuestionToSession({
    userId,
    sessionId: params.sessionId,
    content,
  });

  return redirect(`/sessions/${params.sessionId}/questions/${question.id}`);
};

export default function SessionDetailsPage() {
  const params = useParams();
  const data = useLoaderData() as LoaderData;
  const dateFormatter = new Intl.DateTimeFormat("en-GB");

  return (
    <>
      <Header />
      <div className="mx-auto flex w-full flex-row justify-between px-6 md:w-5/6 lg:w-4/5 xl:w-2/3">
        <div className={params.questionId ? "w-1/2" : "w-full"}>
          <h3 className="flex flex-row items-center justify-between">
            <span className="text-2xl font-bold">
              {data.session?.user.name}
            </span>
            <span>
              {dateFormatter.format(
                new Date(data.session?.createdAt || Date.now())
              )}
            </span>
          </h3>
          <p className="py-6">{data.session?.content}</p>
          {data.currentUserId !== data.session?.userId && (
            <div className="mb-4 rounded bg-gray-100 p-3">
              <Form method="post">
                <div>
                  <label htmlFor="question" className="block">
                    <div className="mb-2 flex flex-row items-center">
                      <img
                        alt="Question logo"
                        src="/icons/question.svg"
                        width={45}
                        height={45}
                      />
                      <span className="ml-2 leading-4">
                        Ask your question
                        <br />
                        <i className="text-xs text-gray-800">
                          Please be concise and expressive. No explicit content
                          allowed!
                        </i>
                      </span>
                    </div>
                    <textarea
                      rows={5}
                      name="content"
                      className="block w-full rounded p-2"
                    />
                  </label>
                </div>
                <div className="mt-2 flex justify-end">
                  <Button type="submit" isAction>
                    Ask Question
                  </Button>
                </div>
              </Form>
            </div>
          )}
          {!!data.session?.questions?.length && (
            <ul>
              {data.session.questions.map((q) => (
                <QuestionAnswer
                  question={q}
                  key={`question_${q.id}`}
                  canAnswer={data.currentUserId === data.session?.userId}
                  isSelected={params.questionId === q.id}
                />
              ))}
            </ul>
          )}
        </div>
        <Outlet context={data} />
      </div>
    </>
  );
}

export function ErrorBoundary({ error }: { error: Error }) {
  console.error(error);

  return <div>An unexpected error occurred: {error.message}</div>;
}

export function CatchBoundary() {
  const caught = useCatch();

  if (caught.status === 404) {
    return <div>Session not found</div>;
  }

  throw new Error(`Unexpected caught response with status: ${caught.status}`);
}
With this one, we will quickly skim through some of the concepts we’ve discussed already and focus on the new bits more:
- Loader: returns the session entry and the current user’s id. It invokes a call to
invariantwhich is an external library for easily checking if a variable is truthy and throwing error if not. - getSession: receives the sessionId as the only argument. Let’s implement it in our
models/session.server.tsfile:
export const getSession = (id: Session["id"]) =>
  prisma.session.findFirst({
    where: { id },
    include: {
      questions: {
        include: {
          user: true,
        },
      },
      user: true,
    },
  });
Notice how it includes all questions belonging to a session and the users who asked those questions as well.
- Action: this page can do 2 things based on who is viewing it. The host of the session can answer any question but can’t ask a question. All the other users can only do the opposite. So the action needs to handle both actions and the way we differentiate between the two is via the
formData.get("answer_to_question")input. From the client side, we will only send this when the host is submitting an answer to a question. Notice how we are redirecting the user to/sessions/${params.sessionId}/questions/${questionId}in case of either action? That’s our entry to nested routing. Keep this in the back of your head for later. - addAnswerToQuestion: This helper adds the host’s answer to a question by taking in an object as an argument which contains the question’s id and answer input. Let’s implement this in
models/session.server.ts:
import type { User, Session, Question } from "@prisma/client";

export const addAnswerToQuestion = async ({
  id,
  userId,
  answer,
}: Pick<Question, "id" | "userId" | "answer">) => {
  const existingQuestion = await prisma.question.findFirst({
    where: { id },
    include: { session: true },
  });

  if (!existingQuestion) {
    throw new Error("question-not-found");
  }

  // Only allow the author of the session to answer questions
  if (existingQuestion.session.userId !== userId) {
    throw new Error("not-session-author");
  }

  return prisma.question.update({ where: { id }, data: { answer } });
};
Notice that the implementation checks if the user making the request is indeed the host of the session or not and throws a specific error if not.
- addQuestionToSession: This one adds any non-host user’s question to a session by taking in an object argument containing the user’s and session’s id and the question input. This is how it’s implemented in
models/session.server.ts:
export const addQuestionToSession = async ({
  userId,
  sessionId,
  content,
}: Pick<Question, "userId" | "sessionId" | "content">) => {
  const existingQuestion = await prisma.question.findFirst({
    where: {
      userId,
      sessionId,
      content,
    },
  });

  if (existingQuestion) {
    throw new Error("already-asked");
  }

  const isSessionHost = await prisma.session.findFirst({
    where: {
      userId,
      id: sessionId,
    },
  });

  if (isSessionHost) {
    throw new Error("host-can-not-ask-questions");
  }

  return prisma.question.create({ data: { sessionId, userId, content } });
};
Notice how we are blocking a user from posting the same question more than once per session?
- useParams hook: This hook is another proxy to react router which simply gives us access to any route parameter such as sessionId in our case.
- Question form: To all non-host, authenticated users, we show a question input form on every session above the list of previously posted questions.
- QuestionAnswer component: To keep a large chunk of code shareable and isolated, we put a single question in a shared component file. We will see why in a little bit but let’s see the implementation of this component first. Create a new file
app/components/sessions/question-answer.tsxand put the following code in there:
import { Form, Link } from "@remix-run/react";
import React from "react";

import type { Question } from "~/models/session.server";
import type { User } from "~/models/user.server";
import { Button } from "~/components/shared/button";

export const QuestionAnswer: React.FC<{
  question: Question & { user: User };
  isSelected?: boolean;
  as?: React.ElementType;
  canAnswer: boolean;
  hideCommentsLink?: boolean;
}> = ({
  question,
  hideCommentsLink,
  isSelected,
  as: Component = "li",
  canAnswer,
  ...rest
}) => {
  const dateFormatter = new Intl.DateTimeFormat("en-GB", {
    dateStyle: "full",
    timeStyle: "short",
  });

  return (
    <Component
      className={`mb-4 rounded p-2 ${isSelected ? "bg-gray-50" : ""}`}
      {...rest}
    >
      <div className="flex flex-row">
        <div className="max-w-40 mr-2">
          <img
            width={50}
            height={50}
            alt="Question icon"
            src="/icons/question.svg"
          />
        </div>
        <p>
          <span className="font-semi-bold text-xs text-gray-500">
            {question.user?.name} at{" "}
            {dateFormatter.format(new Date(question.createdAt))}
            {!hideCommentsLink && (
              <>
                {" "}
                |{" "}
                <Link className="underline" to={`questions/${question.id}`}>
                  Comments
                </Link>
              </>
            )}
          </span>
          <br />
          {question.content}
        </p>
      </div>
      {question.answer ? (
        <div className="mt-2 pl-10">
          <div className="flex flex-row p-2 shadow-sm">
            <img
              width={50}
              height={50}
              alt="Question icon"
              src="/icons/answer.svg"
            />
            <p>
              <span className="font-semi-bold text-xs text-gray-500">
                {dateFormatter.format(new Date(question.updatedAt))}
              </span>
              <br />
              {question.answer}
            </p>
          </div>
        </div>
      ) : (
        canAnswer && (
          <div className="mt-4 px-4">
            <Form method="post">
              <textarea
                rows={5}
                name="answer"
                className="block w-full rounded p-2"
              />
              <div className="mt-2 flex justify-end">
                <Button name="answer_to_question" value={question.id} isAction>
                  Answer
                </Button>
              </div>
            </Form>
          </div>
        )
      )}
    </Component>
  );
};
Notice that this component embeds a form inside of it which means every question will render this form for the host to give them an easy way to add answers to questions that they have not answered yet and the submit button of the form has name="answer_to_question" value={question.id} props which helps us signal the backend (action) that this form submission needs to be tackled as answer input by the host.
You may have also noticed that every question links out to to={questions/${question.id}} which brings us to the nested routing topic. Let’s take a look at that now.
Nested routing
In a traditional react app, you would split up a page in multiple components and the components internally load their own data or get fed by a global data store that passes the data to it. In Remix, you would do that via nested routing where a page can embed another page inside which has its own lifecycle such as data loader, action, error bounder etc. This is incredibly powerful and adds a whole new level of reliability and speed in UX. We are going to use this to show a comment thread per question in a session.
To facilitate this, we added a <Outlet context={data.session} /> component in the session details page. Outlet is the container for nested page content and it gives us the ability to build the layout for a child page at the parent level. When the user goes into a nested route, this will be replaced by the html rendered by the lowest level of the nested page route.
Now, to access the comment thread, we are routing users to session/:sessionId/questions/:questionId route so to match that in file system, we need to create a new directory inside in routes/sessions/$sessionId/questions and create a file named $questionId.tsx inside of it. Notice that we now have a file with the name $sessionId.tx and a directory named $sessionId. This may be confusing but is as designed. This tells Remix to use the $sessionId.tsx file as the parent page and render any nested routes from the $sessionId directory. Now let’s put in the following code in the $questionId.tsx file:
import type { LoaderFunction, ActionFunction } from "@remix-run/node"; // or "@remix-run/cloudflare"
import {
  Form,
  Link,
  useLoaderData,
  useOutletContext,
  useParams,
  useTransition,
} from "@remix-run/react";
import type { Comment } from "~/models/session.server";
import {
  addCommentToAnswer,
  getCommentsForQuestion,
} from "~/models/session.server";
import invariant from "tiny-invariant";
import { json, redirect } from "@remix-run/node";

import type { OutletContext } from "../../$sessionId";
import { requireUserId } from "~/session.server";
import type { User } from "~/models/user.server";
import { QuestionAnswer } from "~/components/sessions/question-answer";
import { Button } from "~/components/shared/button";
import React, { useEffect, useRef } from "react";

type LoaderData = {
  comments: Awaited<ReturnType<typeof getCommentsForQuestion>>;
};

type ActionData = {
  errors?: {
    title?: string;
    body?: string;
  };
};

export const loader: LoaderFunction = async ({ params }) => {
  invariant(params.questionId);
  const data: LoaderData = {
    comments: await getCommentsForQuestion(params.questionId),
  };
  return json(data);
};

export const action: ActionFunction = async ({ request, params }) => {
  const userId = await requireUserId(request);
  invariant(params.sessionId, "sessionId not found");
  invariant(params.questionId, "questionId not found");

  const formData = await request.formData();
  const content = formData.get("content");

  if (typeof content !== "string" || content?.trim()?.length < 3) {
    return json<ActionData>(
      { errors: { title: "Comment is required" } },
      { status: 400 }
    );
  }

  await addCommentToAnswer({
    userId,
    content,
    questionId: params.questionId,
  });

  return redirect(
    `/sessions/${params.sessionId}/questions/${params.questionId}`
  );
};

export default function SessionQuestion() {
  const params = useParams();
  const commentFormRef = useRef<HTMLFormElement>(null);
  const transition = useTransition();
  const outletData = useOutletContext<OutletContext>();
  const data = useLoaderData();
  const question = outletData?.questions.find(
    (q) => q.id === params.questionId
  );

  const isCommenting = transition.state === "submitting";
  useEffect(() => {
    if (!isCommenting) {
      commentFormRef?.current?.reset();
    }
  }, [isCommenting]);

  if (!question) return null;
  const dateFormatter = new Intl.DateTimeFormat("en-GB", {
    dateStyle: "full",
    timeStyle: "short",
  });

  return (
    <div className="w-1/2">
      <div className="pl-8">
        <Link
          to={`/sessions/${params.sessionId}`}
          className="bg-gray-500 rounded-sm px-2 py-1 text-white flex flex-row justify-between"
        >
          <span>Thread</span>
          <span>✕</span>
        </Link>
        <QuestionAnswer question={question} as="div" hideCommentsLink />
        <div className="bg-gray-100 p-3 mb-4 rounded">
          <Form method="post" ref={commentFormRef}>
            <label htmlFor="comment" className="block">
              <div className="flex flex-row mb-2 items-center">
                <img
                  alt="Question logo"
                  src="/icons/comment.svg"
                  width={45}
                  height={45}
                />
                <span className="ml-2 leading-4">
                  Add a comment
                  <br />
                  <i className="text-xs text-gray-800">
                    Please be polite. No explicit content allowed!
                  </i>
                </span>
              </div>
              <textarea
                rows={5}
                className="w-full block rounded p-2"
                name="content"
              />
            </label>
            <div className="mt-2 flex justify-end">
              <Button type="submit" isAction>
                Comment
              </Button>
            </div>
          </Form>
        </div>
        <ul>
          {data.comments?.map((comment: Comment & { user: User }) => (
            <li key={`comment_${comment.id}`} className="mt-4">
              <div className="flex flex-row">
                <div>
                  <img
                    width={40}
                    height={40}
                    alt="Question icon"
                    className="mr-2"
                    src="/icons/comment.svg"
                  />
                </div>
                <p>
                  <span className="font-semi-bold text-xs text-gray-500">
                    {comment.user?.name} at{" "}
                    {dateFormatter.format(new Date(comment.createdAt))}
                  </span>
                  <br />
                  <span className="text-gray-800 text-sm">{comment.content}</span>
                </p>
              </div>
            </li>
          ))}
        </ul>
      </div>
    </div>
  );
}
Here, we’re using that question-answer.tsx component to display the same UI component we show under the session but in this case at the top of the comment thread, to give readers context for the comments. We are also placing a form inside of it through which, any authenticated user can post a comment. Let’s check out the 2 new server functions we’re using in the loader and then action for this page from models/session.server.ts:
import type { User, Session, Question, Comment } from "@prisma/client"; export const addCommentToAnswer = async ({ questionId, userId, content,
}: Pick<Comment, "questionId" | "userId" | "content">) => { return prisma.comment.create({ data: { questionId, userId, content } });
}; export const getCommentsForQuestion = async (questionId: string) => { return prisma.comment.findMany({ where: { questionId }, include: { user: true }, });
};
A couple of noteworthy thing in this component are:
- useOutletContext hook: This gives us access to all the props passed to the child page via the
<Outlet … />component in the parent page. So, here, we have access to the entire session with all the questions inside of it and instead of querying for the single question of the thread, we are simply picking it out of the already passed data. - Loading comments: We are loading all comments for a question without pagination, which is not a great idea for any production app.
Wrap up
If you’ve followed all the previous steps, open the app in an incognito window and create a new account. Then if you click into the previously created session, you should see an input field to ask a question:
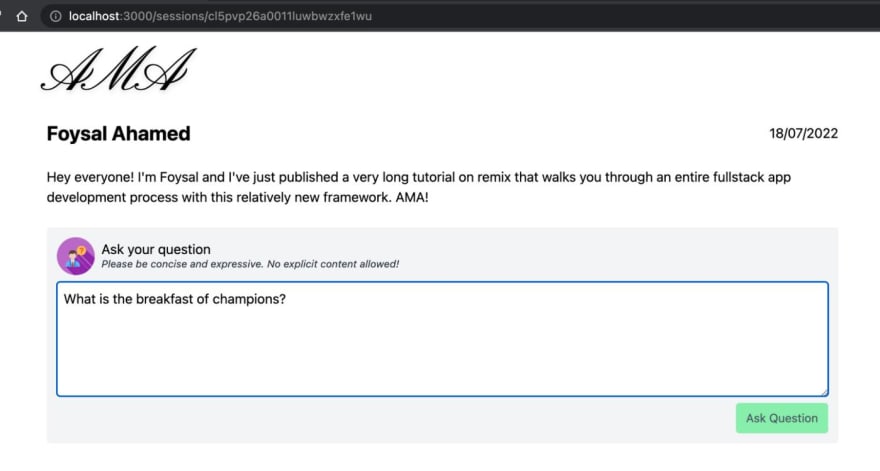
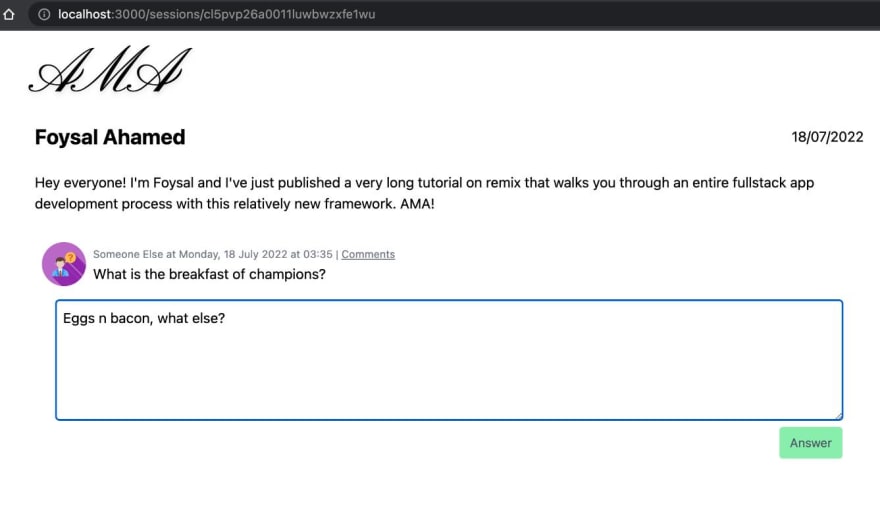
Now if you type up a question and post it from that new account, you should see something like this:

Which shows your comment, opens the comment as a thread on the right hand side and lets you or any other user add a comment to the thread.
Finally, if you go back to the other browser window where you are logged in as the host of the session and refresh the session page, you should see the comment there with an input right underneath to post your answer:
What’s next?
You’ve done an amazing job following through till here so please give yourself a round of applause! If you’re like me and can never get enough of shiny new JS things, you might be wondering: “This is great but is this something I would use as a user?” and if you’re true to yourself then the answer would be a big fat NO. So I will leave you with a few ideas that can make this quickly put together toy app into a production-ready app that might get some traction in the real world:
- Real time data sync - AMA sessions are all about timing. At least the good ones are. People hosting them don’t have the time to hang around and hit refresh every 10s to look for new comments/questions etc. So All of those should be synced in realtime and highlighted to the host. Same for the participants.
- Pagination - As mentioned throughout the post, we cut some corners in data loading that will certainly not scale in a real world app. Adding pagination to all queries would be a good learning experience too.
- Session timer and future session: Since sessions on this app are time-boxed per day, showing a timer for when the session ends may add an element of thrill to the experience. Another killer feature would be allowing hosts schedule sessions for the future and create some hype around it by showcasing upcoming session on the home page in a more highlighted way
Resources
- Remix - https://remix.run/docs
- TailwindCSS - https://tailwindcss.com/docs
- Prisma - https://www.prisma.io/


Oldest comments (0)