You've probably noticed the new and shiny Fidel Dashboard we released recently. There were a few reasons we came up with a whole new dashboard experience, and Katherine goes over all those reasons in her blog post. One of those reasons was that new users had trouble quickly unlocking the power of Fidel. When using our API, the "Aha!" moment comes when you see your first test transaction. But getting there wasn't the easiest of journeys for everyone.
We pride ourselves on how easy the Fidel API is to work with and often get feedback on the ease of the integration. That being said, before someone even starts integrating with the API, they tend to explore our dashboard to help them understand how Fidel works.
With our old dashboard, we lost users in the middle of their onboarding because we had no onboarding experience in the Dashboard. We had hoped they would find their way around, but we should’ve been better hosts. Let me walk you through it.
The first thing a user needs to do is create a Program. But, the old dashboard landed people on the Transactions page. And while that is a valid action for all accounts that have gone through the setup steps, because that's where most people need to land, it was proving confusing for first-time users. Let's assume first time users managed to create a Program. They would try to add a Location to that program, but that wasn't possible before first creating a Brand. They needed to figure than one out on their own, and then come back and create a Location. Let's assume some users managed to do that, and create a Location.
Now, you'd imagine you can create one of those fabled test transactions. You couldn't create one on the Transactions tab, you needed to explore around the Dashboard and land on the API Playground tab. And there, you have a menu entry to create your first transaction. In the UI, you'll notice you needed a Program, a Location and a Card.
Wait a minute, we didn't talk about Cards yet. That's because users haven’t added any yet. So users needed to add a Card before they could make a test transaction. On the Dashboard though, we didn't mention that users could only use test card numbers, or what those numbers were for the three card networks: Visa, Mastercard and Amex. Users had to poke around the Fidel Documentation to figure out what those test card numbers were, and then add a test Card. You could add a card both with the UI (which uses the Fidel Web SDK), or in the API playground. After you'd have done all that, congratulations, you could finally create your first test transaction.
As you can imagine, this wasn't an easy discovery journey, and we had quite a few people dropping off at various steps in this user journey. And we couldn't really blame them. Some of them were highly motivated, so they reached out to Support. For those users, we either had to do a bit of handholding or send them to our various blog posts or documentation explaining these steps. The blog posts and the documentation help you get set up using the API without using the Dashboard for most of those steps. While that was proving successful, it was also proving time-consuming for our small team.
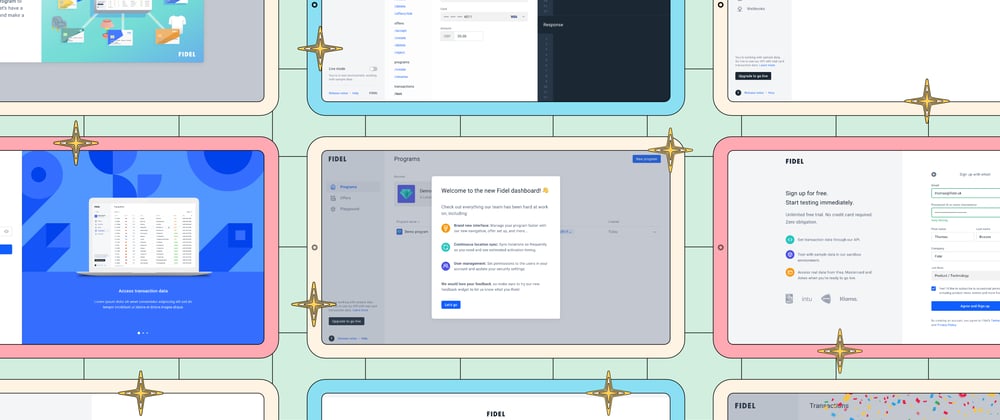
We've decided to take all that we learned from those hand-holding sessions and put them into an automated onboarding process that shows up first thing for all new users. Here's a video of it. We'll go through the steps we took, and why in a minute.
We've decided to take a few steps to alleviate these problems:
- Instead of having everyone create the same setup data on their own, we are now doing that for every new account. Now every new account gets enough demo data so they can make their first transaction: a demo Program, a demo Brand, 3 Locations in the UK and a Visa test Card. There's also one Auth Transaction in there. We've actually added the new demo data while we were developing the new dashboard, and we saw a slight increase in the number of users that were getting to their first transaction in the old Dashboard.
- The second step we took was to add a tour for first-time users on the new dashboard that walks people through the data and explains that:
- Programs are containers, where you add brands, locations and link payment cards.
- Brands are the parent object of Locations and require consent from an authorized merchant to track Transactions in their locations.
- Locations are geolocation data points and you can simply add them to a Program.
- Cards are linked to a Program, and you can conveniently use our SDKs to link cards in your apps.
After the onboarding flow tells you all about the setup blocks and the particularities of running in test mode versus live mode, it drops you off in the new API Playground, where you can make your first test transaction. We've redesigned the API playground as part of the developer experience as well, giving it a more modern look and feel.
The last bit of the onboarding flow is also doing a bit of off-boarding, letting people know they can access more resources for working with the API in the Documentation, on the API reference pages, and on the blog!
Adding this onboarding flow has improved our average “Time to First Transaction” from days to minutes. And because our users are developers, this has been one of the best things we have done to improve the developer experience.
We've got some more things planned, and I don't want to spoil the surprise, so stay tuned for our next little DX chat. In the meantime, feel free to reach out on Twitter or in the Fidel Developer Community forum.


Oldest comments (0)