The other day, I was told I can create a Continuous Delivery pipeline for the documentation for the project and I said yes and for this particular case we use VuePress, which is the new tool by Evan You, the creator of VueJS, to create documentation for your site. We create something simple for it but the curiosity of how can I improve the pipeline started to work and then, this article came up.
Prerequisites
- An AWS Account
- NodeJS (Version must be ≥ 8)
- Yarn
- A Buddy Works CI/CD account
- A Github Account
Code Ready Example
If you just want to test the pipeline and skip the development part (doing your own documentation), you can fork this project ready for S3 deployment and start experimenting with it.
jefer590/vuepress-s3-cd-example
Setup Project
First we will need to init a new NodeJS project using yarn using the next command:
$ yarn init
Then, it’s time to install the only dependency for this project that is VuePress
$ yarn add -D vuepress
After that, you must follow the Getting Started Guide of VuePress. If you have it ready, let’s move on!
Setup Pipeline
Create a new public or private project on Github, you can name it however you want.
We need another config before jumping into Buddy Works and that is creating a programmatically user on AWS IAM that will allow Buddy Works, deploy the built assets into an S3 bucket and, obviously, an S3 bucket configured to support Static Web Pages.
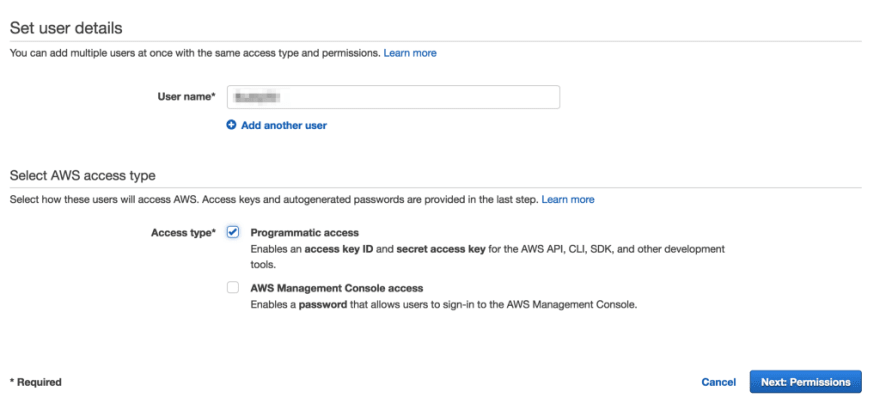
In the AIM dashboard, you have to go to Users > Add User and then, in the next page, you will write the AIM username with programmatic access
In the permissions screen, you will attach an existing policy. For demonstration purposes, we will use the “AmazonS3FullAccess” policy. You can create your own policy with only the necessary permissions for Buddy Works and you can check them in this link

In the next screen, verify the info for your user and click on “Create User” and in the next screen you will get the Access Key ID and the Secret Access Key. save this info because you will use it later.

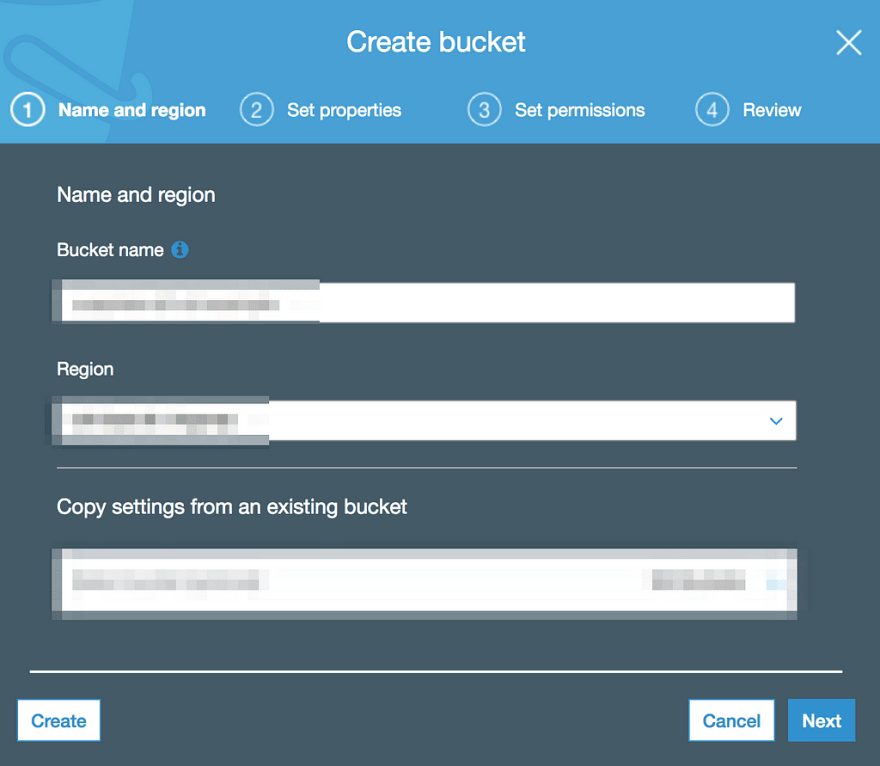
It’s time to create our S3 Bucket! go to the S3 dashboard and click in the button “Create Bucket” and a modal will appear to start creating the bucket. On the first step, add a bucket name that will be part of your domain name and select your preferred region.
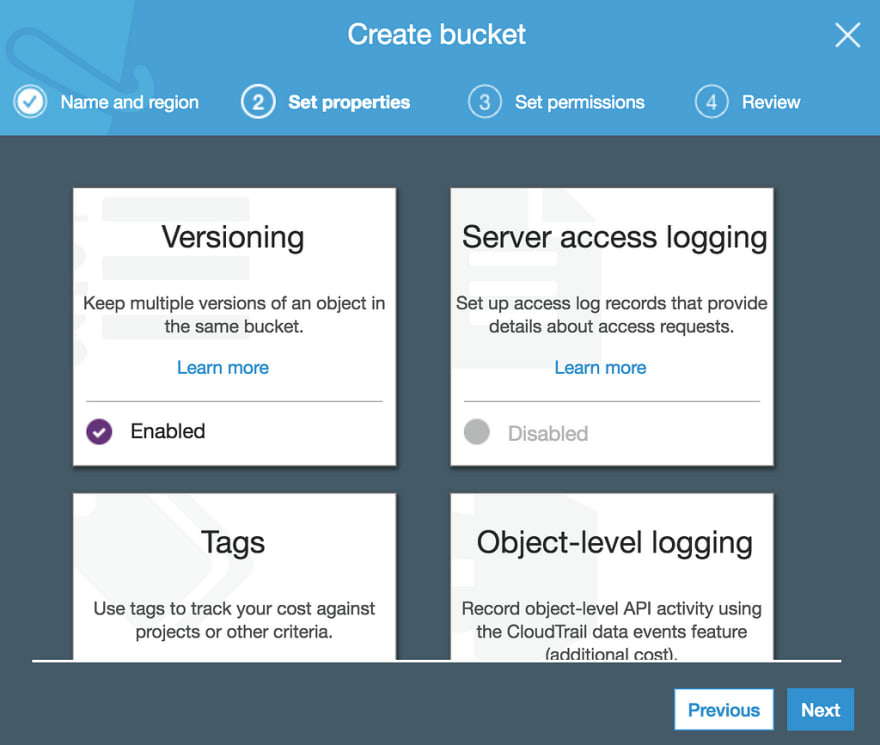
On the next step, you will add “Versioning” to the bucket. Static Web Site config comes later.
Next step, grant read access to all the users.

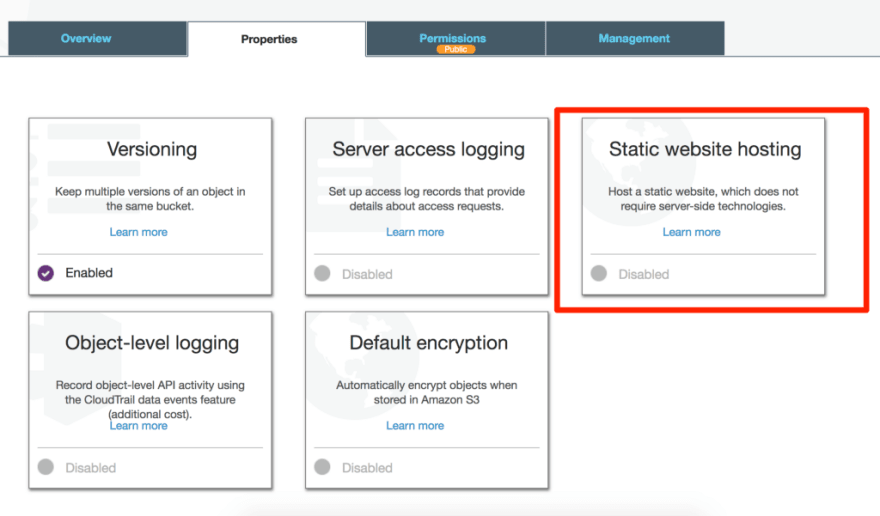
The last step is review your options and that’s it! you have a brand new S3 bucket but only one thing is left, set up the web host for this bucket and for that, in the dashboard of your bucket, go to Properties and then click on “Static Web Hosting”
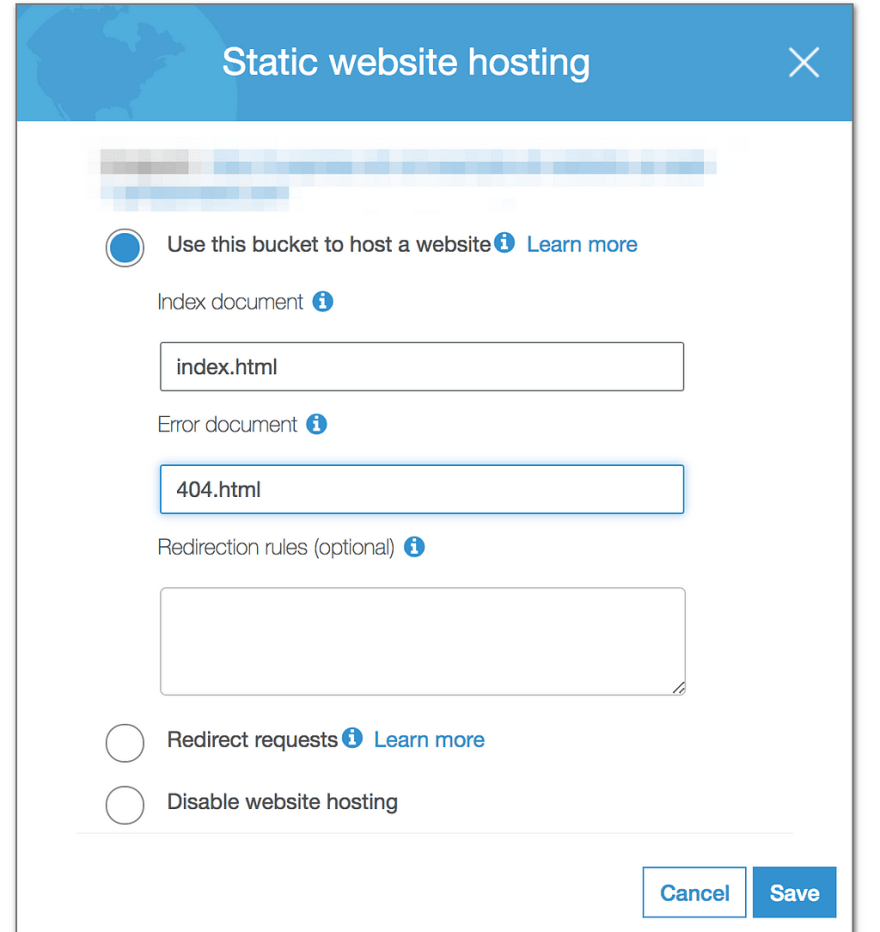
A bunch of options will appear again, click on “Use this bucket to host a website”. On Index document you will put the value “index.html” and on Error document you will add the value “404.html”. Both files are generated by the VuePress building process. You save and that’s it! Everything is ready on AWS.
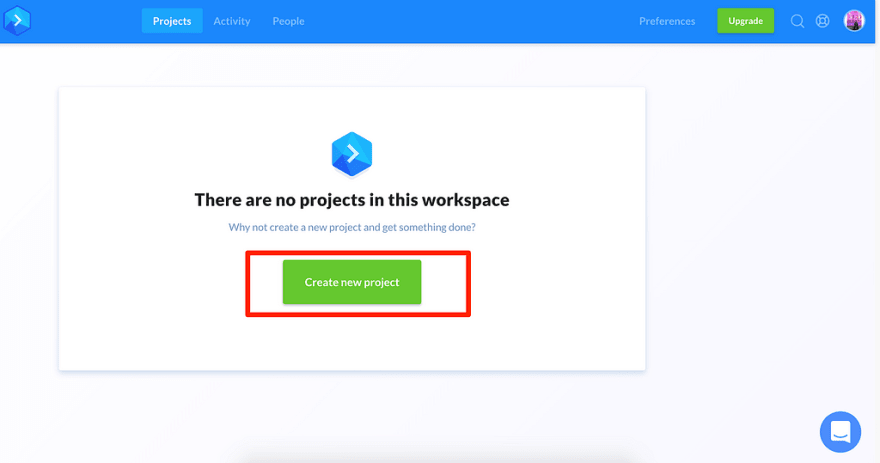
Now let’s go to the fun part, configure the pipeline! Go to your Buddy Works Projects dashboard and click on “Create a new project”
Then, a list with all your repos will appear. Search the one that you created for the VuePress Project

After you selected your project, the pipeline dashboard for that project will appear. Click on “Add a new pipeline”

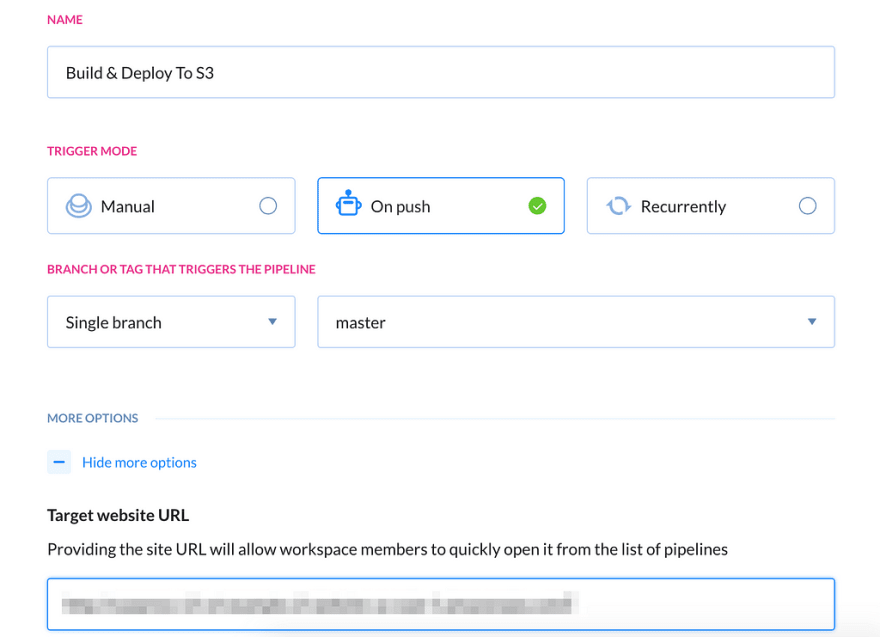
In the next screen, we will set how the pipeline will be triggered and which branch or tag you want it to be triggered. In my case, I’ll trigger this pipeline every push to master. You can add a target website to preview the deployed project. For this case, we will use the S3 static website url which the pattern is .s3-website-.amazonaws.com
After that, a screen to chose a new action for your pipeline. Since we need to build the VuePress project to upload it into our S3 bucket, we will use a node action.

Time to configure our task! We need yarn to build download the packages and download everything, so let’s install yarn in this action. Go to “Environment Customization” and add the next command $ npm install -g yarn and to try that yarn is installed, in the command screen, use the$ yarn -v command. Save the action and let’s run manually our task clicking in the “Run Pipeline” button
If everything went fine, check the logs of your node action and you will see the latest yarn version

All right! Yarn is ready in our pipeline, let’s add the build action into out Node Task! Use the command $ yarn and$ yarn build:docs to install dependencies and build the docs.
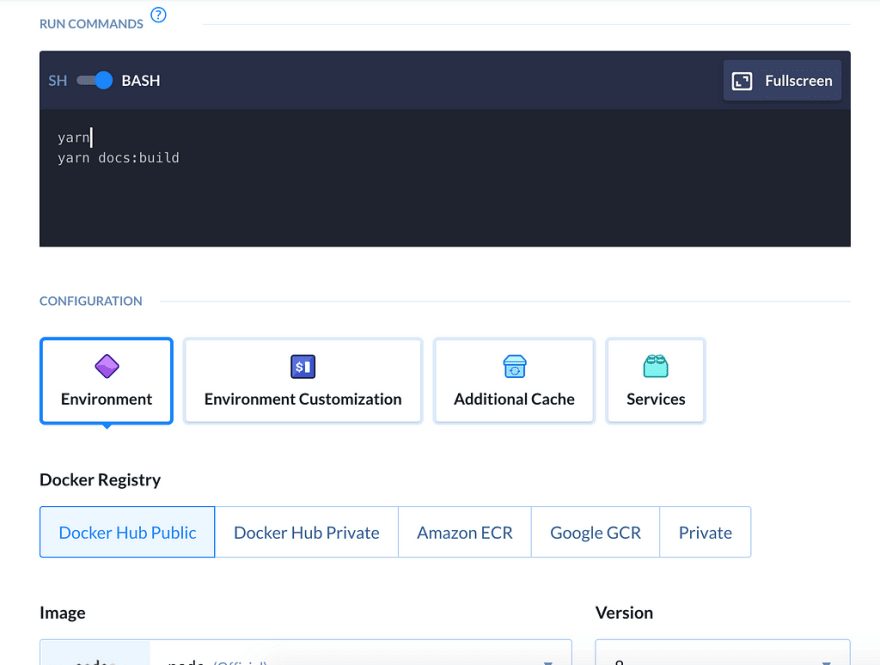
The last thing needed is set the Node Runtime to grab the latest 8 version of node from the Docker Public Hub

At last, we have our first action made on node!!!

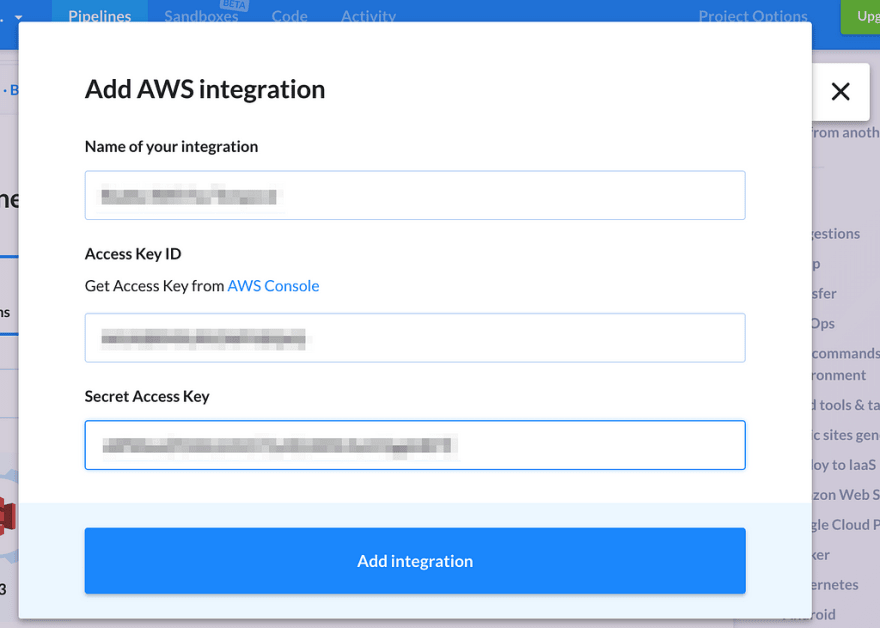
The build should be good! Now let’s actually upload all our documentation into our S3 bucket. Create another action for the pipeline but this time search for a S3 action. It will ask for you S3 User Access Key ID and Secret Access Key. Use the one that you created with the S3 policy.
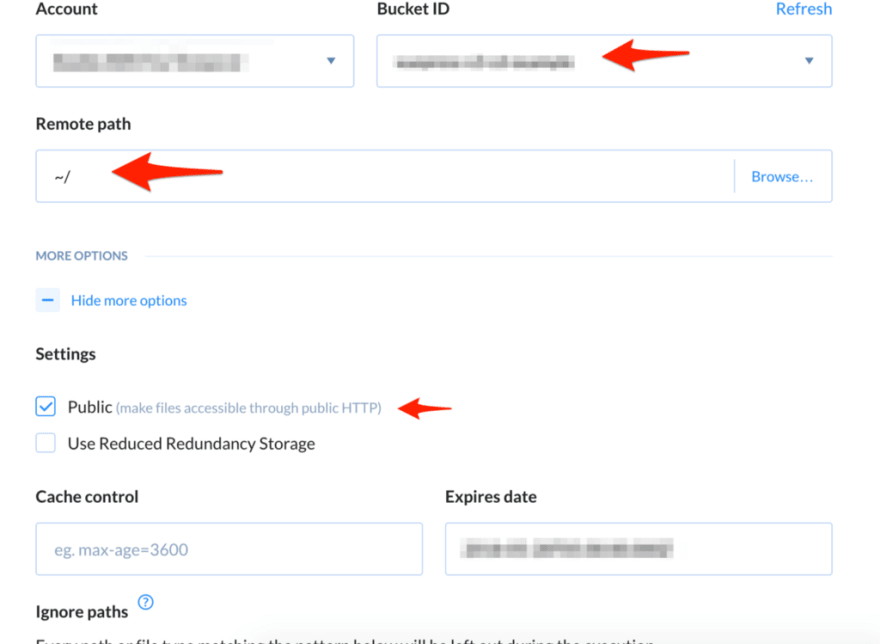
If the integration went fine, a screen with the S3 upload config should appear. Make sure that you are using the “Pipeline Filesystem” to use the build archives in the past action and make sure that your source path is /docs/.vuepress/dist

Also, make sure that you will use the S3 account for this action and you will upload everything to the root of the bucket with public access. At last, set a name for your action.
Click on “Add This Action” to finish and have our second action in our pipeline

Everything is going well, we have a step to build and a step to upload but I think the only thing left is an action to notify me when this was deployed successfully. Let’s do that with an email by creating a new email action.

Let’s add a successful message to the email that we are going to notify
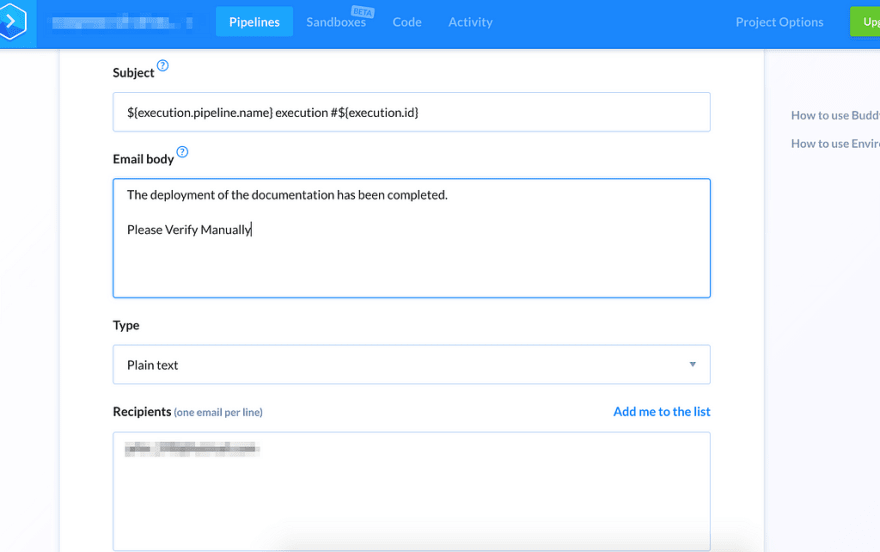
And at last, let’s add the name of the action.

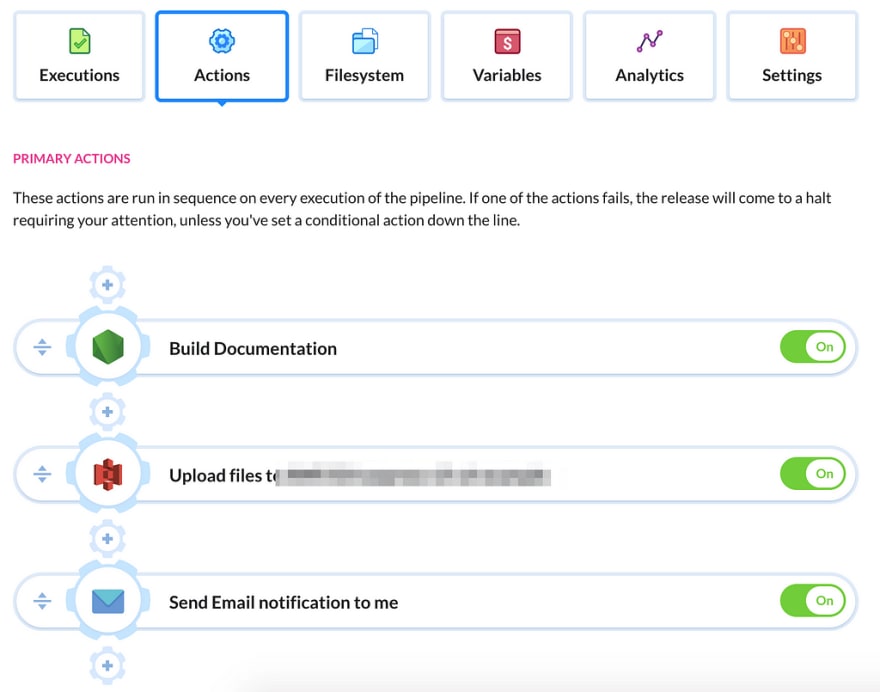
Our pipeline should looks like this.
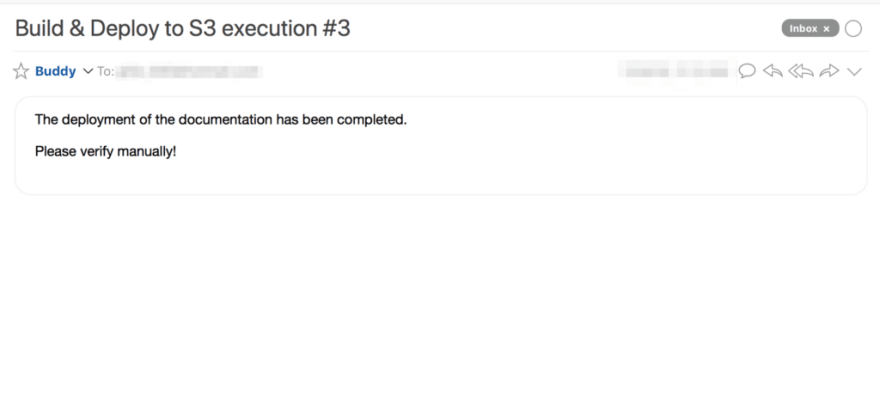
Now, it’s the time of truth. let’s test our new pipeline by clicking on Run Pipeline button. If everything was successful you may see your pipeline as completed and you may received an email.

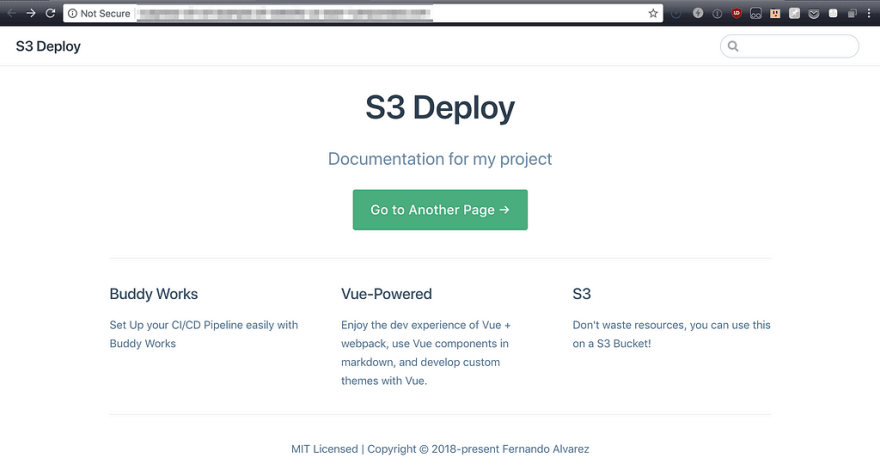
And, of course, our site must be online.

Conclusion
With buddy we can create CI/CD workflow so nice, so easy and so wonderful. VuePress is an excellent tool for Static Documentation because of the uses of Markdown + Vue Componentes + templates. If we keep uploading changes to this repo, the repo will trigger automatically. I suggest you to check it out!


Latest comments (0)