Navigating from one view to another, or simply showing a title and buttons, is one of the most crucial building blocks of modern iOS applications. Almost every app has this feature. SwiftUI brings some new approaches for how to show the Navigation Bar, set the title, and add buttons. So let's check it out.
Showing Navigation View
To show a Navigation Bar using SwiftUI, we should use the NavigationView component that is responsible for this purpose. It requires that we provide the Content that is a View type. The Content can be anything from a text field to scrollable content. In short, it can be any SwiftUI view.
To show a title for the navigation, SwiftUI has a completely different approach than we are used to with UIKit. We should set it as a view modifier, not for the NavigationView, but the Content.
var body: some View {
  NavigationView {
    Text("Hello, world!")
      .navigationTitle("Test")
  }
}

SwiftUI framework provides a means to specify the size of the NavigationView. We want to use the .navigationBarTitleDisplayMode modifier for the Content and provide a display mode. DisplayMode type is an enum that has three cases:
-
automatic- inherits from the previous navigation item; -
inline- small navigation size; -
large- large navigation size.
Let's see how to use it in the code.
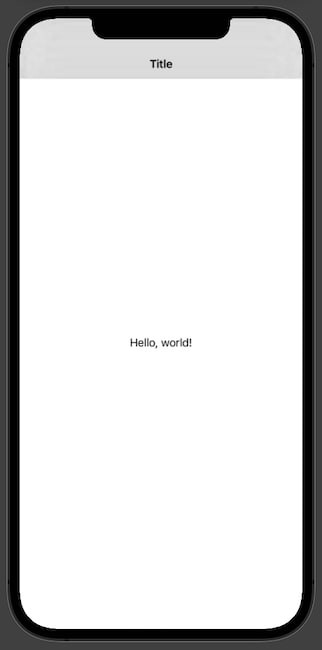
NavigationView {
  Text("Hello, world!")
    .navigationTitle("Title")
    .navigationBarTitleDisplayMode(.inline)
}
When we want to change the NavigationView to a larger size, we simply change the .inline to .large.
NavigationView {
  Text("Hello, world!")
    .navigationTitle("Title")
    .navigationBarTitleDisplayMode(.large)
}
Add Navigation View Buttons
Now that we know how to show the NavigationView, let's explore how to add buttons. I want to point out that previously with SwiftUI, we used the .navigationBarItems view modifier, but this is now deprecated. With the latest SwiftUI version, we should call the .toolbar modifier. Let's dig deeper into how to use it in various scenarios.
Add a Single Button
Let's add a Button to the leading and trailing side of the NavigationView. To achieve this, we need to use the .toolbar view modifier and pass the .ToolbarItem view. To initialize the .ToolbarItem, we should provide the placement and content. The placement parameter is a type ToolbarItemPlacement, which is a struct. There are a couple ways to manage the placement, but for now we will look into two of them:
-
navigationBarLeading- shows the button on the leading side of the navigation bar; -
navigationBarTrailing- shows the button on the trailing side of the navigation bar.
var body: some View {
  NavigationView {
    Text("Buttons Example")
      .navigationTitle("Buttons")
      .toolbar {
        ToolbarItem(placement: .navigationBarLeading) {
          Button(action: {
            print("Refresh")
          }) {
            Label("Send", systemImage: "paperplane.fill")
          }
        }
        ToolbarItem(placement: .navigationBarTrailing) {
          Button(action: {
            print("Refresh")
          }) {
            Label("Refresh", systemImage: "arrow.clockwise")
          }
        }
      }
  }
}

Add multiple buttons
Now that we know how to add a single button, let's learn how to add multiple buttons. This time we need to use the ToolbarItemGroup that represents a group of toolbar items.
.toolbar {
  ToolbarItemGroup(placement: .navigationBarLeading) {
    Button(action: {
      print("Send")
    }) {
      Label("Send", systemImage: "paperplane.fill")
    }
  }

  ToolbarItemGroup(placement: .navigationBarTrailing) {
    Button(action: {
      print("Refresh")
    }) {
      Label("Refresh", systemImage: "arrow.clockwise")
    }

    Button(action: {
      print("Edit")
    }) {
      Label("Edit", systemImage: "slider.horizontal.3")
    }
  }
}

When adding multiple buttons, we shouldn't go too crazy. Eventually it may become difficult to use the app because the buttons could cover up the the navigation bar title.
Change Navigation View Color
Right now, SwiftUI doesn’t have the option to change the color of the NavigationView. For that we need to turn back to UIKit and use the UINavigationBarAppearance object to customize the navigation bar.
To change the color of the SwiftUI navigation bar, we can add the init method to the SwiftUI view and change the navigation bar appearance inside there, like this:
init() {
  let coloredAppearance = UINavigationBarAppearance()
  coloredAppearance.configureWithOpaqueBackground()
  coloredAppearance.backgroundColor = .systemRed
  coloredAppearance.titleTextAttributes = [.foregroundColor: UIColor.white]
  coloredAppearance.largeTitleTextAttributes = [.foregroundColor: UIColor.white]

  UINavigationBar.appearance().standardAppearance = coloredAppearance
  UINavigationBar.appearance().compactAppearance = coloredAppearance
  UINavigationBar.appearance().scrollEdgeAppearance = coloredAppearance

  UINavigationBar.appearance().tintColor = .white
}

var body: some View {
  NavigationView {
    Text("Navigtion Bar with different color")
      .navigationTitle("Title")
  }
}
We can see from the code that we are doing multiple things, like changing the background color and title text color. We can use either system colors or bring in colors from the iOS app assets catalog.

TL;DR
The Navigation Bar is a vital element of modern iOS and iPadOS applications. A majority of apps have more than one screen and our users have to navigate back and forth inside our apps.
SwiftUI comes with a new view, NavigationView, and we are required to completely shift our thinking about the navigation and how to use it compared with the UIKit.
With SwiftUI, it is very straightforward to add navigation on the screen, change the title, and add buttons to the Navigation Bar. But if we want to change the color, we should go back to the UIKit. I believe this will change quite soon.


Top comments (0)