In this article, we are going to build a PWA from scratch with HTML, CSS, and JavaScript. Before starting let us know what is PWA.
What is PWA app ?
PWA (Progressive Web Apps) is one of the most talked about technology shifts in the web and has gained unparalleled momentum among the practitioners in the IT world. If you are building for the web, I’m sure that PWA is the latest ‘buzzword’ that has been added to your work vocabulary. It’s not surprising because PWA has made the far fetched dream of installing web apps on phone for real,it's just your regular website that runs in a browser with some enhancements like the ability:
- To install it on a mobile home screen
- To access it when offline
- To access the camera
- Get push notifications - ...
You can check it live here
Source code here
My blog here
Let's start
I want to first create a new home page, that I will call index.html
<!DOCTYPE html>
<html lang="en">
  <head>
    <meta charset="UTF-8" />
    <meta name="viewport" content="width=device-width, initial-scale=1.0" />
    <meta http-equiv="X-UA-Compatible" content="ie=edge" />
    <link rel="stylesheet" href="css/style.css" />
    <title>Recipes App</title>
  </head>
  <body>
    <main>
      <nav>
        <h1>Recipes App</h1>
      </nav>
      <div class="container flex"></div>
    </main>
    <script src="js/app.js"></script>
  </body>
</html>
And then we need to add page js/app.js
const container = document.querySelector(".container");
const recipes = [
{
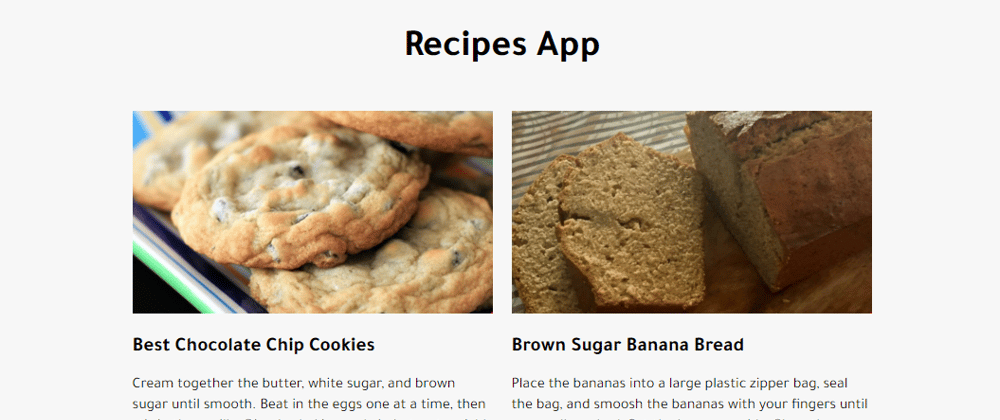
name: "Best Chocolate Chip Cookies",
description: "Cream together the butter, white sugar, and brown sugar until smooth. Beat in the eggs one at a time, then stir in the vanilla. Dissolve baking soda in hot water. Add to batter along with salt. Stir in flour, chocolate chips, and nuts. Drop by large spoonfuls onto ungreased pans.",
image: "images/recipe1.jpg"
},
{
name: "Brown Sugar Banana Bread",
description: "Place the bananas into a large plastic zipper bag, seal the bag, and smoosh the bananas with your fingers until very well mashed. Set the bananas aside. Place the brown sugar and butter into a mixing bowl, and mix on medium speed with an electric mixer until light and fluffy, 1 to 2 minutes. Cut a corner from the plastic bag, and squeeze the mashed bananas into the bowl of brown sugar mixture. With the electric mixer on medium speed, beat in the bananas, egg, cinnamon, vanilla extract, and milk until the mixture is well combined. Switch the mixer to low speed, and gradually beat in the flour, baking soda, baking powder, and kosher salt just until the batter is smooth, about 1 minute. Spread the batter into the prepared loaf pan.",
image: "images/recipe2.jpg"
},
{
name: "Cheesecake Pops",
description: "Cake pops are a fun versatile party food. Learn techniques for making cake pops with a variety of recipes and become inspired with clever decorating ideas.",
image: "images/recipe3.jpg"
},
{
name: "Chicken Soup with Drop-In Noodles",
description: "Chicken soup that you can let simmer in a slow cooker all day then make homemade drop noodles just before serving. Quick and easy.",
image: "images/recipe4.jpg"
},
{
name: " Tortilla Soup II",
description: "You may thicken soup by adding the desired amount of tomato paste to the soup or extend the recipe by adding one 10-ounce can of tomato soup. Garnish with shredded Monterey Jack cheese and the tortilla strips.",
image: "images/recipe5.jpg"
},
{
name: " Copycat Panera® Broccoli Cheddar Soup",
description: "My husband loves Panera® broccoli cheddar soup but it went up in price and therefore we set out on a hunt to create the perfect broccoli cheddar soup. Here is what we came up with. There are tons of variations and options to make this soup your own. You can add extra veggies, different cheeses, garlic to your onions, a little nutmeg to the finished soup, green onions, sour cream, etc. The list goes on and on. Make it your own! Serve topped with cheese!",
image: "images/recipe6.jpg"
},
];
With this code bellow, we can now loop through the array and show them on the HTML file. And to make everything work, we wait until the DOM (Document Object Model) content finished load to run the getRecipes method.
const getRecipes = () => {
  let output = "";
  recipes.forEach(
    ({ name,description, image }) =>
      (output += `
              <div class="item-flex">
                <img class="item-avatar" src=${image} />
                <h1 class="item-title">${name}</h1>
                <p>${description}</p>
                <a class="item-link" href="#">Read More</a>
              </div>
              `)
  );
  container.innerHTML = output;
};

document.addEventListener("DOMContentLoaded", getRecipes);
The Service Worker offers a cache interface to represent the pairs of Request / Response objects that will be cached. You can register multiple cache objects for the same domain.
Next we need to cache the assets,so we should to create serviceWorker.js
// serviceWorker.js
staticRecipes = "recipes-app";
const assets = [
  "/",
  "/index.html",
  "/css/style.css",
  "/js/app.js",
  "/images/recipe1.jpg",
  "/images/recipe2.jpg",
  "/images/recipe3.jpg",
  "/images/recipe4.jpg",
  "/images/recipe5.jpg",
  "/images/recipe6.jpg",
];

self.addEventListener("install", installEvent => {
  installEvent.waitUntil(
    caches.open(staticRecipes).then(cache => {
      cache.addAll(assets);
    })
  );
});

self.addEventListener("fetch", fetchEvent => {
  fetchEvent.respondWith(
    caches.match(fetchEvent.request).then(res => {
      return res || fetch(fetchEvent.request);
    })
  );
});
The service worker has several life cycles, and one of them is the install event. It runs when a service worker is installed. It's triggered as soon as the worker executes, and it's only called once per service worker.
Then we should to register the Service Worker, go to js/app.js and add this code bellow.
// In js/app.js
if ("serviceWorker" in navigator) {
  window.addEventListener("load", function() {
    navigator.serviceWorker
      .register("/serviceWorker.js")
      .then(res => console.log("service worker registered"))
      .catch(err => console.log(err));
  });
}
Now, we successfully cached our assets on the browser. And the next time we load the page, the service worker will handle the request and fetch the cache if we are offline.

In the end I added some css code.
/* In css/style.css */
@import url('https://fonts.googleapis.com/css2?family=Tajawal:wght@400;500;700&display=swap');
body {
    font-family: 'Tajawal', sans-serif;
    background-color: #f7f7f7;
}
h1 {
    text-align: center;
    font-size: 40px;
}
.container {
    max-width: 800px;
    margin: 0 auto;
    width: 100%;
}
.flex {
    display: flex;
    flex-wrap: wrap;
    align-items: flex-start;
    justify-content: center;
}
.item-flex {
    width: calc(50% - 20px);
    margin: 5px;
    padding: 5px;
}
img.item-avatar {
    width: 100%;
}
h1.item-title {
    font-size: 21px;
    line-height: 26px;
    text-align: left;
}

@media only screen and (max-width: 600px) {
    .item-flex {
        width: calc(100% - 20px);
        margin: 5px;
        padding: 5px;
    }
    h1 {
        font-size: 30px;
        line-height: 33px;
    }
}
You can check it live here
You can view the full code report here
My Blog here
Thanks for reading.


Top comments (0)