In this tutorial, we will guide you to learn the steps to Combine Multiple Worksheets/Ranges into One Worksheet in Excel Office 365 using Kutools. Get an official version of MS Excel from the following link: https://www.microsoft.com/en-in/microsoft-365/excel
Note: kutools for Excel has more than 180 features which are used to complete the difficult task with several clicks. If you want to use Kutools, you need to install it from Excel’s official website.
Combine Worksheets from Workbooks into One Worksheet:
If you want to combine worksheets/ranges from different workbooks into one worksheet, follow the below instructions.
- Go to the Kutools Plus Tab, select the Combine option.

- It will display a prompt box, you need to click the OK button.

- Now, it will open the Combine Worksheets – Step 1 of 3 dialog box.
- Combine Operations – In this section, you need to select the Combine multiple worksheets from workbooks into one worksheet option.
- Then, click the Next button.

- It will open the Step 2 wizard , where you need to select the workbooks and worksheets that you want to combine.

Configure the settings as below:
#1) Add workbooks to merge
- In the Add drop-down list, you can click the Files(s) button to add one workbook or multiple workbooks to merge.
- Folder – It will add all workbooks of the folder into the workbook list to merge.
- OneDrive File(s) or OneDrive Folder – This will add one or multiple OneDrive files from one folder or different folders as you need.

#2) Sort all workbooks or worksheets in the workbook
- Sort drop-down list – It is used to sort all workbooks or worksheets in the list box.
#3) Save/Access one scenario of your operation
- You can save the settings of Step 2 for future use. You need to click the Save option under the Scenario drop-down list.
- Then, you need to give the name for the scenario in the popping-out dialog box.

#4) Open workbooks which have been encrypted with the password
- Password – This option is used to combine the workbooks which have been encrypted with passwords.
- Password Manager Dialog box – Click the Add button, enter the workbook password into the text box. Then, fill the Label and click the OK button.
- Repeat the above step until the workbooks passwords are added to the manager, then click the OK button to close the window.
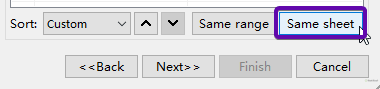
#5) Same range option
- Using this option, you can select the specified range in one worksheet and select the same range from all other sheets in the workbook automatically.

#6) Same Sheet option
- With this option, you can select the specific sheet across multiple workbooks that contain a specific sheet name.
- After configuring Step 2 , kindly click the Next button.

- It will go to the Step 3 wizard. In this dialog box, you need to specify the operations that you need.
- Then, click the Finish button.

- Now, it will open the Specify the file name and location for the combined workbook dialog box , where you need to select a folder to save the combined workbook.

- Click the Save button.
- The new workbook with the information of original workbooks is created as shown in the below image.

- Output file link – You can click this link to view the combined workbook directly.
- Then, all worksheets of the worksheets are combined into one worksheet according to your settings.

Steps to Combine Worksheets of Same Names into One Worksheet:
To combine worksheets/ranges of the same names into one worksheet, follow the below instructions.
- Go to the Kutools Plus Tab, select the Combine option.
- It will display a prompt box, you need to click the OK button.
- Now, it will open the Combine Worksheets – Step 1 of 3 dialog box.
- Combine Operations – In this section, you need to select the Combine multiple worksheets from workbooks into one worksheet option.
- Then, click the Next button.
- In Step 2 , please add the workbooks that you want to combine worksheets of same into one worksheet.

- In Step 3 , refer to the above section to configure the settings. Then, hit the Finish button to get the result.
- You can see that all worksheets of the same name have been combined into one worksheet as shown in the following screenshot.

- Output file link – You can click this link to view the combined workbook directly.
- Then, all worksheets of the worksheets are combined into one worksheet according to your settings.

Combine Same/Different Ranges from Different Worksheets:
To combine the same or different ranges from different worksheets, follow the below steps.
- Go to the Kutools Plus Tab, select the Combine option.
- It will display a prompt box, you need to click the OK button.
- Then, it will open the Combine Worksheets – Step 1 of 3 dialog box.
- Combine Operations – In this section, you need to select the Combine multiple worksheets from workbooks into one worksheet option.
- Then, click the Next button.
- In Step 2 , please add the workbooks that you want to combine worksheets of same into one worksheet.
- In Step 3 , refer to the above section to configure the settings. Then, hit the Finish button.
- You can see the ranges from different or same worksheets will combine into one worksheet as shown in the following screenshot.
- After clicking the Finish button, ranges of different worksheets have been combined into one worksheet as shown in the following screenshot.

A Brief Summary:
In the above article, you Clearly understand the steps to Combine Multiple Worksheets/Ranges into One Worksheet in Excel Office 365 using Kutools. Drop your feedback in the comment section. Thanks for visiting Geek Excel. Keep Learning!


Top comments (0)