I’m relatively new on macOS and one of the biggest problems switching from Windows was set up all those SDK and libraries required for web/mobile development.
I made several mistakes, but I think that finally found a good way to set up a macOS as a development machine.
It's not a definite solution because there are uncountable combinations and I can cover all of them. Just use what you need, don't install SDK or software that you will not gonna use.
Before start highly recommend change your terminal follow this configuration:

Software Repository
Homebrew
Brew has his own classification. The inside brew can found the CLI app and utilities. Inside is cask all the application with Graphical Interface.
/bin/bash -c "$(curl -fsSL https://raw.githubusercontent.com/Homebrew/install/HEAD/install.sh)"
Add this lines to ~/.bash_profile and/or ~/.zshrc file:
#Brew
eval "$(/opt/homebrew/bin/brew shellenv)"
Run this commands on terminal:
eval "$(/opt/homebrew/bin/brew shellenv)"
source ~/.zshrc
source ~/.bash_profile
Restart your terminal, then update and upgrade brew sources:
brew tap homebrew/cask-fonts
brew update --force --quiet
brew upgrade
brew cleanup
Run this command, and follow doctor recommendations:
brew doctor
SDK Man
curl -s "https://get.sdkman.io" | bash
source "$HOME/.sdkman/bin/sdkman-init.sh"
Permissions
Add permissions to user (or group) under this folders and enclosed items:
sudo chown -R $(whoami) /usr/local/opt
sudo chown -R $(whoami) /usr/local/share
WARNING: Add the next permission just in case your machine is used by only one user.
sudo chown -R $(whoami) /usr/local/lib
General Purpose
Visual Studio Code
brew install --cask visual-studio-code
On first run press ⌘ + ⇧ + P and run the command: Shell Command: install 'code' command PATH. And now you can use code command from the command line. Example: code . open an editor on the current folder.
Git
brew install git
brew unlink git && brew link git
brew install git-lfs
git lfs install
Git Config
In order to use setup git config to use Visual Studio Code instead of Vim run this command:
git config --global core.editor 'code --wait'
Use this command to edit global configuration:
git config --edit --global
Merge and Diff Config
If also want to use VScode as your difftool and your mergetool. Add the below configuration to your global configuration.
[merge]
    tool = vscode
[mergetool "vscode"]
    cmd = code --wait $MERGED
[diff]
    tool = vscode
[difftool "vscode"]
    cmd = code --wait --diff $LOCAL $REMOTE
Use main branch
And if you want to change your default branch with main as GitHub does.
git config --global init.defaultBranch main
Source Tree
brew install --cask sourcetree
Web Development
Node.js
I prefer to install Node through Volta.
brew install volta
Add this environment variables to ~/.bash_profile and/or ~/.zshrc file:
export VOLTA_HOME="$HOME/.volta"
export PATH="$VOLTA_HOME/bin:$PATH"
To install a version use:
| Version | Description |
|---|---|
@atest |
Latest version |
@lts |
Long Term Support |
@# |
Suitable version |
@#.#.# |
Specific version |
I'll prefer works with LTS version
volta install node@lts
To list all installed versions use:
volta list all
ℹ️ to switch between versions use the same command to install.
Yarn (npm alternative)
volta install yarn
Packages
Do it with your favorite node package manager: yarn or npm
| Name | Yarn | npm |
|---|---|---|
| Angular | yarn global add @angular/cli |
npm i -g @angular/cli |
| Cordova | yarn global add cordova |
npm i -g cordova |
| Gulp | yarn global add gulp |
npm i -g gulp |
| ESLint | yarn global add eslint |
npm i -g eslint |
| Typescript | yarn global add typescript |
npm i -g typescript |
CLI Tools
Do it with your favorite node package manager: yarn or npm
| Name | Yarn | npm |
|---|---|---|
| fkill-cli | yarn global add fkill-cli |
npm i -g fkill-cli |
| npkill | yarn global add npkill |
npm i -g npkill |
Yarn with VSCode
If you are using Visual Studio Code and ESLint extension, need extra configurations settings:
"eslint.packageManager": "yarn",
Yarn with Angular
Using Yarn with Angular CLI, needs to run a command inside an Angular project.
| v1.7.4- | v6+ |
|---|---|
ng set --global packageManager=yarn |
ng config -g cli.packageManager yarn |
Angular Console
The Power of the Angular CLI. The Convenience of an App.
brew install --cask angular-console
Browsers
brew install --cask google-chrome
brew install --cask firefox
brew install --cask homebrew/cask-versions/firefox-developer-edition
brew install --cask opera
brew install --cask opera-developer
brew install --cask microsoft-edge
brew install --cask microsoft-edge-dev
Take this FREE course: DevTools Pro: The Basics of Chrome Developer Tools.
Mobile
I like to install Gradle and Java with SDK Man because have projects that and need switch between different version, change it with SDK Man is easy.
Gradle
I'm working with 3.3 and 4.4.1 versions, if you want to use the last version, avoid the version number at the end.
sdk install gradle 3.3
sdk install gradle 4.4.1
sdk use gradle 4.4.1
sdk default gradle 4.4.1
Java
sdk list java
Search AdoptOpenJDK version, like 8.0.272.hs-adpt on this list, and use it at the end like those commands.
sdk install java 8.0.272.hs-adpt
sdk use java 8.0.272.hs-adpt
sdk default java 8.0.272.hs-adpt
Android SDK
brew install --cask android-sdk
Useful SDK Manager commands:
| Action | Command |
|---|---|
| List packages | sdkmanager --list |
| Install NDK | sdkmanager "ndk-bundle" |
| Install build-tools | sdkmanager "build-tools;28.0.3" |
| Install platform | sdkmanager "platforms;android-28" |
| Update installed packages | sdkmanager --update |
Add this environment variables to ~/.bash_profile and/or ~/.zshrc file:
export ANDROID_SDK_ROOT="/usr/local/share/android-sdk"
export ANDROID_HOME="$ANDROID_SDK_ROOT"
export ANDROID_NDK_HOME="$ANDROID_SDK_ROOT/ndk-bundle"
export ANDROID_BT_VERSION="$(ls -tr $ANDROID_SDK_ROOT/build-tools | sort | tail -1)"

export PATH="$ANDROID_SDK_ROOT/bin:$PATH"
export PATH="$ANDROID_SDK_ROOT/build-tools/$ANDROID_BT_VERSION:$PATH"
export PATH="$ANDROID_SDK_ROOT/platform-tools:$PATH"
export PATH="$ANDROID_SDK_ROOT/tools:$PATH"
export PATH="$ANDROID_NDK_HOME/:$PATH"
Android Bundle Tool
brew install bundletool
Android Studio
brew install --cask android-studio
brew install --cask intel-haxm
On the first run go to Tools -> Create Command-line Launcher. And now you can use studio command from the command line. Example: studio . open IDE on current folder.
JADX
Dex to Java decompiler
brew install jadx
Scrcpy (Mobile Screen Sharing)
brew install scrcpy
Xcode
Just install it from Apple Store: Xcode and Xcode Command Line Tools
xcode-select --install
Cloud and Remote
Docker
brew install --cask docker
FileZilla (FTP Client)
brew install --cask filezilla
Cryptomator
Free client-side encryption for your cloud files. Open-source software: No backdoors, no registration.
brew install --cask cryptomator
Database
MySQL + Workbench
brew install mysql
brew install --cask mysqlworkbench
To launch MySQL now and restart at login:
brew services start mysql
Or, if you don’t want/need a background service you can just use the mysql.server tool:
mysql.server start
mysql.server stop
PostgreSQL and pgAdmin
brew install postgresql
brew install --cask pgadmin4
Add this environment variables to ~/.bash_profile and/or ~/.zshrc file:
export POSTGRESQL_HOME="/usr/local/opt/postgresql"

export PATH="$POSTGRESQL_HOME/bin:$PATH"
export LDFLAGS="-L$POSTGRESQL_HOME/lib"
export CPPFLAGS="-I$POSTGRESQL_HOME/include"
Initialize and start server
initdb /usr/local/var/postgres -E utf8
createuser -s postgres
brew services start postgresql
Microsoft
.Net Core SDK
brew install --cask dotnet-sdk
Add this environment variables to ~/.bash_profile and/or ~/.zshrc file:
export DOTNET_HOME="/usr/local/share/dotnet/dotnet"
export PATH="$DOTNET_HOME/bin:$PATH"
Graphic Design
Gimp (Image Editor)
brew install --cask gimp
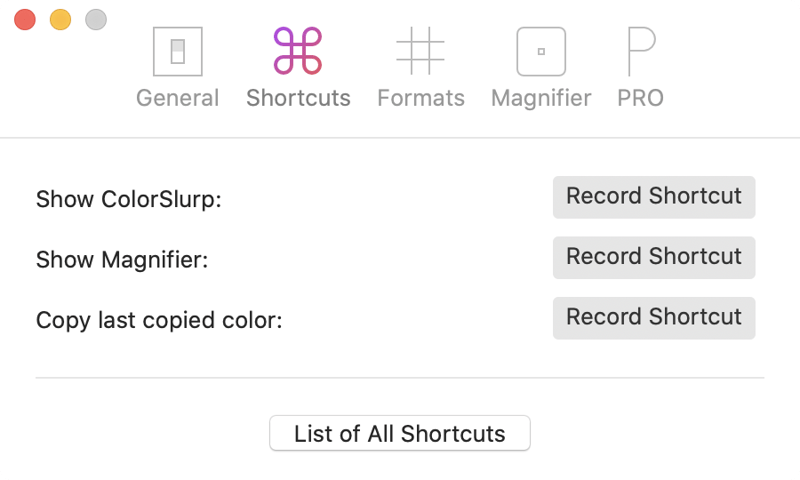
Slurp (Color Picker)
Just install Slurp from Apple Store and remove all his shortcuts because interferes with VSCode ones.
Utilities
Don't use the default mail app, it's primitive and not usable at all. Just install Spark Mail from Apple Store.
Communicators
brew install --cask slack
brew install --cask discord
brew install --cask microsoft-teams
brew install --cask webex-teams
Notion
brew install --cask notion
Keka (File Compression)
brew install --cask keka
Follow these instructions: set as default compress application
App Cleaner (App Uninstaller)
Use it with software installed manually. With software installed with brew use brew remove <package_name> or brew remove --cask <software_name>.
brew install --cask appcleaner
Karabiner (Keyboard Customizer)
brew install --cask karabiner-elements
Muzzle
Silence embarrassing notifications while screencasting.
brew install --cask muzzle
Dozer
Hide menu bar icons on your Mac.
brew install --cask dozer
The Clock
brew install --cask the-clock
EUL
Status monitoring with Big Sur widgets
brew install --cask eul
Productivity
Yes, I'm that kind of Developer that turn Caffeine Music into Code.
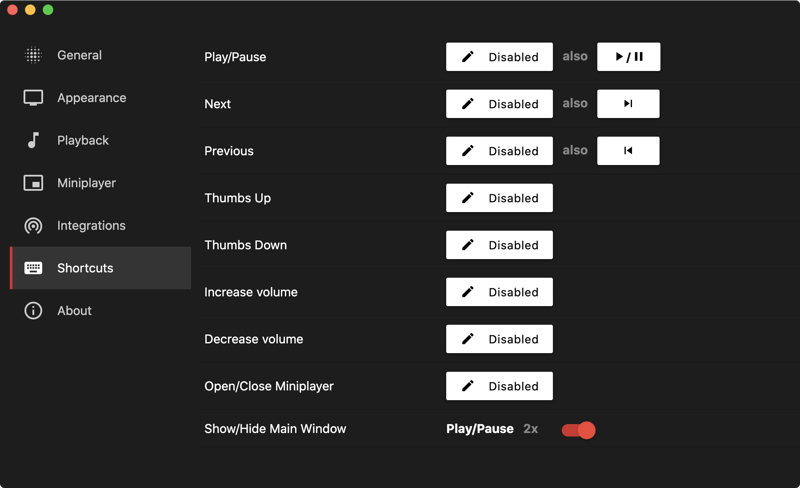
YouTube Music (Desktop Player)
I've preferred YTM over Spotify because I can upload my own underground music collection that is not available in public music collections. That's a plus for Metalheads 🤘.
brew install --cask ytmdesktop-youtube-music
Remove all his shortcuts because interferes with macOS and VSCode ones.
Spotify
brew install --cask spotify
Rectangle (Windows Management)
brew install --cask rectangle
To avoid collisions with Visual Studio Code keyboard combination uses the alternative shortcuts. Running this command in a terminal and restart rectangle:
defaults write com.knollsoft.Rectangle alternateDefaultShortcuts -bool true

Keeping You Awake
A small menu bar utility that can prevent your Mac from entering sleep mode for a predefined duration or as long as it is activated.
brew install --cask keepingyouawake
Aware (Track Time)
A simple menubar app that tracks how long you’ve been actively using your computer.
brew install --cask aware
CheatSheet (Key Shortcuts)
Just hold the ⌘-Key a bit longer to get a list of all active short cuts of the current application. It’s as simple as that.
brew install --cask cheatsheet
Bonus Track
Once finish install of what you need, run the command brew cleanup to release disk space.
Screenshot without Shadow
Just use Shift ⇧ + ⌘ + 4 + Space, and hold down ⌥ when you click to select the window.
Or you can disable forever the shadow added when capturing an entire window by executing the following command from the terminal:
defaults write com.apple.screencapture disable-shadow -bool TRUE
killall SystemUIServer
And change the default location
defaults write com.apple.screencapture location ~/Pictures/Screenshots
Drag & Drop
Learn these useful tips:
That’s All Folks!
Happy Coding 🖖


Top comments (20)
I didn't read everything but a quick note about your Node and Yarn setup! I would strongly recommend using nvm for managing Node versions and not installing Node through Brew. It allows you fine grained control over what Node you want to use, don't have to just use one version on your whole system!
Once you've got that, you'll also want to install Yarn without Node so that it's independent of the version of Node which is handled by nvm.
I've found it's a far more pleasant experience working this way, being able to easily change versions as needed!
Now I moved to NVM :D
Excellent, I have no idea about nvm. I'n my case I'm only need LTS version but it's cool to other know that. Thanks!
Hello Camilo, what a coincidence that I read some of this article yesterday! I just got a new Macbook and looked through around 10 articles to make sure I set up my $PATH and nvm correctly. I'm confused why tutorials advise having
.sshand.bashrcunder$HOMEwhilst stuff that's installed through brew actually goes intoMacintoshHD/usr/local/....?Really, I have no idea. I never seen something about it before.
Do you have some of this links? I can take a look and try to understand.
You might consider giving this repo a look:
github.com/Pivotal/workstation-setup
With a couple of tweaks (you can fork the repo to your own GitHub and make them there) you can cover most everything a modern developer might encounter.
Disclaimer: I work at Pivotal and use this setup project to pave our workstations on a regular basis between client engagements.
Looks nice. I'm thinking do it similar with a console in .Net Core
This leaves out all the web developers, luckily there's this walkthrough --> medium.com/the-way-of-the-dev/http...
DISCLAIMER: the walkthrough is written by me -_^
Fyi: apparently Spectacle isn't actively being developed anymore.
They've recommended users switch to Rectangle instead.
(Haven't tried it personally though)
brew cask install rectangleToday I moved to rectangleapp and it's awesome: have keyboard shortcuts (like spectacle) but also magnetic windows like winOS.
Post updated with Rectangle information.
Thanks for the advice @bxe5056 !
Thanks! I'll take a look next week.
github.com/rxhanson/Rectangle
I don't think you really need to do all this. Macs aren't far off being usable machines in the first place.
I'd do
homebrewand a better terminal and (if my development stack was that way) installdockerand/orvagrant. The rest of it's all very specific to a particular development stack.On a more serious note, I would not do this:
simply because there's no reason to and you're messing things up for anyone else who wants to use the same system. I know, I know, Macs are usually one-person machines, but they run unix and are theoretically multi-user. Why try to break it?
Yes this kind of thing are very opinionated. I work with non particular Stack: c#, .Net Core, Web and Mobile. Hope can be used as guide. You give me a good idea, organizing it as stacks.
About
/usr/local/binyou are completely right I'll add a Warning about. Just use in case you machine is used by only one user.Thanks!
Very Nice overview. But let's not forget dart cli and eco system:
dart.dev/get-dart
Great! Almost everything looks familiar, but have learned something new.
Found typo: Filezilla gist repeats below Keka (File Compression).
Thanks! Fixed.
I never heard about meta key. I'll search about it.
Using docker for development will be good instead of installing all this stuff
Yeeess, that say me a partner. Maybe you know a link that to the same with Docker? I want to learn.
Those quick access sound nice... great tip.
Sometimes fix something in terminal is slowly, moving only with arrow keys.
Thanks!