Recently I had to deploy a full stack project for a client.
I decided to upload it on a Linux VPS server because other solutions seemed more complex or unstable.
So the journey of deploying a full stack project (.NET core 6, React and Postgre) on an empty ubuntu server.
The ubuntu version installed on my vps server was 20.04
So lets begin the setup.
First you need to connect to your machine through ssh.
There are many ways you can ssh but we are going to use Visual studio code, in order to have a visual representation of the directory structure so we can edit file on server with visual studio code.
Let's connect to our VPS with visual studio Code
Step 1 — Install the Remote-SSH Plugin
Search Remote-SSH on extensions Marketplace and install it
Step 2 — Configuring the Remote-SSH Plugin and Connecting To Your Server
Now that you have the plugin installed you can configure it to connect to a server. To do so, you’ll need the following pieces of information:
The server’s IP or hostname.
The server’s IP or hostname.
The username you’ll connect with.
The private key you’ll use to authenticate your user.
You’ll use this information to create an SSH configuration file that Visual Studio Code can use to SSH to the server to sync files and execute code on your behalf. You will create this configuration using Visual Studio Code.
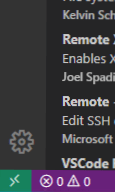
Now that you have the Remote-SSH plugin installed, you’ll see a small green box in the bottom left-hand corner of the Visual Studio Code interface.
Click the button, and a dialog box appears in the top center. Select Remote-SSH: Open Configuration File… from the list:
The next prompt will ask you which configuration file you want to open. If you’re on Windows, you’ll see two locations: one in your personal user directory, and one in the installation location for SSH. You should use the file in your user directory when configuring the server.
Select the file and your editor will open the config file. Add the following code to the file to define the connection to your server, replacing the highlighted sections with the information for your server:
Host my_remote_server
    HostName your_server_ip_or_hostname
    User sammy
    IdentityFile /location/of/your/private/key
Visual Studio Code is now configured and ready to connect to your server. Click on the green Open a remote window button in the bottom left-hand corner and select Remote-SSH: Connect to Host…
Once you’ve done this all the available and configured servers will appear in the dropdown menu. Select the server that you want to connect to from this list.
If this is the first time you have connected to this server from your machine, you’ll likely be prompted with the SSH Fingerprint verification dialog, like the one in the following image:

This is to ensure that you are really connecting to the server you think you are. You can verify this by logging in to your server manually and running ssh-keygen -l -f /etc/ssh/ssh_host_key.pub to view the fingerprint of the server. If this fingerprint is the same as the one being presented to you in Visual Studio Code, then you are indeed connecting to the server you think you are so you can click Continue.
Visual Studio Code defaults to opening a new window when a new connection is made. A new window will appear with the welcome screen. You’ll know that your connection was successful if you see SSH: your_ip_address_or_hostname in the green box in the bottom left-hand corner. This means that Visual Studio Code is connected and communicating with your remote server.
Next let's clean and update the server
Run the following commands
apt clean all && sudo apt update && sudo apt dist-upgrade
rm -rf /var/www/html
Nginx
Nginx, pronounced like “engine-ex”, is an open-source web server that, since its initial success as a web server, is now also used as a reverse proxy, HTTP cache, and load balancer.
Installing Nginx
apt install nginx
UFW
Uncomplicated Firewall (UFW) is a program for managing a netfilter firewall designed to be easy to use. It uses a command-line interface consisting of a small number of simple commands, and uses iptables for configuration. UFW is available by default in all Ubuntu installations since 8.04 LTS.[1] UFW has been available by default in all Debian installations since 10.
Install ufw
apt install ufw
ufw enable
Give nginx full control of firewall
ufw enable
Now you have a full configured ubuntu server. You can run Node.js, dotNet core, static websites , database servers and many other things into your machine
Tell me if you want to to make a new post on how to run some of them in your server.
Thanks for your time.
Leave a question or comment below.


Top comments (0)