React Native is Facebook’s open-source cross-platform mobile application development framework, a derivative of React for the native mobile application platform, which supports both iOS and Android platforms. React Native uses Javascript, similar to HTML’s JSX, and CSS to develop mobile applications, allowing technical staff familiar with web front-end development to start working on mobile application development with a minimal learning curve. React Native also offers performance and experience close to that of native applications.
MQTT is a lightweight IoT messaging protocol based on a publish/subscribe model that enables stable transmission over severely constrained hardware devices and low-bandwidth, high-latency networks. With its easy implementation, QoS support, and small message size, it has been widely used in IoT industry.
This article focuses on the use of MQTT in React Native projects to connect, subscribe and unsubscribe, and send and receive messages from clients to MQTT brokers.
Create a New React Native Project
Here is an example of creating a project named, RNMQTTDemo, in the macOS development environment and iOS application platform. Refer to Setting up the development environment for details.
After the project is created, execute the following commands to install the required dependencies in the project root environment.
npm install @react-native-async-storage/async-storage @rneui/base @rneui/themed
Install the MQTT Client Module
npm install react_native_mqtt
react_native_mqtt is an MQTT client module used for the React Native project, which supports iOS and Android.
How to Use MQTT Client Module
Connecting to an MQTT Server
We use the free public MQTT server provided by EMQ, which is based on the MQTT cloud of EMQX. The server access information is as follows:
- Broker:
broker.emqx.io - TCP Port: 1883
- Websocket Port: 8083
Create a Client Instance
init({
  size: 10000,
  storageBackend: AsyncStorage,
  defaultExpires: 1000 * 3600 * 24,
  enableCache: true,
  sync : {}
});
const options = {
  host: 'broker.emqx.io',
  port: 8083,
  path: '/testTopic',
  id: 'id_' + parseInt(Math.random()*100000)
};
client = new Paho.MQTT.Client(options.host, options.port, options.path);
Connect to the MQTT Server
  connect = () => {
    this.setState(
      { status: 'isFetching' },
      () => {
        client.connect({
          onSuccess: this.onConnect,
          useSSL: false,
          timeout: 3,
          onFailure: this.onFailure
        });
      }
    );
  }
Subscribe
  subscribeTopic = () => {
    this.setState(
      { subscribedTopic: this.state.topic },
      () => {
        client.subscribe(this.state.subscribedTopic, { qos: 0 });
      }
    );
  }
Publish
  sendMessage = () =>{
    var message = new Paho.MQTT.Message(options.id + ':' + this.state.message);
    message.destinationName = this.state.subscribedTopic;
    client.send(message);
  }
Unsubscribe
  unSubscribeTopic = () => {
    client.unsubscribe(this.state.subscribedTopic);
    this.setState({ subscribedTopic: '' });
  }
Running the Project
The complete RNMQTTDemo project is located at: https://github.com/emqx/MQTT-Client-Examples/tree/master/mqtt-client-React-Native
In the project root environment, create two new terminal windows, and execute the following commands:
npx react-native start
npx react-native run-ios
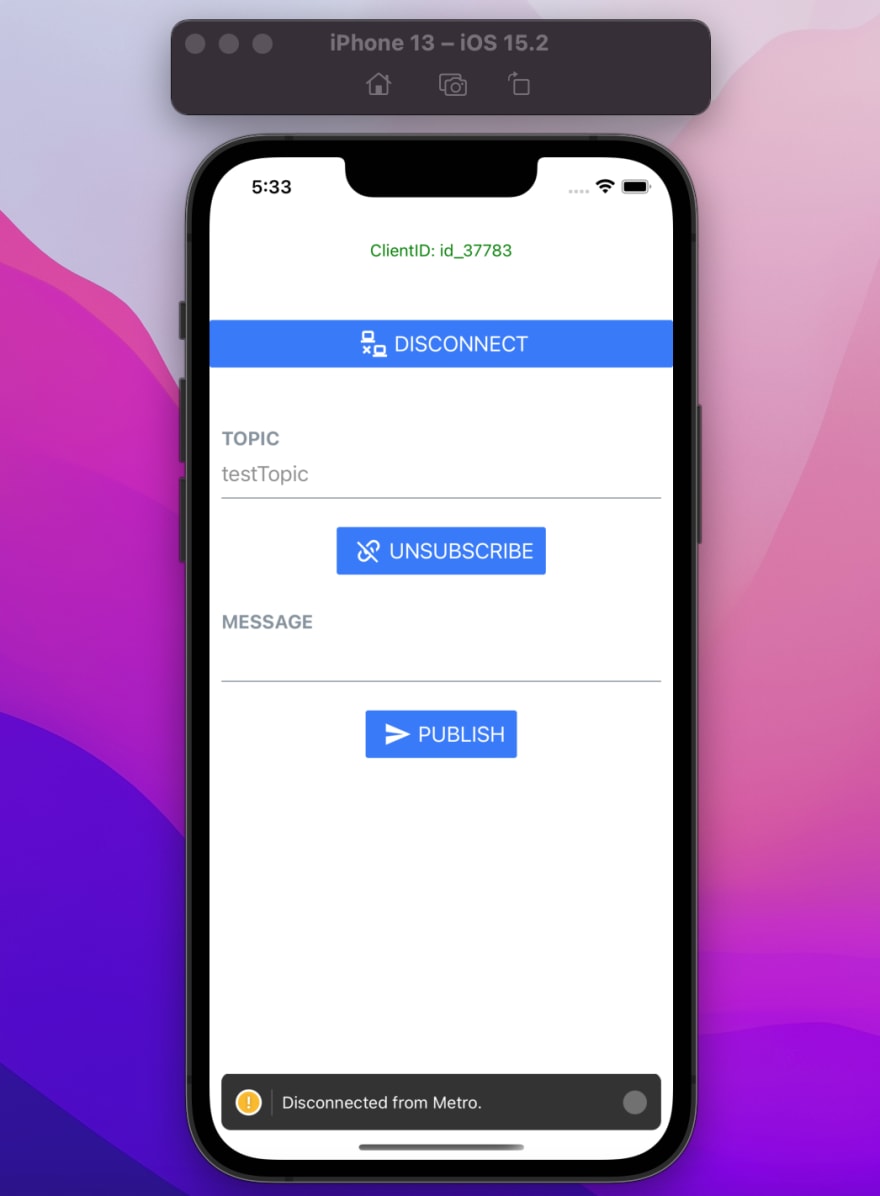
After that you will see the application run in the iOS emulator, where the client ID is displayed at the top, as follows:

MQTT Connection Test
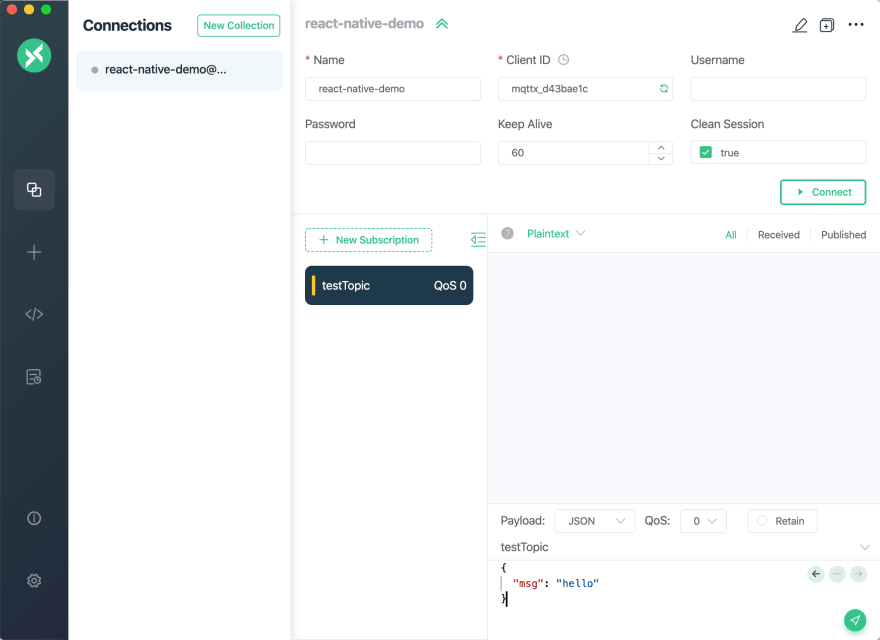
We will use the MQTT 5.0 client tool - MQTT X to perform the relevant tests. Create a connection named react-native-demo, use the default values for all configuration items, click the connect button, and add a subscription with the topic name, testTopic, after a successful connection, as follows:
Connect
Click the CONNECT button in the APP, and the interface will be displayed as below. After a successful connection, the content of the ClientID line at the top will turn green, indicating that the MQTT server has been successfully connected.

Subscribe
Enter the topic you want to subscribe to. Here, we take testTopic as an example. Then, click the SUBSCRIBE button. The interface after subscription will be displayed, as follows:
Publish
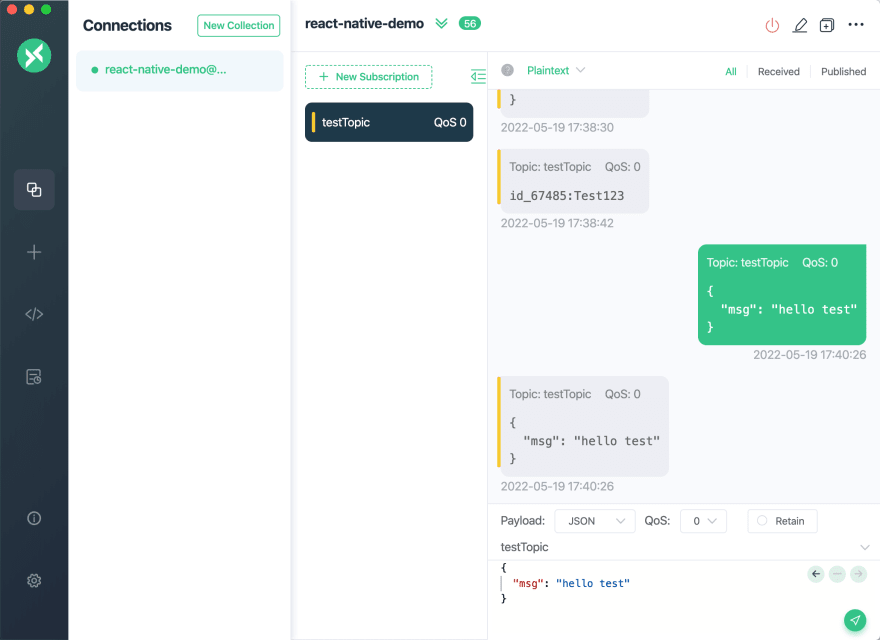
Enter the content of the message to be published, click the PUBLISH button after the input is finished, and the messages received under the present subscribed topic will be listed at the bottom, among which the message with a black background is sent by the present client. The ID of the present client is id_67485, and the interface is shown, as follows:

At the same time, under the react-native-demo connection of MQTT X, we will also publish some messages to the testTopic topic. The messages published by client ID id_67458 to the topic can also be seen, which is displayed, as follows:

Unsubscribe
Click the UNSCRIBE button in the APP. Then, proceed to post a message with { "msg": "hello test" } to the testTopic topic on MQTT X with the following display:
After unsubscribing from the testTopic topic, no message will be received from MQTT X for this topic { "msg": "hello test" }.

Summary
At this point, we have finished building an MQTT app on the iOS platform using React Native, implementing features such as connecting the client to the MQTT server, subscribing to topics, sending and receiving messages, and unsubscribing.
With React Native, developers can use standard iOS platform components and develop apps that perform nearly as well as native apps. The seamless cross-platform allows teams to work faster, while simply saving changes during development, as shown by the actual results in the iOS simulator. Efficient, near-native performance, hot reloading, and broad community support make React Native the best choice for many mobile app developers. Combining React Native with MQTT protocol and MQTT cloud service, users are also able to develop various interesting and innovative apps.


Top comments (0)