
In the current job market, I believe that every new developer should have a portfolio showcasing projects they have built. As someone who doesn't have experience, a portfolio is how you can stand out amongst the thousands of new graduates from college and bootcamps. I built a portfolio just like this when I graduated from bootcamp and got a job in 3 months. You can read my story here.
Even if the recruiter or hiring manager doesn't read everything on your website, a quick scan is enough to set you apart from everyone else who doesn't have a portfolio site.
If you are a beginner developer there is no reason why you shouldn't have your own site. It's free, simple, and quick to set up with Github pages. You can even add a custom domain for around $15 a year with no monthly hosting fees for some extra pizazz.
Here is a step-by-step guide on how to make your own portfolio website. This tutorial will be for complete beginners or people who do not know how to code who want to create their own portfolio websites. This will be extremely easy to follow, and I would encourage experienced developers to skip steps you already know how to do. You will not need to have any coding skills to follow most of this tutorial.
Setting up your Github repo for your page
First, you have to set up your Github repository which is where we will push all of our code.
My next article is a complete guide for git best practices and using git professionally. If you don't see the link yet follow the blog and you'll be notified when I post it.
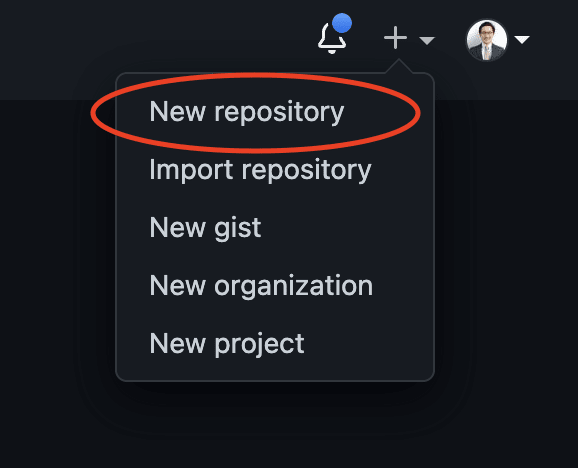
- Click the "+" button on the top right of the page on Github. There should be a dropdown that shows up, then press "New Repository".
- Use the "Select an owner" dropdown to choose which account will own the repository.

- Name your repository using this naming scheme
<user>.github.io. So since my user name is edmondthui I will name my repositoryedmondthui.github.io.
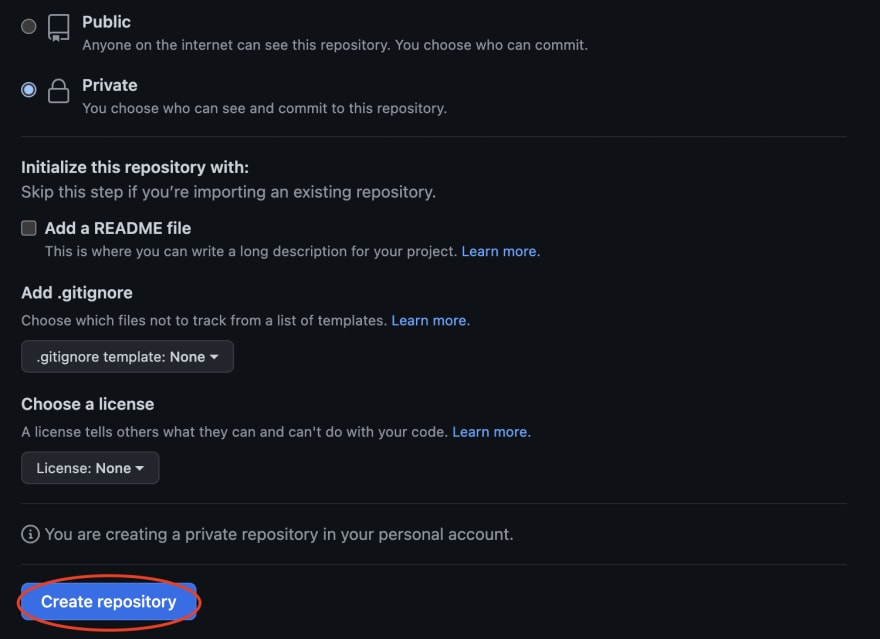
- Make your repository visibility public, check whether you want a read me, and then create your repository.
Setting up Git locally
Now that we're past the boring part we can open up our IDE. I like using VS Code but you can use any editor you like.
- First we have to set up our Github repository locally. In a new directory type
git initinto the terminal to start tracking your current directory with git.
- Copy the quick setup link from Github and run
git remote add origin <your link here>

- Optional - you can rename your branch to "main" by running
git branch -M main. GitHub uses "main" as the name of your primary branch. Git still defaults your branch to be called "master".
Choosing a template for your portfolio website
We will be using a template to make our website. I believe that most developers should use a template when building their personal portfolios.
The amount of time it takes to make a beautiful website is not worth it, especially since this guide is targeting developers who are trying to break into the industry to get their first tech job. There are more important things to do, such as portfolio projects and improving your interviewing skills.
What we are looking for is a template that has the following things:
- An easy-to-customize setup
- Eye-catching responsive design
- A contact form
You can browse different free themes here and choose what you think would work the best for yourself. I will be using this theme called Profile for this example.
- Download your theme and unzip the files into the folder where you created your git repository.

- You should see a file called
index.html. This will be the file we will be editing and customizing with all your information. Click on it and you should be able to edit the contents of that file.
- You can view your progress by opening the
index.htmlfile in chrome by double-clicking it. You will want to inspect your changes ever so often to make sure you aren't breaking anything. - We will only be editing the information between opening and closing HTML tags. The vast majority of tags must be opened
<tag>and closed</tag>with the element information such as a title or text resting between the tags. You can change the information between the tags to whatever text you want to display. Replace all the information on the index page template with your information. Make sure you do not accidentally delete any tags or change the structure of the file.

- Update any links with your personal links. You can do this by replacing wherever it has
href="<your link here>"
- If you need to delete any elements find them in your editor and delete both the tags containing all the information you want to delete.


- Replace any images in your image folder with new files making sure you keep the names of the files the same.

Once you are happy with how your page looks you're ready for the next step.
Pushing your code to Github
The next step is getting all your code to Github so we can use Github pages to create a static site so people can see your website.
- Run
git status, this should show all the changes you have made. Confirm there are changes before continuing.
- Run
git add .to add all the changes from your directory to be staged for the next commit. You can rerungit statusto make sure your files have been added.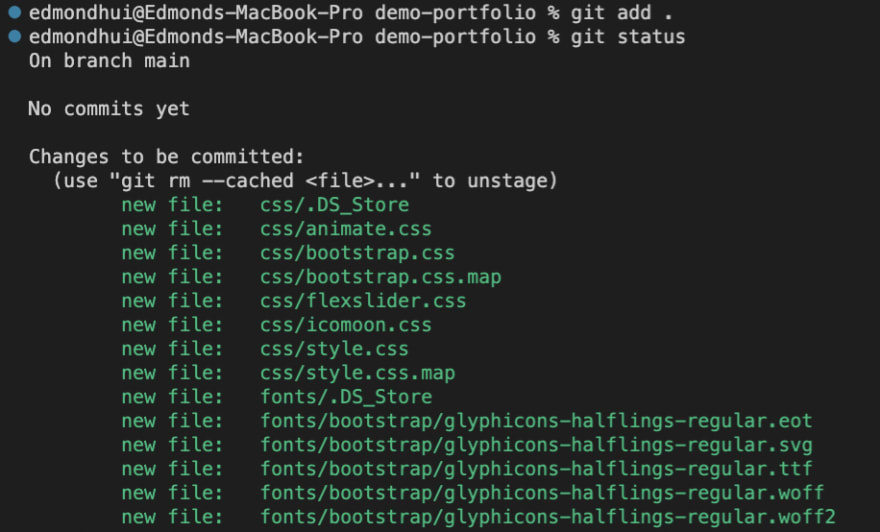
- Now that you have staged your changes you have to commit them by running
git commit -m "<any message here>"
- Push your code to Github by running
git push origin mainif you changed your branch name to main orgit push origin masterif you haven't changed your branch name.
- You should now see the code in your Github repository!
Creating a Github page for your repository
The last step is to make a Github page. Your repository needs to be public if you want to have a Github page with a free account.
- Go to settings for your repository on Github on the top right of the page.

- Click pages on the left side of the settings page.

- Select the
mainormasterbranch as the branch for your page, then click save.
- Click the checkbox to enforce https.

- Thats it! Your site should be live. Here is a link to the demo site that I made in this tutorial.
Optional - Adding a custom domain and sitemap for SEO
Custom domains are a great way to build a brand around yourself. It is another factor that can help set you apart from other developers. I do the exact same thing with my blog at https://www.blog.edmondhui.com/.
Using a custom domain with a Github page
- On the same page in the repository settings there is a field called custom domain. If you own a domain you can input it there. You can buy a domain on Godaddy or Google Domains for around $15. Then, click save.

- Next go to your PROFILE settings and click pages.


- Click "add domain" and then input your domain.
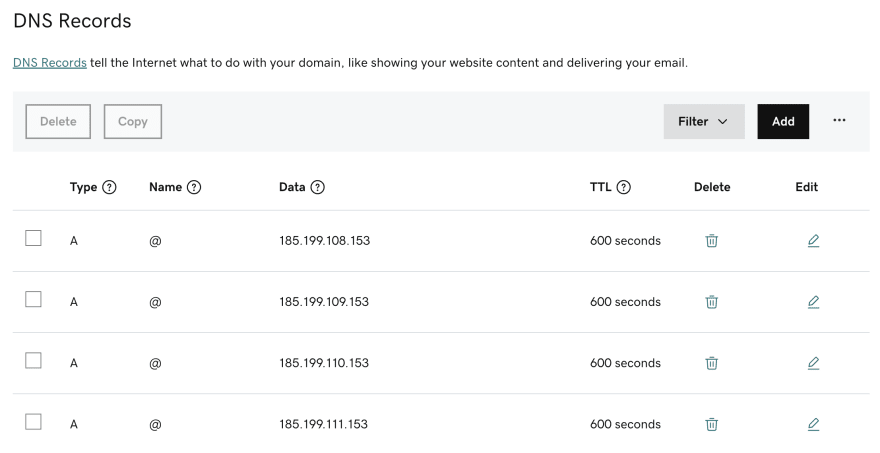
- Now go to manage DNS wherever you purchased your domain and add the A records you got from Github. You can copy and paste them here:
185.199.108.153
185.199.109.153
185.199.110.153
185.199.111.153
Using Github actions to automatically create a sitemap
If you want to try to rank your portfolio site you will need to submit a sitemap to Google to index your website. To do this you will need to use a Github action.
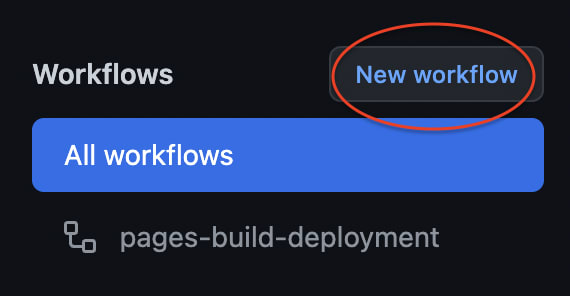
- In your repository click "Actions"

- Click "New workflow" to create an automated action
- Then click set up a workflow yourself

- In the workflow editor paste this code.
name: Generate xml sitemap
on:
push:
 branches: [main]
jobs:
sitemap_job:
 runs-on: ubuntu-latest
 name: Generate a sitemap

 steps:
   - name: Checkout the repo
     uses: actions/checkout@v2
     with:
       fetch-depth: 0

   - name: Generate the sitemap
     id: sitemap
     uses: cicirello/generate-sitemap@v1.8.4
     with:
       base-url-path: https://edmondhui.com/
       include-pdf: false

   - name: Output stats
     run: |
       echo "sitemap-path = ${{ steps.sitemap.outputs.sitemap-path }}"
       echo "url-count = ${{ steps.sitemap.outputs.url-count }}"
       echo "excluded-count = ${{ steps.sitemap.outputs.excluded-count }}"

   - name: Create Pull Request
     uses: peter-evans/create-pull-request@v3.12.0
     with:
       title: "Automated sitemap update"
       body: >
         Automated changes. Sitemap updated by
         the [generate-sitemap](https://github.com/cicirello/generate-sitemap)
         GitHub action.
       commit-message: "Automated sitemap update."
       author: Edmond Hui <edmond.t.hui@gmail.com>
       committer: Edmond Hui <edmond.t.hui@gmail.com>
       branch: create-pull-request/sitemap
       delete-branch: true
Change the branch name in the code to match whatever is your primary branch. Currently, it is set to [main]. You will also have to change the base-url-path to point to your url.
- Click "Start commit" and "Create new file" to create this Github action. This will run every time you push to either "main" or "master".

- Now you can go to Google Search Console and add your sitemap to your property.

Conclusion
Congratulations on making it to the end of the article! Hopefully, you will have your very own portfolio site that you can proudly share.
Even if you are not on the job hunt, having a personal portfolio website is extremely useful. Portfolios can help you professionally or help build your brand. For entrepreneurs, this can unlock opportunities and help you find business partners or investors.
I hope you enjoyed this beginner's guide to creating a personal portfolio. If you are a beginner developer I recommend reading my article about whether you should join a bootcamp or self study.


Top comments (0)