
In this article, we'll be covering the different types of navigations and also how to combine them together in react-native using react-navigation 5.
Table Of Content
- Prerequisite
- Project Setup
- Screens Setup
- Installing Dependencies
- Stack Navigator
- Tab Navigator
- Drawer Navigator
- Conclusion
Prerequisite
To be able to follow up with this article, you must have the following setup on your local environment
Node installed.
An emulator to test the app. You can use either Android Studio or Xcode.
Project Setup
To set up a react-native project, you can make use of the React Native CLI or the Expo CLI.
I would be making use of the Expo CLI to set up a react-native project. To do so, run the following command on your terminal.
npm install -g expo-cli
The above command would install Expo CLI on your machine.
Note: You need to have Node v12 installed on your machine to be able to install Expo CLI using the command line.
After the above command runs successfully, run the command below to generate/create a react-native project.
expo init project-name
Once the above command runs successfully, open the project in your desired code editor, and run npm start on the terminal to start the application.
To set up a react-native project using the React-Native CLI, check here.
React Navigation Dependencies & Setup
The dependencies below are the core utility used by the navigators to create the navigation structure, as well as our Stack, Tab, and Drawer navigation.
In your project directory, run the command below on your terminal
npm install @react-navigation/native @react-navigation/stack @react-navigation/bottom-tabs @react-navigation/drawer
These dependencies below are the dependency relied upon for gestures, animations, and transitions. Also, run the command below on your terminal to install the dependencies.
npm install react-native-reanimated react-native-gesture-handler react-native-screens react-native-safe-area-context @react-native-community/masked-view
In the root file of our app, in this case, the App.js file, we would set up our react-navigation there.
// ./App.js

import React from "react";
import { NavigationContainer } from "@react-navigation/native";

 const App = () => {
  return <NavigationContainer>{/* Navigation here */}</NavigationContainer>;
}
export default App;
Screens setup
The next step would be to set up screens that would be used in our application.
I would be setting up 3 screens for the purpose of this demo, feel free to just copy them.
So I'd set them up in a screens directory. Create a screens directory in the root of the project and add the components below
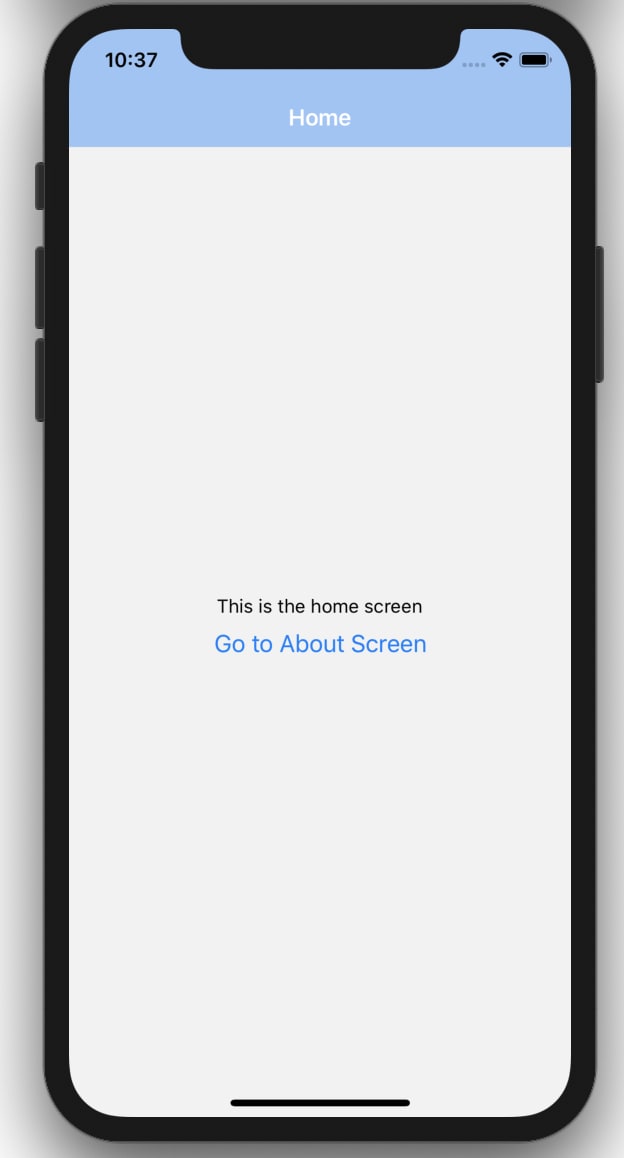
Home Screen
// ./screens/Home.js

import React from "react";
import { View, Button, Text, StyleSheet } from "react-native";

const Home = () => {
  return (
    <View style={styles.center}>
      <Text>This is the home screen</Text>
      <Button title="Go to About Screen" />
    </View>
  );
};

const styles = StyleSheet.create({
  center: {
    flex: 1,
    justifyContent: "center",
    alignItems: "center",
    textAlign: "center",
  },
});

export default Home;
About Screen
// ./screens/About.js

import React from "react";
import { View, StyleSheet, Text } from "react-native";

const About = () => {
  return (
    <View style={styles.center}>
      <Text>This is the about screen</Text>
    </View>
  );
};

const styles = StyleSheet.create({
  center: {
    flex: 1,
    justifyContent: "center",
    alignItems: "center",
    textAlign: "center",
  },
});

export default About;
Contact Screen
// ./screens/Contact.js

import React from "react";
import { View, StyleSheet, Text } from "react-native";

const Contact = () => {
  return (
    <View style={styles.center}>
      <Text>This is the contact screen</Text>
    </View>
  );
};

const styles = StyleSheet.create({
  center: {
    flex: 1,
    justifyContent: "center",
    alignItems: "center",
    textAlign: "center",
  },
});

export default Contact;
Stack Navigation
Stack navigation provides a way for react-native apps to transition between screens by using a stack, which means the screens are stacked on each other.
For example, if you navigate from login to signup screen, the signup screen is stacked on top of the login screen, and if you navigate back, the signup screen is then popped off the stack.
To set up the stack navigation, I'd create a navigation directory at the root of our project. Inside our newly created directory, I'd also create a StackNavigator.js file in there, and add our stack navigation setup.
Note: You can decide to name the folders and files however you want
// ./navigation/StackNavigator.js

import React from "react";
import { createStackNavigator } from "@react-navigation/stack";

import Home from "../screens/Home";
import About from "../screens/About";

const Stack = createStackNavigator();

const MainStackNavigator = () => {
  return (
    <Stack.Navigator>
      <Stack.Screen name="Home" component={Home} />
      <Stack.Screen name="About" component={About} />
    </Stack.Navigator>
  );
}

export { MainStackNavigator };
You can also customize and style the stack navigation by adding screenOptions prop style, see basic example below
// ./navigation/StackNavigator.js

const MainStackNavigator = () => {
  return (
    <Stack.Navigator
      screenOptions={{
        headerStyle: {
          backgroundColor: "#9AC4F8",
        },
        headerTintColor: "white",
        headerBackTitle: "Back",
      }}
    >
      <Stack.Screen name="Home" component={Home} />
      <Stack.Screen name="About" component={About} />
    </Stack.Navigator>
  );
}
Back in our App.js file, we can import and add our newly created Stack Navigator. So our App.js file would look like the code below
// ./App.js

import React from "react";
import { NavigationContainer } from "@react-navigation/native";

import { MainStackNavigator } from "./navigation/StackNavigator";

 const App = () => {
  return (
    <NavigationContainer>
      <MainStackNavigator />
    </NavigationContainer>
  );
}
export default App
Now if we run the code on our emulator, We should now see our Home screen rendering on our Stack screens.
Remember in our ./screens/Home.js file, we had a button that did nothing, but since we have our stack navigation setup, we can now have access to navigation prop injected by the stack navigation which can help us perform many operations, one of which is redirecting.
So navigate to ./screens/Home.js and add the code below.
// ./screens/Home.js

import React from "react";
import { View, Button, Text, StyleSheet } from "react-native";

const Home = ({ navigation }) => {
  return (
    <View style={styles.center}>
      <Text>This is the home screen</Text>
      <Button
        title="Go to About Screen"
        onPress={() => navigation.navigate("About")} // We added an onPress event which would navigate to the About screen
      />
    </View>
  );
};

const styles = StyleSheet.create({
  center: {
    flex: 1,
    justifyContent: "center",
    alignItems: "center",
    textAlign: "center",
  },
});

export default Home;
In the code above, we get the navigation prop, which is an object that has a navigate function which we then call passing in the name of the screen we want to navigate to after the button is pressed.

And there we have it, we can now navigate between screens using our stack navigation.
Tab Navigation
Tab navigation is a navigation that is tabbed at either the bottom or top of a screen and can be used to switch between different screens.
Tab navigation can take in either the screen as a component or a Stack as the component.
In our StackNavigator.js file, let's create another stack for our contact screen. So our StackNavigator.js will look like below
// ./navigation/StackNavigator.js

import React from "react";
import { createStackNavigator } from "@react-navigation/stack";

import Home from "../screens/Home";
import About from "../screens/About";
import Contact from "../screens/Contact";

const Stack = createStackNavigator();

const screenOptionStyle = {
  headerStyle: {
    backgroundColor: "#9AC4F8",
  },
  headerTintColor: "white",
  headerBackTitle: "Back",
};

const MainStackNavigator = () => {
  return (
    <Stack.Navigator screenOptions={screenOptionStyle}>
      <Stack.Screen name="Home" component={Home} />
      <Stack.Screen name="About" component={About} />
    </Stack.Navigator>
  );
}

const ContactStackNavigator = () => {
  return (
    <Stack.Navigator screenOptions={screenOptionStyle}>
      <Stack.Screen name="Contact" component={Contact} />
    </Stack.Navigator>
  );
}

export { MainStackNavigator, ContactStackNavigator };
We can then create another file TabNavigator.js in the navigations directory and add the markup for our TabNavigator
// ./navigation/TabNavigator.js

import React from "react";
import { createBottomTabNavigator } from "@react-navigation/bottom-tabs";

import { MainStackNavigator, ContactStackNavigator } from "./StackNavigator";

const Tab = createBottomTabNavigator();

const BottomTabNavigator = () => {
  return (
    <Tab.Navigator>
      <Tab.Screen name="Home" component={MainStackNavigator} />
      <Tab.Screen name="Contact" component={ContactStackNavigator} />
    </Tab.Navigator>
  );
};

export default BottomTabNavigator;
And then back in our App.js file, we can now import our newly created TabNavigator and use it there.
//  ./App.js

import React from "react";
import { NavigationContainer } from "@react-navigation/native";

import BottomTabNavigator from "./navigation/TabNavigator";

 const App = () => {
  return (
    <NavigationContainer>
      <BottomTabNavigator />
    </NavigationContainer>
  );
}
export default App

Drawer Navigation
Drawer navigation is a slide-out and slide-in drawer that contains links to various screens. The Drawer navigation opens when a menu icon is clicked or when a user swipes their finger from the left or right edge of the app.
In order to create drawer navigation, we would create another file in our navigations directory called DrawerNavigator.js
In that file, we would add our drawer navigator markup
// ./navigation/DrawerNavigator.js

import React from "react";

import { createDrawerNavigator } from "@react-navigation/drawer";

import { ContactStackNavigator } from "./StackNavigator";
import TabNavigator from "./TabNavigator";

const Drawer = createDrawerNavigator();

const DrawerNavigator = () => {
  return (
    <Drawer.Navigator>
      <Drawer.Screen name="Home" component={TabNavigator} />
      <Drawer.Screen name="Contact" component={ContactStackNavigator} />
    </Drawer.Navigator>
  );
}

export default DrawerNavigator;
And then back in our App.js file, we can now import our newly created DrawerNavigtor.js file and use it as our navigator.
// ./App.js

import React from "react";
import { NavigationContainer } from "@react-navigation/native";

import DrawerNavigator from "./navigation/DrawerNavigator";

 const App = () => {
  return (
    <NavigationContainer>
      <DrawerNavigator />
    </NavigationContainer>
  );
}
export default App;

There are also configuration options and header icons you can add to customize your drawer navigation. Find out more here.
Conclusion
In this article, we've been able to look at how to set up and combine the Stack, Tab, and Drawer navigation for our react-native app using react-navigation 5.
The source code used in demonstrating this article can be found here.
If you have any questions or feedback about this article, feel free to leave a comment.
Thanks for reading.


Oldest comments (41)
Hi! Great Article, Can I hide tab bar on nested About ?
Yes, you should be able to hide the tab bar on specific screens by passing tabBarVisible as a prop to the navigation options I think
how can i insert icons in tab navigator items
Hey! you just saved a soul today. Thanks alot.
I have made a Tab Navigator for my React Native App and I want to call this tab navigator with a click of a button. Currently, I have a SignUpScreen and SignInScreen and the button I want to call is inside SignInScreen with the props called { navigation } with the function but the button is throwing an error of undefined 'navigation.navigate' object. My Tab Navigator works perfectly fine but I am not able to call it on this Login button, is there something to do with Stack Navigator here? I am calling Tab Navigator to my HomeScreen and this HomeScreen inside the Login Button. Any help will be appreciated.
So I'm guessing the way your navigation is set up is that your Tab navigation is calling the Stack navigation, and the Tab navigation is being used in the
App.jsentry point to the app right?Actually, Tab Navigation (I am using this inside return function of a HomeScreen) should be called on a button but it’s not working.
For the App.js, right now I have made SignInScreen as my entry point which comes from AppTextInput file and this AppTextInput.js file has a button to call Tab Navigation, but unluckily, I am getting an error of undefined navigation.navigate even though I am using the navigation props with the function.
I think the issue is you need to return a navigation (tab navigation which contains the stack screens) in the app.js file, just like it's shown in this article. You can set the default screen to show up on the first app load.
My default screen is SignInScreen and this screen has a button to it. On a click of this, I want to go to Tab Navigation which I created.
It's giving me navigation error even though I am using navigation as a props with the SignInScreen return function. Normally, I have tested my Tab Navigation by straight calling it into App.js. This works but I want this to be called on Button. It's not working for me.
Hi. Thanx for your tutorail. Is it possible to create a clickable button for DrawerNavigation?
Yes, it's possible, you can still the entire drawer however you want to. Take a look at the
drawerContentprop for a Drawer navigatorHey thank you very much for this tutorial, i'm making an app based on this, but the header its being duplicated, i've searched trough youtube and the official documentation but i didn't find anything, any help'll be appreciated 🙏. dev-to-uploads.s3.amazonaws.com/i/...
Awesome, but that's made the first item in Drawer slider useless
thank you very much for this tutorial
thanks
If we switch from one stack navigation to another stack navigation via drawer how can we refresh the screen which is available in each stack navigation?
Thanks
This was very helpful. Thank you!
How about doing this with classes? For example, if Home was defined as :
Anyone written a sample or template like this?
class Home extends React.Component{
render() {
This is the home screen
}
}
This tutorial is lightyears better than the official React Navigation tutorial on Reacts website.
Thanks
Thanks a lot for putting time and effort into writing this.
This article was very helpful, but I have a small issue.
In drawer navigation, when I go forth and back in my screens, the screen freezes.
In the beginning, I search all of my code but didn't find anything,
finally, I came across one example in Reac Navigation Documentation, and I ran it in my Expo and saw similar behaviour.
I was wondering that have you ever experience this? What causes this issue?
Any suggestion will be helpful.
I haven't had that error, unfortunately. Maybe try google that particular error to see if other people have faced that issue.
The excellent article Thank you,
Is it possible to choose which screen to switch from the drawer menu?
like this
component={ContactStackNavigator,{screen: 'menu"}}`