
TestCafe Studio allows us to test large pools of data and scenarios, thereby catching issues before we launch our products. It has transformed our launches and improved our product success rate.
Our customers love TestCafe Studio for many reasons – among them its accurate and easy-to-use test recording engine. By clicking through a target website, TestCafe Studio allows you to emulate end-user actions and automatically record stable web tests without writing any code.
In this post, we will show you 6 tips to boost productivity and leverage TestCafe Studio’s Test Recorder to address a variety of usage scenarios.
1. Hover Over an Element
TestCafe Studio’s recorder does not save mouse movements during most actions (except for drag-and-drop operations). This enhances test stability because recorded mouse movements usually generate random errors during playback (for instance, this occurs when an element is rendered at a different position).
If you need to perform actions against specific UI elements (when you hover over a menu item or button), TestCafe Studio requires you to explicitly add a hover action.
To add a hover action during recording, switch to the TestCafe Studio window and click the Hover button in the Actions panel to add a Hover action:
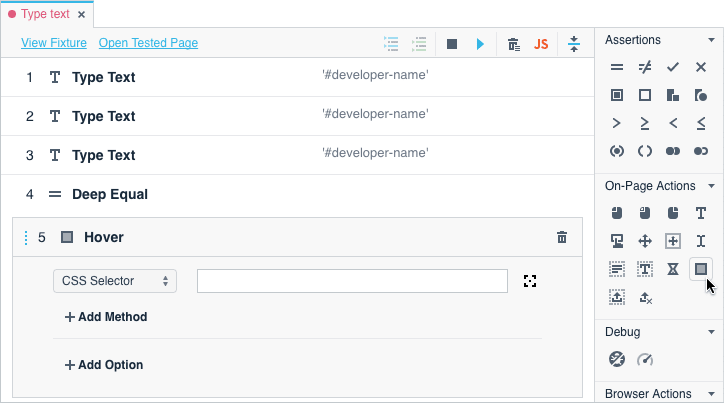
Click Pick a target element to select an element to hover within the browser:

You can now switch back to the browser window and continue recording.
2. Save the Actual Click Point
TestCafe Studio clicks the center of the target element when it replays a recorded test. This produces stable tests even when a target element’s size changes over time.
If you need TestCafe Studio to click the exact position you clicked during recording, simply add an Offset parameter. To add an Offset parameter, expand the action within our Test Editor and click the +Add Option.
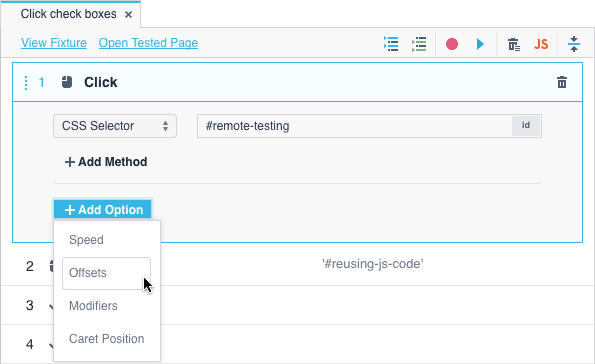
Select Offsets from the dropdown menu. This adds both X and Y options to the action.
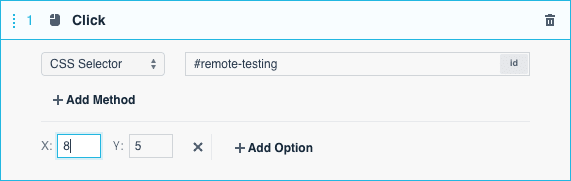
TestCafe Studio initializes these with coordinates captured during the recording. You can use these values or specify a different offset.
3. Repeat Recorded Actions Before Each Test
Many test scenarios begin with similar actions (like login or opening a view). TestCafe Studio allows you to record these actions and configure them prior to each test run.
Action sequences executed before and after each test are called hooks. Here’s how to add actions to a hook.
Run the recorder as you normally would and record your actions:

Hold the Cmd/Ctrl button and select actions you need to repeat before each test:
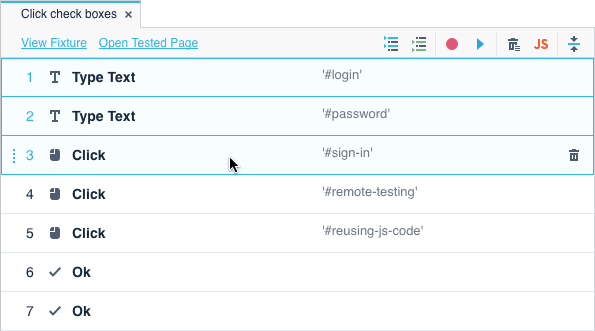
Then click the Move to before each hook button.

TestCafe Studio creates a ‘before each’ hook with these actions or appends them to an existing hook.
4. Handle Native Browser Dialogs
TestCafe Studio allows you to define how tests should respond to native browser dialogs (alert, confirmations, etc.) invoked on a page.
Click the Handle Native Dialogs button in the Actions panel to add the Handle Native Dialogs action. Ensure that it is executed before the action that invokes the dialog.
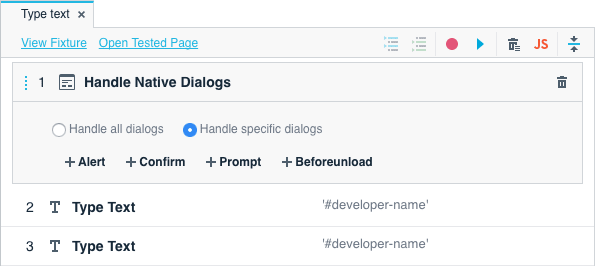
Click +Confirm to add a confirmation dialog.

Specify OK as the close action, enable the Message switch and specify the expected message:
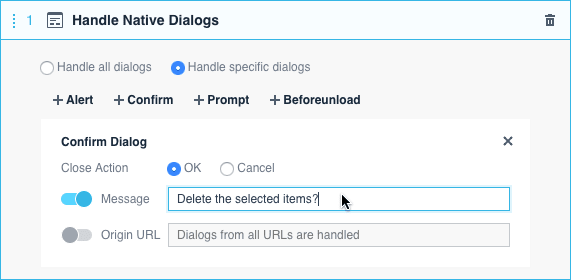
If any subsequent action invokes a confirmation dialog with the specified message, TestCafe Studio will emulate the OK click to close it.
5. Take a Screenshot of the Tested Page
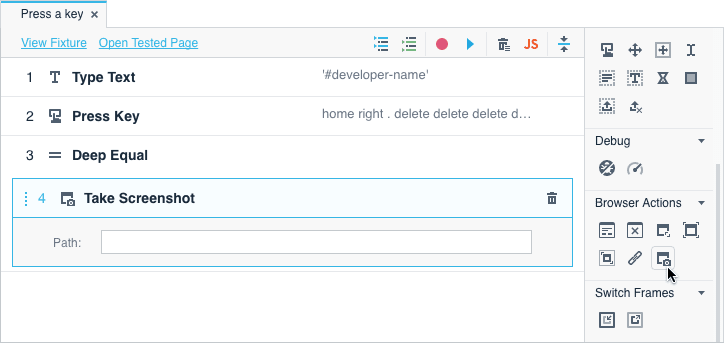
TestCafe Studio allows you to take screenshots of your tested page throughout the test execution process.
Once you record actions that require a screen capture, switch to the TestCafe Studio window and click the Take Screenshot button in the Actions panel.
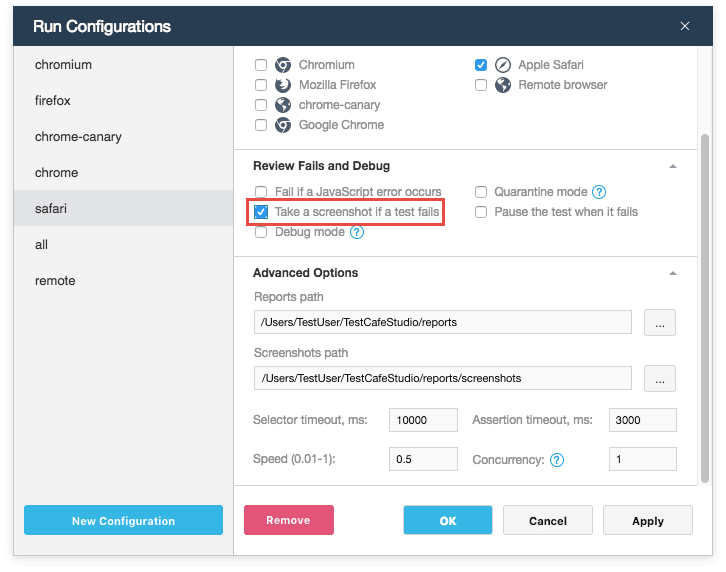
TestCafe Studio can also capture screenshots each time a test fails. To enable this option, click the Settings button next to the Run Configuration drop-down menu on the main toolbar and check ‘Take a screenshot if a test fails‘ in the dialog window.
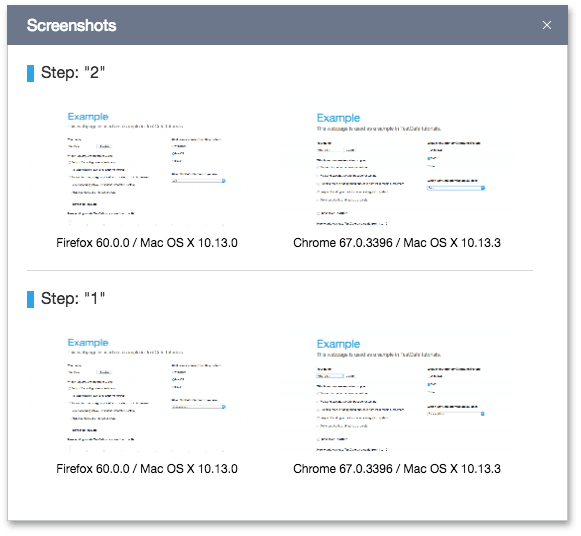
You can view screenshots captured during test execution in your report.
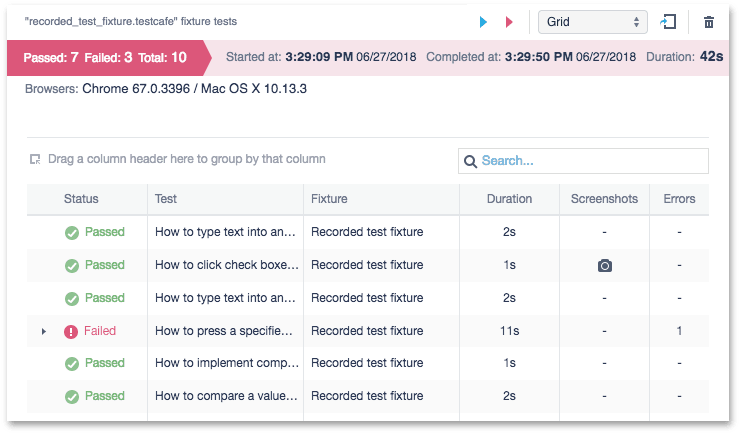
Click the View screenshots icon in the grid to open the screenshot window.
6. Add an Assertion and Verify Its Status
TestCafe Studio provides a straightforward way to create an assertion, configure it and check if it passes.
Select the assertion in the Actions panel to create your assertion.
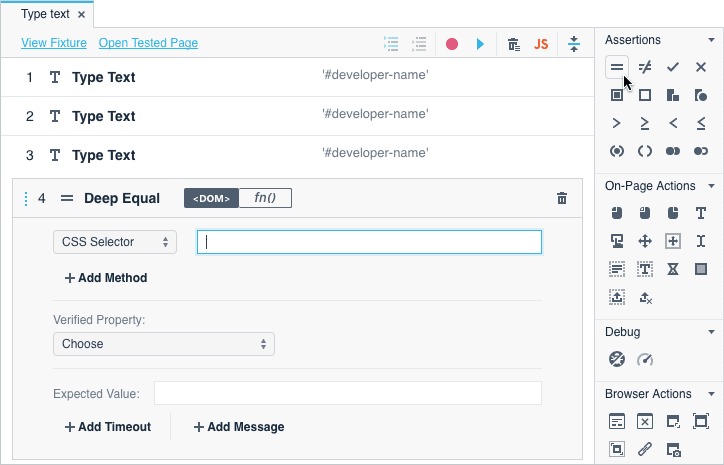
Click Pick a target element to specify the element whose state you need to verify. This opens the browser where you can point to the target element.

Use the property grid to select the element property whose value you need to check.

TestCafe Studio retrieves and displays its actual value. Click the Copy to the ‘Expected Value’ field button. This is a reference value compared with the values obtained during the test run.
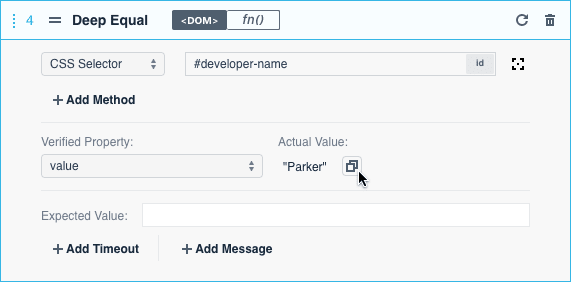
Finally, click the Evaluate assertion button to check if the assertion passes. The tick mark indicates that the assertion’s condition matches.

Your Feedback Counts
As always, we welcome your feedback. Please share your thoughts below and let us know how you’re using TestCafe Studio within your enterprise.


Top comments (0)