TestCafe's Visual Test Recorder automatically creates selectors for all elements used in a test. This complicated algorithm balances many different variables, and we just recently added a few options so that you can customize it to meet your specific needs.
This article first covers what we consider to be a reliable selector. We then mention the pros and cons of various selector strategies, and custom attributes in particular. Finally, we'll show you how to customize TestCafe options so that it builds selectors that are optimized for your website.
How TestCafe Studio Generates Selectors
To record an automated test in TestCafe Studio, specify the tested page’s URL and start the recorder. TestCafe Studio launches the selected browser, opens the web page, and records your actions. Once the test scenario is ready, you can run it in any local browser, a mobile device, or as part of your CI pipeline.
TestCafe Studio not only records your actions (element clicks, text input), but it also creates a selector for every affected page element. The selector generation algorithm was developed to adhere to the following requirements:
Selectors shouldn’t be too specific. Otherwise, you might have to rewrite them after each page modification. For instance,
Selector(‘body’).find(‘div’).nth(5).find(‘p’).nth(3)must be revised each time the number of elements on the page changes.Selectors shouldn't be too generic. Otherwise, they may return different elements after each markup change. For example,
Selector(‘div > button’)can match multiple elements at once.Selectors shouldn’t rely on element parameters that are likely to change. For instance,
Selector('[style*="background-color: red"]')uses a CSS style that changes frequently.Selectors should remain readable. Selectors should be easy to understand (by you or another developer) for as long as the test is maintained. For instance, it may be difficult to understand which element corresponds to the following selector:
Selector(‘div’).find(‘pre’).nextSibling(-1). If you useSelector(‘#topContainer’).find(‘.child’).withText(‘Add item’)instead, the selector is much easier to read.Selectors should reflect the user’s point of view. Since TestCafe supports end-to-end testing, it’s a good idea to build selectors that identify elements as an end-user would. For instance,
Selector(‘form’).find(‘[name=”btn-foo-123”]’)might be stable, but it is written from the programmer’s perspective rather than from the user’s point of view.
In addition to these general requirements for selectors, page organization is also vital in the testing process. Some pages may have stable selectors that rely on the ‘id’ attribute, while other pages use auto-generated ‘id’ attributes - so it does not make sense to use ‘id’ in a selector. This also applies to other attributes such as ‘class’. Text-based selectors can also be ineffective, depending on changes you introduce to the page over time.
Why Custom Attributes are Required
Modern web component frameworks, like React, complicate DOM element identification. This is why many developers prefer to assign custom attributes to page elements. Custom attributes enable tests to survive changes in HTML structure, script behavior, and styles.
Let’s consider the following Populate button on our example page:
<input type="button" id="populate" data-testid="populate-button" value="Populate">
You can build the following selectors for this button:
HTML-based
Selector: Selector('input').nth(1)
Pros and Cons: Too generic.
Summary: Might match the wrong elements because it is vague.
Selector: Selector('body').find('form').find('div').find('fieldset').find('input').nth(1)
Pros and Cons: Too strict.
Summary: May break due to minor changes in HTML structure.
ID-based
Selector: Selector('#populate')
Pros and Cons: Relies on ID only, which could be introduced for styling or event handling, or may be auto-generated.
Summary: Better options are available.
Selector: Selector('#main-form').find('input').nth(1)
Pros and Cons: Similar to the above selector, but relies on the parent ID.
Summary: Appears to be more specific than the above selector, but it is not.
Class-based
Selector: Selector('.column.col-1').find('input').nth(1)
Pros and Cons: The element has no class, so this selector uses the parent class. Classes can change because they are usually assigned for styling purposes.
Summary: Sensitive to CSS modifications; difficult to maintain.
Text-based (text matches the attribute value in this case)
Selector: Selector('input[value="Populate"]')
Pros and Cons: Mirrors how users perceive the page, so it may be stable. Detects actual issues caused by accidental text changes.
Summary: Satisfactory, but fails even when text changes are intended.
Custom attribute-based
Selector: Selector('[data-testid="populate-button"]')
Pros and Cons: The most stable selector, since it is not affected by changes.
Summary: The preferred selector type for most scenarios.
In summary, custom attributes have the following benefits:
- Tests do not break based on markup or code changes. A test will not fail when you refactor HTML or implement new behavior in JavaScript.
- Tests do not depend on page styles. You can switch themes as many times as you wish - tests will not fail because of a certain style or theme.
-
Text content modifications do not affect tests. Tests are not affected by changes to content, including localization changes. Note, however, that if an element’s text is essential to a test scenario, you should verify the text content or use a text-based selector:
Selector(‘div’).withText(‘Add to Cart’). - Use a custom attribute to indicate that an element is used in tests.
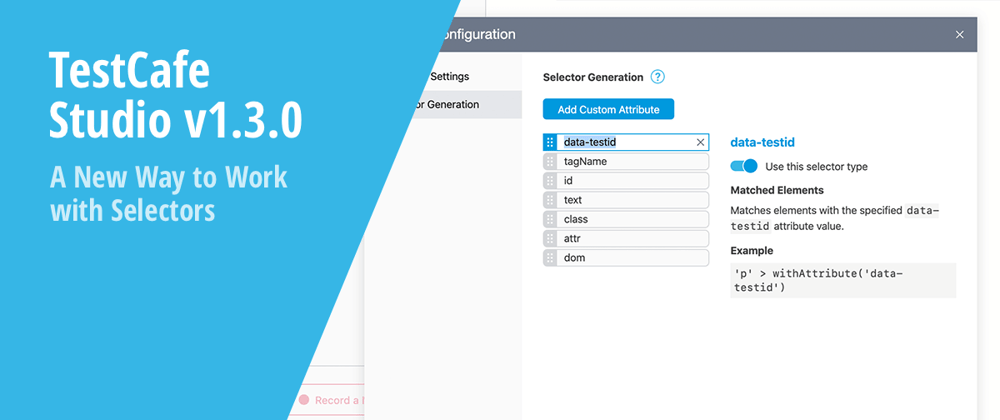
A New Way to Customize Selectors
When you record a test, TestCafe automatically generates a selector. TestCafe also lets you choose an alternative selector from a drop-down list or create one manually. The latest TestCafe update (v1.3.0) ships with an adjustable selector generation algorithm. You can now configure the selector generator on the fly, based on the tested page:
Prioritize selector types. Use this option if you often need to choose a different selector from the suggestion list. The default selector is generated based on your preferences.
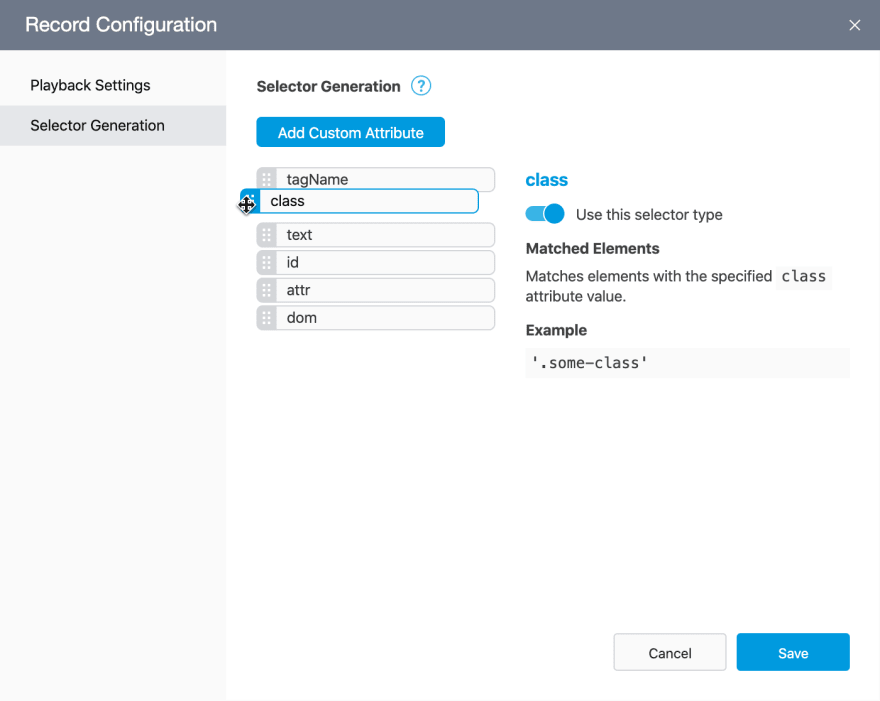
Disable unwanted selector types. For instance, your website can generate id, class, or other element attributes automatically, so that they change each time the page reloads. However, you cannot use these values in selectors because the test cannot be replayed. In this instance, you may want to exclude these attributes from selector generation rules. You can now simply disable the corresponding selector type - and switch back to it at any time - without restarting the recorder.

Add selector types based on custom attributes. These selector types are preferred because if you configure them, you won’t have to edit selectors due to changes. The only requirement is that you maintain unique attribute values during development.

Recap
TestCafe Studio generates selectors for every page element that takes part in a test. Good selectors must comply with strict guidelines to be stable and reliable. TestCafe algorithms use best practices to generate selectors that meet these criteria. You can also optimize selectors based on your understanding of how the website works. Our latest update (v1.3.0) allows you to instruct TestCafe Studio to use custom attributes in selectors or ignore dynamic IDs. The result is more stable selectors that are easy to read and maintain.
You can read more about the new adjustable selector generation algorithm in our documentation. As always, we are happy to answer your questions in the comments. Happy testing!


Top comments (0)