
TestCafe Studio is a cross-platform IDE for end-to-end web testing. It is powered by the TestCafe open-source framework and allows you to create, run, and maintain automated tests with zero code.
In this quick tutorial, I’ll describe how to get started with TestCafe Studio and how to test an existing webpage (in this instance, a relatively advanced web page with integrated file upload functionality). As you’ll soon see, I will select and upload two files and then run two assertions: The first for correct file name output and the other for correct file size label format.
I promise – this should only take two minutes of your time - TestCafe Studio’s Visual Test Recorder makes it easy to visually record web tests.
Step 1: Record a Script
I’ll first launch TestCafe Studio (if you’d like to install TestCafe Studio and follow along, simply download our 30-day trial), enter the website URL inside TestCafe’s Welcome screen and press ‘Start Recording a Test’. My browser will navigate to the appropriate address – and since TestCafe’s Visual Test Recorder is up and running in the background – I’ll be ready to record actions performed on this webpage.

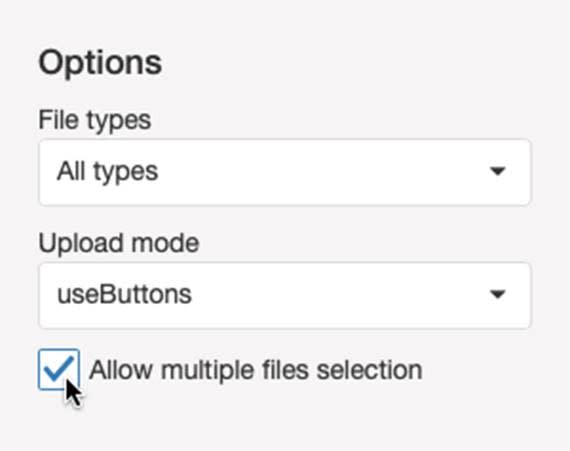
I’ll use the Upload mode drop-down and specify that I wish to begin file upload manually.

I’ll then enable multi-file checkbox.
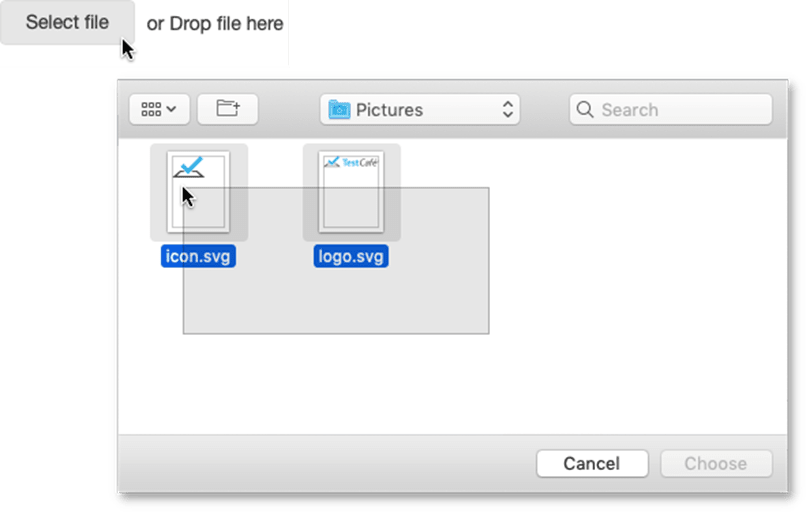
I’ll click Select file and make my file selections.
I’ll click Upload to complete the process.

Step 2: Review the Action List
Its time to switch to TestCafe Studio and review the commands generated by my actions.

Step 3: Add a Value Assertion
As you can see, site UI is rendered in an IFRAME, so the first action represents a context switch - click and upload steps follow thereafter (replicating my earlier site actions).
It’s time to finalize the test with a couple of assertions. I’ll first check whether the demo app displays the correct file name.
As you can see, you don’t have to write a single line of code to do this (unlike competing web testing tools which do require you to write lots of custom test code). I’ll simply click a toolbox icon to add an assertion with an “equals” condition.

I’ll then use the Element Picker button to select the target element within the browser.
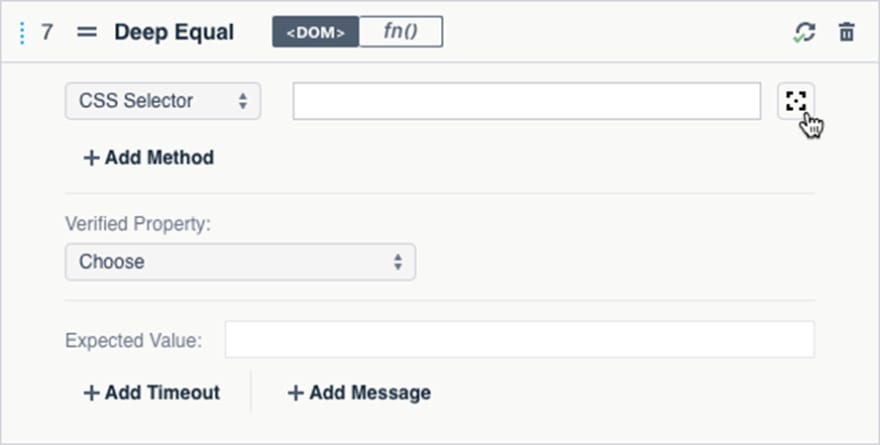
This focuses the browser window so you can point to the appropriate element.

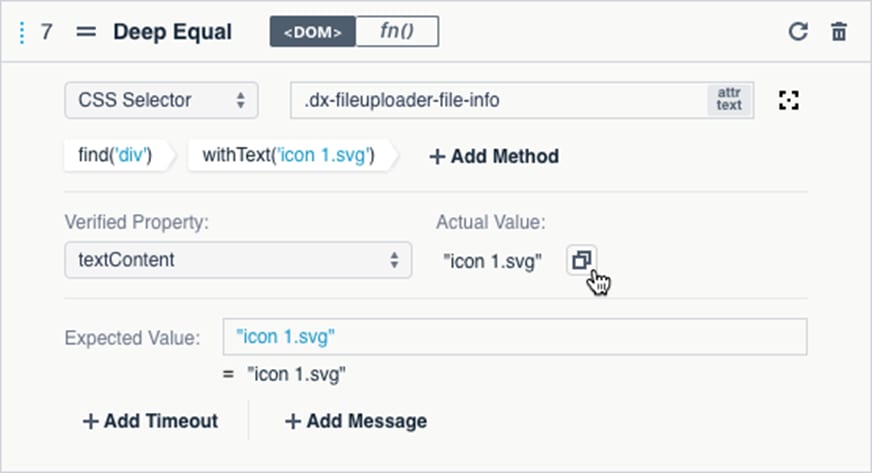
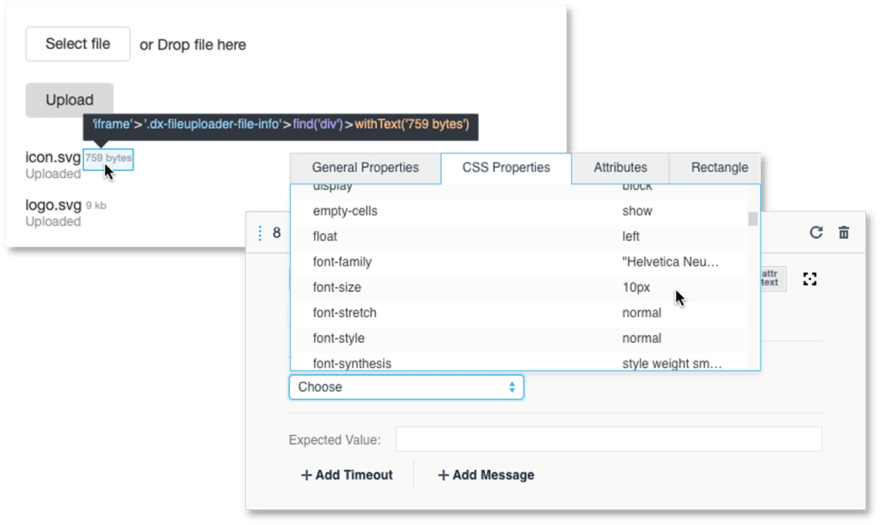
As you can see below, TestCafe Studio generates a selector for this element and opens a list of its properties. Select the property you wish to assert.

TestCafe Studio obtains the current property value and asks me to confirm its use (for comparison).
Step 4: Add a Format Assertion
In much the same way, you can assert a label’s font-size CSS property value.
Step 5: Stop the Recorder and Run the Test
My test is ready and recording can be stopped. To execute my newly recorded test, I’ll press the Run button and watch TestCafe replay my actions.

Step 6: Review the Test Report
Once TestCafe completes the test run, I can review test results within TestCafe’s intuitive UX.

That’s it. In just a few minutes and without a single line of code, I created a test that was ready to run across all modern browsers and on different platforms (Win, Mac, and Linux).
Get Started Today
Ready to compare TestCafe Studio to your current web testing platform and experience the TestCafe difference for yourself?


Oldest comments (0)