
I recently launched a web application that consisted of a React frontend that communicated with an Express server. It was my first time working with this stack and everything worked smoothly on my local, but then came the time for deployment. Cue the ominous music.
There are many many articles and tutorials on how to deploy this kind of app to production, to the point where I decided not to follow any of them and make up my own way. I had been wanting to practice using AWS so all the services used here are on that platform. I'm not claiming this is the best way but it's just what worked for me.
TL;DR
- Domain name registered on Route 53
- React frontend deployed to Amplify
- Express backend hosted on a Lightsail instance
Deploying the Frontend
Amplify is an AWS service for hosting SPAs. It connects directly with your GitHub or GitLab repository, has continuous deployment set up on each push on master, and is totally free. It also has other awesome services such as deploying test branches, or generating preview builds when a PR is created.
Start by navigating to the Amplify console in AWS and click on the Connect App button.
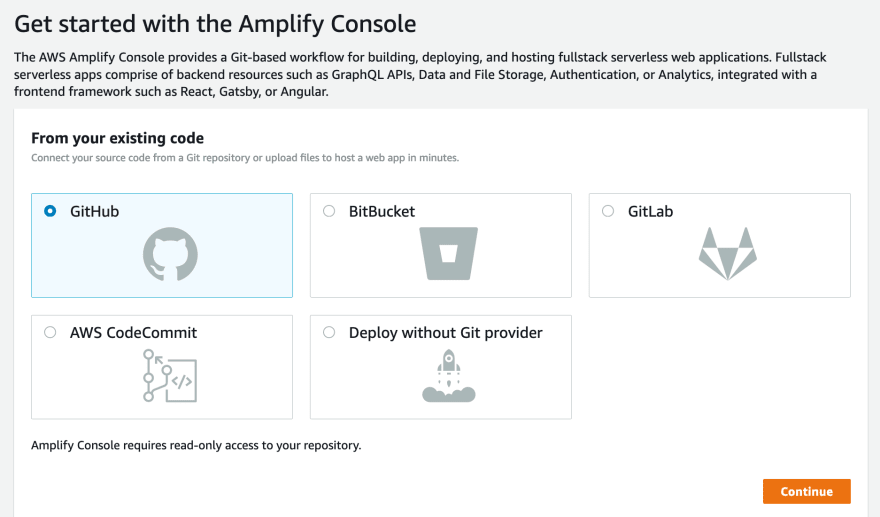
After selecting your code hosting provider, Amplify will ask for read-only access to your account and you can go on with selecting a repo and a branch to deploy from.

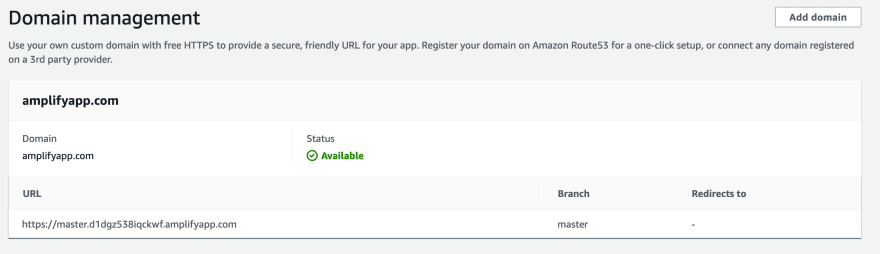
Afterwards, you'll be asked to verify the build process generated for you, and soon enough your app will be live! 🙌 Amplify's generated URLs follow this format branchName.randomCharacters.amplifyapp.com, so your website URL may look something like this https://master.d1dgz538iqckwr.amplifyapp.com/.
In my code I was using an environment variable, and I was confused on how Amplify will be able to read it since the .env file was in .gitignore and therefore not committed, and I had no way to access the server on which the app is hosted. Then my eye caught the side menu where Environment Variables is written. Here, I was able to add the key and value pair for my environment variable.

Updating environment variables requires redeploying the site, so go back to the app page and click on any of the steps shown in green. This will show you your build history and related data, plus a redeploy this version button which you should click. Now, your deployed app can use the environment variable you specified. 👏

Another great thing about using Amplify is that you get an SSL certificate installed on your website and automatic redirection from HTTP to HTTPS.
Registering the Domain Name
Route 53 is a DNS service offered by AWS that integrates nicely with Amplify. It allows you to get your own domain name and connect it to your deployed app easily.
First, go to the Route 53 page in the AWS console, where you'll see the following component letting you know that you can create a new domain or transfer an existing domain into Route 53. In my case, I needed a brand new domain.

Just type in the domain name you'd like to have and you'll get a list of all the available options with prices, plus some related suggestions. Once you settle on a domain, add it to your cart and check out. You'll be asked for your contact details for verification.

Now go back on your application in the Amplify console, click on Domain Management in the side menu, and you'll be able to see the Add domain button.
Note that the domain name takes a while to get set up, and you'll get an email when it's finished. Mine was ready in about 15 minutes. A glass of water and some stretches later, visit your domain name to see your deployed frontend application. 🥳
Deploying the Backend
There are a lot of options for deploying an Express backend. I wanted to try out serverless but I found it too complex. I saw a lot of tutorials using EC2 because it's included in the free tier, but it also requires a lot more setup. I opted to use AWS Lightsail which is a lightweight version of EC2 that lets you spin up virtual servers in no time.
Simply navigate to the Lightsail console in AWS console, and click on Create instance. Here, you'll need to pick an operating system for your server, a geographical region and a blueprint. The blueprint is a preconfigured image already set up to run your applications. I selected a Node.js blueprint.

I chose the smallest instance size, with a memory of 512MB, 1 virtual CPU and 20GB of SSD storage. All of this comes at a cost of $3.50 a month, with the first month being offered for free. After your instance is created, you'll be able to see it in the Lightsail console.
Chances are your Express application is running on a custom port like ports 3000 or 4000. All of these ports are closed by default to protect the instance. You can open custom ports by clicking on the three vertical dots in the instance component and clicking on Manage then clicking on the Networking tab. In this page, you can attach a static IP address for your instance for free, so that the IP address doesn't keep changing every time the instance is rebooted or taken down and restarted. A little further down under Firewall, you can add a rule to open up your port to all IP addresses.
Now that the server is set up and accessible on the internet on the specified port of the attached static IP address, you can ssh into it and get your application code. Lightsail allows ssh via a browser terminal, but you can also download the private key from your account page and use your own local terminal. After logging into the server, I cloned the backend repo from GitHub, installed dependencies then reloaded the sever. I used PM2 as a process manager. Now my endpoints are accessible on the internet! 🎊 I also went back into the Route 53 to add an A record to my hosted zone to have a subdomain for my backend: https://api.example.com.
This setup means that whenever I make changes in the code, I have to ssh into the server, run git pull and pm2 reload app, which is too manual for my liking. I looked into GitHub Actions that continuously deploy to Lightsail instances but didn't find any good options. I'm fine with keeping it like this for the moment, since I know my backend repo won't have a lot of changes.
Connecting the two
When I was developing on my local, I had a proxy option added in package.json in my frontend. It was hardcoded to the value of my backend url, and after a bit of research it seemed that replacing the hardcoded value with an environment variable was too much of a hassle. Instead, I removed the proxy option and added the environment variable in each fetch request.
const token = await fetch(`${process.env.REACT_APP_BACKEND_URL}/token`);
At this point, my frontend is live and has the URL for my backend which is also live, so they should be able to talk to each other, right? Not so fast! My frontend was being served over HTTPS while my backend was served over HTTP. The browser rightly didn't allow me to make a request from a secure domain to an insecure one.
With bitnami, you can install an SSL certificate on your server for free with one command: sudo /opt/bitnami/bncert-tool. More info on that here. This tool also lets you enable automatic HTTP to HTTPS redirection. After this step, I could type in my server URL with an HTTP and see it get resolved into an HTTPS on the browser.
At this point, I reloaded my frontend via the Amplify console to try to get the API requests going. In the browser's network tab, I was able to see that the request is going to the correct URL: https://api.example.com:4000/, but my request is failing without even reaching the server! On a closer look, I noticed the error shown next to the failed status: NET::ERR_SSL_PROTOCOL_ERROR. Here I realized that I've been trying to access a custom port using the HTTPS protocol.
I thought of a couple of options: either run my Express server on port 443 to be served over HTTPS, or somehow make my custom port be served over HTTPS. After checking out a lot of options, I was able to get it working by setting up the Apache virtual host to redirect all traffic from ports 80 and 443 to port 4000.
Finally, my full stack application was truly up and running! 🎉 If you're curious what the application is, check out my announcement post.
Thanks for reading 👋 Until next time.
Cover photo by Marek Szturc on Unsplash


Oldest comments (4)
did you get time to review the code which i have sent to you
Hi there. I took a look but wasn't able to figure it out.
Sorry I couldn't be of more help.
@dmahely I really like your moxy of taking on AWS and using their services. Most find them intimidating. Great on you!
One question I have though is, why not use Vercel or Netlify for this project? Was it about learning to use AWS? I'm just curious.
Hey Roger, pretty much! I've used Netlify before to deploy a React app but not one with a backend, and this seemed like the perfect opportunity to get my hands dirty with AWS.