
Emails are an essential part of any web application these days. From registration info to order information to password recovery instructions, every web app uses email as their primary form of communication with their users.
As a crucial part of any application and sometimes even business, these emails must work as expected. When an app doesn't send out an email as expected, any trust you've built with your customers begins to fade away. Not only that, but it might chip away at the trust your organization has with them, too.
Missing messages, important information arriving late, emails going straight to the spam folder, sensitive information getting leaked - Nobody wants their emails going rouge. Testing that your application's emails work correctly is not a nice to have; it's a must.
Developers can write small, isolated tests to check correct configuration and setup of emails inside the application. However, testing the entire email-sending process - from triggering the message to having that message arrive at someone's inbox - is necessary if you want to ensure that everything's working well.
Usually, this testing process is entirely manual. The test procedure often goes like this:
- The tester runs a series of steps that trigger an email from the application.
- The email arrives in a test email account.
- The tester opens the email account and verifies the contents of the message.
- The tester may need to go through additional actions, like clicking on links and opening attachments.
- Repeat the process over and over again with multiple messages.
Unfortunately, it's a slow, tedious, and inconsistent process. I once worked on a project that sent plenty of transactional emails for different actions. The team needed a dedicated tester on the team to spend nearly an entire workday just running QA on emails before each release cycle. Even with all the hours used to run tests, the team still had lots of regressions on emails slip through the cracks.
The process was highly inefficient, yet it's how I've observed most projects run their email testing. If your application has multiple paths and permutations that send different emails, it devours your testing team's time. It's not the best use of their time and effort.
Automating email testing approaches
Thankfully, these days we have tools and services that allow us to automate this kind of testing. There are also different ways of handling the testing process.
Some teams have an interface built into their application for intercepting messages for testing purposes. For instance, in a staging environment, any emails sent through the application don't go through the normal sending process. This way, the messages are stored and accessible by automated tests. This process works but has a few downsides. It requires software development time, which many teams can't spare. It also doesn't work as it would in a production environment, as the emails stay inside the system and never arrive at a real mail server.
Another way I've seen teams handle this is to send test emails the same as in real-world environments. Then, in their automated tests, they automate the process of fetching the email from the server and parse the email. Having to reach inside a mail server for testing purposes is tedious and a bit overkill.
The ideal way to test email sending is a combination of both of the approaches mentioned above - send an email out to a real mail server, and have an accessible interface to collect the message.
Mailosaur - End-to-end email testing service
Mailosaur is a tool that combines these approaches. It's an email service that allows you to send emails as you normally would, allowing simple retrieval of the messages through an API. It's a paid service, but if you need to test lots of emails in different settings, it's a solid choice.
(Note: I am not associated with Mailosaur in any way. It's just a useful service that I wanted to share. I'm sure it will help you with your email testing woes.)
Mailosaur has a few ways of receiving test emails. You can create email servers on the fly, allowing you to send messages to any address with a specific format for collection. You can also set up your application to send all emails to an SMTP server, useful for intercepting emails without sending them to their real recipients.
Once your Mailosaur server receives an email, you can access the message through their API. It's a RESTful API, so the service works with any development environment and testing framework out there. They also have client libraries for common programming languages, making it easier to use their API.
Using TestCafe with Mailosaur to automate email testing
This article covers how to use Mailosaur with the TestCafe testing framework. If this is your first time hearing about this framework, I wrote an article on how to get started with TestCafe. It covers the basics to get you up and running with the tool quickly.
I'll use the Airport Gap application that I built as the place to point the tests we'll cover here. As mentioned in previous articles on Dev Tester, this application was built mainly for helping others practice their API testing skills. However, the application sends emails when someone generates a token or needs to reset their account password. It's a good starting point to show how Mailosaur can work with your projects.
The examples in this article assume you're familiar with JavaScript, as it's the primary programming language used by TestCafe. We won't go through the entire setup process in detail. You can get additional details in the article on getting started with TestCafe.
We'll begin the setup process by creating a new directory to write our tests. You can choose to put your tests inside your project directory, depending on your preferences and needs. Regardless of where the tests are, you can still follow along with the examples.
Start by setting up TestCafe for the tests:
- Install Node.js and NPM in your development environment, if not set up yet.
- In your test directory, run
npm init -yto generate a basicpackage.jsonfile. - Install TestCafe by running
npm install testcafein the test directory.
These steps get TestCafe ready to use. In addition to TestCafe, we'll install the Mailosaur client library for Node.js. This library helps us connect to our Mailosaur mail server and fetch the test messages the application sends. Install the library by running npm install mailosaur.
Sidenote: Managing data in end-to-end tests
Before proceeding with the article, I wanted to address the topic of managing data when running end-to-end tests. It's a common subject that testers and developers have when creating tests that go through the entire tech stack.
There's no "one size fits all" solution to this question, unfortunately. There's no one right way. It all depends on your particular circumstances - how your application stores and manages data, any integrations that interact with the data like queues or message brokers, the list goes on. This topic is broad and out of the scope of this article. However, I mention the topic here because we have to decide what strategy to use for these tests.
Ideally, when testing an application in an environment close to a real-world situation, you'll want to use a real database instead of mocking the data. In these examples, some of these tests create new data in the database.
Since the test environment used for the Airport Gap application doesn't have any complex requirements, I decided to not worry about having to clean up the database during or after test runs. But that brings up the issue of ensuring that we have unique data during tests to avoid any conflicts. For instance, one of our tests creates a new account. The account creation process validates that the email address doesn't already exist in the database.
To manage this scenario, we'll use a JavaScript library called node-uuid. This library generates unique identifiers (called UUIDs) with virtually no possibility of the same string getting generated twice. It helps us with generating unique email addresses without having to worry about duplicates in our tests. To install the library, we'll use NPM as the other libraries: npm install node-uuid.
Mailosaur setup
As mentioned, Mailosaur is a paid service. They offer a free 14-day trial to help you test things out. The trial grants you access to everything the service has to offer.
Once you sign up for a Mailosaur account, the first step is to create a new virtual server. This server is essentially your mailbox - messages sent to this server or email accounts associated with this server arrive here. Creating a new server is simple - all you need is a name to identify the server.

After creating the server, you'll see the details you need to send messages to this mailbox.

Mailosaur allows you to send emails to any email address ending in your unique server identifier. Alternatively, you can configure your application to send all emails to Mailosaur using the SMTP server details. I've already configured the Airport Gap staging environment to send its emails to Mailosaur via SMTP. I won't cover the setup here since it depends on your project, but either method works the same.
The last bit of information you need is your account's API key. This key allows you to authenticate with Mailosaur and access your mailbox. The API key is available in your account settings under "API Access."
That's all you need to get started with Mailosaur and TestCafe. With our setup complete, we can begin writing our tests.
Testing the token generation email
For our first test, we'll go through Airport Gap's token generation process. When someone generates a token on Airport Gap, the application sends out an email with information about the generated token. Let's write a test that validates this email.
We'll start by creating a page model class to define the selectors we'll use in the test. Create a new sub-directory called page_models and inside the sub-directory, write the class inside a new file called sign_up_model.js:
import { Selector } from "testcafe";

class SignUpModel {
  constructor() {
    this.emailInput = Selector("#user_email");
    this.passwordInput = Selector("#user_password");
    this.submitButton = Selector("input[type='submit']");
  }
}

export default new SignUpModel();
The article on how to get started with TestCafe goes into more detail about page model classes in TestCafe.
Next, we'll create a new file inside our main test directory called sign_up_test.js. This file contains our test:
import uuidv4 from "uuid/v4";
import MailosaurClient from "mailosaur";

import signUpModel from "./page_models/sign_up_model";

const client = new MailosaurClient("<MAILOSAUR API KEY>");
const mailosaurServerId = "<MAILOSAUR SERVER ID>";
const emailAddress = `${uuidv4()}@dev-tester.com`;

fixture("Airport Gap Signup Flow")
  .page("https://airportgap-staging.dev-tester.com/tokens/new")
  .beforeEach(async () => await client.messages.deleteAll(mailosaurServerId));

test("User receives an email after signup", async t => {
  await t
    .typeText(signUpModel.emailInput, emailAddress)
    .typeText(signUpModel.passwordInput, "airportgap123")
    .click(signUpModel.submitButton);

  await t.wait(10000);

  let message = await client.messages.get(mailosaurServerId, {
    sentTo: emailAddress
  });

  await t.expect(message.to[0].email).eql(emailAddress);

  await t.expect(message.subject).eql("Here's your generated token");

  await t
    .expect(message.html.body)
    .contains("Here's your newly generated Airport Gap token");
});
A fair amount of testing is going on here, so I'll explain the fundamental parts in detail.
In the first line, we'll set up the node-uuid library to use UUID Version 4. I chose Version 4 since it's a randomly-generated string that doesn't depend on other factors. Any version of UUID works well with little chance of duplication, so there's no particular reason to choose this version.
Next, we set up an instance of the Mailosaur client using the API key you received when generating a new Mailosaur SMTP server. The client allows you to retrieve the data needed from Mailosaur during our tests quickly. You also need the server ID for the generated SMTP server.
To generate a unique email address to use when signing up for a token on Airport Gap, we use the node-uuid library. The library will help us create an email address starting with a unique string such as 27cd1cb5-74e9-4fea-9cf2-c71e285007b25.
To begin the test, we'll tell TestCafe to begin on the token generation signup page for Airport Gap. We also add a test hook to tell TestCafe to empty the Mailosaur SMTP server before each test, using the client library (await client.messages.deleteAll(mailosaurServerId). We do this to prevent potential issues with test emails sent from other tests. It's not necessary, but it makes the test process smoother.
Finally, we get to the actual test. The test begins by opening the browser and filling out the signup page with the randomly-generated email address and password. When the form submits, the application sends an email to Mailosaur, and we'll explicitly wait 10 seconds before getting to the next step.
The reason why we're telling TestCafe to wait for 10 seconds is due to a potential bug in the Mailosaur client. If the Mailosaur server is empty - which is it since we're clearing it before running the test - the client returns a 404 error, and the test fails. This explicit wait gives us time for Mailosaur to receive the email sent by the app. It's not ideal since we can't guarantee if the email gets sent immediately and Mailosaur processes it in less than 10 seconds. The Mailosaur team has been notified of this issue, but in the meantime, this workaround serves our purpose here.
After waiting for 10 seconds, we'll use the Mailosaur client to get the first message it finds sent to our generated email address and stores it in the message variable as a JavaScript object. The message object contains every detail you need about the message, like to whom it was sent to, the subject, the body, headers, and any links or attachments included in the message.
With our email in hand, we can run the assertions on the message to validate that it worked properly. The main things we check here are:
- The email recipient to ensure we sent the message to the right person.
- The subject of the email to check the correct email was sent.
- Part of the body's HTML rendered correctly by checking that it contains something we expect.
These assertions are enough to validate the correct email. With this test done, we use TestCafe to run the test:
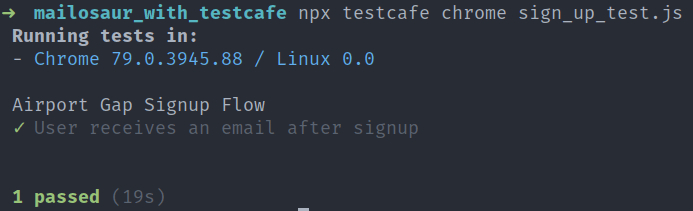
npx testcafe chrome sign_up_test.js
TestCafe automatically opens Google Chrome, sets up its web proxy, and goes through the steps from your test. Before starting the test steps. TestCafe empties the Mailosaur server. Then the token generation signup page loads up, and the form gets filled and submitted. After a brief pause, TestCafe runs the assertions in its code after fetching the message from Mailosaur using the Node.js client. The results of the test appear in your terminal:
This test demonstrates a quick way to validate your emails in what's close to a real-world environment. The application under test works the same as in production. An action occurs, and the application sends an email. The main difference is that we have a place to check the email in an automated way, bypassing the need for manual intervention.
Testing the password recovery flow
Let's do something a bit more interesting with Mailosaur and TestCafe. The next test goes through the entire process for resetting an account's password.
Airport Gap implements this process in a familiar way. When someone wants to reset their account's password, they fill out a form with the email address used for the account they want to reset. The application generates a unique link to allow them to reset the password and sends it via email. The person can then set up a new password and regain access to their account.
This test is often done manually since it requires someone to get the unique link to reset the account's password. Fortunately, Mailosaur's message object parses all links in the email body and allows us to access the links easily.
Let's begin our test by defining the selectors used during the test in a page model class. This class is a bit more involved since it goes through multiple pages. Inside the page_models sub-directory, write the class inside a new file called password_reset_model.js:
import { Selector } from "testcafe";

class PasswordResetModel {
  constructor() {
    // Selectors for sending password reset instructions.
    this.emailInput = Selector("#email");
    this.sendInstructionsButton = Selector(
      "input[type='submit']"
    ).withAttribute("value", "Send Reset Instructions");
    this.instructionsSentAlert = Selector("div[role='alert']").withText(
      "An email was sent with instructions for resetting your password."
    );

    // Selectors for resetting password.
    this.setUpInstructions = Selector("p").withText(
      "Set up a new password for your Airport Gap account."
    );
    this.passwordInput = Selector("#user_password");
    this.passwordConfirmationInput = Selector("#user_password_confirmation");
    this.resetButton = Selector("input[type='submit']").withAttribute(
      "value",
      "Reset Your Password"
    );

    // Selectors for login page.
    this.resetSuccessAlert = Selector("div[role='alert']").withText(
      "Your password was reset successfully."
    );
  }
}

export default new PasswordResetModel();
Next, we'll create a new file inside our main test directory called password_reset_test.js, and write our test:
import MailosaurClient from "mailosaur";

import passwordResetModel from "./page_models/password_reset_model";

const client = new MailosaurClient("<MAILOSAUR API KEY>");
const mailosaurServerId = "<MAILOSAUR SERVER ID>";
const resetEmail = "airportgap@dev-tester.com";

fixture("Airport Gap Password Reset Flow")
  .page("https://airportgap-staging.dev-tester.com/password_reset/new")
  .beforeEach(async () => await client.messages.deleteAll(mailosaurServerId));

test("User can reset their password", async t => {
  await t
    .typeText(passwordResetModel.emailInput, resetEmail)
    .click(passwordResetModel.sendInstructionsButton);

  await t.expect(passwordResetModel.instructionsSentAlert.exists).ok();

  await t.wait(10000);

  let message = await client.messages.get(mailosaurServerId, {
    sentTo: resetEmail
  });

  await t.expect(message.to[0].email).eql(resetEmail);
  await t.expect(message.subject).eql("Password reset instructions");

  const passwordResetLink = message.html.links.find(link =>
    link.href.includes("password_reset")
  );

  await t
    .navigateTo(passwordResetLink.href)
    .expect(passwordResetModel.setUpInstructions.exists)
    .ok();

  await t
    .typeText(passwordResetModel.passwordInput, "new-password-123")
    .typeText(passwordResetModel.passwordConfirmationInput, "new-password-123")
    .click(passwordResetModel.resetButton);

  await t.expect(passwordResetModel.resetSuccessAlert.exists).ok();
});
As expected, this test has more activity than our previous example. However, this represents an accurate end-to-end test flow, covering multiple steps without having to run through the process manually.
The test begins similarly to our previous example. It sets up the Mailosaur client with the Mailosaur API key, clears out the server, and loads the specified page. In this scenario, we'll start on the page where someone requests to reset their account's password.
There's a pre-existing test account in the Airport Gap staging environment. We can use that account and skip the steps of creating a new account.
The test begins by filling out the password reset form. All it does is fill out the test account email address and submit the form. As a quick sanity check, there's an assertion that verifies we have an alert stating an email is on its way with instructions for resetting the password.
After waiting ten seconds - as we did before - we fetch the message from Mailosaur. A few quick assertions validate the recipient and the email subject to ensure we're getting the correct email message.
Here, we'll do a lot more with the Mailosaur message object. As mentioned, Mailosaur parses all links in a message and conveniently gives us access to them separately. We don't have to parse the message body ourselves.
Since the message contains multiple links, Mailosaur returns the links inside an array. We need to iterate through the links array using the find method. Here, we're looking for a link that contains the term password_reset in the URL, since we know this is the correct link.
Once we find the link, we tell TestCafe to navigate to the URL. This command loads the unique page to set a new account password. The rest of the test fills out the form with a password, submits the form, and validates that we receive an alert indicating the password reset was successful.
We run our new test with the same command as before, this time specifying the new file:
npx testcafe chrome sign_up_test.js
TestCafe goes through the entire password reset process, from beginning to end, without tester intervention.

This test is an excellent example of how these tools can free up tons of manual testing time. There's no need to spend time checking emails manually and clicking through the links - TestCafe and Mailosaur help you with that.
Summary
Testing emails for modern web applications is essential. These messages are your main line of communication with your users. If something goes wrong with these messages, trust in your application is plummet.
Most email testing is done manually, which is difficult and time-consuming. Automating these tests significantly cuts down on the amount of time your entire team spends on triggering and validating these messages. It frees everyone up to do more important things, instead of opening emails and clicking through links.
As shown in these examples, Mailosaur allows you to have a server to send, store, and retrieve emails while testing. It provides simple ways to access the information you need to run
Mailosaur has more functionality than covered in this article. For instance, it can parse file attachments in the message, which you can download for your needs. It also has an endpoint to run your message through spam tests and return a report analyzing the results.
Overall, Mailosaur is a useful tool for automating your email tests. If your application sends lots of emails, I highly recommend looking into Mailosaur to automate these tests. It frees up your team and gives you peace of mind that your application is sending emails as expected.
What's your organization's method for testing emails? Are there any tools or services you have used with good results? Leave a message in the comments below!

P.S. Was this article helpful to you? I'm currently writing a book that will cover much more about about the TestCafe testing framework.
With the End-to-End Testing with TestCafe book, you will learn how to use TestCafe to write robust end-to-end tests on a real web app and improve the quality of your code, boost your confidence in your work, and deliver faster with less bugs.
For more information, go to https://testingwithtestcafe.com. Sign up and stay up to date!


Oldest comments (0)