
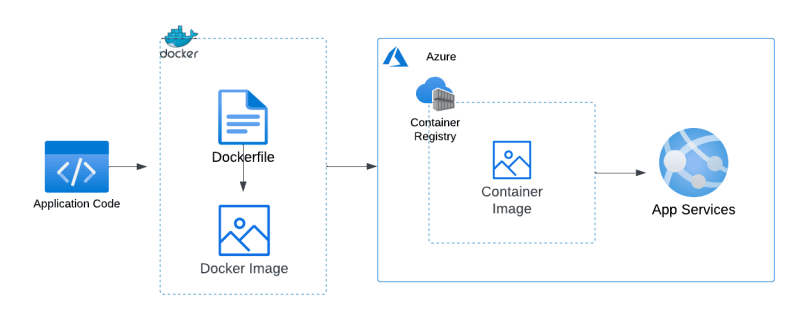
The actions that would be taken to build this project are depicted in the below diagram. Your application code (NodeJS + ExpressJS) would be developed, containerized using Docker, and deployed to Azure.
GitHub URL
https://github.com/FavourDaniel/Containerized-Node-Express-App
Pre-requisites
- An active Azure subscription
- Docker installed
- Basic knowledge on Containers and Docker
- Text editor installed, VSCode recommended
- Node installed on your desktop
Setup Project files
- Package.json
Create a folder on your local machine to house your project. Give it a name and open it up in your text editor (VSCode).
Open up a terminal in the text editor and run the below command
npm init
This command would create a package.json file for the project. Your project's packages and dependencies are described in this file.
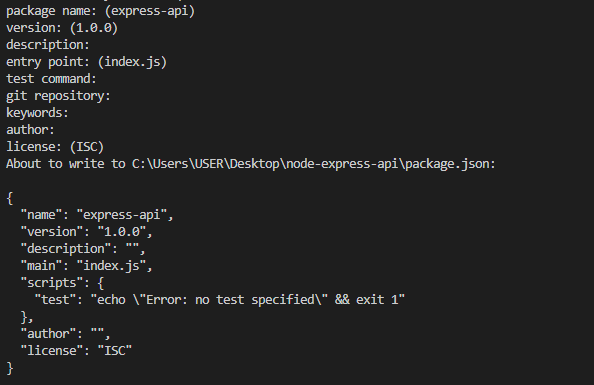
While running the command, you would be asked to input some information as shown above. You can choose to leave them all as default by continuously selecting enter as the prompt comes up.
- ExpressJS
ExpressJS is a Node.js web app framework that is used to develop web and mobile applications. It is typically used in conjunction with Nodejs to speed up and improve the building of server-side web applications.
To install ExpressJS, run the below command
npm install express
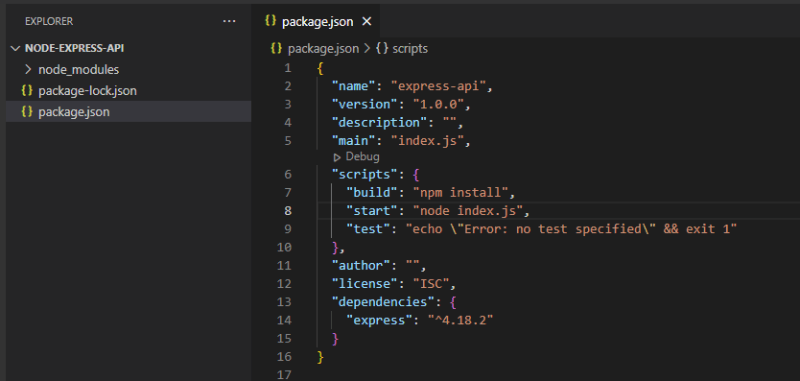
The above command would install ExpressJS and add the dependencies to the package.json file previously created.
In your package.json file, under scripts, add the below scripts
"build": "npm install",
"start": "node index.js",
- Config.JS
In your project folder, create a file config.js and paste the below into it
module.exports = {
    PORT: process.env.PORT || 3000
}
- Index.JS
Create an index.js file in your project folder and paste the below into it
const config = require('./config');

const express = require('express');
const app = express();

app.get('/', (req, res)=>{
    res.send('Welcome to the world of Containers on Azure Cloud!')
});

app.listen(config.PORT, ()=>{
    console.log('Application started successfully on port: ' + config.PORT);
});
Now your application has been setup, run the below command to start it
npm start
npm start basically checks your package.json file for the "start" script which was added previously and starts the index.js file.
The command should return the below output

Navigate to your browser, at localhost:3000, your application should be running.

You can now delete the node module folder which was created when you created the ExpressJS.
Containerize the application
The next step is to containerize the application and Docker would be used for this. As you should already know, applications can be swiftly developed, tested, and deployed using Docker.
To containerize your application, you need to create a Dockerfile.
- Dockerfile
A Dockerfile is a text document that contains all the commands a user could call on the command line to assemble an image. -Docker
They are basically manifests that are used to describe images which containers would be built from.
Create a Dockerfile file in the project folder, keep in mind that Dockerfile files do not have any file extensions.
Paste the below into the Dockerfile file
FROM node:alpine
COPY . .
RUN npm install
CMD ["npm", "start"]
To simplify the above;
FROM: This is where the Docker image would be built from (parent or base image), in this case the image would be built from a pre-existing node:alpine image that is currently available on Docker Hub. This image is used since the application is node based and alpine is a lightweight Linux flavor which uses less storage. Node on its own weighs about 946MB while alpine weighs only 5MB.
COPY: This command lets you copy files from your local machine into a layer of the image. In this case, you are basically telling Docker where your application is present and the destination inside the image to copy the application files to.
RUN: This command executes a new layer on the image. It can be used for the installation of software packages and applications. RUN command executes during the creation of a Docker image.
CMD: This sets the default commands to be ran when the container starts.
- Container Registry to store the image
Basically using a Dockerfile, you would build the image and push it to Azure Container Registry after which it would be deployed.
Just the way images are built and stored in Docker Hub, they could be stored in an Azure Container Registry as well.
An Azure Container Registry (ACR) can be used to build, store and manage container images. Refer to this for more insight.
To create an Azure Container Registry, login to Azure portal using your credentials and search for container registry and click on "create container registry"

You can choose to create a new resource group or you can use an existing one if you have, give the registry a name, select a region close to you and create.

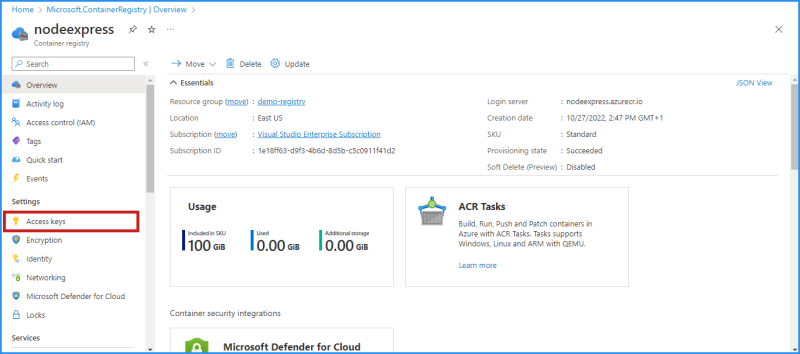
Once the registry has been created, go to the resource. To be able to login to the registry, you need access keys. Select access keys, enable admin user and then copy the server name.

Go back to your text editor and in the terminal, paste the below command
docker login "login-server"
You would be asked to enter your username and password, refer back to your container registry under access keys for this info.

This process allows you to be connected from your local desktop to Azure Container Registry. Now you can build the Docker image and push it to the registry.
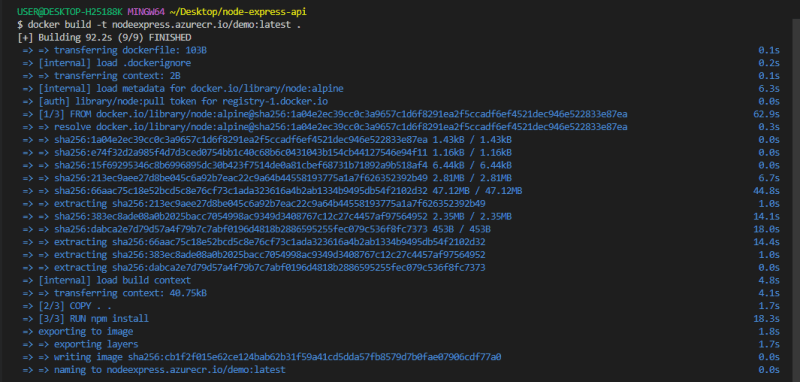
- Building the Docker Image
To build the image, use the below command
docker build -t "login-server"/"name-of-image:version" .
Modify it to fit your details.
Here, I named my image "demo" and gave it a "latest" tag.
To see the recently built image, run the below command
docker images

This shows a list of all the images you have built with the most recent image at the top.
Deploying to Azure
The next step is to push the image from your local to the Azure Container Registry. To do this, run the following command
docker push "login-server"/"your-image-name:tag"
This would push the image to the container registry previously created which acts as a repository to store the image.

Head back to the Azure portal, refresh the "Container registries" page and the image should be visible

Azure App Service
Now that your container image is present in the ACR, it needs a server which would host it and for this you would use App Service.
Azure App Service is a managed hosting platform providing easy to use services for deploying and scaling web applications and services.
Search for and open "App Services" in the Azure portal.

Select "Create app service" and proceed in creating a "Web App".
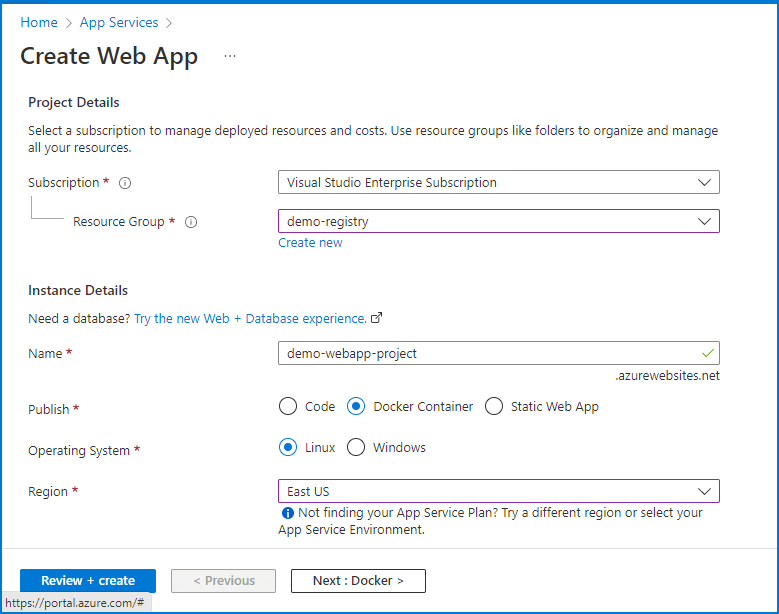
You can refer to the above image for the necessary configurations needed, after filling them in, select Review + Create
Setup Deployment
Continuous Deployment is an automated process of delivering code changes to servers quickly and efficiently in an enormous phase.
What this basically means is that any change or modification made in your code would be automatically deployed to the server. You would get to see this in action soon.
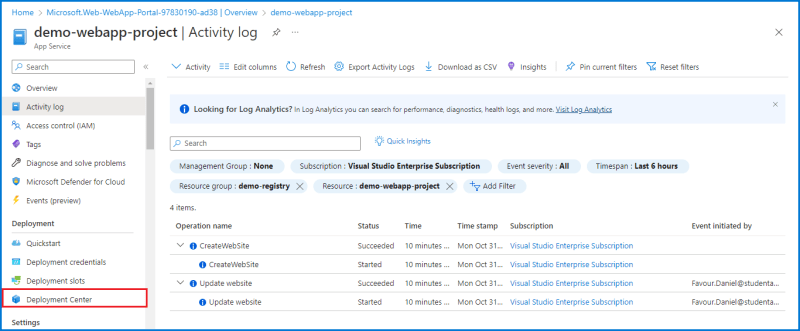
Now, once the web app has been created, go to the resource and navigate to the deployment section on the left-hand side of the portal page, select "Deployment Center".
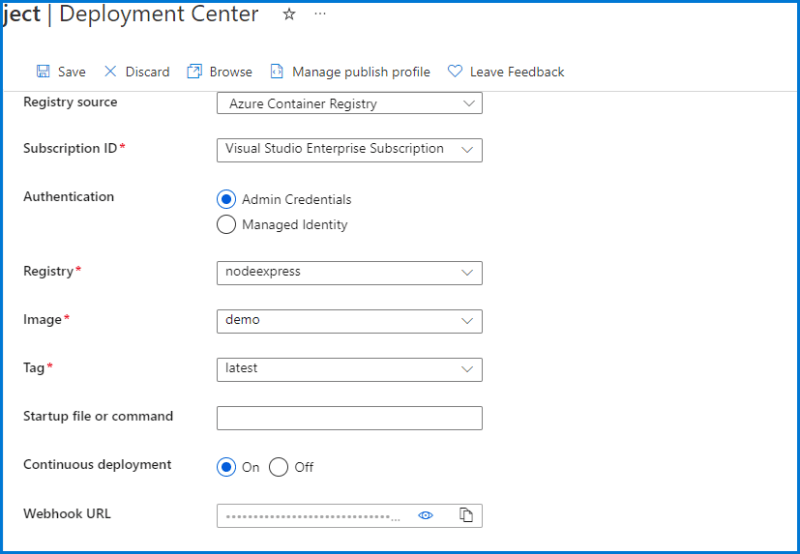
Refer to the above for configuration settings, then save the deployment.
After saving the deployment, you can navigate to activity logs to see the processes taking place.
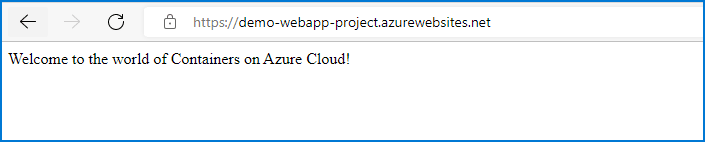
From the overview section, copy and paste the url on your browser and your container image should be running
To see how Continuous deployment works, you should make modifications in your application and redeploy it.
To do this, go back to your text editor and make a change in your index.js file. You can refer to the below code edit
const config = require('./config');

const express = require('express');
const app = express();

## I modified this
app.get('/', (req, res)=>{
    res.send('Welcome to my demo tutorial!')
});

## I added a new endpoint (greet)
app.get('/greet', (req, res)=>{
    res.send('Hello there, how is your day going?')
});

app.listen(config.PORT, ()=>{
    console.log('Application started successfully on port: ' + config.PORT);
});
Then repeat the process of building and pushing the image again
To build
docker build -t "login-server"/"name-of-image:version" .
To push
docker push "login-server"/"your-image-name:tag"
Now go back to your url and reload the page, your pushed changes should reflect

You can also test the greet endpoint added

You can see that your changes were immediately visible after re-deployment, that is how continuous deployment works.
Conclusion
In this article, you learnt the process of building a demo app, a Docker image using Dockerfile, pushing it to a registry (ACR) and hosting the container image using App Service.
By now you should have familiarized yourself on the use of Docker and some of Azure services.


Top comments (0)