The other day I wrote this article A first look at Astro.
This article showcases Astro's collection capabilities and while working with Astro for a while.
I've realized that it is not clearly documented how to create individual pages from a collection.
So I decided to give this a go and document the process.
What you'll learn today:
- Unique individual pages from an external API
- Individual pages having more data than the initial data set
- Linking to these pages
If you want to follow along, you can download the starting code from GitHub.
Note: Important information regarding the current API state
While researching this article, I concluded that Astro would loop the initial query for each page. This caused the API I was using to rate-limit.
At the time of writing (July 2021) Astro is working on a fix for this.
Keep an eye out for this PR on GitHub.
Creating the individual collection page
The cool part about Astro is that it provides us with a wildcard page setup, meaning we can use one file to load pages dynamically!
How this works is by prefixing the page with a $ (dollar sign).
This will create a dynamic page we can load data in.
Since we already have our index page listing the top anime shows from an API endpoint, let's go ahead and make a singular page for each show to load all episodes for that show.
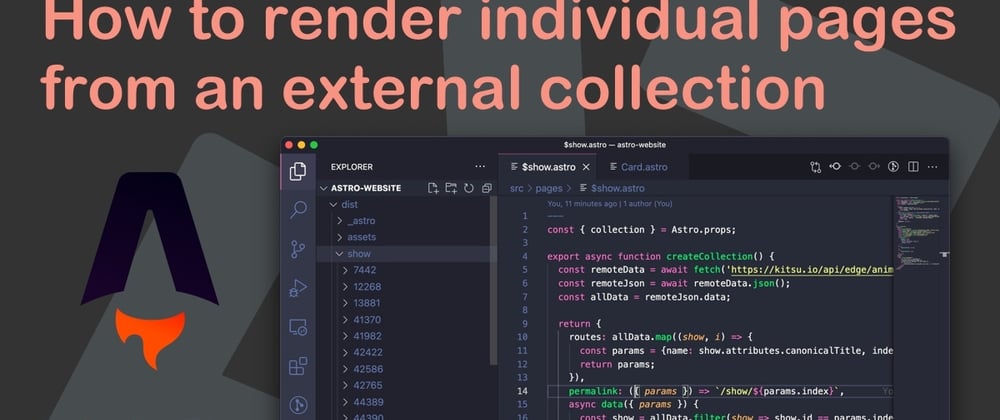
In your pages folder, create a file named $show.astro.
In the frontmatter part (the --- section) is where we can define the behavior for this collection of pages.
The first thing we need to do is state this is an Astro collection.
---
const { collection } = Astro.props;
---
Then we can call the createCollection function, which can create a collection dynamically.
---
const { collection } = Astro.props;

export async function createCollection() {
    // TODO
}
---
This createCollection function comes with a return value, which will hold some convenient options.
But before we get to those, we need to define our base collection. In our case, we'll use the collection we used on our homepage.
Place the following code inside the collection so that we can loop over the results in a bit.
What's pretty cool about this approach is that the two top-level awaits, making sure the data is available.
export async function createCollection() {
  const remoteData = await fetch('https://kitsu.io/api/edge/anime?sort=-averageRating');
  const remoteJson = await remoteData.json();
  const allData = remoteJson.data;

  return {
    // TODO
  };
}
With the above code, we state that the collection now has a variable allData containing an array of all our shows.
The first thing we'll need to define in the return function is the routes. The routes will define the total collection of routes for this collection type.
return {
  routes: allData.map((show, i) => {
    const params = {name: show.attributes.canonicalTitle, index: show.id};
    return params;
  }),
};
We map each data object and return params for each route, including the name of the show and the id. This show.id is the unique ID in the external API, so we'll be using that.
Then we can define a permalink which will be the final URL for each route.
permalink: ({ params }) => `/show/${params.index}`,
This will give us a permalink like: show/4333 where 4333 is the id of that show in their API.
Then we need to return the actual data per page. We can do this by leveraging the data option in return.
async data({ params }) {
    const show = allData.filter(show => show.id == params.index);
    const episodes = await fetch(`https://kitsu.io/api/edge/episodes?filter[mediaId]=${params.index}}`).then(response => response.json());
    show[0] = {...show[0], ...{episodes: episodes.data}};
    return show;
},
What will happen here is that for each page, this data method is called using the params for that route.
We then filter the show based on the id to return just the single object.
In our case, we then want to retrieve extra information being a list of episodes for this show!
And lastly, we merge the show with the episodes array and return it.
Now the data object will have all the data we need in the frontend.
Note: The return of the data must always be an array!
Lastly, we can set the pageSize. In our case, we'll use the Infinity type.
pageSize: Infinity,
Let's head over to the HTML part, do note that this code is still in the same file as the above functions, but below the last --- section.
<html lang="en">
<head>
<meta charset="UTF-8" />
<meta name="viewport" content="width=device-width, initial-scale=1" />
<title>Anime show: {collection.params?.name}</title>
<link rel="icon" type="image/svg+xml" href="/favicon.svg" />
<link rel="stylesheet" href="/style/global.css" />
<link rel="stylesheet" href="/style/home.css" />
<style lang="scss">
.container {
margin: 4rem;
display: grid;
@media (max-width: 650px) {
margin: 2rem;
}
}
a,
p {
margin-bottom: 0.5rem;
}
h1 {
margin-bottom: 1rem;
}
</style>
</head>
<body>
<div class="container">
<a href="/">← Go back</a>
<h1>{collection.params?.name}</h1>
<p>These are all episodes for this show:</p>
<ul class="list">
{collection.data[0]?.episodes.map((item) =>
<li>{item.attributes.number} - {item.attributes.canonicalTitle}</li>
)}
</ul>
</div>
</body>
</html>
Here I add some basic styling and showcase the show's title by using the data attribute on this collection.
Then I loop over each episode item and render a list of episodes for this particular show.
Linking to these individual pages
As mentioned above, these pages will get a permalink like show/{id} so we can leverage that in our existing homepage layout.
However, since we render those as Card components, let's open up the Card.astro file. Add the ID to the props of the card since we'll need that to link.
---
export interface Props {
  id: number;
  title: string;
  image: string;
  episodes: number;
  score: float;
  href: string
}

const { title, image, episodes, score, href, id  } = Astro.props;
---
And now we can simply add a link in the card:
<a href={`/show/${id}`}>Read more →</a>
We do need to pass this id to the card in the index.astro file.
<Card id="{item.id}" ... />
With that done, we can now open up individual pages for each show on our homepage!
And the cool part is, once we build our site, they will all be created on runtime as separate files.
You can try the static output on this example page:
If you want to see the full code for today, head over to this GitHub repo.
Thank you for reading, and let's connect!
Thank you for reading my blog. Feel free to subscribe to my email newsletter and connect on Facebook or Twitter


Top comments (0)