So, I started to work on my personal portfolio as an aspiring Junior Frontend developer before I switched my career to Security Analyst :D
At my previous job we were building an internal testing tool (top secret stuff), and the stack we used was pretty trendy on the frontend side, it was React with Typescript and other friends.
So, I wanted to develop my skillset further, and on top of that learn a bit of backend, while building a personal project for my portfolio.
I would probably do something with NodeJS, Express, MongoDB and React-Typescript, since I actually wasn’t sure about the backend, and at the same time I didn’t want to go that deep into it rather just having fun while building my precious UI.
But then my colleague told me to look into Prisma and GraphQL… and I was sold!
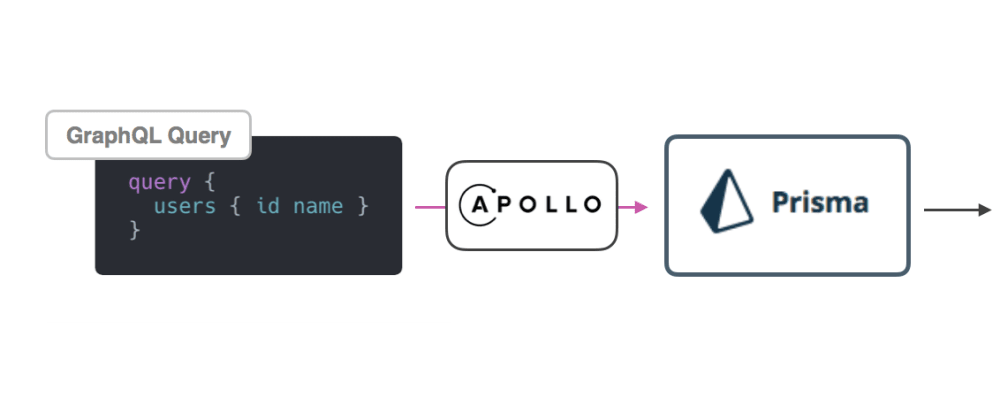
GraphQL is sexy. See why "GraphQL is the better REST"
The Stack
Backend
- Prisma v 1.34 — an open source library, that sort of sits on top of your database and provides a full-featured GraphQL API that you can use to interact with the database.
- Apollo Server v2 — implements a GraphQL server and can be queried from ApolloClient.
- Node.js v8.9.4 or later
- PostgreSQL
Frontend
- React v16.8 — in particular Create-React-App will serve as a great template for starters.
- ApolloClient v2.6 — will be responsible for requesting and caching your data, as well as updating your UI
Initial Setup
While I was deciding on how to approach the backend, I had already cloned create-react-app and installed nodejs. Fairly easy, so I won’t focus on it here.
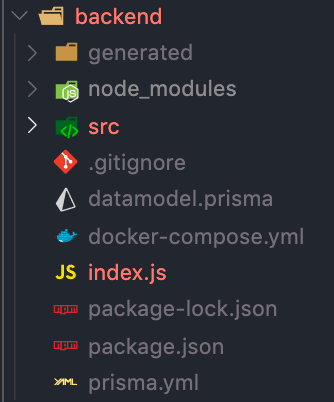
However, for beginners, I think it is worth mentioning the folder structure.
So, inside my-app folder, you will have two other folders: backend and frontend. Each of them has their respective package.json files, which have their scripts to start the server-side with node and the frontend.
Prisma Setup
Install the Prisma CLI
npm install -g prisma
Set up Prisma using Docker, in order to use Prisma locally. For this, you will create a Docker Compose file that configures Prisma and specifies the database it can connect to, in my case its a brand new Postgres db.
touch docker-compose.yml
Paste the contents of the file below into your docker-compose.yml file.
To launch Prisma and the connected database:
docker-compose up -d
And now Prisma is connected to your local database and runs on http://localhost:4466, which was specified in the configuration file above.
You might want to access Prisma admin panel http://localhost:4466/_admin to gain more detailed view of the responses when querying your database. You can also delete records from your database there.
To find out how you can secure your Prisma server, see this
Configure your Prisma API
To bootstrap the configuration files for your Prisma client run the following command, where endpoint needs to match the URL of a running Prisma server.
prisma init --endpoint http://localhost:4466
This will create the minimal setup required to deploy the Prisma datamodel: prisma.yml and datamodel.prisma. And it will allow you to finally deploy the Prisma API.
Few things before deploying.
Add the following lines to the end of your prisma.yml:
generate:
  - generator: graphql-schema
  output: ./generated/prisma.graphql
This will generate our GraphQL schema which we will be referring to when building queries and mutations.
Now let’s deploy using the following command.
prisma deploy
At this point you can consider your Prisma set up done. 🎉🎉🎉
In the next part, I will set up both Apollo Client and Server, as well as write my first queries and mutations.


Top comments (0)