This article was written as a requirement for Lambda School's Curriculum
About 4 weeks ago, I began the final section of my part-time experience at Lambda School, Lambda Labs.
Student developers are split into teams and collaborate to build a project that meets all release requirements. The first week is spent planning your approach to the project, and designing the app UI using Whimsical, a UI creation collaboration tool.
Our team was given a deadline of 4 weeks to create CitySpire, a city-searching app utilizing a data science backend to display city data to web and iOS frontends. Created to help users find the perfect city for their needs.
Finding Cityscapes to use
This article discusses how I handled a technical challenge, integrating the Google Places API into our iOS app, adding a crucial UI improvement to our app, changing all city images from a placeholder icon to pictures of their actual locations.

Acquire an API key
The first step in setting up our app to use the API is to acquire a valid API key through the Google Developer Console. This is required by Google for billing and analytics.
No need to worry though, Google's API services are free for 90 days and won't automatically charge our account once the trial ends.
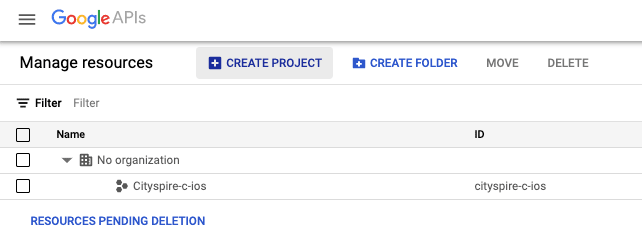
Lets sign in to the Google Cloud Resource Manager and add our project.
Step 1:
Step 2:
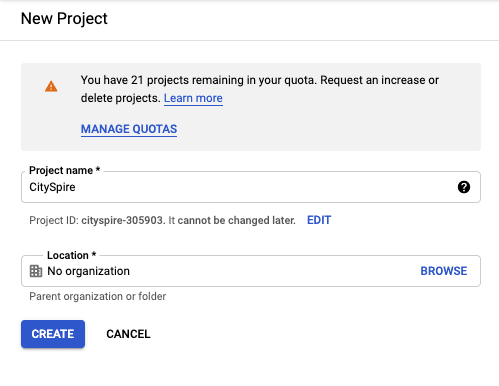
With our project created, lets enable API services.
Step 3:

Step 4:
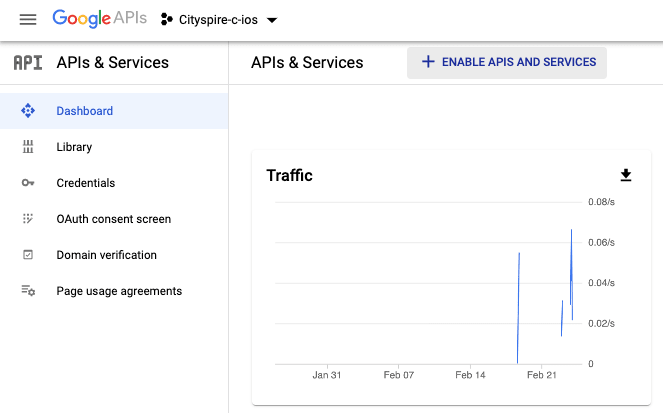
Locate the Places API and enable it.

Step 5:
Generate an API key.
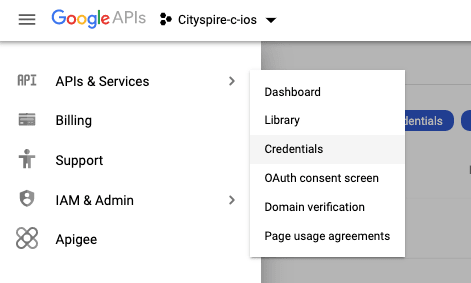

Create Credentials and select API Key
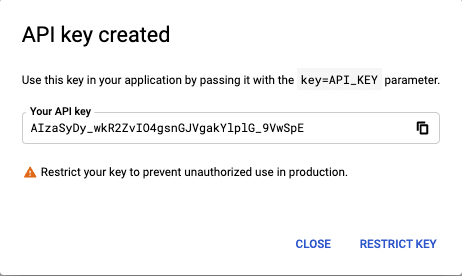
Step 6:
We must enable billing in order for our API key to be valid, even though Google offers a free trial.

Fill out the credit/debit card information, billing address, etc.
With the API enabled and our key obtained and valid, it's time to request images from the API.
Using the API
The Google Places API documentation is very clear and concise, the first thing we need to create is our Find Place request.
A Find Place request takes a text input and returns a place. The input can be any kind of Places text data, such as a name, address, or phone number. The request must be a string. A Find Place request using non-string data such as a lat/lng coordinate or plus code generates an error.
We are using this API to request data regarding cities, so passing the name and state of a city will suffice.
Example: input="San Francisco, California"
From the documentation, we know the endpoint URL is located at https://maps.googleapis.com/maps/api/place/findplacefromtext/json, and that we are sending a POST request, setting URL parameters and receiving a response in JSON format.
The parameters our app sets to request a city are:
input=CITY, STATE
key=YOUR_API_KEY
inputtype=textquery
fields=name,photos
All in all, our request for San Francisco, California looks like this:
https://maps.googleapis.com/maps/api/place/findplacefromtext/json?input=San%20Francisco,%20California&key=YOUR_API_KEY&inputtype=textquery&fields=name,photos
With a JSON response containing:
- An array of
candidates - a
status
A candidates object contains:
name - The name of the location
An array of photos
A photos object contains:
height
width
An array of html_attributions - Credits to those who provided the photos
photo_reference
Strangely, a photos object does not contain any actual photos, but it does provide us with the ability to request them via the photo_reference property, a base64 encoded string.
Obtaining the image
In order to request an image via photo_reference, a new endpoint must be used:
https://maps.googleapis.com/maps/api/place/photo
with the following required HTTP parameters:
photoreference=YOUR_PHOTO_REFERENCE
key=YOUR_API_KEY
maxwidth=YOUR_MAX_WIDTH
maxheight=YOUR_MAX_HEIGHT
All in all, our GET request should look something like:
https://maps.googleapis.com/maps/api/place/photo?key=API_KEY&photorefernce=PHOTO_REFERENCE&maxwidth=1200&maxheight=800
And finally the response:

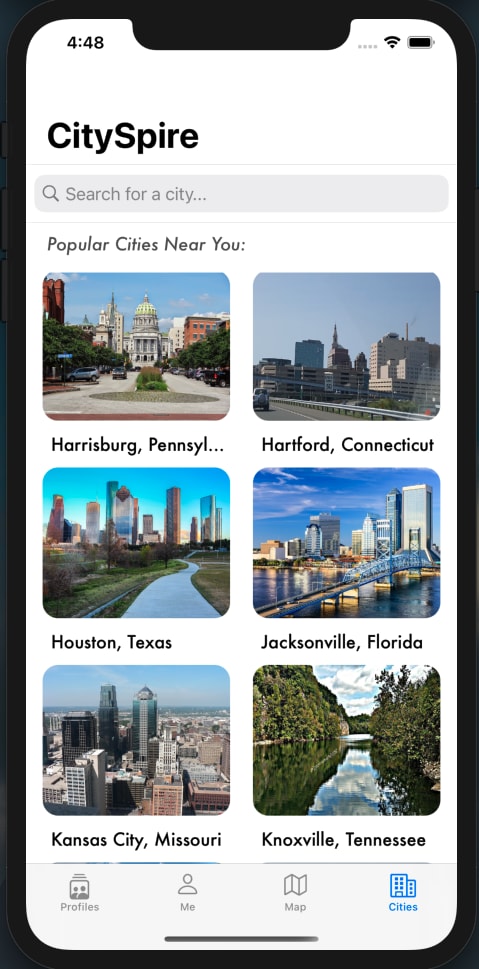
The End Result
After integrating this knowledge into our app using URLSession to make REST API requests, great results are seen in the collection view of our app. Google Places has brought us a picture for every city in our list!
By the end of our project it had good amount of features:
- MapKit section where user can search for a city, and display it on the map.
- Overlay view to display city information in the map.
- Google Places integration to fetch images for each city.
- Favoriting cities added to the user's profile.
- Collection view alongside the map, allowing users to search and filter through cities outside of Mapkit.
Future Challenges
For the continuation of work on this project, a UI overhaul is definitely needed. Our app has mismatching fonts, a default apple color scheme, and not much color besides white and black.
There are still some technical challenges in the form of bugs too, the image caching was written hastily near a our deadline, and it can unexpectedly display the wrong photo for a cell in the collection view.
API requests for the Mapkit view controller are also made even if the cache contains and image for the requested city, because of the speed in which this image fetch was implemented, it was deemed unimportant to check the cache beforehand.
Reflections
This project provided a lot of long term experience about planning, making design choices, and brainstorming about feature implementations with others in cross-platform teams.
I thoroughly enjoyed the experience and found that I and others worked very well in this environment, I received a lot of great feedback on my Github pull requests and slack messages. This experience leaves me looking forward to working within large teams to create amazing products in the future.


Top comments (0)