Prerequisites: Python fundamentals
Versions: Python 3.10
Read Time: 45 minutes
Introduction
In this tutorial, we'll learn how to set up your Python programming environment, create and register a bot using Discord Developer Portal, and write a few lines of Python code to respond to users' messages in Discord. We'll also provide a breakdown of each line of code for those who want to get a deeper understanding of how it all works.
The Discord bot that we are going to build will listen for the keyword $meme and responds with a random meme from Reddit.
The final result will look like this:

Let's dive in!
Requirements
Before we get started, you will need a few things if you don't have them already:
- Python 3 installed.
- pip (package installer) installed.
- A Discord account.
- A Discord server with "Manager Server" permissions.
How Does a Discord Bot Work
First, let's zoom out a bit and think about this question: "What does it mean to code a Discord Bot?" Simply put, a bot is nothing more than a computer program that performs some useful actions.
Because Discord wants bots to be able to do useful things, they have allowed developers to access parts of its system in their code, such as automatically responding to messages or helping with the server's admin functions (e.g. check out these popular Discord Bots).
Today, we're focused on getting our bot to read and write messages, so let's see how that works.
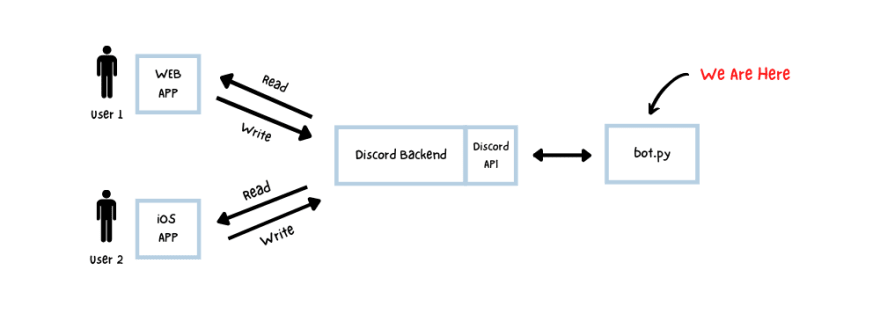
From the crude drawing above (I'm an engineer, not an artist), we can see how users and bots connect to the Discord backend. Each user interacts with the Discord backend to write and read messages. Then, the Discord backend servers will broadcast an event to any program listening that a new message has been posted. All we have to do is write our program to respond to message events (named bot.py here) and connect it to the Discord backend by using their API.
API (Application Programming Interface) is just a fancy terminology to define how one program talks to another program. In our case, Discord's API allows us to read and send messages to its backend servers.
First, we'll have to create and register our bot from Discord's Developer Portal.
Setting Up Discord Developer Portal
We'll be creating and registering our Discord Application inside the Developer Portal. Then, we will create a Bot for the application and get the required permissions.
Step 1. Go to Developer Portal
Visit https://discord.com/developers/applications and sign in if you haven't already.
Step 2. Create a New Application
To let Discord know we're going to be connecting to their backend servers, we need to register an application and set up the required permissions.
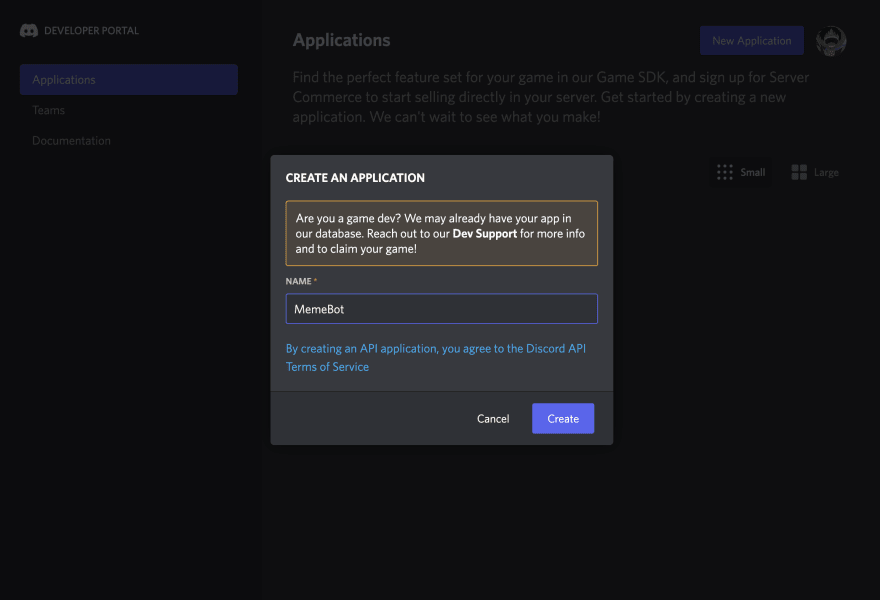
Click "New Application" on the top right.

Next, give your application a name. Here, we are calling ours MemeBot:
Step 3. Add a Bot to Your Application
Find the "Bot" tab in the left panel:

And click "Add Bot":

Step 4. Get the Token for Your Application
This step is important because we'll need this Token for later. This Token is similar to a password for your application. Anybody who has this can control it. (So make sure to never share your bot token with anyone, or upload it on GitHub by mistake!)
Click "Reset Token", write it down somewhere safe and definitely don't put it in any public place.

Step 5. Invite Application to Your Server
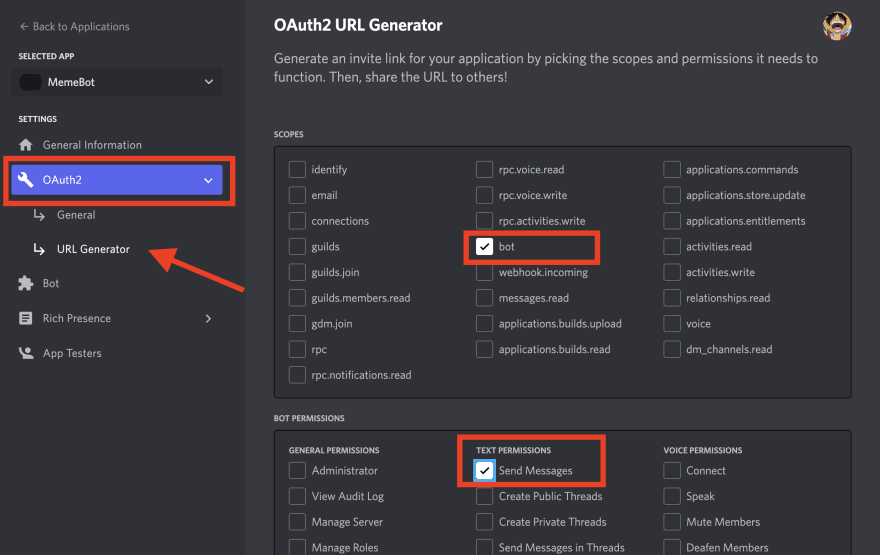
Now that we've set up our first application, we have to create an invite, to get our bot into our Discord server. To do that we can click URL Generator and select the following permissions. In the screenshot below, we are telling Discord to create an invitation link for our application with the scope "Bot" and that bot should be able to "Send Messages." (Note: Be careful with granting the all-powerful "Administrator" permission to your bot).

This is the link to invite our application (Discord bot) into a Discord server. Copy and paste this link into another tab in your browser and invite the bot into the Discord server that you want.

You can confirm if this worked by checking for this message in your Discord server.

Alright, now that we’ve set up our coding environment and got the necessary permissions from Discord for our new application, let’s write some code.
Writing the Python Code
Installing discord.py
The code that we will write, will be responsible for the creation of the bot that will connect to the Discord backend using Discord APIs.
The complicated part about writing this program is how we're going to interact with the Discord API. While we can read the API documentation and send HTTP requests directly to Discord, we have an easier way.
We'll be using a Python package called discord.py which is a simple wrapper around the Discord API. A wrapper provides a way to access an API through a particular programming language, in this case, Python!
If you are using Mac, run the following command in the Terminal to install it:
python3 -m pip install -U discord.py
If you are using Windows, then the following command should be used instead:
py -3 -m pip install -U discord.py
What did we just do here? We just installed a Python package from pip the package installer, which is just another way of saying we downloaded code that someone kindly wrote and uploaded to a public repository.
Log Into the Discord Server with the Bot
Let’s create a new file called bot.py in a new directory. This is the main file where we'll code the logic to make our Discord bot. Now paste the following code into it:
import discord

class MyClient(discord.Client):
  async def on_ready(self):
    print('Logged on as {0}!'.format(self.user))

client = MyClient()
client.run('Your Token Here') # Replace with your own token.
Let’s go over this block of code line by line.
import discord

class MyClient(discord.Client):
  async def on_ready(self):
    print('Logged on as {0}!'.format(self.user))
First, we've imported the discord.py package that we just installed and created our own class MyClient which we will use to interact with the Discord API. We create this class by extending from the base class discord.Client. This base class already has methods to respond to common events. For example, the on_ready() function above will be called when the Discord bot's login is successful.
discord.py works around the concept of events. There are other types of events (e.g. messages) that we will see later, but for now here's the definition of events from their website:
An event is something you listen to and then respond to. For example, when a message happens, you will receive an event about it that you can respond to.
Finally, our last two lines of code instantiates the MyClient class and calls run, which is the main way to start the client. The client will use the given token (which you should have saved from before) to authenticate itself to the Discord backend servers.
client = MyClient()
client.run('Your Token Here') # Replace with your own token
Running the Bot
You can run this code by typing in the following in your terminal.
python3 bot.py
As long as you keep this program running, your Discord bot will be online.
If you see this output in your terminal, then your Discord bot has successfully logged into your Discord server.
Logged on as MemeBot#3995!
Responding to Messages
Next, we want our bot to read messages in a Discord channel and respond to them.
Add the .on_message() method to the MyClient class like the following:
async def on_message(self, message):
  if message.author == self.user:
    return

  if message.content.startswith('$hello'):
    await message.channel.send('Hello World!')
The .on_message() method gets called automatically anytime there is a new message in a channel where our bot is located. In our method:
- We are first checking
if message.author == self.user, if the bot is the one sending the message in the chat. We don’t want the bot to keep responding to its own messages. - Then, we have some code to respond to a special keyword
$hello.
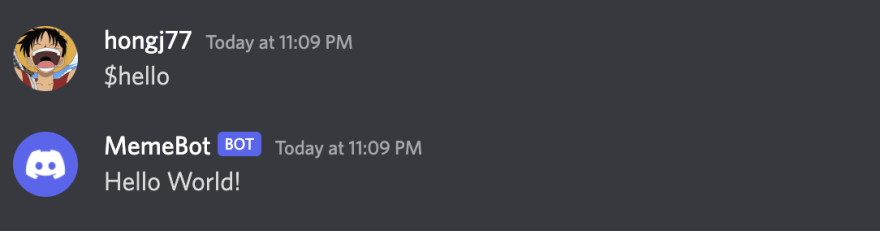
Let's try it out. Run the command python3 bot.py to start our program.
Now, add Memebot to any channel and type the word $hello in that channel and see what happens:
We've successfully programmed our bot to log into Discord and respond to our messages. But can we go further?
How to Respond with Memes
What if instead of responding with a text message, the bot responds with memes? Well that sounds like a lot of work.. buuut the cool thing about programming is that we can reuse other people’s work (yay for open source).
Check out this Github repository: https://github.com/D3vd/Meme_Api. This API returns a JSON response containing information about random memes from Reddit. Hmm, let’s see how it works by visiting this URL: https://meme-api.herokuapp.com/gimme.
Here is the response that I got:
{
  "postLink": "https://redd.it/w0teq0",
  "subreddit": "me_irl",
  "title": "me_irl",
  "url": "https://i.redd.it/ztpkxx6yl0c91.png",
  "nsfw": false,
  "spoiler": false,
  "author": "ozgonngu",
  "ups": 110,
  "preview": [
    "https://preview.redd.it/ztpkxx6yl0c91.png?width=108\u0026crop=smart\u0026auto=webp\u0026s=e3db2a1ed5ee73480224b55b16fcb38925ea9095",
    "https://preview.redd.it/ztpkxx6yl0c91.png?width=216\u0026crop=smart\u0026auto=webp\u0026s=aaec73a28c4c0b2bc47f4f9722be2fdb8ba95893",
    "https://preview.redd.it/ztpkxx6yl0c91.png?width=320\u0026crop=smart\u0026auto=webp\u0026s=90495a39d05f6d9d8975fb776887c08f65ece2c4",
    "https://preview.redd.it/ztpkxx6yl0c91.png?width=640\u0026crop=smart\u0026auto=webp\u0026s=b291abfb8f85b5826f001dee881570e694bdb46c",
    "https://preview.redd.it/ztpkxx6yl0c91.png?width=960\u0026crop=smart\u0026auto=webp\u0026s=7afc3f2532c7017a0045ae50777a18a2e452183e",
  ],
}
It looks like the url field here contains the link for the meme's image. How about we have our bot respond to user's messages with this image?
Integrating the Meme API
Let's paste these lines of code to the top of the file.
import requests
import json

def get_meme():
  response = requests.get('https://meme-api.herokuapp.com/gimme')
  json_data = json.loads(response.text)
  return json_data['url']
requests package allows us to make HTTP requests to any URL. In this case we're calling the GET method to the URL that will give us the meme data.
json package allows us to read JSON data. This is useful since most data passed around on the web is in the JSON format, like the JSON response we saw above.
We need to install the requests package to import it. Run the following command:
python3 -m pip install requests
Now all we need to do is call get_meme() inside our bot's on_message() method. Let's also change the keyword from $hello to $meme since it's more fitting. Your code should look like this:
import discord
import requests
import json

def get_meme():
  response = requests.get('https://meme-api.herokuapp.com/gimme')
  json_data = json.loads(response.text)
  return json_data['url']

class MyClient(discord.Client):
  async def on_ready(self):
    print('Logged on as {0}!'.format(self.user))

  async def on_message(self, message):
    if message.author == self.user:
      return
    if message.content.startswith('$meme'):
      await message.channel.send(get_meme())

client = MyClient()
client.run('Your Token Here') # Replace with your own token
Time to test it out!
Just remember you need to close and restart your program. Press control+c to close the currently running program in the terminal and then, run python3 bot.py again.
The moment of truth...

Success! 🎉
Final Words
That's all it takes to set up and code a Discord bot in Python! Just a note: the bot will respond to you as long as the program is kept running. If you close your terminal or turn off your computer, it will no longer be running. If you want to keep the program running forever, we’ll have to deploy it to another computer in the cloud. However, that is a lesson for another day.
Hope you enjoyed the tutorial. If you have any questions, you can DM me on twitter at @hongjjeon.
More Resources
About the Author:
Hong Jeon is a Software Engineer at Waymo (formerly known as the Google self-driving car project). Hong discovered his passion for sharing knowledge in college during his time as a Teaching Assistant in several programming classes. You can catch him on Twitter at @hongjjeon.


Top comments (1)
Thanks. It is really useful. I don't about that.
I needed to
something
client=MyClient(intents=None)