
Unity animation system is quite the beast, and setting it up feels very opaque. Most tutorials opt for explaining everything all at once. While informative, it doesn't make for a great "getting started" experience. So, I'll be focusing this note toward creating and manipulating an animation.
The Void
Let's start from an empty project.
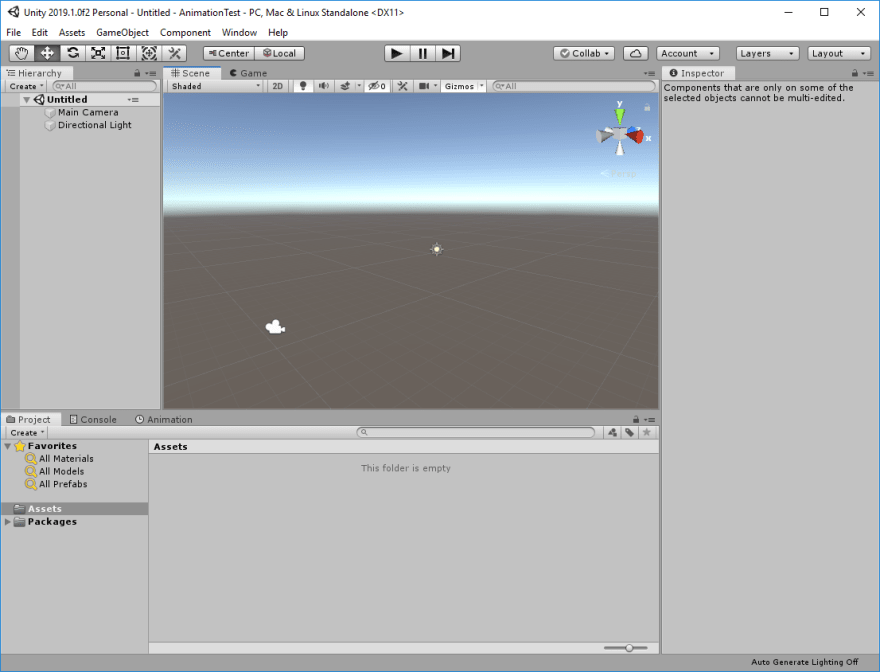
Now, Let's add an object to animate. Something simple, like a cube.

With that, we can start the process of animation.
The Animating Maze
Animating in Unity is a multi-step process. A Game Object needs an Animator Component. An Animator Component needs Animation States. An Animation State needs transitions to other states. Additional, Animation States need Animation Clips.
Animator Components
First, our Game Object needs an Animator component. That component can be found in Add Component → Miscellaneous → Animator as shown below.

Now, an Animator Component needs an Animator Controller Asset. That Asset can be found under Assets → Create → Animator Controller

Next, we add the controller to the component.
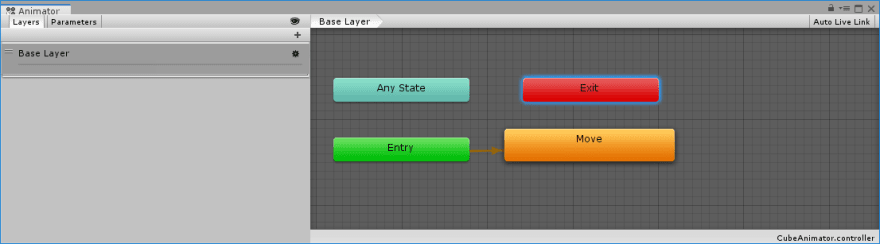
An Animator Controller stores a series of finite state machines, separated into layers. Each node represents a different animation state. Each node can have a series of connections. And, each connection defines a transition from one animation to the next. More information can be found in The Animator Controller Asset section of the Unity Manual. However, this component is meaningless without Animation Clips.
Animation Clips
An Animation Clip stores all the keyframes of animation. To create one, we first need to open the animation window. This can be done by selecting Window → Animation → Animation.
With the Animation window open, select the object we want to animate. Then, click Create in the Animation window. Name and save the animation file. This will create a blank animation.

Rather conveniently, the new animation gets automatically added to the Animator Controller.
Next click Add Property, then we can select the properties we want to animate.

Click the record button, and use the Unity Editor to manipulate the selected properties.

Press the play button in the Animation window to see the result of our animation.
Let's add another animation to the Animator by click where the Animation name is in the Animation window. Also, Let's have this animation reset the cube to its resting position.
If we run the scene as is, the Cube automatically starts playing the Move animation. Therefore in order to control this Animation, we must change the transitions.
Connecting Nodes
Each node can have connections to other states. The Entry node is the start of the state machine. The animation controller will automatically play the first animation connected to the Entry Node. Additionally, by default, the first animation we create will be connected to the Entry node.
So, Let's change Entry ⇒ Move to Entry ⇒ Idle. First, we have to remove the "Move" node because Unity will only change it when it is deleted.

Next, we add it again. This is quite a roundabout method. First, we select the animation in the Project window. Then, we return to the Animator window. Finally, in the Animator window, we Right Click → Create State → Create From Selected

Now, Let's connect Move ⇒ Idle.

C# API
For this final part, we're going to write code to press a button, disable the button, have the cube move, and re-enable the button when the animation finishes. But first, we'll need a button.
GUI Sidetracking
Before we start scripting, Let's add a button to trigger the animation script action. We need to go to GameObject → UI → Button. Let's reposition the button in the center of the screen, too.

Now, we add a script component to the button. Let's name it ButtonAction.cs.

Also, it turns out the Cube will need a script, too. Let's name it CubeAction.cs.

We'll see why later...
But, with that, we can finally dig into the C# side of things.
Back to Scripting
Here's what Unity generates for us by default in the ButtonAction.cs file:
using System.Collections;
using System.Collections.Generic;
using UnityEngine;

public class ButtonAction : MonoBehaviour
{
    // Start is called before the first frame update
    void Start()
    {

    }

    // Update is called once per frame
    void Update()
    {

    }
}
First, let's add the following fields and imports to ButtonAction.cs (also the ... represents code omitted from previous examples):
...
using UnityEngine.UI;

public class ButtonAction : MonoBehaviour
{
    // Button to control animation
    [SerializeField]
    private Button button;

    // animator to control
    [SerializeField]
    private Animator animator;

    ...
}
The button field is used to add a callback on the button object. The animator field is used to add callbacks to the Move animation clip. Using the Unity inspector window, set the fields to point to the desired Button Game Object and Animator Game Object.
All animation clips are stored in an array you can use at run-time through the following code:
...
public class ButtonAction : MonoBehaviour
{
    ...
    void Start()
    {
        // Store the Move animation clip into a variable
        AnimationClip moveClip = animator.runtimeAnimatorController.animationClips[1];
    }
    ...
}
The array animationClips is where our Move animation clip is located. The index number is based on the order the clips were added to the Animator Controller. Since "Move" is the second animation, it's located in array index 1. Now, that we have the animation clip, we can add an Animation Event to the Animation Clip.
...
public class ButtonAction : MonoBehaviour
{
    ...
    void Start()
    {
        AnimationClip moveClip = animator.runtimeAnimatorController.animationClips[1];
        moveClip.AddEvent(new AnimationEvent()
        {
            // Wait until the clip is over
            time = moveClip.length,
            functionName = "EnableButton"
        });
    }
    ...
}
An Animation Event can be used to call a method in a Game Object. But, it has a restriction. An Animation Event can only call methods from within the Game Object that owns its Animator. In other words, EnableButton will be defined in CubeAction.cs and not ButtonAction.cs. Currently, CubeAction.cs looks like this:
using System.Collections;
using System.Collections.Generic;
using UnityEngine;

public class CubeAction : MonoBehaviour
{
    // Start is called before the first frame update
    void Start()
    {

    }

    // Update is called once per frame
    void Update()
    {

    }
}
So first, we need to add a field for the button. This will allow us to enable the button after the animation ends.
...

using UnityEngine.UI;

public class CubeAction : MonoBehaviour
{
    [SerializeField]
    private Button button;

    ...
}
We can use the inspector, like before, to set the field to our button.

Then, we can add the EnableButton() method.
...
public class CubeAction : MonoBehaviour
{
    ...
    void EnableButton()
    {
        button.enabled = true;
    }
}
Finally, returning to ButtonAction.cs, we need to add an event listener to the button.
...
public class ButtonAction : MonoBehaviour
{
    ...
    void Start()
    {
        ...
        button.onClick.AddListener(OnClick);
    }

    void OnClick()
    {
        animator.Play("Move");
        button.enabled = false;
    }
    ...
}
So all together, this is what ButtonAction.cs looks like:
using System.Collections;
using System.Collections.Generic;
using UnityEngine;
using UnityEngine.UI;

public class ButtonAction : MonoBehaviour
{
    // Button to control animation
    [SerializeField]
    private Button button;

    // animator to control
    [SerializeField]
    private Animator animator;

    void Start()
    {
        AnimationClip moveClip = animator.runtimeAnimatorController.animationClips[1];
        moveClip.AddEvent(new AnimationEvent()
        {
            time = moveClip.length,
            functionName = "EnableButton"
        });
        button.onClick.AddListener(OnClick);
    }

    void OnClick()
    {
        animator.Play("Move");
        button.enabled = false;
    }
}
And this is what CubeAction.cs looks like:
using System.Collections;
using System.Collections.Generic;
using UnityEngine;
using UnityEngine.UI;

public class CubeAction : MonoBehaviour
{
    [SerializeField]
    private Button button;


    void EnableButton()
    {
        button.enabled = true;
    }
}
Fin
With all that in place, running the project should result in a button that triggers the "Move" animation. Also, that button can't be pressed again until the animation ends.

When compared to the System I'm used to using in Godot, this feels like a very long method with an awkward workflow. But, at least I finally figured out how to Animate something.


Top comments (0)