We recently updated our storybook in a few dramatic ways that I wanted to share the process we used to improve them.
- I audited what we were communicating and removed dead leaves
- I added things we were missing
- I revamped our docs to include a simple way to supply developer shortcuts to get started with our elements
- I added in custom-elements.json details for advanced devs
Here's what it looks like if you didn't navigate to the vercel driven storybook.

How we handle stories
Most of how we've automated storybook stories can be attributed to:
- My coworker Nikki is an Evil Genius and syphons off the class properties to generate knobs automatically!
-
custom-elements.jsonis auto built by our tooling using the web-component-analyzer package with it'swcacommand - Our elements almost all have
static get tag()for the name of the element andexporttheir class to make it easier to build out - We wire many elements to our HAXSchema that supplies custom demo content
Here's an example of how our RPG character page works as it's a typical implementation.
import { withKnobs } from "@open-wc/demoing-storybook";
import { StorybookUtilities } from "@lrnwebcomponents/storybook-utilities/storybook-utilities.js";
import { RpgCharacter } from "./rpg-character.js";

export default {
  title: "System|RPG Character",
  component: "rpg-character",
  decorators: [withKnobs],
  parameters: {
    options: { selectedPanel: "storybookjs/knobs/panel" },
  },
};
const utils = new StorybookUtilities();
export const RpgCharacterStory = () =>
  utils.makeUsageDocs(
    RpgCharacter,
    import.meta.url,
    utils.makeElementFromHaxDemo(RpgCharacter)
  );
storybook-utilities
npm install @lrnwebcomponents/storybook-utilities- NPM page
The makeElementFromHaxDemo can also be swapped out for makeElementFromClass to be used more broadly in any web component storybook!
utils.makeElementFromClass(GitCorner,
      {
        source: 'https://github.com/elmsln/lrnwebcomponents',
        alt: "Our monorepo of all the things you see here",
        corner: true,
        size: "large"
      })
Our pattern follows that we pass in the class for the element (it should work with any library as our Vanilla and LitElement bases both work well)
makeUsageDocs
This is where the quality stepped up a notch. By passing the template for our demo through this function, as well as import.meta.url we've got everything we need in order to build our standard doc page that includes:
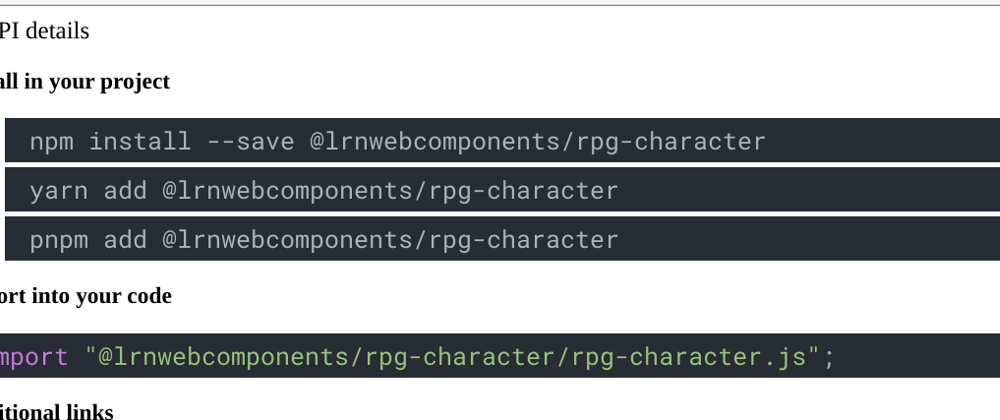
- how to install via npm, yarn or pnpm
- how to use in your project
- deep API details from
custom-elements.json - links to github / npm
How we get custom-elements.json
So this probably has better ways of handling it but I went with a simple fetch relative to import.meta.url and then stored it in a localStorage variable. Why? Because Storybook didn't enjoy rendering out async. As a result, there are 2 features that sorta "show up" as you use the stories more (we get our haxProperties in a similar way if its in a remote file).
Here's what the code looks like for that specific custom-elements.json section:
    const url = new URL(path);
    let entryFile = el.tag;
    let importPath = url.pathname.replace('/elements/','@lrnwebcomponents/').replace('.stories.js','.js');
    packageName = packageName || `${importPath.split('/')[0]}/${importPath.split('/')[1]}`;
    var description = window.localStorage.getItem(`${entryFile}-description`);
    setTimeout( async () => {
      // pull from the custom-elements json file since our tooling rebuilds this
      const d = await fetch(`${url.pathname}/../custom-elements.json`.replace('/lib/','/')).then((e) => e.json()).then(async (d) => {
        let allD = '';
        if (d.tags) {
          await d.tags.forEach((item) => {
            // ignore source versions
            if (!item.path || !item.path.startsWith('./src/')) {
              allD += item.name + "\n" + (item.path ? item.path + "\n" : '') + (item.description ? item.description + "\n" : '') + "\n";
            }
          })
        }
        return allD;
      })
      window.localStorage.setItem(`${entryFile}-description`, d);
    }, 0);
Here we can see that we use import.meta.url from the rpg-character.stories.js file requesting. This gives us the path to the file that loaded the story so that we can then base the path to custom-elements.json off of that. As our tooling runs in that same directory we just take the pathname from a new URL(), go back a directory (/../) which is a hack that can be used to move out of file names (could have replaced it but meh) and target custom-elements.json from there.
After getting that file we walk through the json and use pre to print the contents that we care about. wca did all the hard work of documenting tags, descriptions, and properties; now we're just printing it out in-case people want to see that at a glance without digging into the source.
I hope this helps give you ideas on how to automate your web component monorepos!


Latest comments (0)