Push notifications, also known as remote notifications, are a tremendously useful feature of mobile applications. They can be used for sending users marketing offers, increase users engagement by providing a personalised content, implementing a chat or even triggering some action to be performed in the background. And what's really useful, users don't have to keep their app opened.
Sounds great, doesn't it? Yes, but it's necessary to understand how push notifications work and learn how to set them up properly to avoid some unnecessary hassle.
iOS 10 novelties
iOS 10, in addition to a short text message, playing a notification sound, and setting a badge number on the app's icon, has expanded iOS push notifications capabilities with:
- media attachments (images, gifs, audio, video),
- expanding detail view with 3D Touch,
- notifications actions allowing user to take immediate actions.
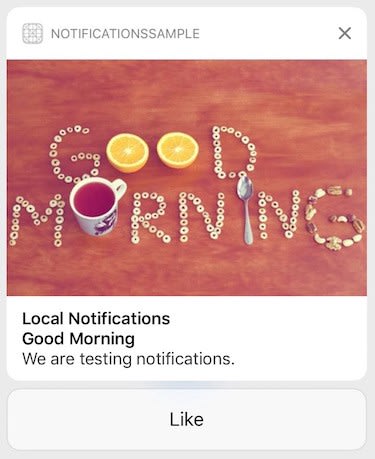
In the example below, there is an iOS 10 push notification with the image attached and "Like" action button.
This allows developers to increase push notifications quality and get even more from this versatile feature.
The server
Push notifications are sent on Apple Push Notification service's (APNs) behalf, directed to one or more specific devices that have registered to the APNs. To achieve that we need to set up a server that will gather mobile devices tokens and use them to send push notifications through APNs. It might sound quite complicated, but don't worry, there are plenty of ready-made solutions that can be used, even for free.
Let's glance at the most popular services that support both iOS and Android:
Each of these services offers also other features like analytics, A/B testing, crash reporting, real-time database or even authentication, but you don't have to use any of them.
Note that using a 3rd party service has its downsides, like:
- If you decide to switch to your own server, you'll need to communicate with the service you've used instead of the APNs directly, or you'll have to reconfigure your mobile app.
- You must be aware that your data is sent through servers that you don't control, so it might concern you regarding your data protection policy.
- Some services are free until you reach some limit, for example, Mixpanel lets you create only up to 1000 user profiles for free. It might be expensive if your app becomes popular.
- When a service is being closed down, you have limited time to migrate to another provider. Such situation has already happened with a very popular platform for mobile developers maintained by Facebook called Parse, which was shut down on January, 2017. The project is now open source and you can set it up on your own machine, but you can't use it out of the box anymore.
Firebase
For purpose of this post we'll use the Firebase Cloud Messaging (FCM). It's an interesting solution, especially that on I/O 2016 Google has turned Firebase into an unified mobile platform, which has replaced the Google Cloud Platform as the default solution for handling push notifications on Android. This means that we can use the same service for sending push notifications on both platforms, while using the default implementation on Android.
FCM inherits GCM's core infrastructure, but simplifies the client development. GCM is still supported but all new client-side features will be available on FCM only. Firebase Cloud Messaging uses the Apple Push Notification service to send messages to your iOS app.
Certificates
First, we need to generate APNs SSL Certificate or APNs Authentication Key to allow our notification server (Firebase) to connect to the APNs.
Configuration with auth keys is recommended as they are the more current method for sending notifications to iOS, but they might be problematic since they are bigger. This happened to me when I wanted to upload Base64-coded auth key to the AWS using Cloud Formation configuration.
To enable push notifications service in application identifier:
Log in to Apple Developer Center.
Open Certificates, IDs & Profiles.
Open applications identifiers on the left pane: Identifiers -> App IDs.
Find your application identifier and Edit its services.
-
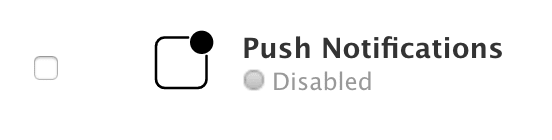
Enable Push Notifications.
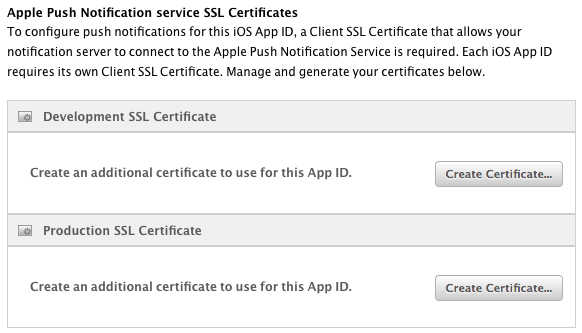
To generate APNs SSL Certificate on Apple Developer Center:
-
Choose Create Certificate... for Development or/and Production.
Note: If you expect push notifications to work in an app distributed via TestFlight, you'll need to use the Production SSL Certificate.
Read instructions, Continue, and upload your Certificate Signing Request (CSR file) exported from your Keychain.
Download the certificate and finish the process with Done button.
To generate APNs Authentication Key on Apple Developer Center:
Open Keys -> All on the left pane.
Create a New Key by tapping at (+) sign.
Fill Key Description, select APNs key service and Continue.
Download the key, make sure you keep it securely and finish the process with Done button.
Now we need to upload the generated key or certificate to Firebase.
Log in to Firebase Console and select your project. If you haven't had it yet, create new a project.
-
Open your Project settings from left pane.

Open CLOUD MESSAGING tab.
-
Under iOS app configuration upload your key or certificate.

Note that you can't use
APNs auth keyandAPNs certificatesimultaneously.
Project configuration
After setting certificates up we can configure the Xcode project:
Open project settings.
Open Capabilities tab.
-
Enable Push notifications.

Entitlements file will be created or updated automatically. If you've skipped adding push notifications service to your application identifier in previous chapter, you'll encounter an error.
Once you've finished Xcode configuration make sure that the project builds without errors. If you encounter any signing issues, you might need to refresh the provisioning profile or even restart the Xcode. However, I recommend using Fastlane Match to share code signing identity or Fastlane Sigh to download or repair provisioning profiles. Automating code signing will save you a lot of time in the future.
There is no need to duplicate instructions how to integrate Firebase SDK with iOS project, so simply follow this tutorial. You need to install Firebase/Core and Firebase/Messaging libraries.
If you have more build configurations to handle multiple environments, you might find it problematic to use different Firebase configurations stored in different GoogleService-Info.plist files because you can't use User-Defined build settings there. But don't worry, you can follow this great StackOverflow post to solve this problem by copying an appropriate configuration file at build time.
Permissions
Remember that you can ask user to allow receiving notifications only once. For this reason you should never do that just after the app launches (although many apps do that). It is also a good idea to first introduce user on a separated screen and explain why would you send any notifications. You should also let user opt-out without asking for permissions, to keep the chance to successfully go through the process later on.
If the user has forbidden notifications, then the only thing you can do is to let him know why is it worth enabling them and instruct how to do that (it is only possible from the device Settings).
Note that since iOS 10 you should use UNUserNotificationCenter object:
if #available(iOS 10.0, *) {
    UNUserNotificationCenter.current().delegate = self

    let authOptions: UNAuthorizationOptions = [.alert, .badge, .sound]
    UNUserNotificationCenter.current().requestAuthorization(options: authOptions, completionHandler: { _, _ in })
} else {
    let settings: UIUserNotificationSettings = UIUserNotificationSettings(types: [.alert, .badge, .sound], categories: nil)
    application.registerUserNotificationSettings(settings)
}
Device token
APNs device token allows you to target notification messages at the particular instance of the app. It rarely changes, but you can't assume that it won't happen. The token may change when:
The user reinstalls the app
The user restores the app on a new devices
The user clears app data.
If you handle push notifications manually, you need to upload and refresh the device token on your own, so you'd have to implement server logic to store tokens and determine whether the token sent is new. If you're using Firebase SDK and you haven't disabled method swizzling (the process of changing the implementation of an existing selector), then you don't have to do that - Firebase will handle it for you.
While handling device tokens manually, you need to remember that device token is not a string. It's 32 bytes of opaque data that needs to be decoded. You can do that in the following way:
func application(_ application: UIApplication, didRegisterForRemoteNotificationsWithDeviceToken deviceToken: Data) {
    let token = deviceToken.map { String(format: "%02.2hhx", $0) }.joined()
    print(token)
}
Testing
It might be quite troublesome to test push notifications because you can't do that on iOS simulator and you need to make sure that it works correctly on each build configuration. You can send yourself a push notification from Firebase Console (GROW->Notifications->NEW MESSAGE on the left pane) but you'll have to target all users unless you have some segments or topics defined. Another way to target notifications is to provide FCM registration token that you can collect in messaging:didReceiveRegistrationToken callback of the FIRMessaging delegate. This function will be called after every token refresh and on each app startup.
There is also a very useful command line tool called Houston that lets you send push notifications directly to APNs with a single command:
apn push "device-token" -c /path/to/cert.pem -m "Hello from the command line! "
PEM (Privacy Enhanced Mail) is a container format that may include the public certificate or an entire certificate chain including public key, private key, and root certificates. You can download .cer file from Apple Developer Center, to convert this format to .pem:
Open certificate in Keychain (simply open a file).
Right click on certificate (not a key below) and select Export option.
Save certificate in
.p12format.Run this command to convert
.p12format to.pem:
openssl pkcs12 -in cert.p12 -out cert.pem -nodes -clcerts
Silent notifications
Background update notifications, often referred as silent notifications, were introduced in iOS 7 to provide a way to wake up an app so that it could refresh its data in the background. It's very useful to improve user experience and prevent displaying outdated information when user launches the app.
Since silent notifications are meant to refresh data in the background, APNs treat them as low priority and may throttle their delivery if the total number of notifications becomes excessive. The limits are dynamic and can change based on conditions, but you should not send more than a few notifications per hour.
To support the background update notifications, make sure that the payload's aps dictionary includes the content-available key with a value of 1. You also need to enable Remote notifications background mode in your project settings (Capabilities->Background Modes):

iOS 11 problems
iOS 11 brings a lot of new features but it also comes with some problems. One of them is that silent notifications are not working on iOS 11.0 - 11.0.3 and were fixed only in iOS 11.1. Due to the high iOS 11 adoption, it has become a major issue for a number of apps.

Sky is the limit
Push notifications are an incredibly useful feature that is the basis for many applications. A range of functions that we can use with notifications in our application grows in time so it's worth being up-to-date with this topic. Push notifications can be used in various ways so you need to think about how you can use them in your application, not necessarily for simple messaging.
Originally published at brightinventions.pl
By Mateusz Klimczak, Pushing things forward @ Bright Inventions


Top comments (1)
Also an easy way to integrate Push notifications, is by integrating INDIGITALL, it has been developed with the latest technology to guarantee maximum effectiveness and simplify the process of creating and sending Notifications with animated image, Segmented, Geolocated and many other functions, it is great.
Here you can see the easy installation for your Ios platform:docs.indigitall.com/en/indigitalls...