Every now and then, you may come across the need to build a simple website hosted somewhere on the internet. Many services for this exist such as Squarespace, Wix, etc.; however, these options can be expensive and do not give you complete control of your web server. Using Apache and Google Cloud Platform, we can create a simple website with almost no cost. In this tutorial, we will do just that.
Note on Netlify
If you wish nothing more than to display HTML / JavaScript pages, Netlify could be a better option for you. Netlify offers free web hosting for simple HTML projects at no cost. However, if you wish to have a full Linux Server, Apache with Google Cloud Platform is a good option.
What is Apache Web Server
"The Apache HTTP Server Project is an effort to develop and maintain an open-source HTTP server for modern operating systems including UNIX and Windows." - Apache Project Team
In simpler terms, Apache allows you to start a web server which can display simple HTML, JavaScript, and CSS code. Apache accomplishes this by listening for incoming traffic on port 80 (the default internet port) and serving up the HTML documents accordingly. Therefore, with Apache we can write simple HTML, JavaScript, and CSS files and serve them to internet clients.
What is Google Cloud Platform
Google Cloud Platform is a service created by Google to host virtual machines in the cloud. Virtual machines can be configured to have very powerful hardware (very expensive) or micro hardware (very cheap). These virtual machines are also available with many operating systems including different distributions of Linux (Ubuntu, Debian, Red Hat, etc.) or Windows Server. In short, Google Cloud Platform gives us a virtual machine to run our Apache Web Server.
Setting up Google Cloud Platform
Setting up and creating a new virtual machine on Google Cloud Platform can be daunting and confusing at first. However, once you are used to the process, it is fairly straight forward.
First, navigate to cloud.google.com and sign in using a Google account. Next click the "Get started for free" button. This will take you to the google Cloud Platform Console. Agree to the terms of service and continue. Next, you will be brought to a signup page. Unfortunately, you will have to enter your credit card information to start an account. Once complete, click the "START MY FREE TRIAL" button.
Building Your Google Platform Virtual Machine
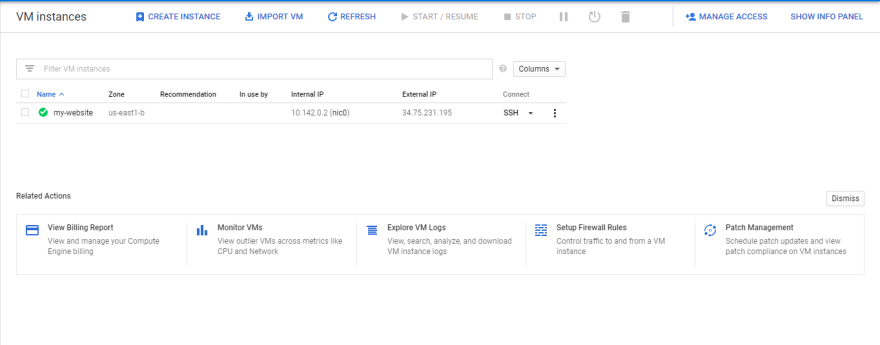
Congratulations! You are now ready to start building virtual machines. You should be looking at a page similar to the following:

Creating your VM
To start creating a VM to host your web server, navigate to the Computer Instances tab and select "Create". This will bring you to a perhaps confusing web page, but don't worry, we will walk through everything you need to know.

Name
First, you must name your virtual computer instance. This can be anything you want, but I'm going to call this one "my-website". This is simply what GCP will display for your VM name.
Labels
Next, you may add one or more labels to this VM, however, I am going to skip this since we are only creating one VM at the moment.
Region and Zones
Next, you must choose a region for your VM. In short, VM's are hosted in physical data centers. These data centers exist around the world, so you are essentially picking where your VM will be physically hosted. Since I am on the east cost, I am going to choose an east coast zone. To read more about selecting regions and zones see this article.
Computer Type
Now we must select the type of computer we would like to create. There categories for these options including machine family, series, and machine type.
Machine Family
Machine family comes in three types: General-purpose, Memory-optimized, and Compute-optimized. In short, you can select your VM configuration based on if you need more memory or computer power. For simplicity, we are going to stick with the General-purpose family.
Series
Next, we can choose a series. At the time of this writing, N1, N2, and E2 are available. N1 uses Intel Skylake processors, N2 uses Intel Cascade Lake processors, while E2 will dynamically select the computer platform based on availability. If you would like to read more about available series, see the documentation here. Since we don't want anything fancy, we're going with the cheapest option - N1.
Machine Type
Now we must select our machine type. Again, since we don't want anything crazy, we'll select f1-micro (1vCPU, 614 MB memory). As you can see by the specs, this guy is really tiny; however, for a simple Linux distribution (touching on this next), this will do just fine. If you would like to read more on machine types, see the documentation here.
Operating System
And last but not least, we will select our operating system. By default Debian 9 is selected, and this is a great choice since it is lightweight and fairly simple to use. Feel free to change this to whatever you would like; however, I will be sticking with Debian 9.
Allow HTTP access
This step is VERY important and easily missed. If you do not allow HTTP traffic, all HTTP access to your VM will be blocked. Make sure the box labeled "Allow HTTP traffic" is checked. If desired, you can also allow HTTPS traffic, however, we are not going to set up a certificate today.
And that's it! All we need to do now is hit the create button and wait for it to spin up! This should not take long as we are creating a very small VM and Google can spin these bad boys up like nobody's business. After creation, you'll be directed to a page that looks like this:
If you were able to get here, good job! Grab yourself a coffee and pat yourself on the back. You are now a proud owner of a micro computer somewhere in the CLOUD.
Getting Apache on Our VM
Now that we've got our new machine, we can open the bash terminal by connecting to the machine via SSH. Under the connect column, click the SSH button. This will open a new window where where you can access your new VM! (Don't worry about the fancy SSH key transfer. This is just security on Google's part). You should now be viewing a window that looks like this:
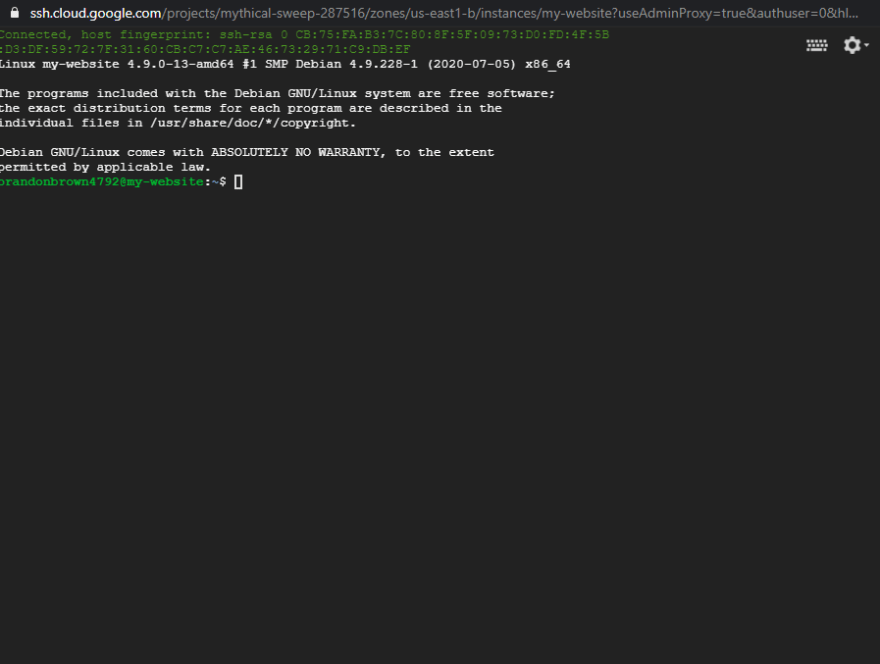
Hopefully this looks a little familiar to you as it is just the bash terminal for Debian 9. Therefore, we can run any Linux command we need including installing programs! However, first let's update our machine just in case.
sudo apt update
Now we can install Apache.
sudo apt install apache2
Hit 'Y' when prompted to continue the installation. This will do everything necessary to install Apache onto your new machine.
By default, Apache should be started, but you should check to make sure by running:
sudo systemctl status apache2
If the service does not respond with "Active: active (running)", run the following to start it.
sudo systemctl start apache2
If you should ever need to restart your Apache server, run the following command:
sudo systemctl restart apache2
Verify Apache is running by checking the status again. Once it is running, you should be to go.
Verify Website is Working
Now we need to verify that Apache is running and responding to HTTP requests. Head back to the VM dashboard and click the External IP assigned to your VM. This should open a new tab with Apache startup page displayed.
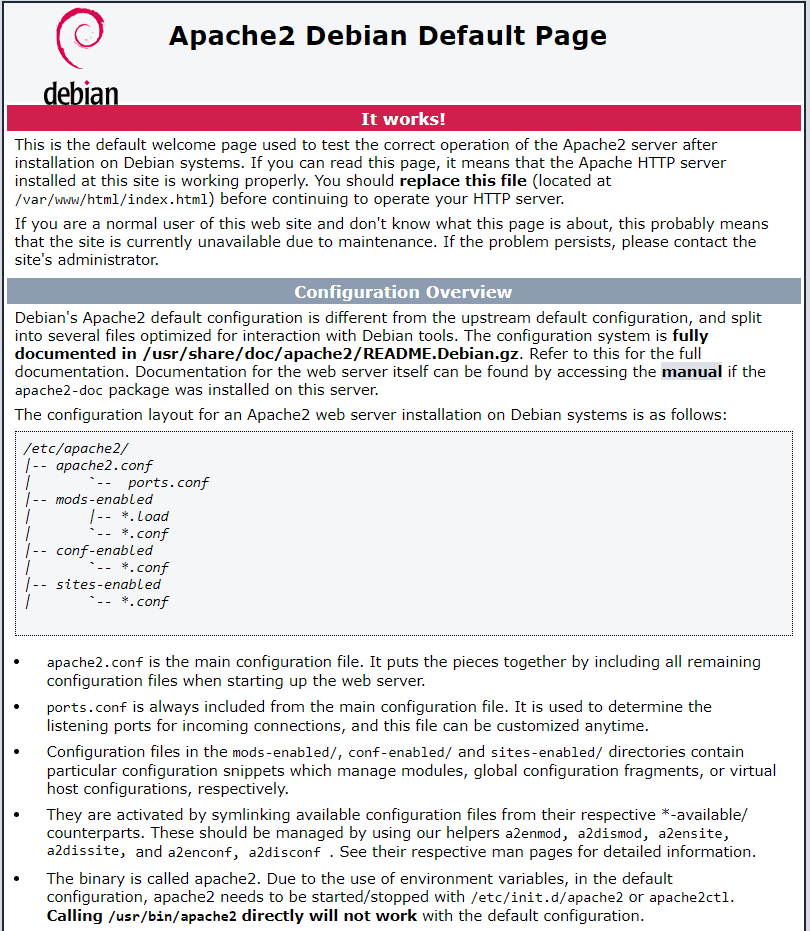
If you got here, good job! Give yourself yet another cup of coffee and another pat on the back. We have gotten through the hardest part, and you should be proud. You now have a working web server hosted on Google Cloud Platform. Next, we are going to update the index.html file that Apache pull from to display your own custom webpage.
Update index.html file
It is entirely possible to update the index.html file using the Linux terminal; however, I prefer to use a text editor like VS Code or something similar. In the end we will create a html file called index.html with the following contents:
<!DOCTYPE html>
<html lang="en">

<head>
    <meta charset="UTF-8">
    <meta name="viewport" content="width=device-width, initial-scale=1.0">
    <title>My Webpage</title>
</head>

<body>
    <h1>This is my brand new web page!</h1>
    <h2>I can do anything I want with this!</h2>
</body>

</html>
Once you have created that file, navigate back to the VM's terminal and upload the file by clicking the cog in the top right corner then "Upload file." Navigate to your file and select "Open."
This copies your file to the root directory of your VM. In the terminal navigate to home and check the files that are there by entering:
cd ~ && ls
You should see your new index.html file listed. Now we just need to move this file to the Apache html directory. Do this by entering:
sudo mv index.html /var/www/html
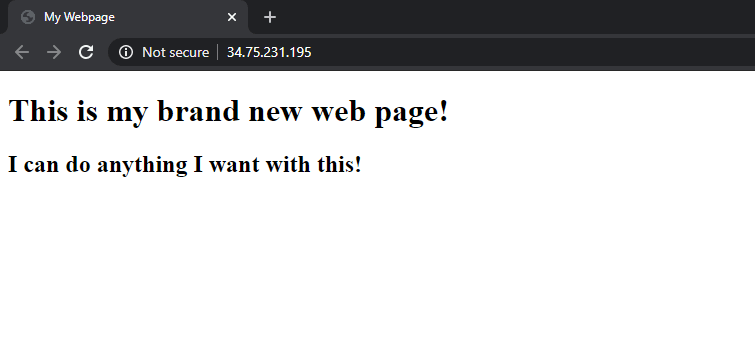
Navigate back to your VM's external IP address, and you should see the following:
*Important Note: *
Apache by default looks for a file called index.html in the directory /var/www/html/. This is the default file Apache will display when people navigate to the web server homepage. If more web pages are needed, you can create them by defining a new HTML files and moving them into the /var/www/html/ directory.
You may also add folders to this directory to add more levels to your website. For instance, creating a file called 'about.html' under /var/ww/html/custom-webpages/ will make http://[External IP]/custom-webpages/about.html display whatever is inside the about.html folder. Basically, your URL's follow the file structure within /var/www/html/.
If you got this far, yet another congratulations. You are now able to create whatever you want on your own website. That's spectacular!
Conclusion
I hope this tutorial has helped you create your own website using Apache on Google Cloud Platform. In the coming weeks, we will look at adding a certificate to your website to allow for secure HTTP (HTTPS). We will also work on attaching this external IP to a domain such as (yourwebsite.com). Catch you next time!


Top comments (3)
Amazing article.
But can you also explain the limitations and amount of requests the website can handle.
It's all depends upon resources you have.
You need load balancer to manage high traffic .
HAPROXY comes with reverse proxy and load balancing.
Nginx can also be load balancer but it's paid version.
If you just want a http server with better performance than apache look at litespeed server
Very simple, easy to follow instructions and amazing. Thank you Brandon