
Written by Brian De Sousa✏️
A major benefit of Node.js is that it offers multiplatform support. Whether you’re running Mac, Linux, or Windows, the experience is nearly seamless.
However, there can be subtle differences between each platform, especially when developing Node.js applications that interact closely with the underlying operating system.
So how can you be sure that what you code, run, and test on your Windows workstation will run the same way on your host Linux server?
In this post, we will take a look at two options for Windows developers who want to run and test their Node.js applications on Linux: Hyper-V virtual machines and Windows Subsystem for Linux 2 (WSL2).
We will walk through setting up an instance of Ubuntu 19 with Node 12 running in both systems, compare differences between the two, and ultimately determine which system is best suited to handle each scenario.

The sample app
In order to thoroughly test out the developer experience, we will be using the prebuilt Image Compressor sample application.
This is a simple Node.js web application that accepts one or more image file uploads, compresses the images, and allows users to download the compressed images.

Image Compressor interacts with the underlying operating system’s file system and requires some processing power to perform image compression.
The app also displays how long it takes to compress images on the server, which will allow us to do a basic performance comparison between Hyper-V and WSL2.
The Image Compressor app can be downloaded from the briandesousa/image-compressor repository on GitHub. The app can be installed and started with a simple npm install & npm start. Once running, you can access the app at http://localhost:3000.
Tip: Recent builds of WSL2 support using localhost to access servers running within WSL2. I found this capability did not work consistently.
Initially, the sample application was accessible at http://localhost:3000, but after a short period of time I could no longer connect to it.
Restarting the WSL2 subsystem with net stop LxssManager and net start LxssManager seemed to momentarily resolve the issue.

Ubuntu on Hyper-V
We will begin by setting up a Node 12 server on Ubuntu 19 running in a Windows Hyper-V virtual machine. In order to do this, your system will need to meet a few requirements:
- Your system must be running Windows 10 Pro edition or higher. Home edition does not support Hyper-V
- Your system must meet the hardware requirements set by Microsoft
- You must enable Hyper-V on your system
Before we get started, let’s take a moment to recognize how Microsoft has embraced Linux over the last few years. We will be using the Quick Create function in Hyper-V manager to set up an Ubuntu 19 virtual machine with minimal fuss.
Later you will see how easy it is to get an Ubuntu system running in WSL2. It’s hard to believe how simple it is to run Linux within Windows these days.
To get started, first launch the Hyper-V Manager from the start menu. Click the Quick Create option in the upper-right corner, and then select the Ubuntu 19 operating system option.

Hyper-V manager will download an Ubuntu image and set up the virtual machine. Once the process is complete, you will be presented with a window you can use to edit the virtual machine’s settings.
By default, Hyper-V does a decent job allocating appropriate CPU, RAM, hard-disk space, and other hardware resources. However, if you’re interested in tweaking the settings, you can do so at this point or later on.
First click Connect and then Start to launch the virtual machine. A virtual machine connection window will open with your new Ubuntu system.
After Ubuntu boots up, go through the system configuration wizard to set up system preferences such as language, time zone, machine name, username, and password.

Ubuntu will require a restart after system configuration is complete. Hyper-V manager will prompt you to reconnect to the virtual machine after the restart.
This time around, you will be prompted to enter the username and password you specified in previous steps.

Getting the sample app running
From here on out we will use the command-line to update the system, install necessary software, download, and run the sample application. Launch a command window from the Application menu and complete the following tasks:
- Make sure all Ubuntu system updates are installed:
sudo apt update
sudo apt upgrade
- Install the latest stable version of Node.js 12 using snap:
sudo snap install node --channel=12/stable --classic
Tip: If snap install fails with "too early for operation, device not yet seeded or device model not acknowledged", try reinstalling snap with sudo apt purg snapd & sudo apt install snapd.
git clone https://github.com/briandesousa/image-compressor.git ~/image-compressor
cd ~/image-compressor
npm install
- Just before starting the application, take note of the virtual machine’s IP address. You will need this to access the web app directly from within Windows. Use
ip addr | grep eth0to quickly locate the IP address. - Start the app in debugging mode with
npm run debug. You will see a message in the console indicating the application is listening on port 3000.
At this point you can switch back to Windows, launch your favorite browser, and access http://<ip>:3000 using the virtual machine’s IP address. Can you see the Image Compressor app?
Getting up and running with a Hyper-V virtual machine is pretty fast and straightforward. The most time-consuming parts of the process involve waiting for the Hyper-V manager to download and installing the Ubuntu operating system.
Depending on your internet connection speed and hardware, you may find that Ubuntu on WLS2 installs much faster.
Ubuntu on Windows Subsystem for Linux 2
WSL2 is considered to be an overhaul of the original Windows Subsystem for Linux. At the moment, WSL2 is only available to Windows Insiders starting with build 18917.
It now uses a full Linux kernel, as well as virtualization technology under the covers. This means that it shares similar system requirements with Hyper-V.
Before you can use WSL2, you will need to enable a few optional features. Open a powershell command window as an administrator and run the following commands:
Enable-WindowsOptionalFeature -Online -FeatureName VirtualMachinePlatform
Enable-WindowsOptionalFeature -Online -FeatureName Microsoft-Windows-Subsystem-Linux
By default, the original version of WSL is enabled. We want to make WSL2 the default so that any Linux distros we install run under WSL2 as well. In the same powershell command window, run this command:
wsl --set-default-version 2
Tip: In-depth instructions on how to set up WSL2 can be found here.
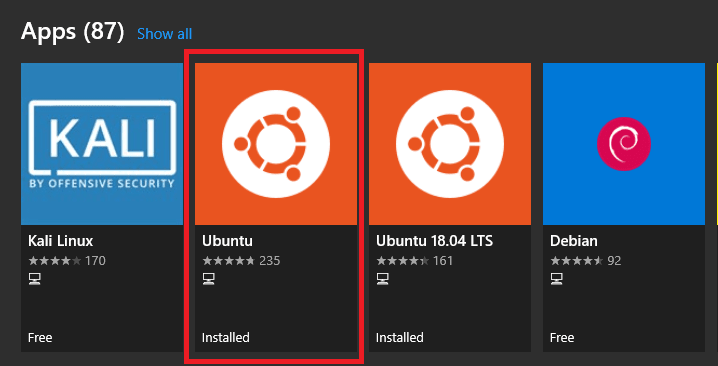
Now that WSL2 is set up, we will install the Ubuntu distribution from the Microsoft Store. Launch the store app from the start menu and search on “Linux.”
You will find a few Linux distributions in the search results. The one we will install is simply named Ubuntu.
After the Ubuntu app is installed from the Microsoft Store, return to the powershell window and run this command to confirm that Ubuntu is installed and running under WSL2:
> wsl -l -v
      NAME            STATE           VERSION
      Ubuntu          Running         2
Open the Ubuntu app from the start menu. An Ubuntu command window connected to your new Ubuntu WSL2 system will open. Before you can start using it, you will be prompted to create a username and password.
Upgrading Ubuntu on WSL2
Did you notice that the Ubuntu app we installed from the Microsoft Store didn’t specify a version number? This is intentional.
The generic version of the Ubuntu app will always install the latest Ubuntu LTS release. Users can still directly install previous releases of Ubuntu using other versions of the Ubuntu app in the store that contain an explicit Ubuntu version number in the app’s name.
But wait — we have a bit of a problem. Our Hyper-V virtual machine was running the latest and greatest Ubuntu 19 “Disco Dingo,” but the WSL2 Ubuntu app installed Ubuntu 18 “Bionic Beaver.”
You can confirm this by running lsb_release -a in the Ubuntu command window and observing the output:
No LSB modules are available.
Distributor ID: Ubuntu
Description:    Ubuntu 18.04.3 LTS
Release:        18.04
Codename:       bionic
We want to compare apples to apples, so we should upgrade to Ubuntu 19 to match our Hyper-V virtual machine. Luckily, the upgrade process is fairly straightforward.
First, we need to change the Prompt setting in /etc/update-manager/release-upgrades from lts to normal. You can edit this file with a command-line editor of your choosing. I prefer to use nano:
sudo nano /etc/update-manager/release-upgrades
Next, run this command to upgrade to the latest normal version of Ubuntu:
sudo do-release-upgrade
The upgrade will take some time to complete. During the upgrade, you may be prompted to resolve conflicts on files that have been previously modified.
You will need to decide whether to accept the incoming changes. In my experience, it is safe to replace modified files with incoming changes.
Once the upgrade is complete, you can check the Ubuntu version using lsb_release -ato confirm you are now running Ubuntu 19.
Getting the sample app running
From here on out, you will notice the setup instructions are very similar to how we set up the sample app on the Hyper-V virtual machine, with a few caveats.
In the Ubuntu command window, complete the following steps:
- Make sure all Ubuntu system updates are installed.
sudo apt update
sudo apt upgrade
- Install Node.js using the
apttool. On our Hyper-V virtual machine, we usedsnap. However,snapdoes not work by default in WSL2.
It may be possible to get snap working on WSL2, but that is beyond the scope of this post.
sudo apt install nodejs
- If you check the installed version of Node.js with
node -v, you will notice that an older version, such as v8.10.0, is installed. The Ubuntu package repositories include a rather old version of Node.js by default, but we can install a newer version from a different package repository.
The easiest way to do this is to download and run a handy script provided by NodeSource.com and then reinstall Node.js. In order to download the script, we will need to install curl first.
sudo apt install curl
curl -sL https://deb.nodesource.com/setup_12.x | sudo -E bash -
sudo apt install nodejs
- Confirm that Node.js 12 is installed with
node -v - Download, install, and run the Image Compressor sample application:
git clone https://github.com/briandesousa/image-compressor.git ~/image-compressor
cd ~/image-compressor
npm install
- Take note of the IP address of your Ubuntu system so you can access the sample application from a host browser. Use
ip addr | grep eth0to quickly locate the IP address. - Start the app in debugging mode with
npm run debug. You will see a message in the console indicating the application is listening on port 3000.
At this point you can switch back to Windows, launch your favorite browser, and access http:/<ip>/:3000 with the Ubuntu system IP address. Can you see the Image Compressor app again?
Comparing Hyper-V to WSL2
The biggest difference between running Ubuntu Linux in a Hyper-V virtual machine versus running the operating system in WSL2 lies in the ability to access the Ubuntu user interface in Hyper-V.
The user interface allows you to install and use more than just command-line tools.
Depending on your system’s hardware performance, you likely found that WSL2 is the faster option. To expedite the process of running Ubuntu Linux on Hyper-V, you could set up SSH access to the virtual machine.
This speeds up command-line access. However, WSL2 may still have the upper hand since it does not require SSH to enable access.
A continuous deployment setup
If you intend to develop in Windows and run your app in Linux, you may want to set up a continuous deployment pattern in which you push your code to a remote Git repo from Windows and automatically pull and deploy these changes on your Linux system.
This pattern can be achieved with WSL2, but a Hyper-V virtual machine is more suitable for a few reasons:
- Virtual machines can run in the background without an active connection. Processes can be left running as long as your virtual machine is launched, whereas WSL2 requires the command window to be left open to keep your processes running.
- Virtual machine state persists across host system restarts. Your processes can be left running and you can pick up where you left off with your development without having to relaunch the WSL2 command window and restarting your processes.
Summary of differences
Let’s summarize the differences between Hyper-V virtual machines and WSL2 from the perspective of a Node.js developer:
| Comparison point | Linux on Hyper-V | Linux on WSL2 |
|---|---|---|
| Has a graphical user interface | Yes | No |
| Has a command-line interface | Yes, either launching a command window within the GUI or via SSH | Yes |
| Latest version of Ubuntu available out-of-the-box | Yes, Hyper-V manager quick create has latest Ubuntu version | No, Ubuntu app installs latest LTS release but can be upgraded |
| Methods for installing developer software |
apt, snap, snap store (GUI) |
apt |
| Ease of installing latest version of Node.js | Easy, using snap
|
Not as easy, need to install with apt from alternate package repository |
| Node.js server can be accessed from host operating system | Yes, by dynamic IP address | Yes, by dynamic IP address or localhost
|
| Can run Node.js server in background | Yes, virtual machines continue to run in background, even after host system restarts | Yes, but you need to leave the Ubuntu WSL2 command window open |
Comparing performance
One of the most highly touted improvements in WSL2 is performance — specifically, file-system performance.
So how does file-system performance in WSL2 stack up against a Hyper-V virtual machine?
Well, we can get a general idea using our Image Compressor sample application, which performs some in-memory compression operations and then writes the compressed images to disk.
To compare performance between the two systems, I uploaded 50MB worth of image files to Image Compressor on each system and observed how long it took for the app to respond with compressed versions of the images.
These are the average times for each system:
Hyper-V average time: 62 seconds
WSL2 average time: 59 seconds
In this basic performance test, WSL2 consistently comes out on top at about 5 percent faster.
What should I use?
Are you more interested in running and testing your app in one or more Linux environments? WSL2 is probably the way to go since you can install a few different distributions. The WSL2 instances are fairly lightweight, which means you can even run a few instances at the same time if necessary.
Are you looking to develop, test, and run your app directly in the Linux operating system? Hyper-V is probably the way to go since you can run a full Linux OS with a GUI shell, install all your developer tools (GUI or CLI), and allocate as much or as few system resources as you want to your virtual machine.
Do you need to run and test your app on a distribution of Linux not supported by WSL2?
WSL2 currently supports Ubuntu, SUSE Linux Enterprise Server, Debian, and Kali. If you are looking to run a different distribution, you will likely want to use Hyper-V, which supports a wider range of Linux distributions.
Hyper-V virtual machines and Windows Subsystem for Linux are both very powerful tools for developers. While there will always be a place for Hyper-V virtual machines, the speed at which Windows Subsystem for Linux is evolving is particularly interesting.
Node.js developers working with Windows and Linux systems should keep their eyes on WSL and take note of its potential.
Editor's note: Seeing something wrong with this post? You can find the correct version here.
Plug: LogRocket, a DVR for web apps

LogRocket is a frontend logging tool that lets you replay problems as if they happened in your own browser. Instead of guessing why errors happen, or asking users for screenshots and log dumps, LogRocket lets you replay the session to quickly understand what went wrong. It works perfectly with any app, regardless of framework, and has plugins to log additional context from Redux, Vuex, and @ngrx/store.
In addition to logging Redux actions and state, LogRocket records console logs, JavaScript errors, stacktraces, network requests/responses with headers + bodies, browser metadata, and custom logs. It also instruments the DOM to record the HTML and CSS on the page, recreating pixel-perfect videos of even the most complex single-page apps.
Try it for free.
The post Working with Node.js on Hyper-V and WSL2 appeared first on LogRocket Blog.


Top comments (0)