Implementing press and hold using RxJS
RxJS is a reactive programming library for JavaScript, which leverages Observable sequences to compose asynchronous or event-based programs. As part of the Reactive Extensions project, the architecture of RxJS combines the best parts from the Observer pattern, the Iterator pattern, and functional programming.
If you have used a JavaScript utility library like Lodash before, then you can think of RxJS as the Lodash for events.
RxJS is no longer a new JavaScript library. In fact, at the time of this writing, the most recent version of the library is 6.3.3, which is the latest of over 105 releases.
In this tutorial, we will leverage on reactive programming using RxJS to implement force press detection and handling for regular DOM mouse events.
Here is the force press demo on Code Sandbox. Navigate to the link and press and hold the volume controls to see the force press in action.
https://medium.com/media/b78623965cea0f14ea9d796ad078d74d/href
This tutorial should not be used as a substitute for a proper RxJS beginner’s guide, even though it briefly explains a couple of reactive programming concepts and operators.
Observables and operators
Observables are the core of the RxJS architecture. An observable can be likened to an invokable stream of values or events emanating from a source. The sources can be time intervals, AJAX requests, DOM events, etc.
An Observable:
- is lazy (it doesn’t emit any value until it has been subscribed to)
- may have one or more observers listening for its values
- may be transformed into another observable by a chain of operators
Operators are pure functions that can return a new observable from an observable. This pattern makes it possible to chain operators since an observable is always returned at the end.
In fact, more recent versions of RxJS expose a .pipe() instance method on the class, that can be used for chaining operators as function calls.
An operator basically listens for values from the source observable, implements some defined logic on the received values, and returns a new observable emitting values based on the logic.
Force press
Force press simply refers to a DOM press event like keydown and mousedown, sustained over a period of time before the corresponding DOM release event is activated, such as keyup and mouseup in this case.
In simple terms, a force press is synonymous to press and hold.
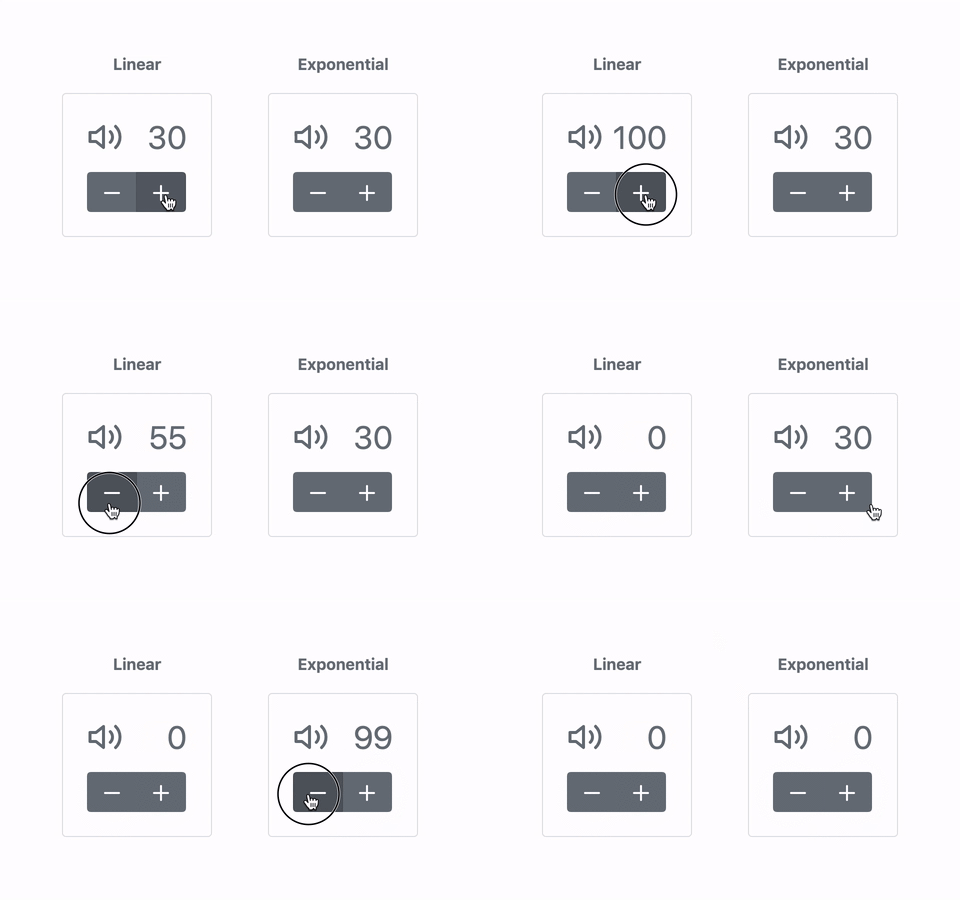
There are many areas in user interfaces where a force press might be applicable. Imagine having a set of volume controls for a music player widget, and you want to increase the volume from 30 to 70.
Basically, you can achieve this in two ways:
- press the VOLUME UP button several times until you reach the desired volume — this press could possibly be done 40 times
- force press (press and hold) the VOLUME UP button until you reach or are close to the desired volume, and then adjust until you reach the desired volume
Here is a simple demo of this illustration:

Force press with vanilla JavaScript
Implementing force press with vanilla JavaScript, similar to what we have above, isn’t a Herculean task. This implementation will require:
- listening for mousedown events on the volume control button
- using setInterval() to continuously adjust the volume until a mouseup event happens
Let’s say the markup for our volume controls looks like the following:
https://medium.com/media/0de2bbdfe94c53d947f457f0f7b3f2ca/href
The following code snippet shows what the force press implementation will look like using vanilla JavaScript. For brevity, the implementations of the increaseVolume() and decreaseVolume() functions have been left out:
https://medium.com/media/6332127c560eaf08546dc6088ee26dc5/href
This force press implementation using vanilla JavaScript looks very simple, hence, a library like RxJS doesn’t seem necessary.
A quick observation of the code snippet will show that the volume will continuously be adjusted by an equal amount at equal time intervals until a mouseup event is fired. This is a linear progression.
However, the implementation starts becoming complex when we want some more advanced control over the force press. For example, let’s say we want some form of exponential progression of the volume. This means the volume should be changing more rapidly for longer force press.
Here is a simple illustration showing the difference:
An implementation such as that of exponential volume progression will be quite challenging using vanilla JavaScript, since you may have to keep track of how long the force press lives in order to determine how fast the volume should change.
Cases like this are best suited for the RxJS library. With RxJS comes even more power to compose observable sequences in order to handle complex asynchronous tasks.
Force press with RxJS
Let’s go ahead and re-implement the force press with linear volume progression using RxJS. Here is what it would look like:
https://medium.com/media/11c4b30650279f19827f30bec51bf8cd/href
A careful observation of this code snippet will show that we have imported some functions and operators from the RxJS library. The assumption is that you already have RxJS installed as a dependency for your project.
There are some important parts of the code snippet that are worth highlighting.
Line 7
const documentMouseup$ = fromEvent(document, 'mouseup');
The fromEvent helper function creates a new observable that emits every time the specified event is fired on a DOM node.
For example, in the line above, fromEvent creates an observable that emits an event object every time a mouseup is fired on the document node. The fromEvent function is also used in Line 21 to listen for mousedown events on a volume control button.
Notice that the observable is stored in a constant named documentMouseup$. It is common practice to attach a $ after the name of a variable used to store an observable.
Lines 9–15
const forcepress = fn => {
  return timer(500, 100).pipe(
    startWith(fn()),
    takeUntil(documentMouseup$),
    map(fn)
  );
};
The forcepress() function takes a handler function fn as its argument and returns an observable. The returned observable is created from a timer using the timer() function and transformed using a chain of operators.
Let’s break down the code line by line:
timer(500, 100)
This timer() function call creates a new observable that emits a count integer starting from zero (0). The first integer is emitted after 500ms and then subsequent integers are emitted at 100ms intervals.
The .pipe() method on an observable is used to chain operators by applying them as regular functions from left to right.
startWith
timer(500, 100).pipe(
  startWith(fn())
)
The startWith() operator receives a value as an argument that should be emitted first by the observable. This is useful for emitting an initial value from an observable.
Here, the startWith() operator is used to execute the handler fn and emit the returned value.
takeUntil
timer(500, 100).pipe(
  takeUntil(documentMouseup$)
)
The takeUntil() operator is used to stop emitting values from the source observable based on another observable. It receives an observable as its argument. The moment this observable emits its first value, no more value is emitted from the source observable.
In our code snippet, the documentMouseup$ observable is passed to the takeUntil() operator. This ensures that no more value is emitted from the timer the moment a mouseup event is fired on the document node.
map
timer(500, 100).pipe(
  map(fn)
)
The map() operator is very similar to Array.map() for JavaScript arrays. It takes a mapping function as its argument that receives the emitted value from the source observable and returns a transformed value.
Here, we simply pass the fn function as the mapping function to the map() operator.
Lines 21–26
fromEvent($button, 'mousedown').pipe(
  switchMap(evt => {
    evt.preventDefault();
    return forcepress(fn);
  })
).subscribe();
These lines simply map the mousedown event on a volume control button to the force press action using the switchMap() operator.
It first creates an observable of mousedown events on the button element. Next, it uses the switchMap() operator to map the emitted value to an inner observable whose values will be emitted. In our code snippet, the inner observable is returned from executing the forcepress() function.
Notice that we passed fn to the forcepress() function as defined. It is also very important to note that we subscribed to the observable using the subscribe() method. Remember that observables are lazy. If they are not subscribed, they don’t emit any value.
Improving the force press
A few things can be done to improve the force press using RxJS operators. One improvement will be to implement an exponential volume progression instead of the linear progression as we saw before.
Exponential volume progression
Doing this with RxJS is very simple. Let’s assume the current implementation of our volume adjustment functions looks like this:
https://medium.com/media/6b27d8affe951571ad470903a6582c15/href
We can modify the volume adjustment functions slightly to accept a volume step factor. These modifications will make it possible for us to achieve the exponential progression as we will see in a moment.
The following code snippet shows the modifications:
https://medium.com/media/e691e432f95b31f0f789862cbba99ebe/href
With these modifications, we can now pass a factor to the volume adjustment functions to specify how much the volume should be adjusted. Calling these functions without passing a factor will simply adjust the volume one step at a time.
Now, we can modify the forcepress() function we created earlier as follows:
https://medium.com/media/e06eecb1891a9795722c84a6ba8bde0c/href
With this modification, we have successfully implemented force press on the volume control buttons with an exponential volume progression.
computedFactor
Here we have added a simple function named computedFactor for computing the volume adjustment factor. This function takes an integer argument n with which it computes the factor.
We are simply computing this expression:
Math.round(Math.pow(1.25 + n / 10, 1 + n / 5));
Here, we are using Math.pow() to progressively compute exponents based on the value of n. This expression can be modified to suit the exponential progression required. For example, it can be as simple as this:
Math.pow(2, n);
Also, notice that we are using Math.round() here to ensure that we get an integer factor since the computation involves a lot of floating-point numbers.
Here is a summary of the first ten values returned by the computedFactor() function. It seems like the perfect function for computing the factors:
0 => Math.round(Math.pow(1.25, 1.0)) => 1
1 => Math.round(Math.pow(1.35, 1.2)) => 1
2 => Math.round(Math.pow(1.45, 1.4)) => 2
3 => Math.round(Math.pow(1.55, 1.6)) => 2
4 => Math.round(Math.pow(1.65, 1.8)) => 2
5 => Math.round(Math.pow(1.75, 2.0)) => 3
6 => Math.round(Math.pow(1.85, 2.2)) => 4
7 => Math.round(Math.pow(1.95, 2.4)) => 5
8 => Math.round(Math.pow(2.05, 2.6)) => 6
9 => Math.round(Math.pow(2.15, 2.8)) => 9
withLatestFrom
A careful observation of the forcepress() function will show that this line:
map(fn)
has been replaced with these lines:
withLatestFrom(
  timer(1000, 500).pipe(startWith(0))
),
map(([t, n]) => fn(computedFactor(n)))
Here, we have introduced another RxJS operator withLatestFrom(). It takes another observable as its first argument. This operator is useful for emitting values from multiple observables as an array of values.
However, it only emits every time the source observable emits, emitting the latest values from all of the observables in order each time.
In our example, we passed in another observable created with the timer() function to the withLatestFrom() operator.
The timer observable emits an integer first after 1000ms and then subsequently every 500ms. The startWith() operator is piped to the timer observable causing it to start with an initial value of 0.
The mapper function passed to the map() operator expects an array as its first argument, since the withLatestFrom() operator emits an array of values.
Here is the map operator again:
map(([t, n]) => fn(computedFactor(n)))
In this code snippet, the t represents the value emitted by the first observable, which in this case is the source observable. The n represents the value emitted by the second observable, which is the timer.
Finally, we call fn() like before, only this time we pass a computed volume adjustment factor derived from calling the computedFactor() function with n.
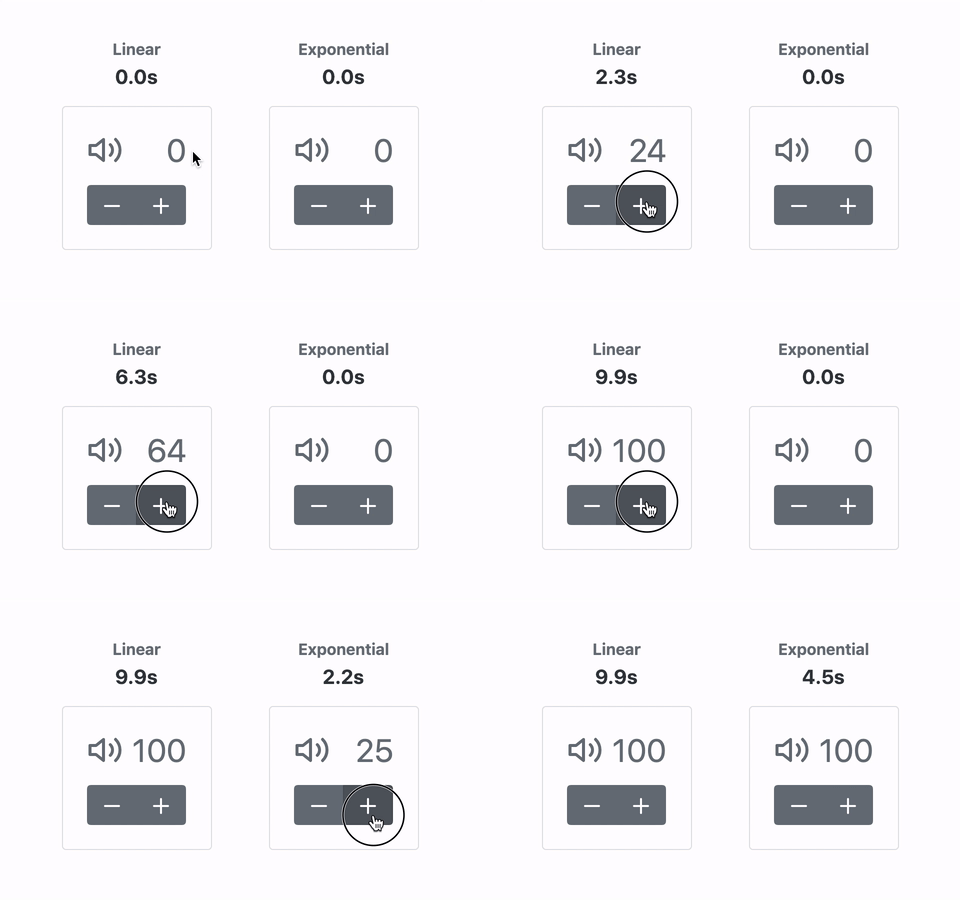
Now here is the comparison between the linear and exponential progressions showing the duration of increasing the volume from 0 to 100:
Enhanced force press termination
So far, we are terminating the force pressed volume adjustment once a mouseup event is fired on the document node. However, we can enhance it further to allow termination of the force press when the volume reaches any of the limits, either 0 or 100.
We can create a custom operator function that we can pipe to the source observable to prevent it from emitting the moment any of these happens:
- a mouseup event is fired on the document node
- the volume reaches either 0 or 100
Here is the custom operator function named limitVolume():
https://medium.com/media/df9f41326f7bb50101e9be05d426d614/href
Here, we created two timer observables namely timerUntilMouseup$ and timerWithinLimits$ that terminate based on the two conditions we stated respectively.
Then we composed the volumeStop$ observable from the two observables using the zip() and last() operators to ensure that this observable only emits one value for the first of the two observables that are terminated.
Finally, we use the takeUntil() operator in the limitVolume() custom operator function to ensure that the source$ observable is terminated when the volumeStop$ observable emits its first value.
Notice that limitVolume() returns a function that takes an observable as its argument and returns another observable. This implementation is critical for it to be used as an RxJS operator.
With the limitVolume() custom operator, we can now modify forcepress() as follows:
https://medium.com/media/ed39a337be4ceb60c9d359b2ce3cf521/href
More force press for the calendar
A lot has been done already in implementing force press. However, let’s consider another force press demo that involves cycling through calendar months and years.
Imagine you were building a calendar widget and you wanted the user to cycle through months and years on the calendar. This sounds like a pretty nice use case for force pressing.
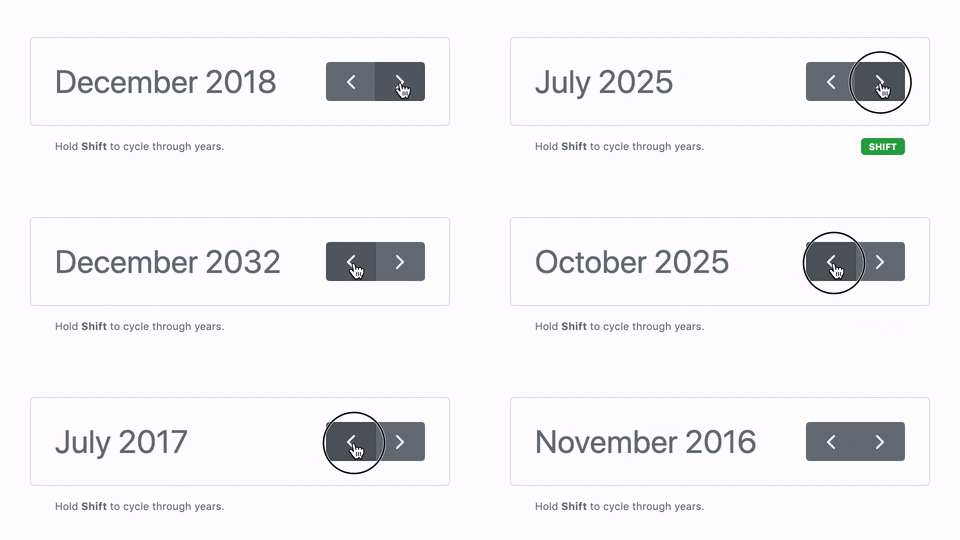
Here is a screenshot of the demo:
In this demo, a little spice has been added to the force press to enable key detection. Notice that whenever the SHIFT key is being pressed, the cycling switches from months to years.
Also, notice that the speed of cycling through the months is more rapid than that of cycling through the years.
Implementing something like this with setTimeout() and vanilla JavaScript will be quite complex. However, it is a lot easier with RxJS.
The following code snippet shows the implementation. The month and year cycling functions have been omitted for brevity:
https://medium.com/media/5951c99d3198c1245d5d185474bbc04e/href
I’ll leave you to figure out how the code snippet works in this example. However, you can get a live demo on Code Sandbox.
https://medium.com/media/b2cf425764c0873700756338a7cdf67d/href
Conclusion
RxJS is a very powerful library for composing asynchronous events and sequences. It can be used to build complex asynchronous programs that cannot be built easily using just plain JavaScript.
In this tutorial, we have learned how to implement improved force pressing (press and hold) using RxJS. Although we focused on force pressing on mouse events, the same can also be implemented for keyboard events.
Clap & follow
If you found this article insightful, feel free to give some rounds of applause if you don’t mind.
You can also follow me on Medium (Glad Chinda) for more insightful articles you may find helpful. You can also follow me on Twitter (@gladchinda).
Enjoy coding…
Plug: LogRocket, a DVR for web apps
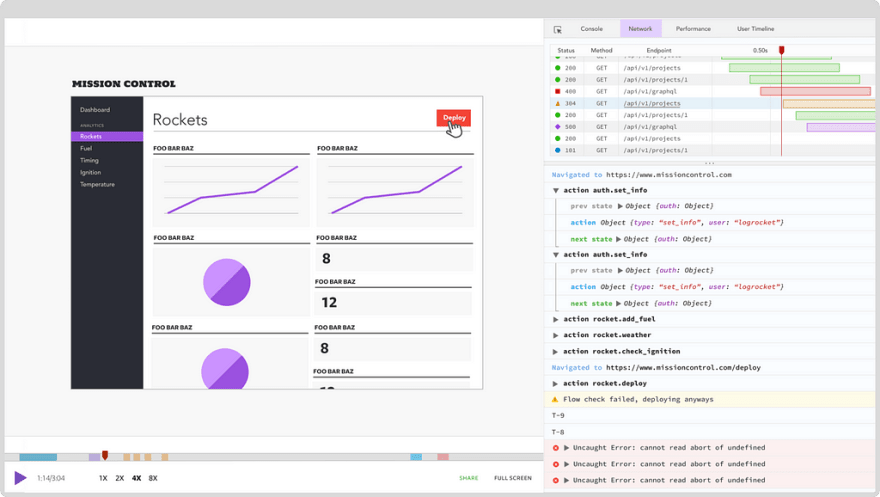
LogRocket is a frontend logging tool that lets you replay problems as if they happened in your own browser. Instead of guessing why errors happen, or asking users for screenshots and log dumps, LogRocket lets you replay the session to quickly understand what went wrong. It works perfectly with any app, regardless of framework, and has plugins to log additional context from Redux, Vuex, and @ngrx/store.
In addition to logging Redux actions and state, LogRocket records console logs, JavaScript errors, stacktraces, network requests/responses with headers + bodies, browser metadata, and custom logs. It also instruments the DOM to record the HTML and CSS on the page, recreating pixel-perfect videos of even the most complex single page apps.





Oldest comments (0)