
This tutorial is all about the MERN stack. We are going to explore this popular stack and how to use it by developing a simple CRUD (create, read, update, and delete) application from scratch.
Rather than focusing on the application itself, we will focus on the MERN setup. Though the project will be very simple, we will try to follow the best possible project structure to elevate it to an industry-standard level so that anyone can use this as a boilerplate project.
The phrase “MERN stack” refers to the following technologies:
- MongoDB: MongoDB is a cross-platform document-oriented database program
- Express.js: Express.js, or simply Express, is a web application framework for Node.js
- React: React is a JavaScript library for building user interfaces.
- Node.js: Node.js is an open-source, cross-platform JavaScript run-time environment that executes JavaScript code outside of a browser
To make this tutorial simple, I will break it into two parts:
- Part 1: In this part, we want to complete the server-side work. We’ll work with Node and Express and connect it with MongoDB. After that, we’ll create some APIs.
- Part 2: In the next section, we will focus on the frontend part with React to build our user interfaces. After that, we will connect our frontend to our backend.
Note: The series will assume a basic understanding of Node.js, Express, MongoDB, and React.

Server setup with Express and Node
npm package initialization
Our first task is to create a project folder. Enter the folder through the terminal, then run the following command:
$ npm init
Now it will ask you some questions about package name, version, entry point, etc. Hit enter if you want to keep the default. After that, you will get something like this:

Select yes and you are ready to go. It creates a file named package.json.
Dependencies packages installation
Now, I would like to add some dependencies:
$ npm i express mongoose body-parser bcryptjs validation
Type or copy the command above and hit the enter button. You will see something like this:

- bcryptjs is a password hashing function designed by Niels Provos and David Mazières
- body-parser allows us to get the data throughout the request
- express is our main framework
- mongoose is used to connect/interact with MongoDB
- validation (as its name implies) is used for validation
Now I want to add nodemon as a dev dependency. If you don’t want to add this, you can skip it — it’s optional.
$ npm i -D nodemon
nodemon is a utility that will monitor for any changes in your source and automatically restart your server.
At that point, your package.json should look like this:

Setting the entry point
Now create a file named app.js for our entry point. You can create this from the project folder with the command below (on Mac):
$ touch app.js
Then paste the code below:
// app.js

const express = require('express');

const app = express();

app.get('/', (req, res) => res.send('Hello world!'));

const port = process.env.PORT || 8082;

app.listen(port, () => console.log(`Server running on port ${port}`));
Now, run the command
$ node app
You will see Server running on port 8082. You can also check it from the browser: open the browser and enter http://localhost:8082.
At this point, if we change anything, we need to restart the server manually. But if we set up nodemon, then we don’t have to restart it every time; nodemon will watch if there is any change and restart the server automatically.
So what you need to do for that is a little change to the scripts in our package.json file. See below:
// package.json

{
  "name": "mern_a_to_z",
  "version": "1.0.0",
  "description": "",
  "main": "app.js",
  "scripts": {
    "start": "node app.js",
    "app": "nodemon app.js",
    "test": "echo \"Error: no test specified\" && exit 1"
  },
  "repository": {
    "type": "git",
    "url": "git+https://github.com/nurislam03/MERN_A_to_Z.git"
  },
  "author": "Nur Islam",
  "license": "MIT",
  "bugs": {
    "url": "https://github.com/nurislam03/MERN_A_to_Z/issues"
  },
  "homepage": "https://github.com/nurislam03/MERN_A_to_Z#readme",
  "dependencies": {
    "bcryptjs": "^2.4.3",
    "body-parser": "^1.19.0",
    "express": "^4.17.1",
    "mongoose": "^5.5.15",
    "validation": "0.0.1"
  },
  "devDependencies": {
    "nodemon": "^1.19.1"
  }
}
So, now you can run your project using this command:
$ npm run app
If you get any error at this point, then run the commands below:
$ npm install
$ npm run app
You will see the following changes in your terminal if everything goes right:
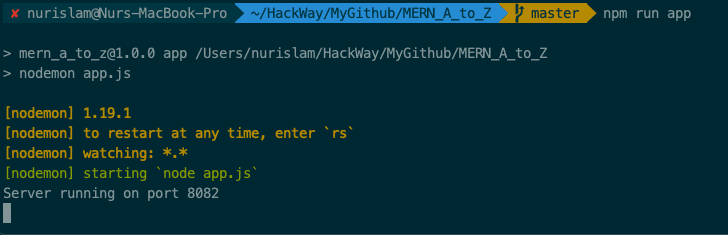
Database management with MongoDB
Now it’s time to work on our database setup with MongoDB. For simplicity, we will use MongoDB Atlas.
Creating an account for MongoDB Atlas
MongoDB Atlas is a fully managed cloud database developed by the same team that built MongoDB.
First, you need an account. Create one and follow the procedure. After creating an account, you will see something like this:

Click on the Project 0 section (top left) and you will see a button for creating a new project. Create a project and select the project.
Now, click on the Build a Cluster button from the project you have created. It will show you all the information. At the bottom, you will see a section called Cluster Name , click on that and enter a name for the database, then hit the Create Cluster button.
After two to three minutes, if everything goes well, you will find something like this:

Click on the CONNECT button and fill in the username and password form for your database.
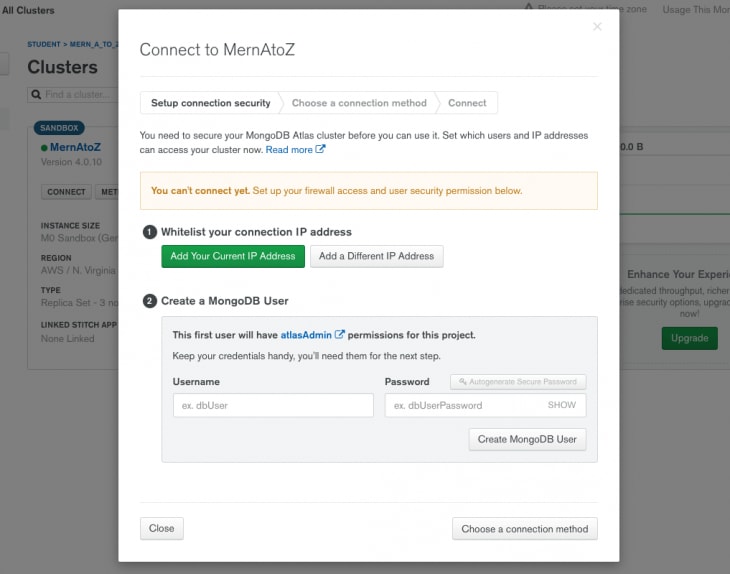
Now hit the Create MongoDB User button. You can also choose either your current IP address or a different IP address, it’s up to you.
Now, if you follow the CONNECT button or the Choose a connection method button, you will see some different methods. Select accordingly.

In this case, select the Connect Your Application section.
Now you will get your database link, which we will use in our next step.
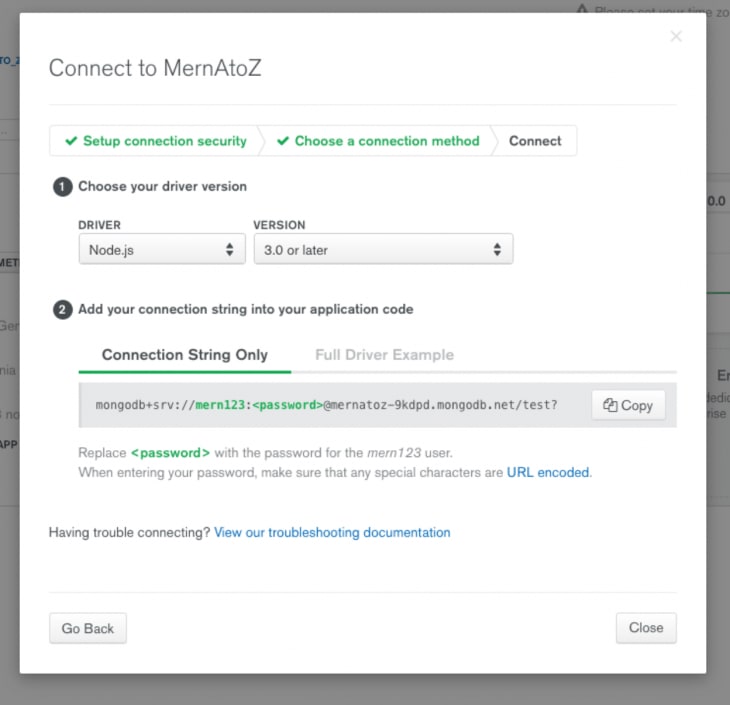
Our database is ready — now we need to add it to our project.
Inside the project folder, create another folder named config and inside it create two files named default.json and db.js. Add the following code:
// default.json

{
  "mongoURI":
    "mongodb+srv://mern123:<password>@mernatoz-9kdpd.mongodb.net/test?retryWrites=true&w=majority"
}
 /* Replace <password> with your database password */

/* ------------------------------------------------------------------ */
// db.js

const mongoose = require('mongoose');
const config = require('config');
const db = config.get('mongoURI');

const connectDB = async () => {
  try {
    await mongoose.connect(
      db,
      {
        useNewUrlparser: true
      }
    );

    console.log('MongoDB is Connected...');
  } catch (err) {
    console.error(err.message);
    process.exit(1);
  }
};

module.exports = connectDB;
NOTE: We need a little change in our app.js file to connect to the database. Update your app.js with this:
// app.js

const express = require('express');
const connectDB = require('./config/db');

const app = express();

// Connect Database
connectDB();

app.get('/', (req, res) => res.send('Hello world!'));

const port = process.env.PORT || 8082;

app.listen(port, () => console.log(`Server running on port ${port}`));
We need another dependency package called config for the global variable to run our project. Use the following command to install it to the project:
$ npm i config
Now, you can run the project using the following command:
$ npm run app

Great! So far we are on the right track. Our database is successfully connected. Now time to complete the route setup, and after that, we will see how to create RESTful APIs.
RESTful APIs
Create a folder named routes. In it, create another folder named api, which will hold all our APIs.
Inside the api folder, create a file named books.js. We will create some APIs here to show how it works in a moment.
Now update your books.js with the following code:
// routes/api/books.js

const express = require('express');
const router = express.Router();

// Load Book model
const Book = require('../../models/Book');

// @route GET api/books/test
// @description tests books route
// @access Public
router.get('/test', (req, res) => res.send('book route testing!'));

// @route GET api/books
// @description Get all books
// @access Public
router.get('/', (req, res) => {
  Book.find()
    .then(books => res.json(books))
    .catch(err => res.status(404).json({ nobooksfound: 'No Books found' }));
});

// @route GET api/books/:id
// @description Get single book by id
// @access Public
router.get('/:id', (req, res) => {
  Book.findById(req.params.id)
    .then(book => res.json(book))
    .catch(err => res.status(404).json({ nobookfound: 'No Book found' }));
});

// @route GET api/books
// @description add/save book
// @access Public
router.post('/', (req, res) => {
  Book.create(req.body)
    .then(book => res.json({ msg: 'Book added successfully' }))
    .catch(err => res.status(400).json({ error: 'Unable to add this book' }));
});

// @route GET api/books/:id
// @description Update book
// @access Public
router.put('/:id', (req, res) => {
  Book.findByIdAndUpdate(req.params.id, req.body)
    .then(book => res.json({ msg: 'Updated successfully' }))
    .catch(err =>
      res.status(400).json({ error: 'Unable to update the Database' })
    );
});

// @route GET api/books/:id
// @description Delete book by id
// @access Public
router.delete('/:id', (req, res) => {
  Book.findByIdAndRemove(req.params.id, req.body)
    .then(book => res.json({ mgs: 'Book entry deleted successfully' }))
    .catch(err => res.status(404).json({ error: 'No such a book' }));
});

module.exports = router;
Database model
In order to interact with our database, we need to create a model for each of our resources. So, create a folder called models in the root, and inside the models folder, create a file called Book.js and update it with this:
// models/Book.js

const mongoose = require('mongoose');

const BookSchema = new mongoose.Schema({
  title: {
    type: String,
    required: true
  },
  isbn: {
    type: String,
    required: true
  },
  author: {
    type: String,
    required: true
  },
  description: {
    type: String
  },
  published_date: {
    type: Date
  },
  publisher: {
    type: String
  },
  updated_date: {
    type: Date,
    default: Date.now
  }
});

module.exports = Book = mongoose.model('book', BookSchema);
Run the project to see if everything is fine at this point, and you can test all the APIs through Postman (note that before testing APIs using Postman, you need to run the project first). You can download Postman here.
Conclusion
So far, so good! We have set up our backend successfully. Now we need to work with our frontend part, where we will be using React to build user interfaces. Check back soon for Part 2, and in the meantime, you can find the GitHub repo for the project here.
Plug: LogRocket, a DVR for web apps

LogRocket is a frontend logging tool that lets you replay problems as if they happened in your own browser. Instead of guessing why errors happen, or asking users for screenshots and log dumps, LogRocket lets you replay the session to quickly understand what went wrong. It works perfectly with any app, regardless of framework, and has plugins to log additional context from Redux, Vuex, and @ngrx/store.
In addition to logging Redux actions and state, LogRocket records console logs, JavaScript errors, stacktraces, network requests/responses with headers + bodies, browser metadata, and custom logs. It also instruments the DOM to record the HTML and CSS on the page, recreating pixel-perfect videos of even the most complex single-page apps.
The post MERN stack A to Z: Part 1 appeared first on LogRocket Blog.


Oldest comments (0)